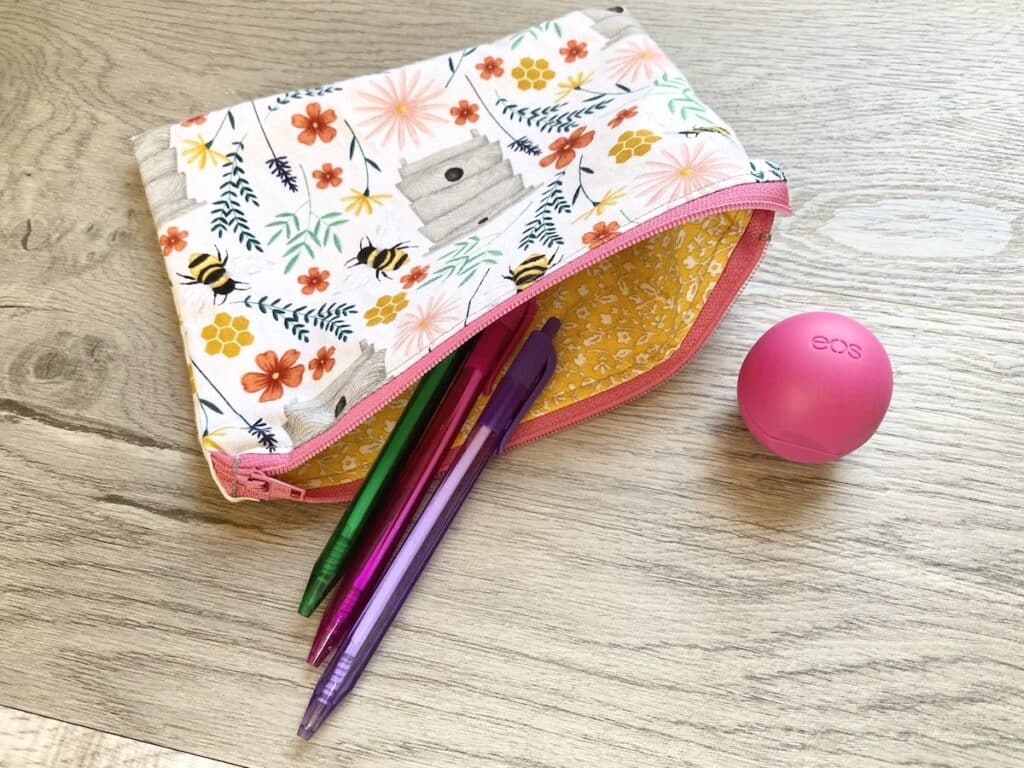
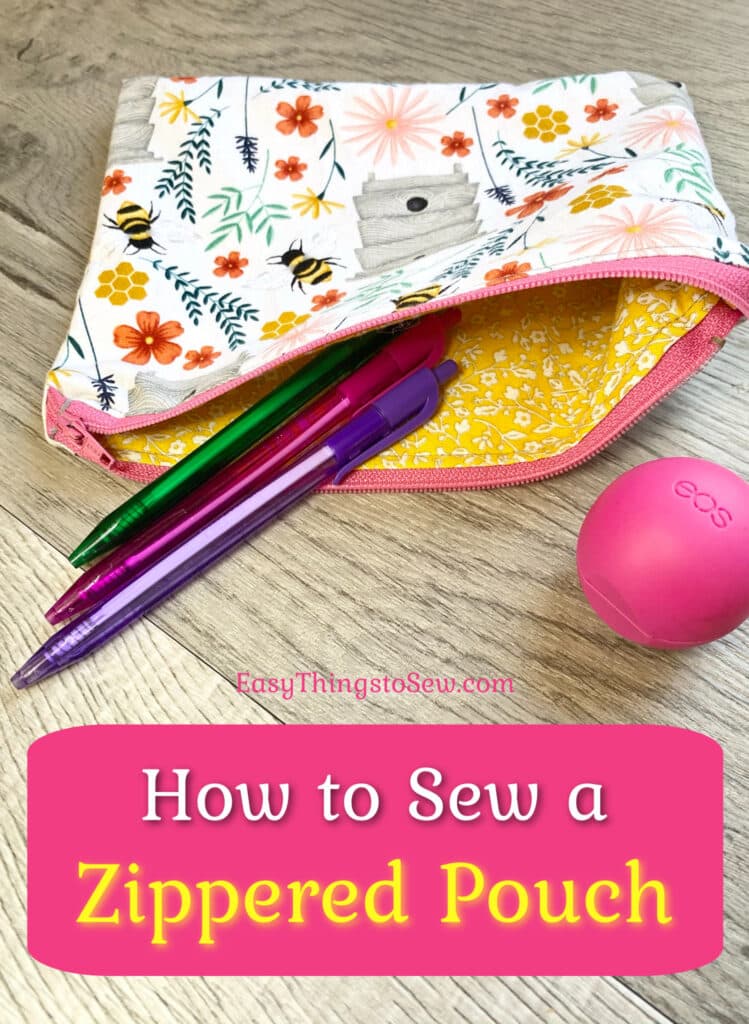
Easy Lined Zippered Pouch Tutorial
Our lined zipper pouch tutorial shows how easy it is to sew a bag with a lining that will zip close.
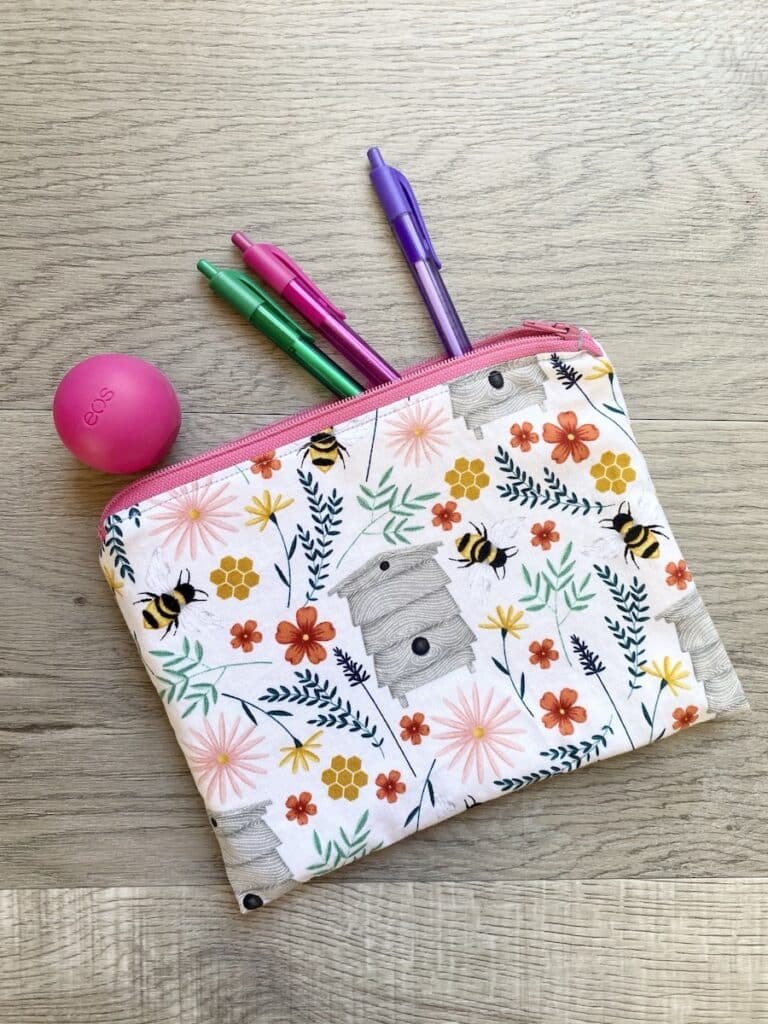
Zippered pouches can be useful for so many things, from cosmetics to pen holders to snack bags.
A lining in the bag is important if you want to protect the outer bag from spills or messes, such as crumbs, makeup smears or ink stains.
Follow the step-by-step photo tutorial below and you can customize your own stylish pouch with coordinating fabrics. You’ll probably want to make more than one once you find out how simple it is!
You might also like our easy drawstring bag tutorial or our DIY Crayon Bag. And this round drawstring pouch is a little different than most.
Once you are comfortable sewing a zipper (it’s easy, we promise!), try making these zippered pillow covers.
FAQs
How Can I Wash the Pouch if It Gets Dirty?
We suggest hand washing your handmade pouch if possible. You can also put it in the washing machine using cold water. Putting the pouch in a delicates bag for the washing machine will protect it.
Can I Use a Waterproof Fabric for the Lining?
You can use an oil cloth or vinyl fabric for the lining if you want it to be water-resistant or stain-resistant. Sew with these fabrics just like normal fabric. However, you won’t want to wash the pouch in the washing machine since those types of fabric are not easily washable.
Do I Need to Wash the Fabric Before Sewing?
Yes, we always suggest pre-washing the fabric before starting your project. This makes sure that the fabric has shrunk before you sew. If you ever intend on washing the pouch, you need to pre-shrink the fabric. Otherwise, it could shrink when you wash it and become ruined. Wash on hot water to pre-shrink the fabric.
How to Sew a Zippered Pouch with a Lining
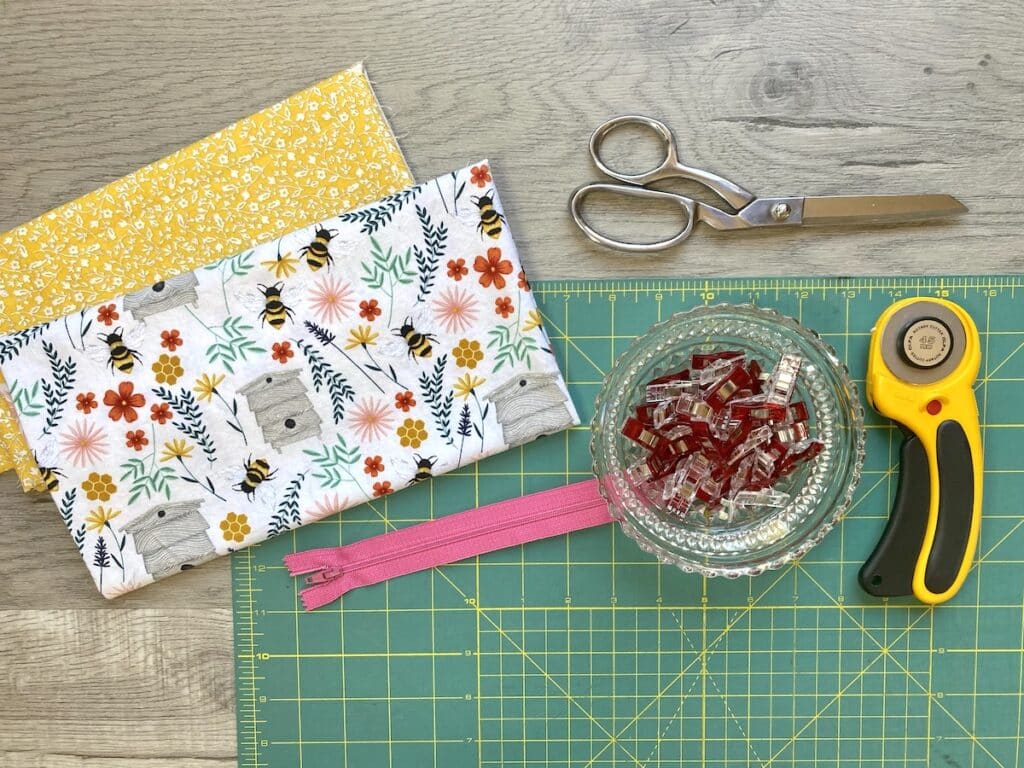
Supplies
- Cotton Fabric (Scraps or Fat Quarters)
- 9″ Zipper
- Coordinating thread
- Rotary cutter and cutting mat (or scissors)
- Ruler
- Sewing clips
Instructions
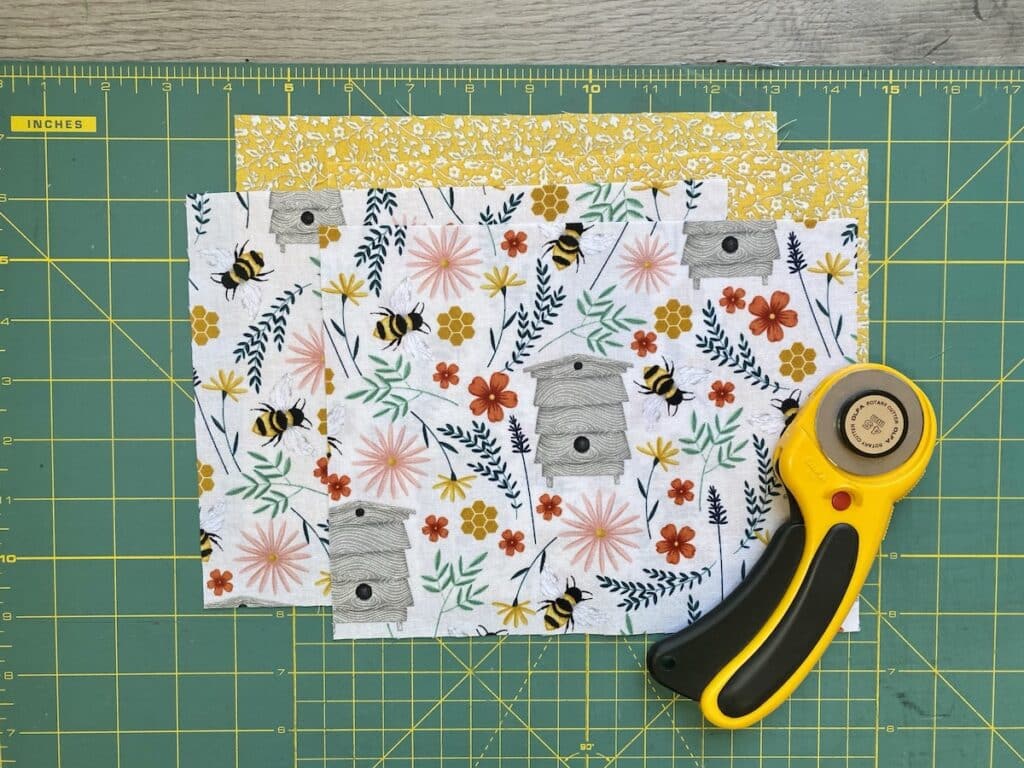
Step 1
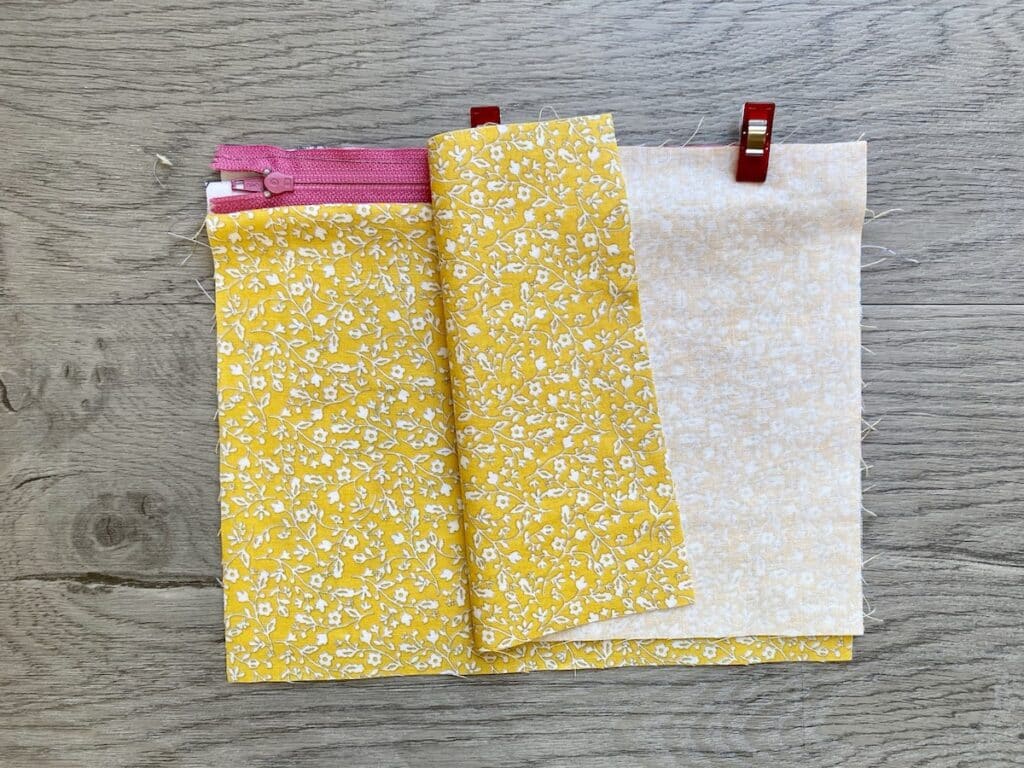
Cut fabric to be 9” x 7”. You will need two pieces for the outer fabric and two pieces for the inner lining.
Step 2
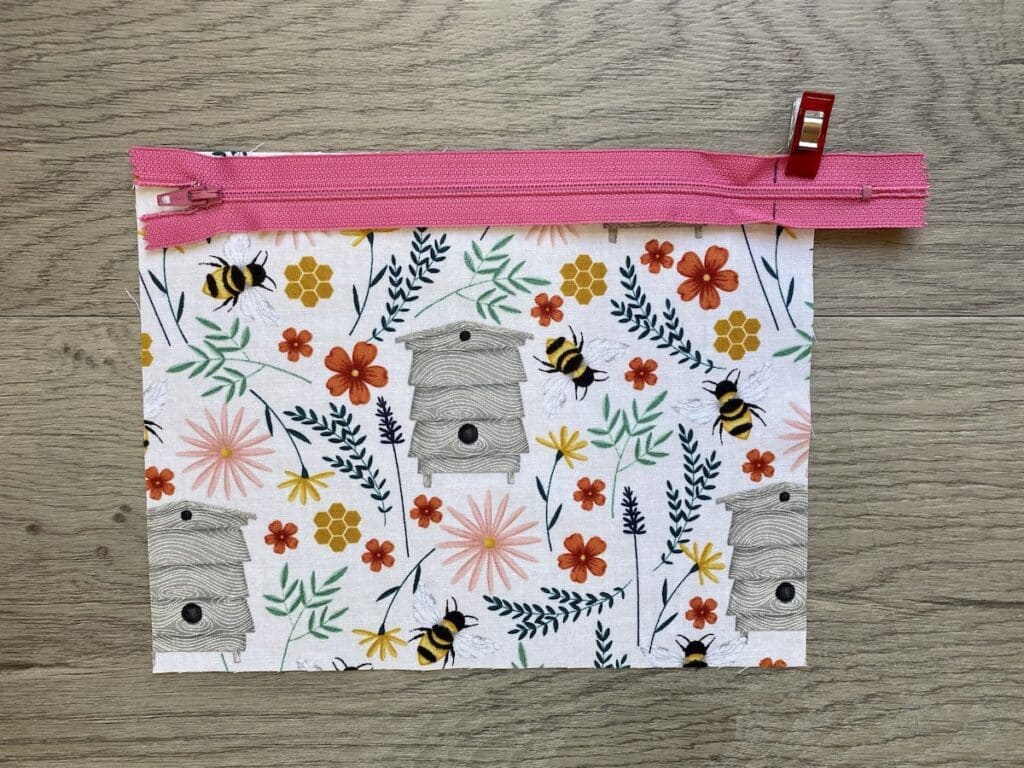
Place zipper on top of outer fabric (with the right side facing towards you) with the top edge of the fabric and zipper edge aligned.
Mark the zipper ½ inch from the edge with a pen (see below).
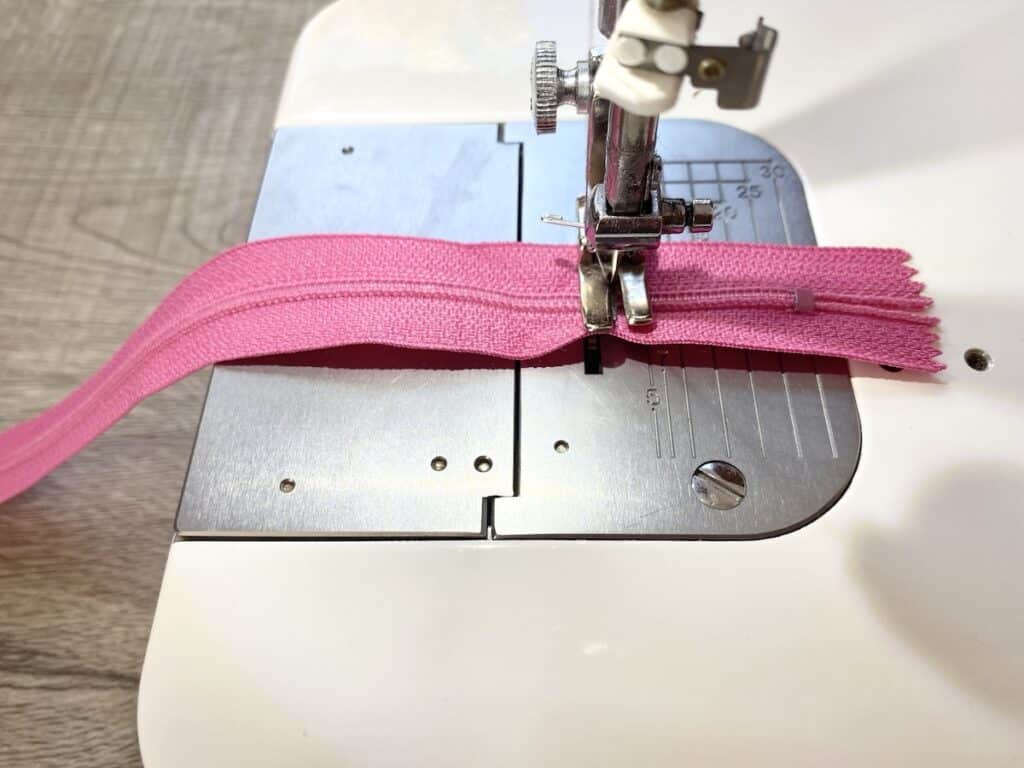
Step 3
Bring the zipper to your sewing machine. Use a straight stitch or a zig zag stitch to sew across the zipper several times at the mark that you made in the previous step.
Step 4
Trim the zipper to 9” so the outer edge is flush with the fabric edge.
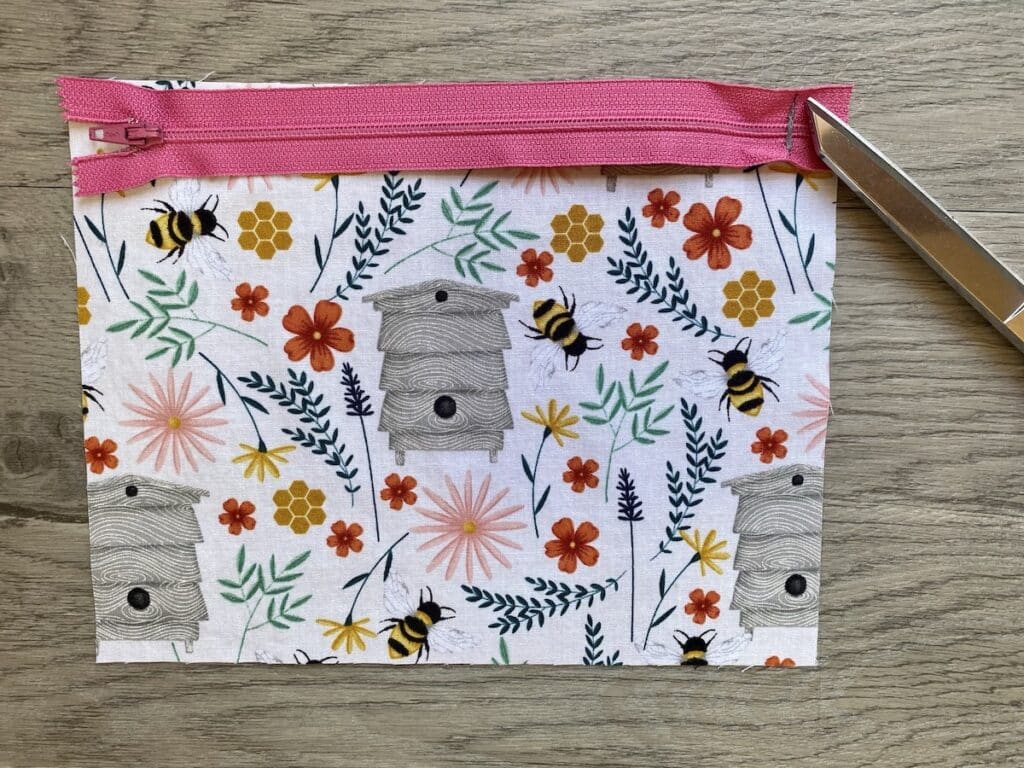
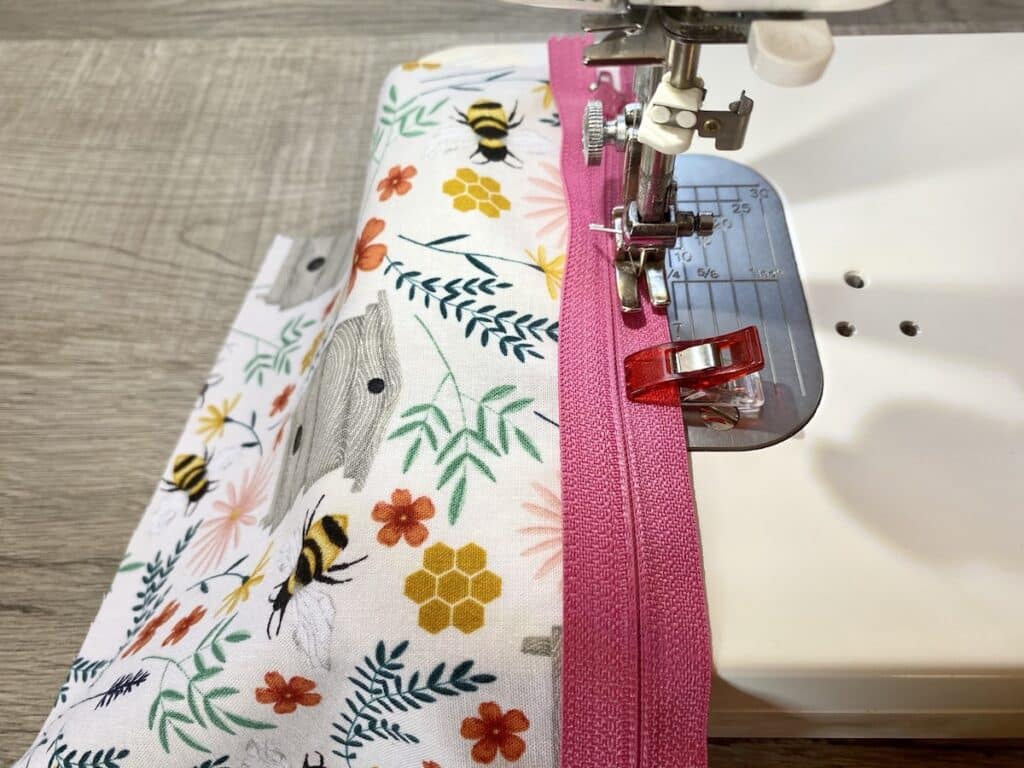
Make sure the zipper is face down (the part that you grab to zip it should be on the fabric) and clip to hold it it in place with the edges of the zipper lining up with the edges of the fabric.
Step 5
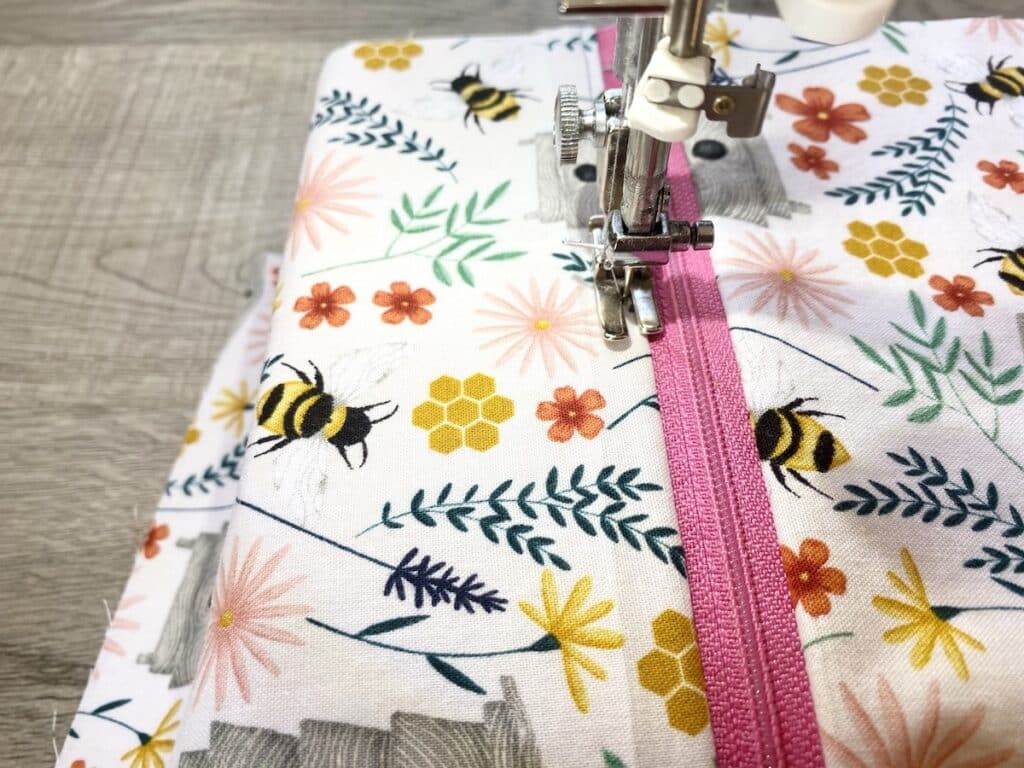
Sew across the top of the zipper with a zipper foot on your sewing machine.
Step 6
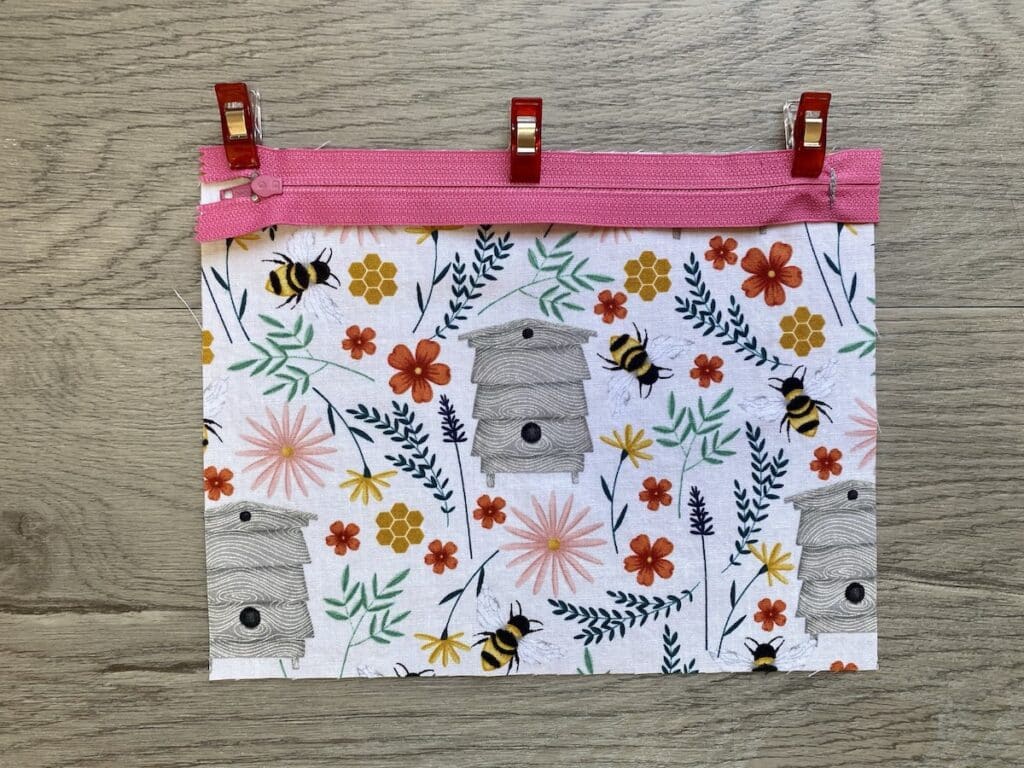
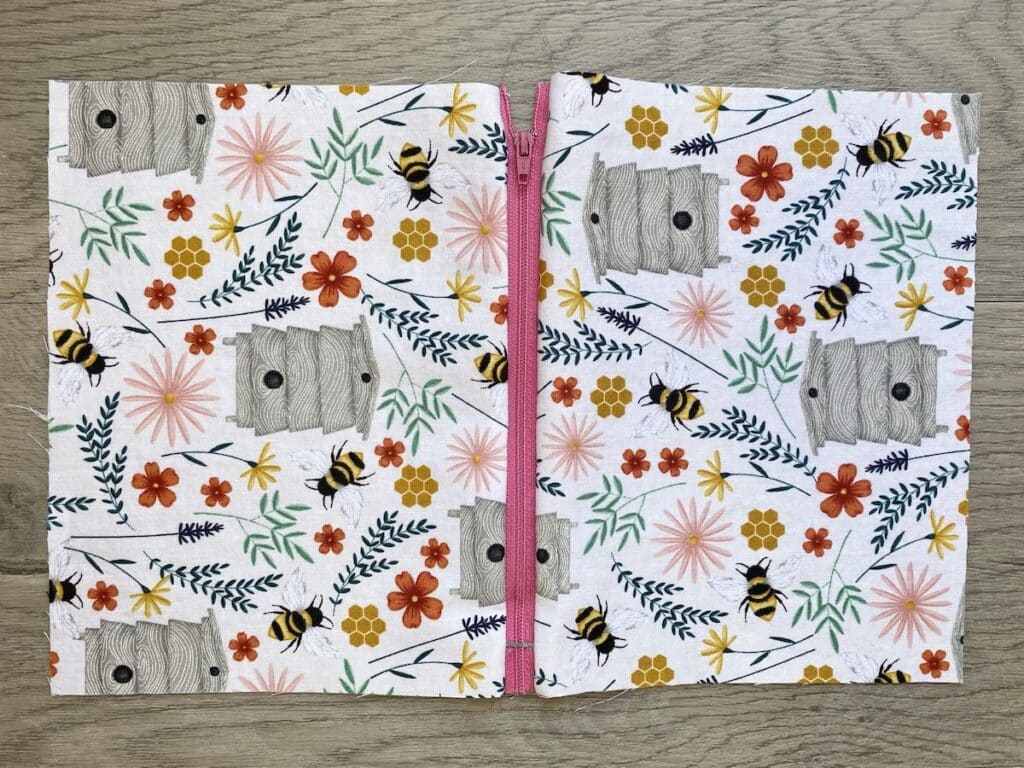
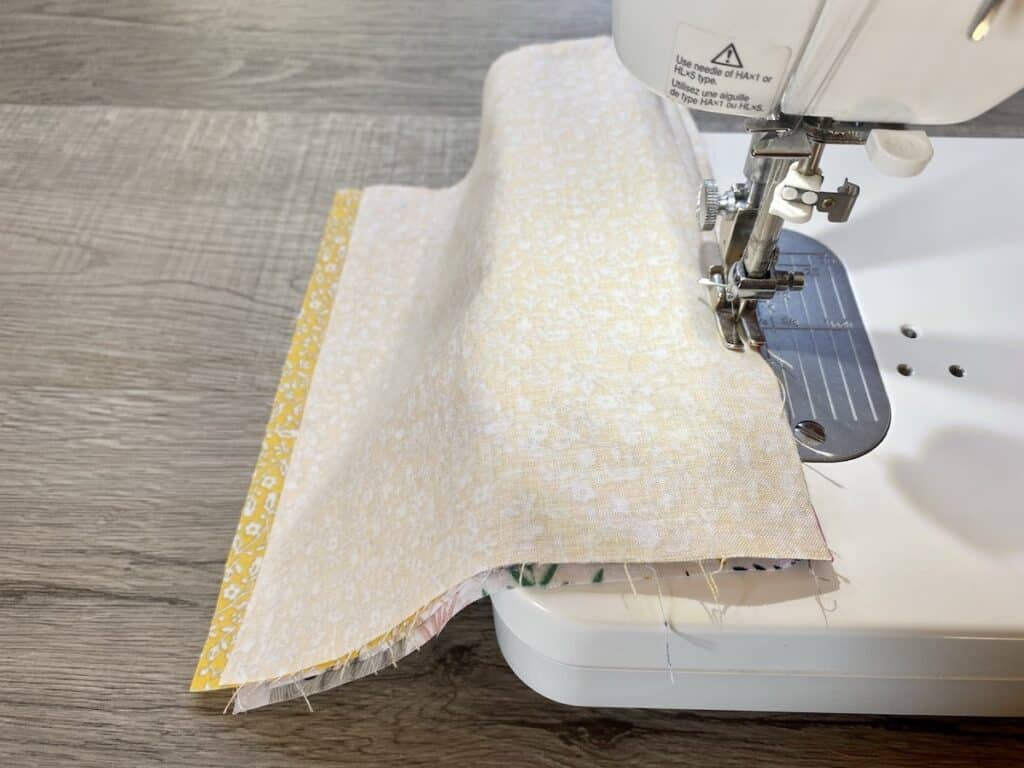
Align the other edge of the zipper (the one not sewn) with the other outer fabric piece. Place the right sides of the fabric together before aligning the zipper edge.
Sew across this zipper side with a zipper foot, as you did in the previous step.
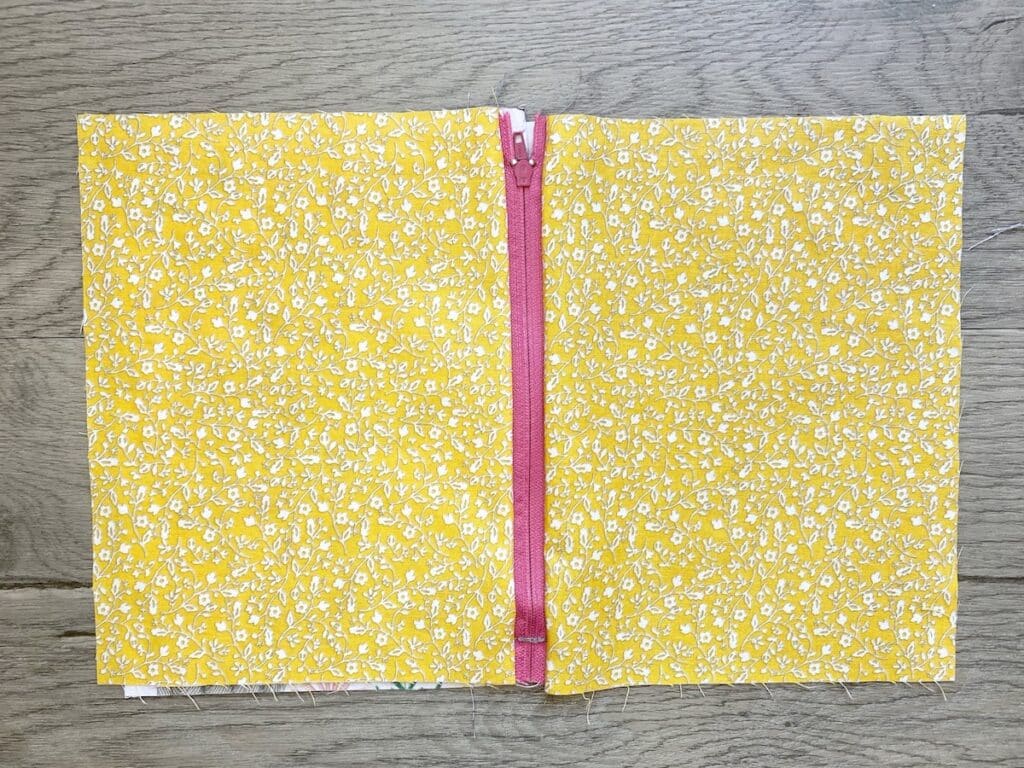
Open the fabric up just to make sure that it is sewn correctly and looks like the example below.
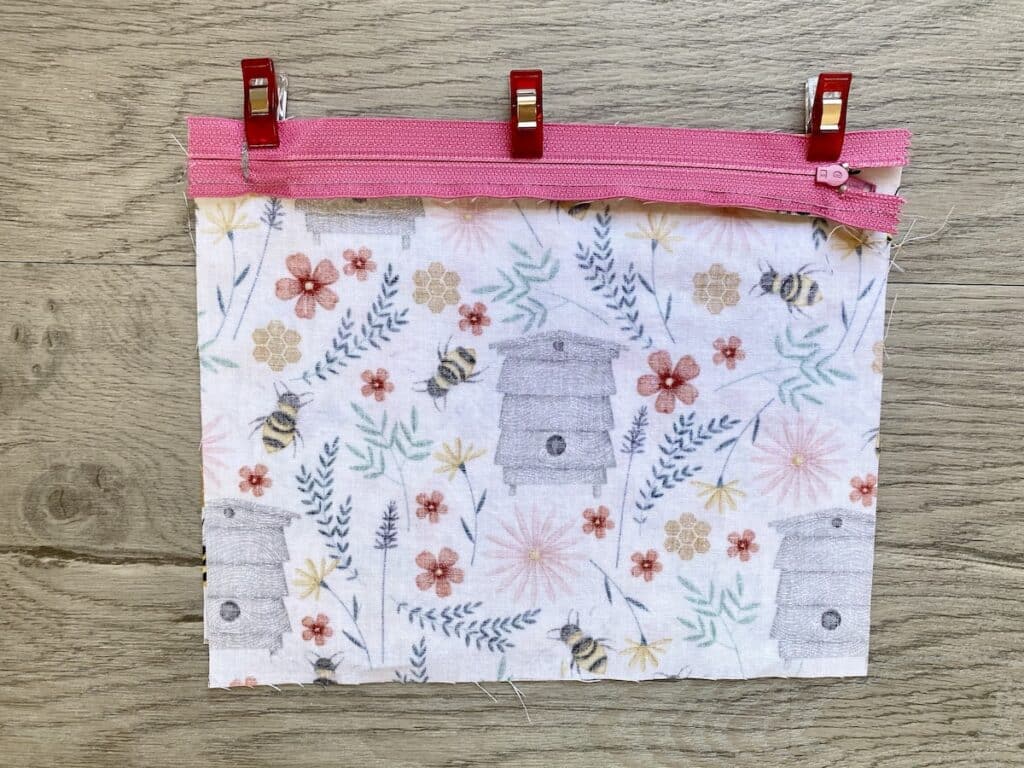
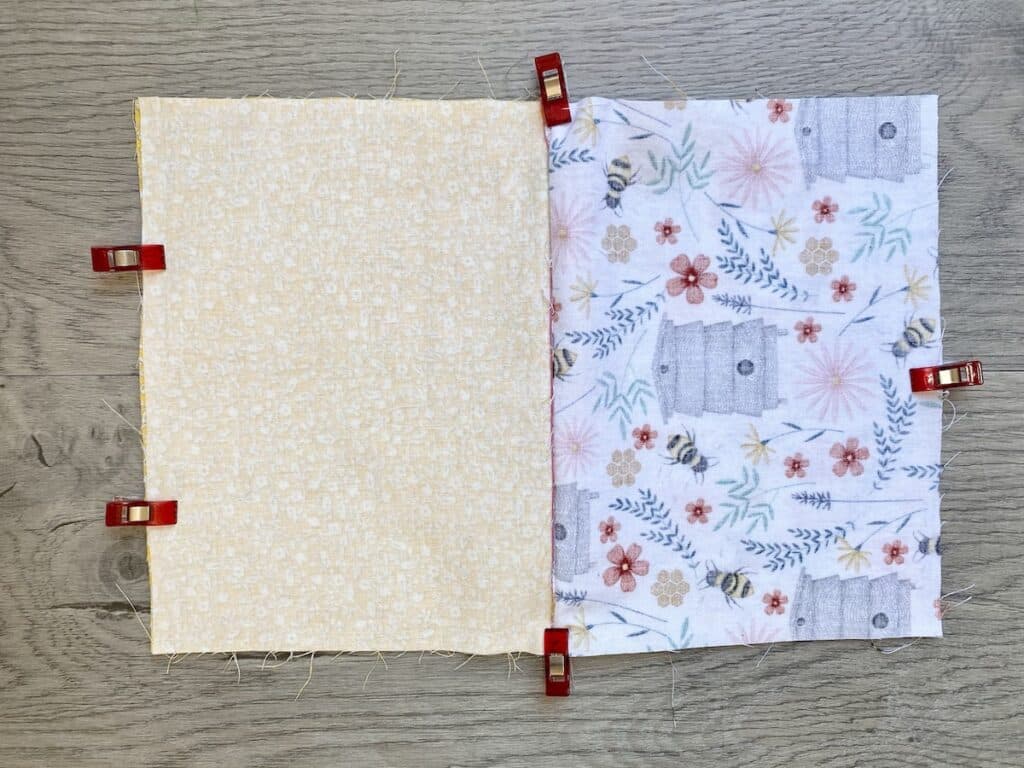
Step 7
Place the outer fabrics with the zipper sewn on them together, with the right sides together again.
Now, place one of the lining fabric pieces along the top edge of the zipper. Make sure the right side is facing down and clip together.
Step 8
Sew across the top of lining piece with a zipper foot.

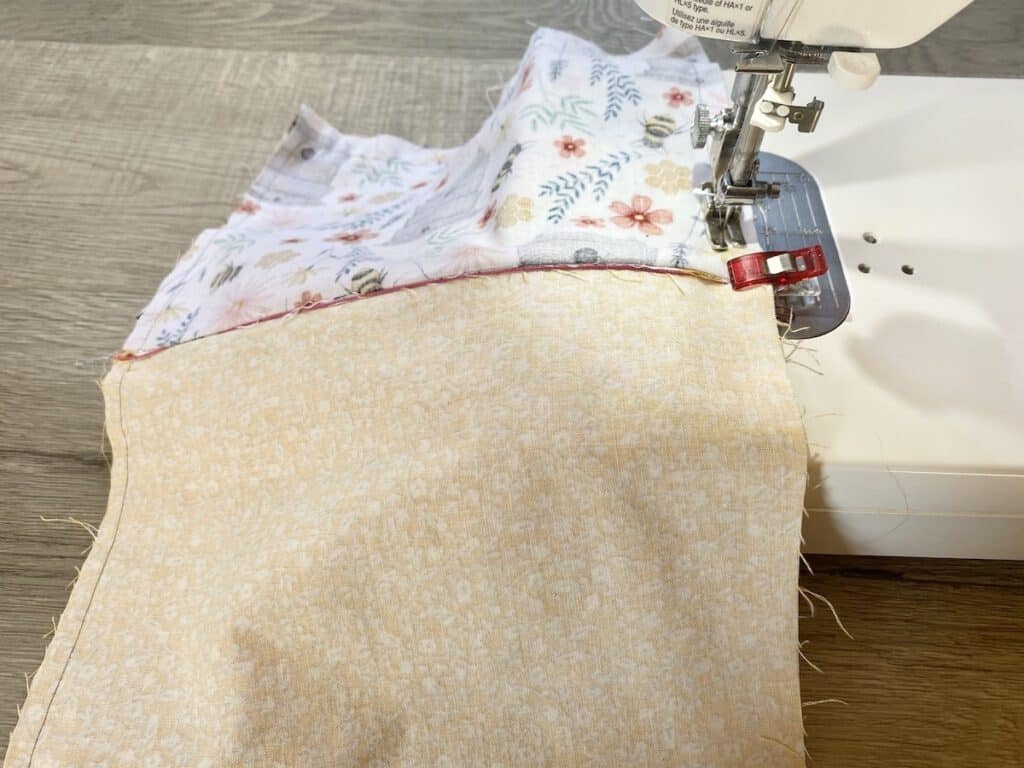
Step 9
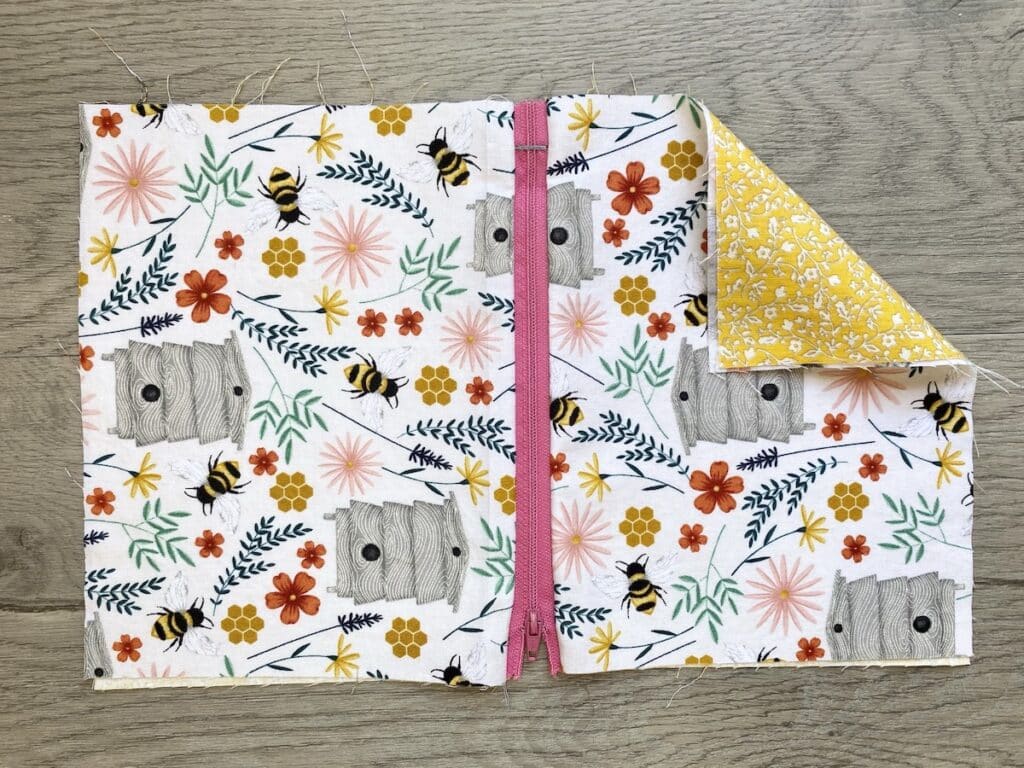
Repeat the process on the other side. Align the other piece of lining fabric to the other side of the zipper and clip together.
Sew together using a zipper foot on the sewing machine.
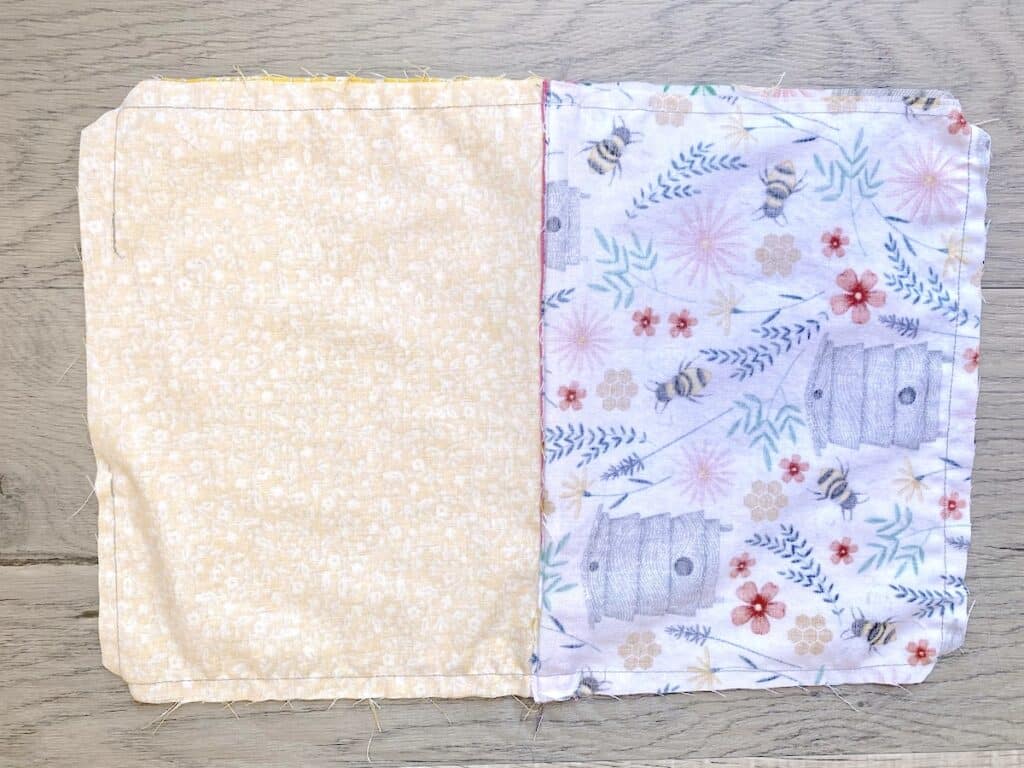
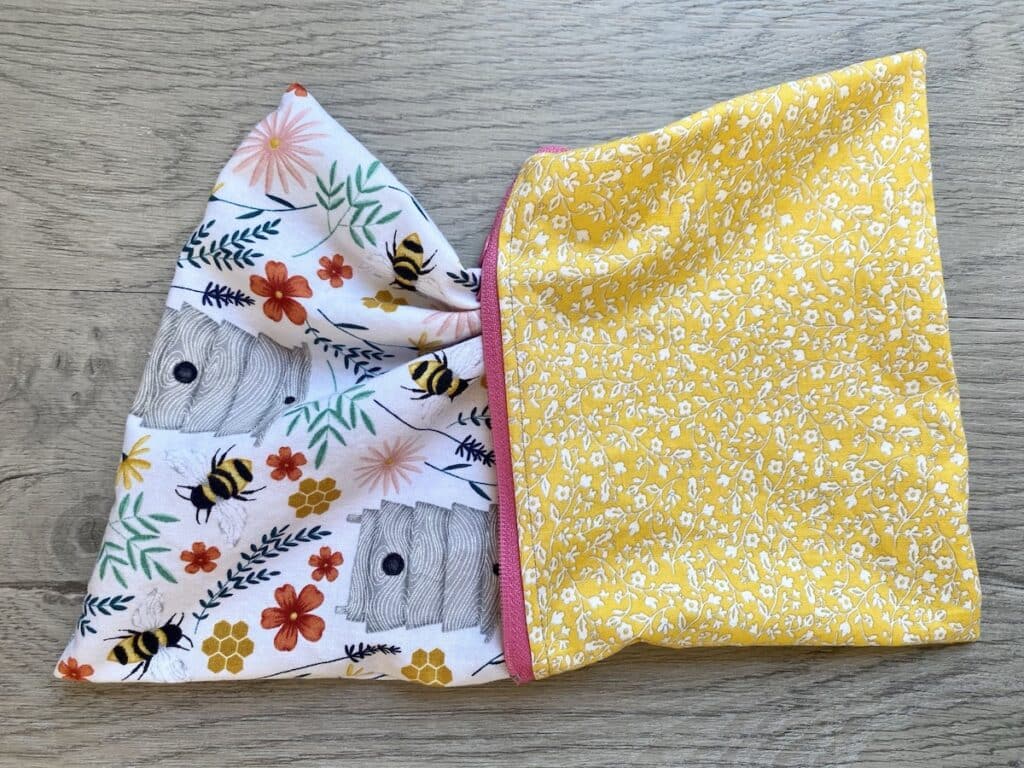
Step 10
This is what your pouch should look like on the inside (zipper upside down) and the outside (zipper side up).
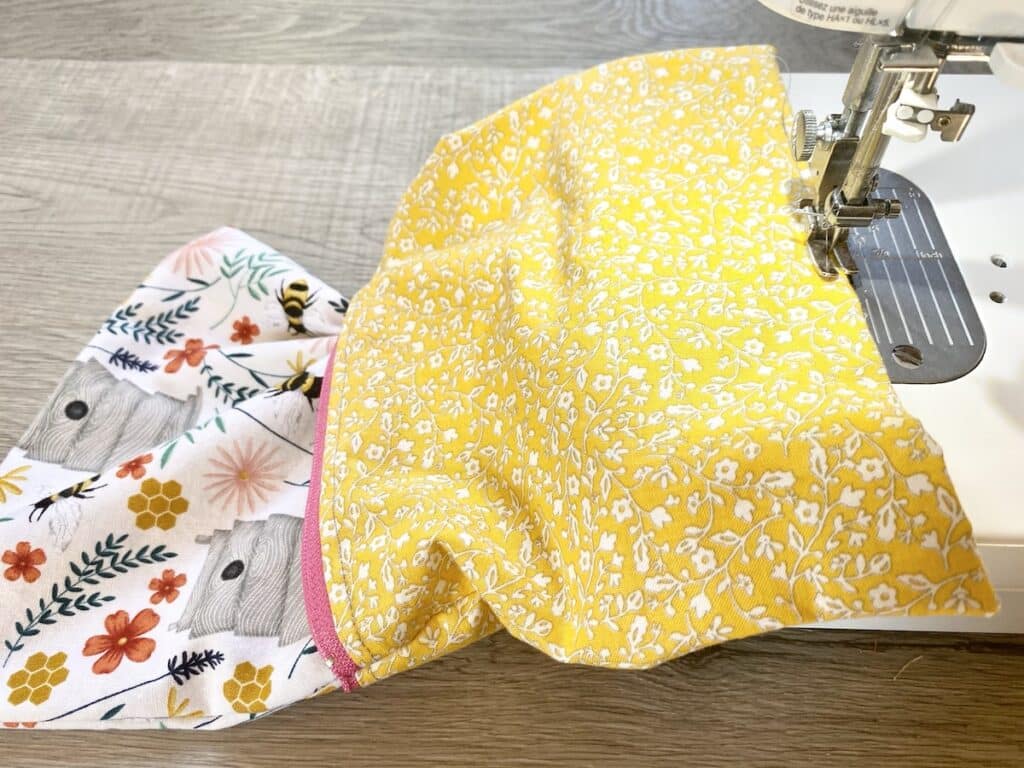
Step 11
Next, top stitch along both sides of the zipper. You want to sew a line of stitching beside the zipper (you can use your sewing machine footer as a good way to evenly space the stitches from the edge of the zipper).
Sew through the two pieces of fabric on each side.
Step 12
Unzip the zipper ¾” of the way.
Fold the pouch so that the outer fabrics are right side together on one side and the lining fabrics are right sides together on the other side. Make sure that the zipper teeth of the zipper are folded toward the lining side.

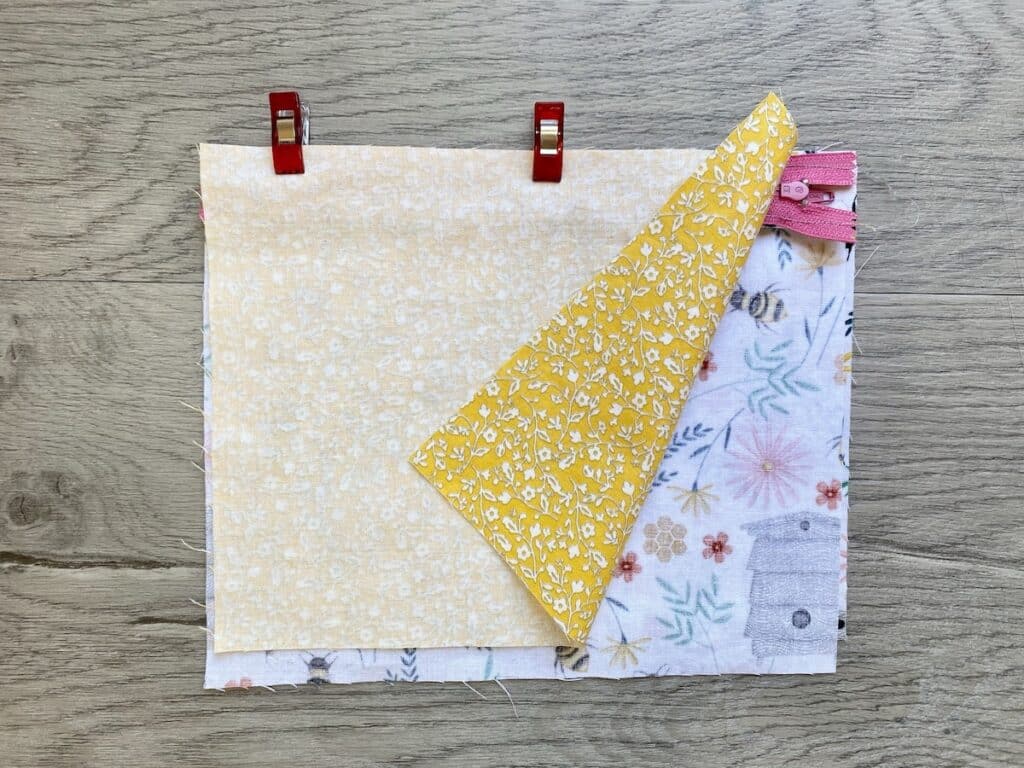
Step 13
Place a few clips around the perimeter to hold it in place. Use two clips to mark a 2 inch opening along the bottom of lining. (See the picture below how the two red clips are space apart on the yellow lining side.)
Step 14
Sew around the perimeter of the entire pouch with a ½ inch seam allowance. Be sure to leave the 2 inch opening in the lining unseen.
Step 15
Clip the corners of the pouch with scissors to remove the excess fabric so that your corners will turn inside out.
When you do this, be sure not to cut the stitches! You can cut the fabric diagonally close to the stitches, but don’t get so close that the hem might fray with wear and tear of using the pouch.
Step 16
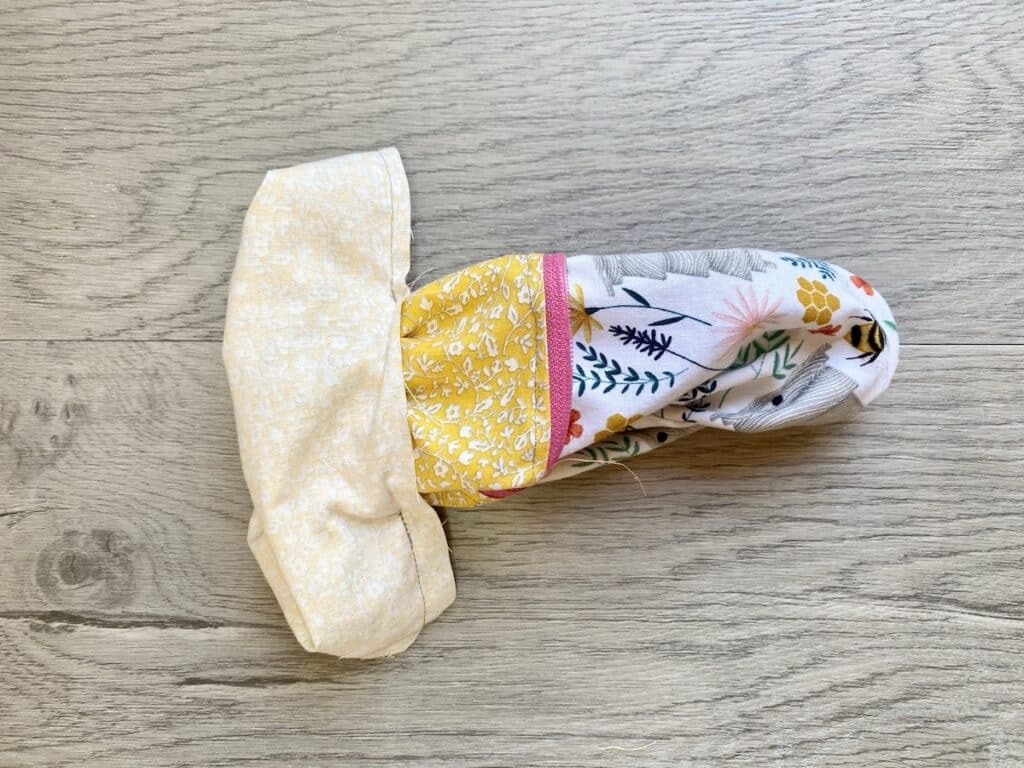
Turn the pouch right side out through the 2 inch opening that you left in the lining.
You will want to press out the corners of the pouch. You can use a chopstick or a turning tool (I LOVE this flamingo turning tool because it’s so fun!) to get the edges crisp.
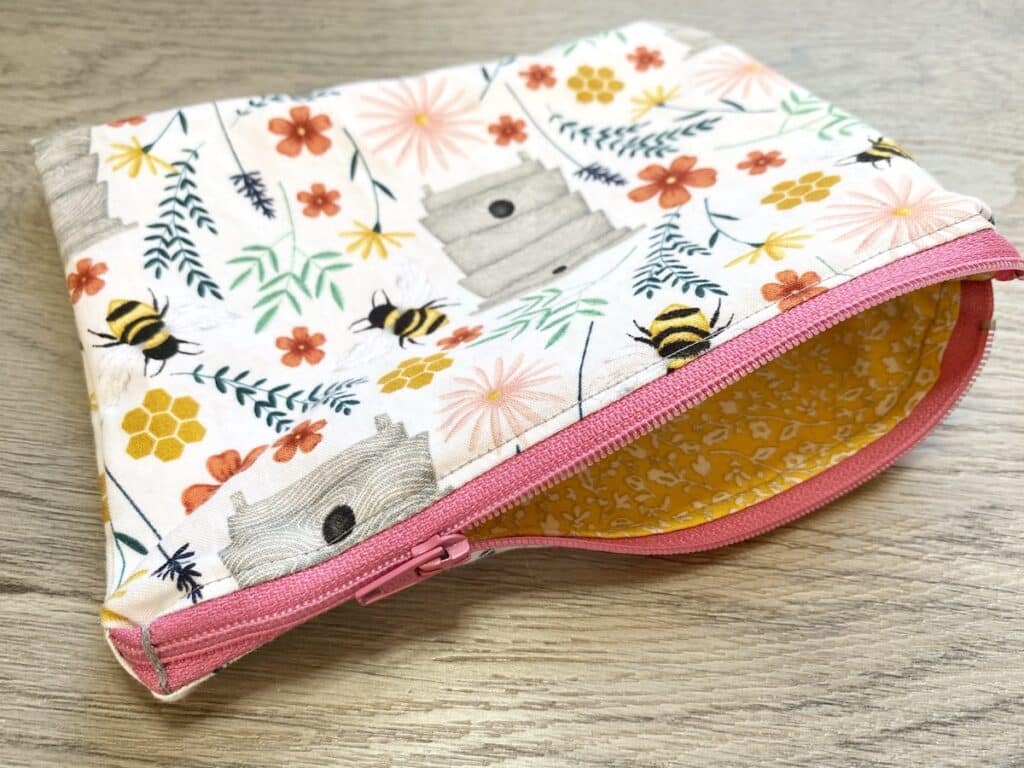
Step 17
Finally, top stitch along the 2 inch opening in the lining to close it shut.
You may choose to hand stitch the opening closed so that stitches are invisible. Either way works. The stitches will be enclosed in the pouch.
Tuck the lining back into the pouch and you are done.
Want to remember this project? Be sure to Pin It!
If you are looking for more crafts to help you get organized, check out our pretty DIY felt fabric trays.

Thank you for this easy to understand diy pouch tutorial. I have made several from finished placemats which is easy, but I have several 9 inch zippers that I have left over from other projects that I can use for these. Can’t wait to try it, but supper is calling. lol
Thank you so much, Karen!