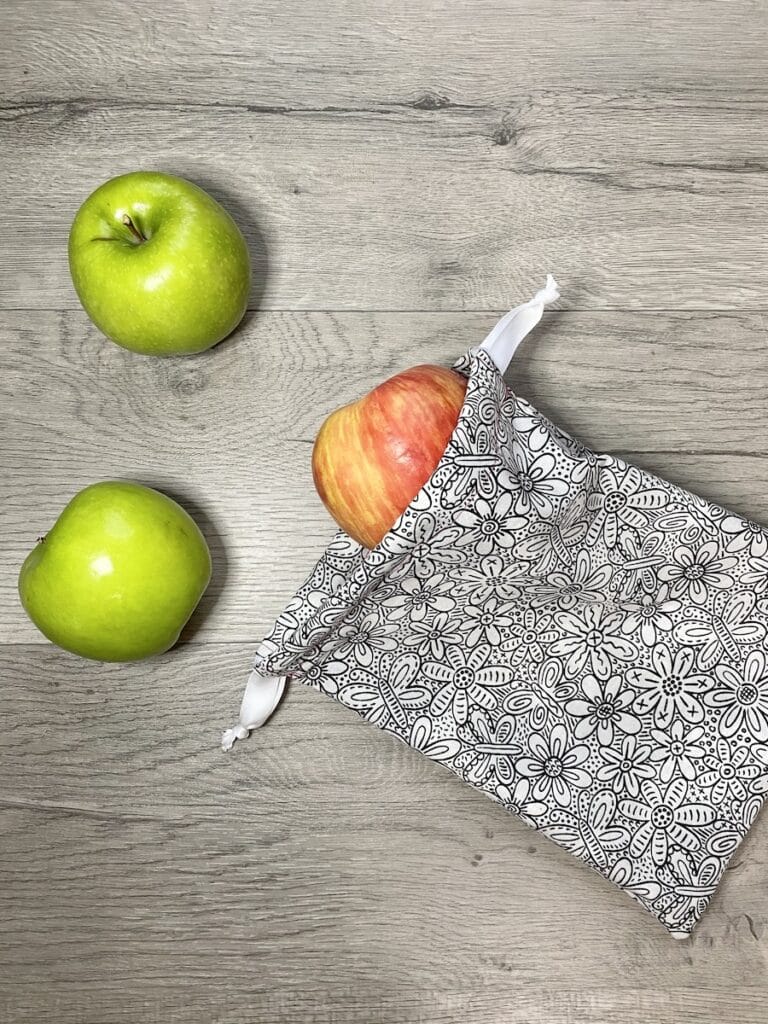
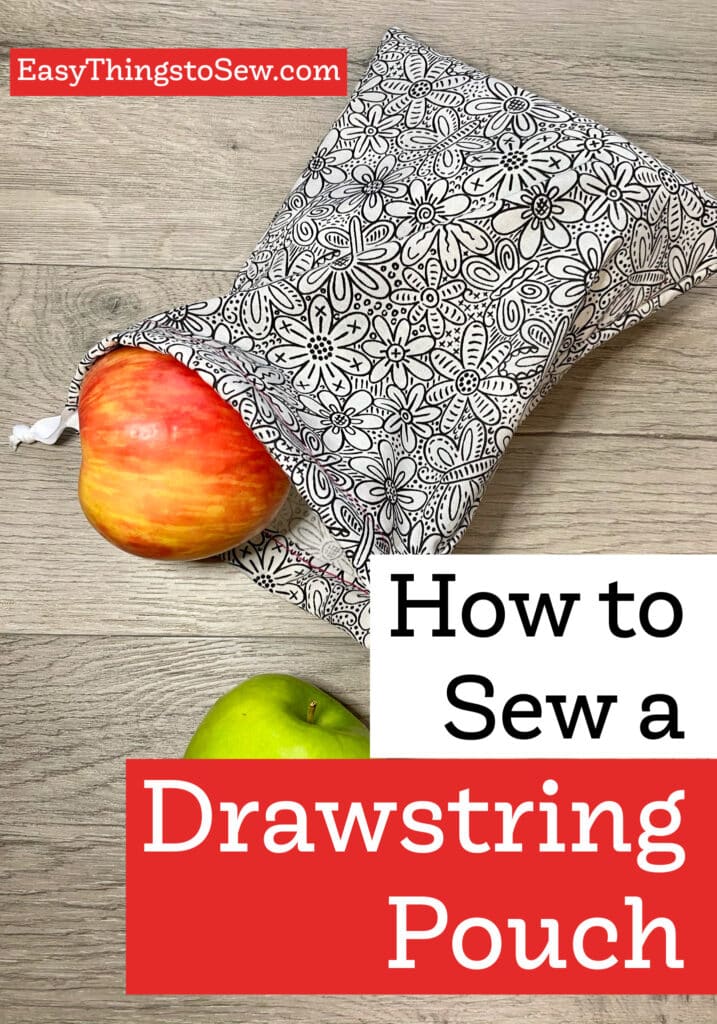
How to Sew A Drawstring Bag In Minutes
This easy drawstring bag can be sewn in minutes!
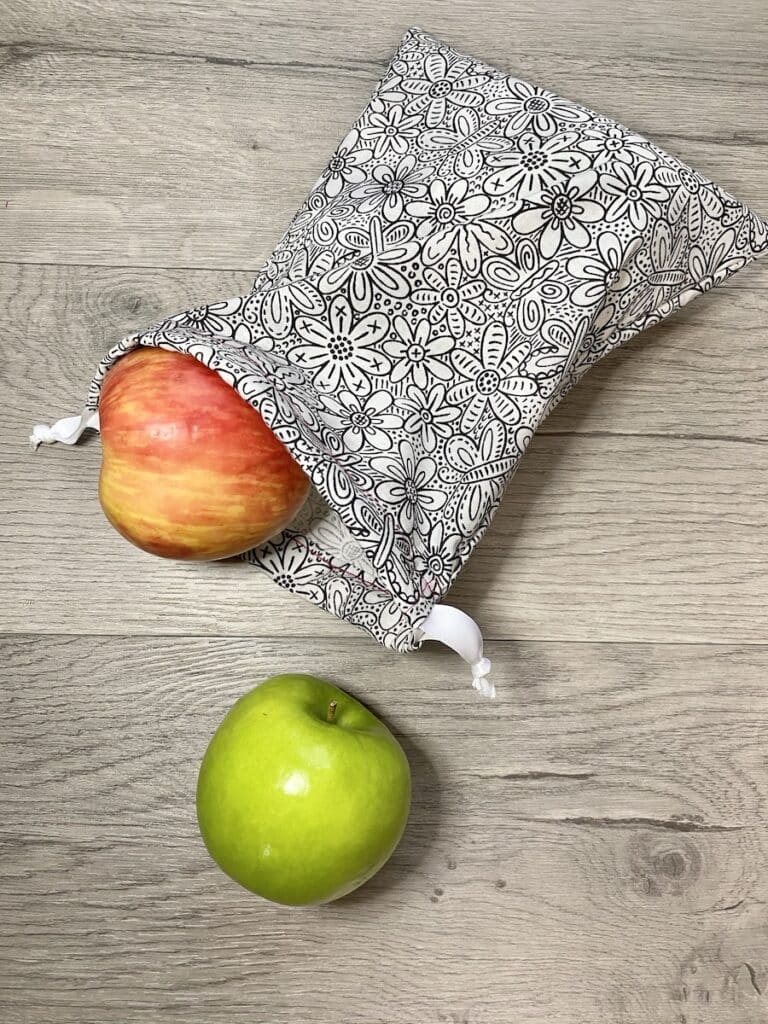
Seriously, this easy to sew craft is very simple. Once you read through the directions and get an idea of what you’ll be doing, you can make these drawstring pouches while watching TV or on your lunch break!
Drawstring bags are among the easiest beginner sewing projects. Be sure to see our easy drawstring backpack which uses a similar method.
You can probably already think of a million ideas to use these drawstring bags, but here’s a few more just in case:
- Snack bags
- Toy storage
- Lingerie bags
- Sandwich bags
- Craft supplies
- Crayon Bag
- Keep cords tidy while traveling
- Gift bags
- Protect cameras or equipment
Be sure to Pin This idea to save for later!
You might also like these zero waste sewing projects, too:
How to Sew a Drawstring Bag
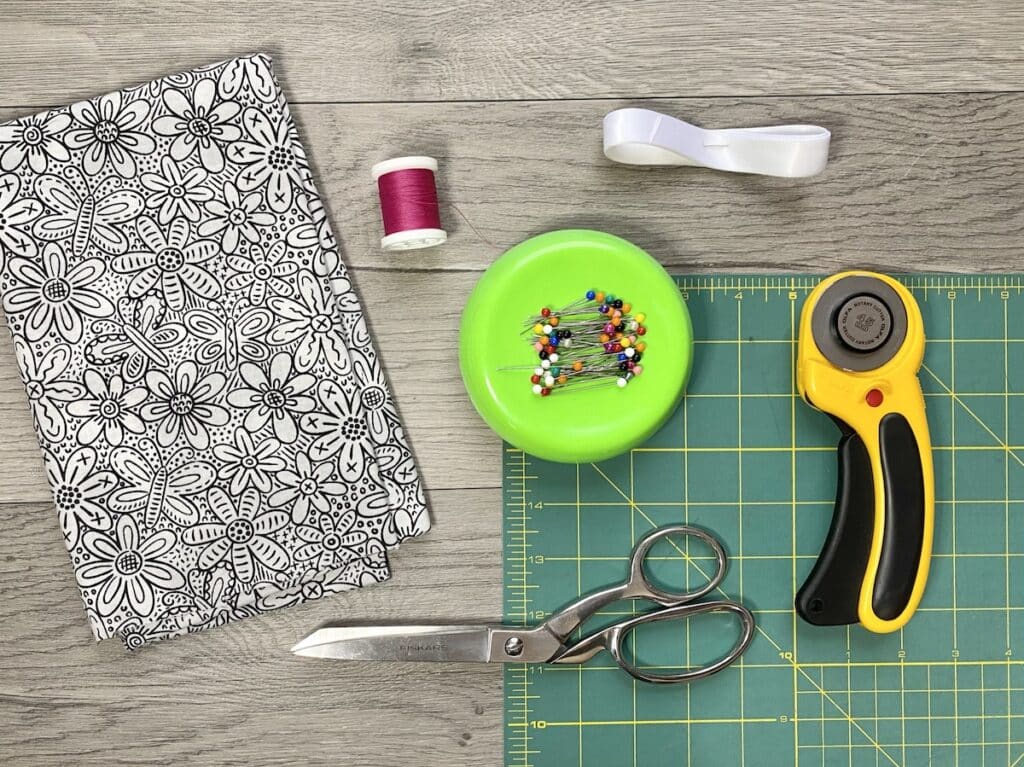
Supplies
- ⅓ yard Fabric (or two fat quarters)
- Coordinating Thread
- 1 yard Ribbon or Cording
- Rotary Cutter or Scissors
- Ruler
- Cutting Mat
- Straight Pins
- Safety Pin
Instructions
Step 1
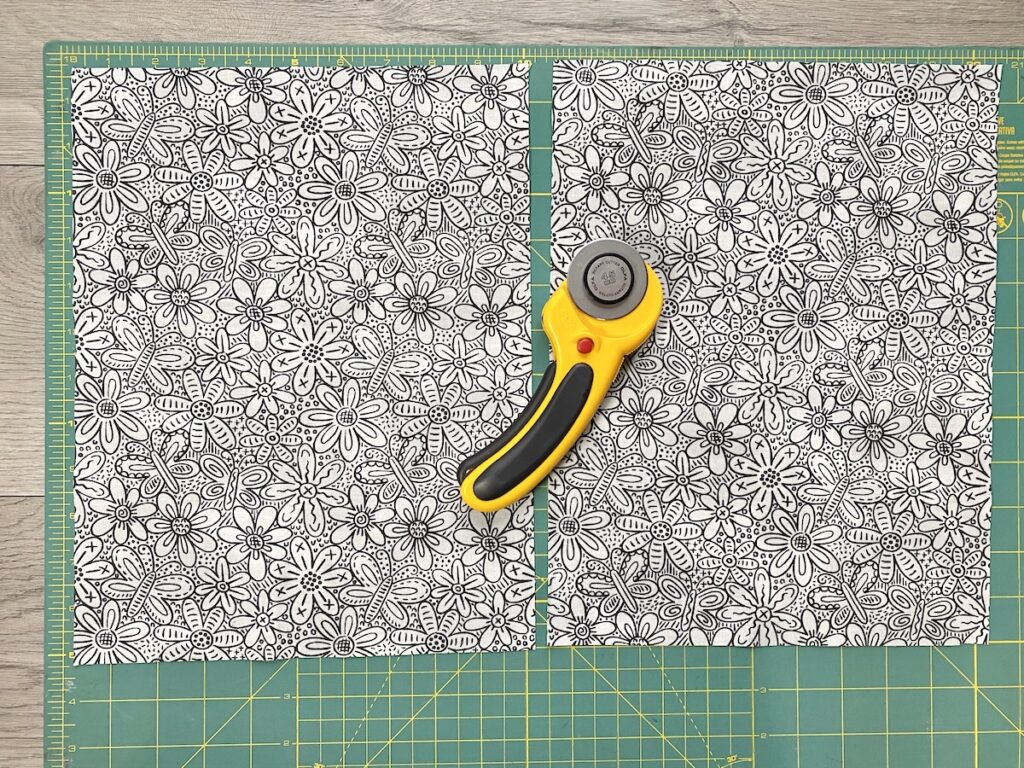
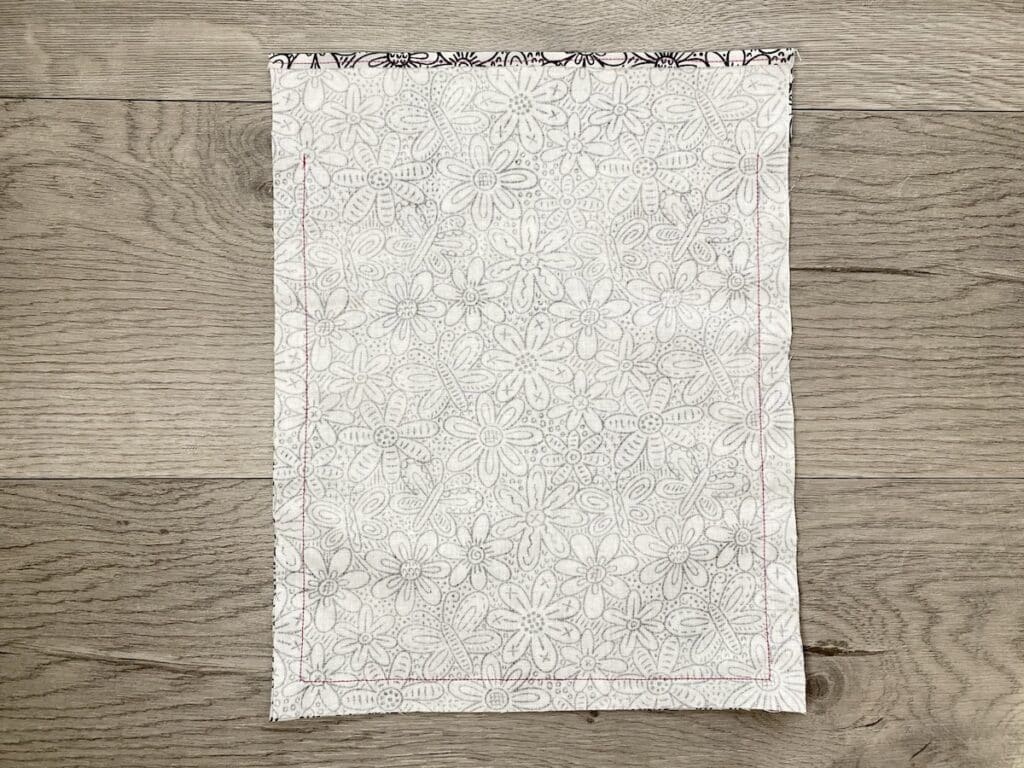
Cut fabric into two pieces measuring 10” x 13” each.
Step 2
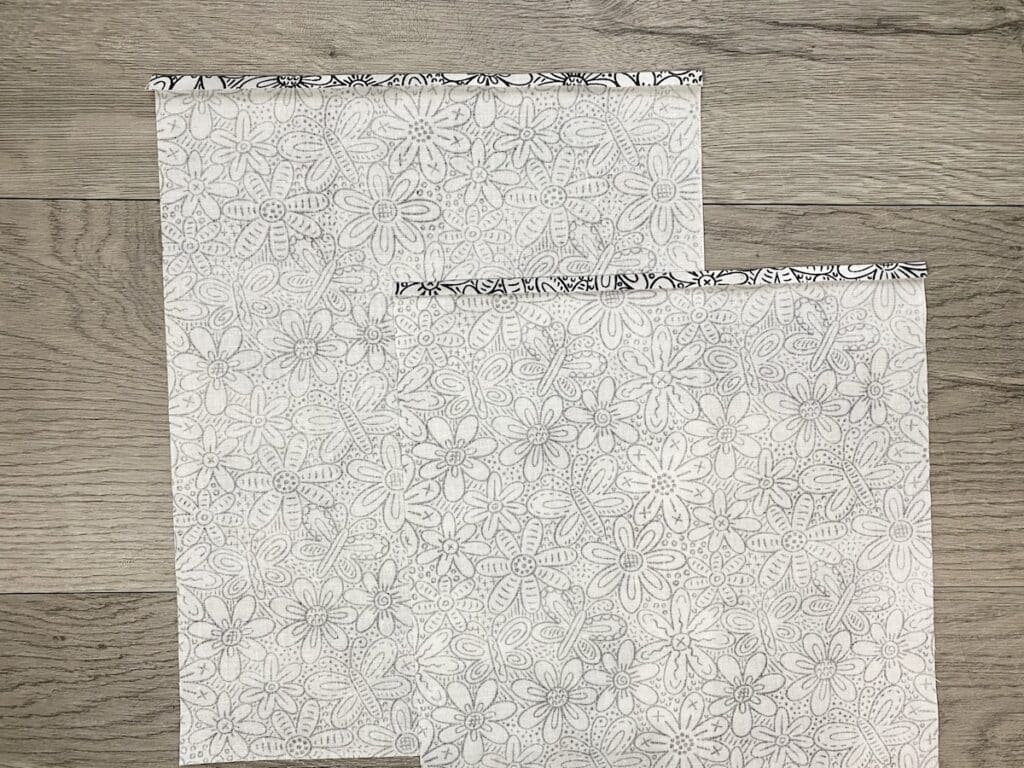
Fold one of the 10” edges under ¼” and press. Repeat for the other piece of fabric, too.
Step 3
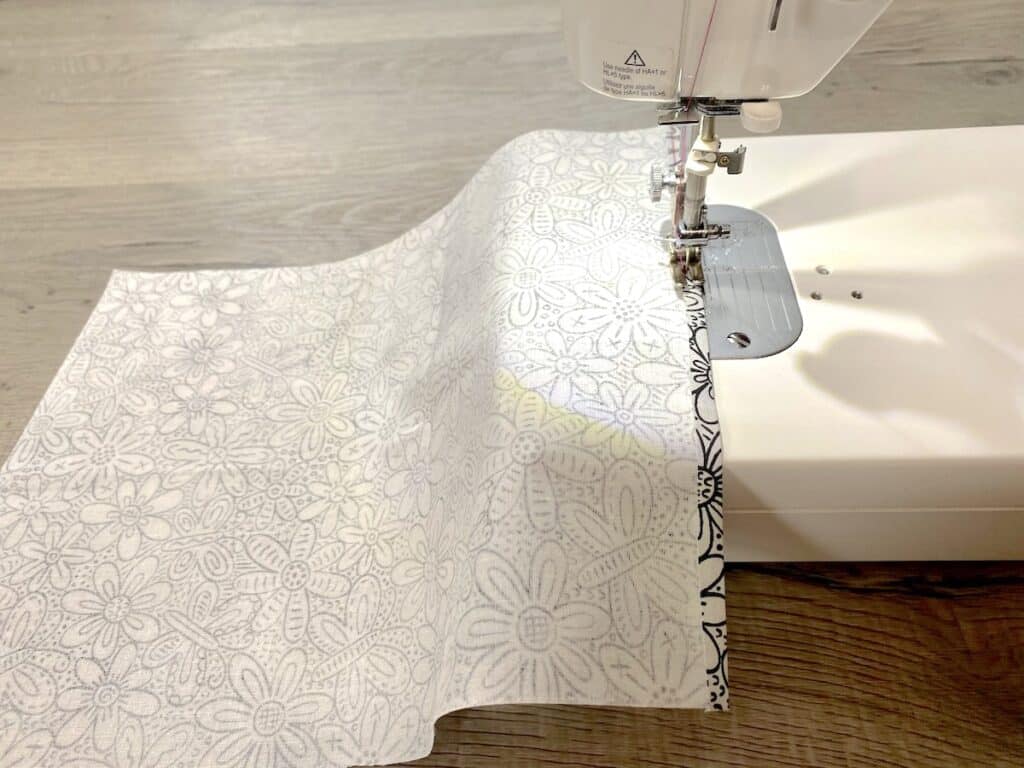
Sew the edge in place on both pieces.
Step 4
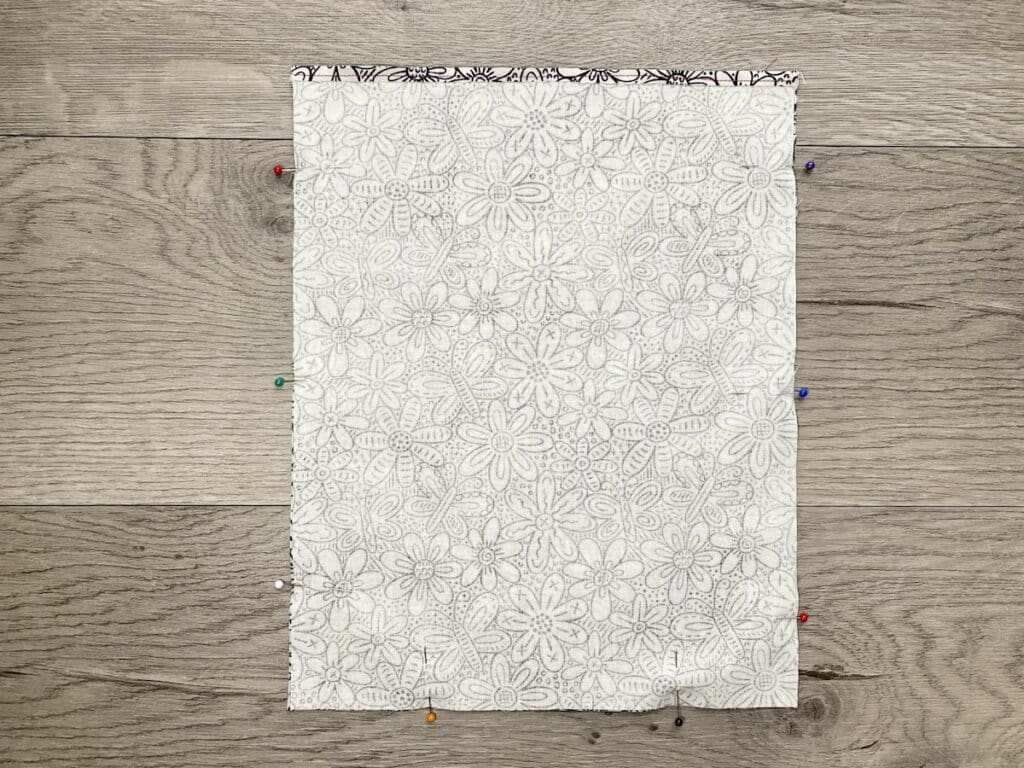
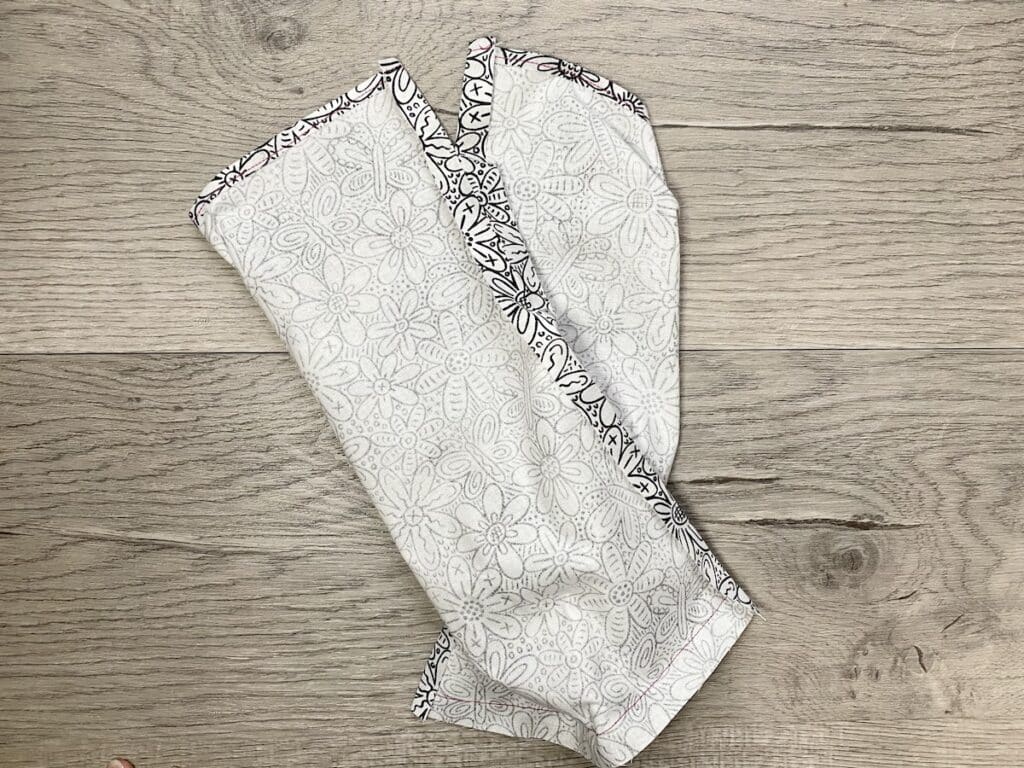
Place fabric pieces with right sides together. Use straight pins to hold in place and mark 2” below turned/hemmed edge.
Step 5
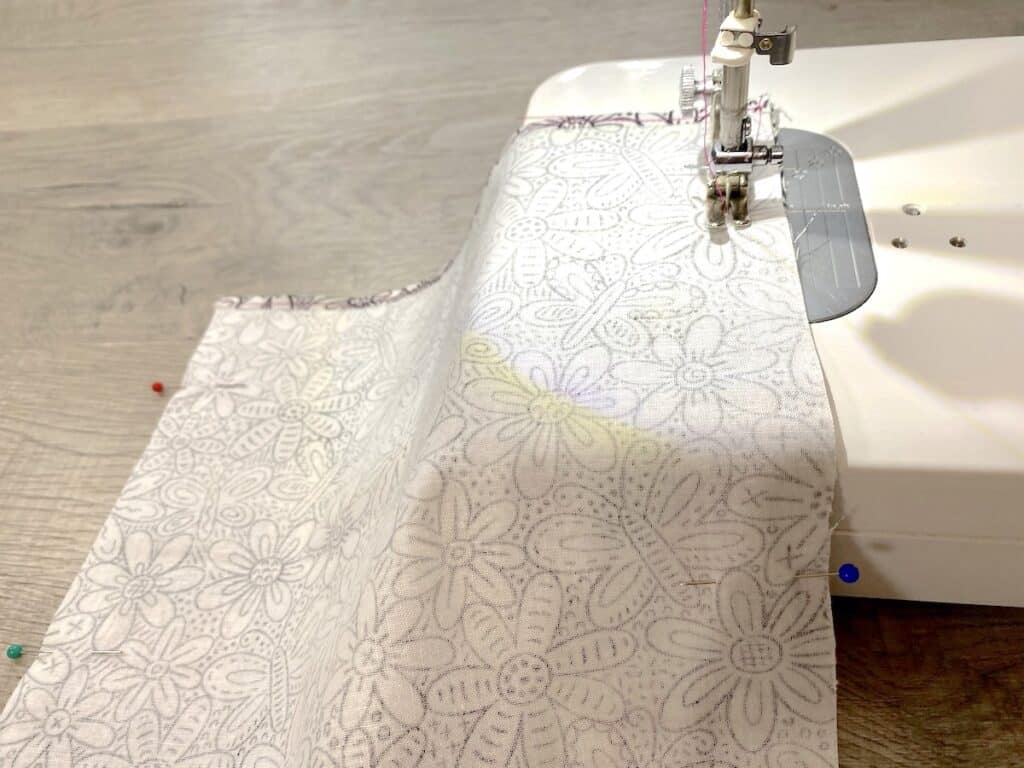
Beginning at one of the 13″ sides, make a mark 2 inches below the turned edge. Then start sewing down the side with a ⅝” seam allowance.
Step 6
Turn with a 90 degree angle and sew across the bottom and then back up the other side, stopping 2” from the turned/hemmed edge.
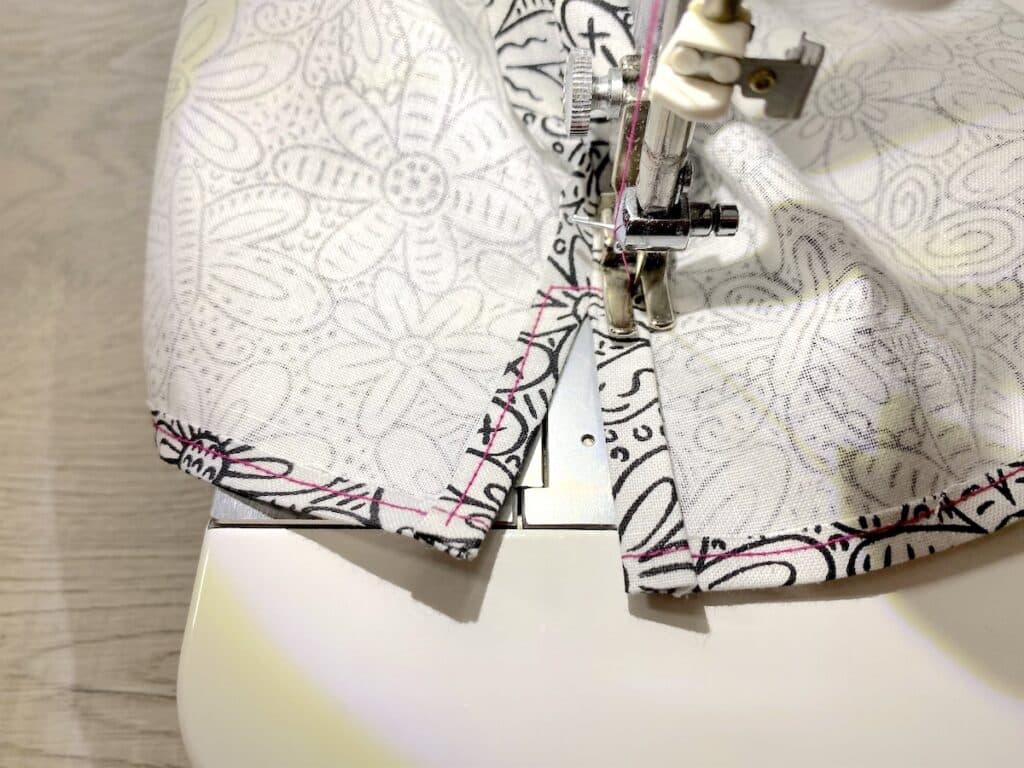
Step 7
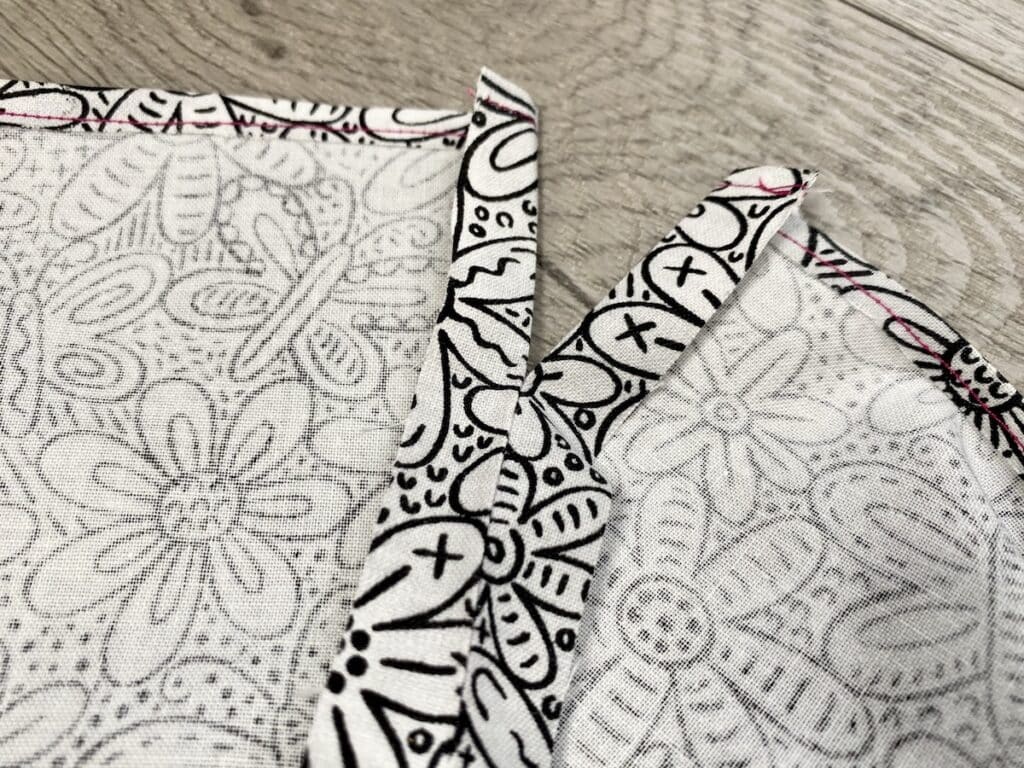
Turn the top 2” of the seam under ¼” then press all of the side seams open, including the turned under edge.
Step 8
Turn under another ¼” and press. Repeat on other side.
Step 9
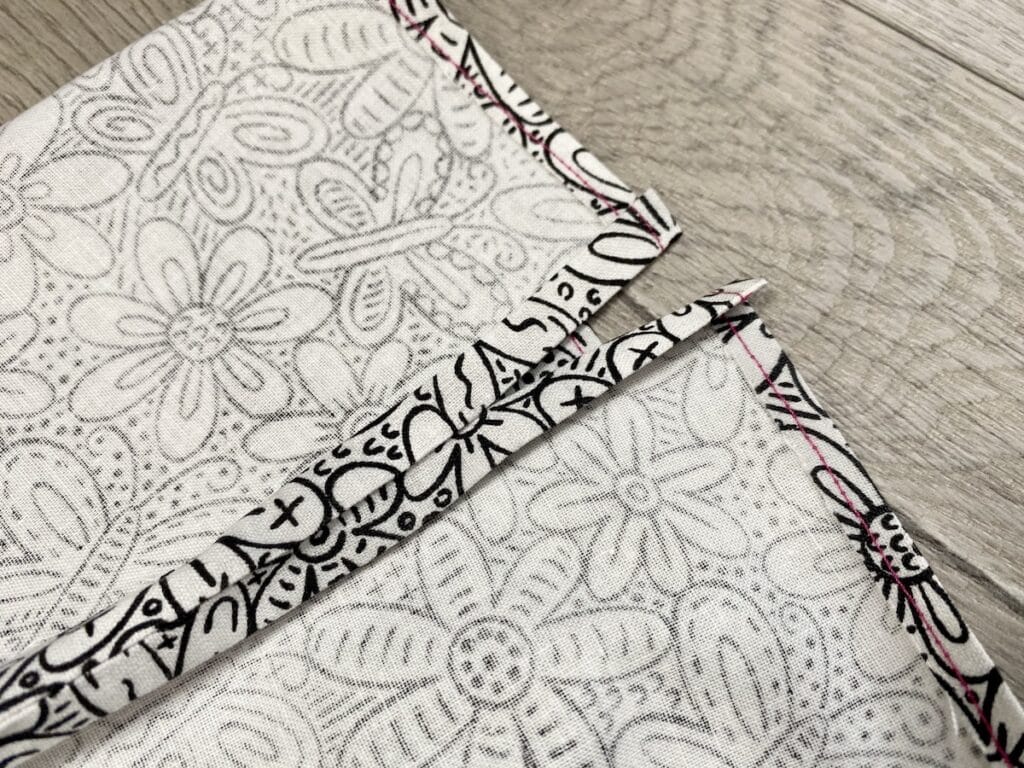
Beginning at top of side seam, sew down to the bottom of the split, across, and then up the other side. Repeat on both sides.
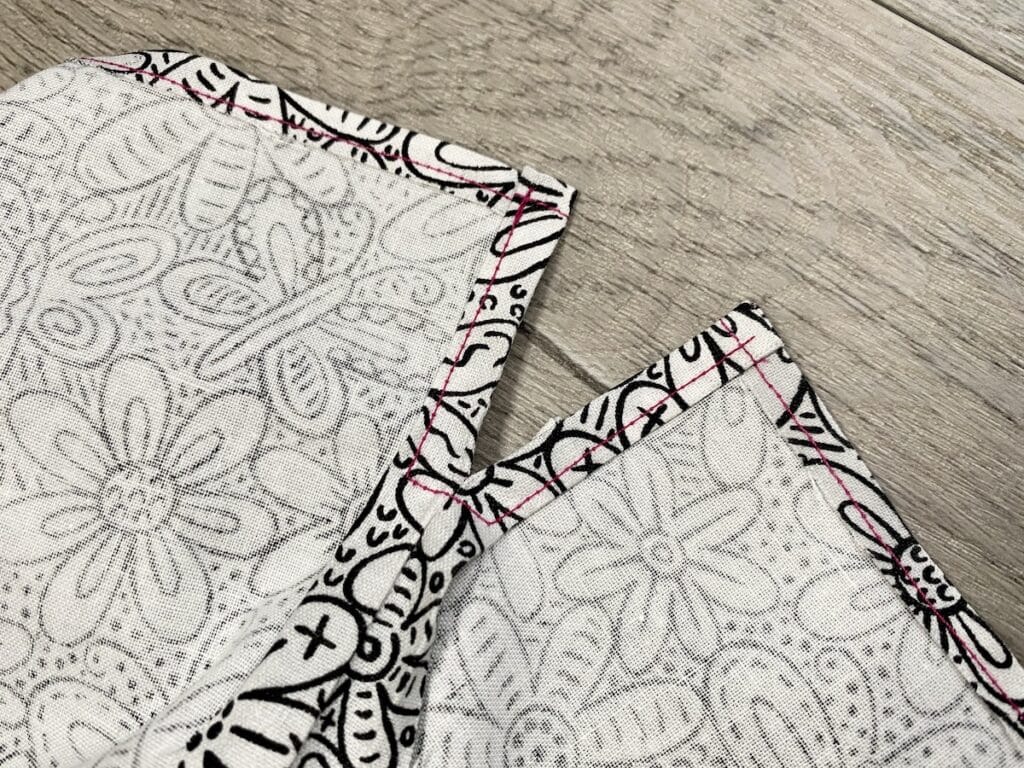
Repeat for other side.
Step 10
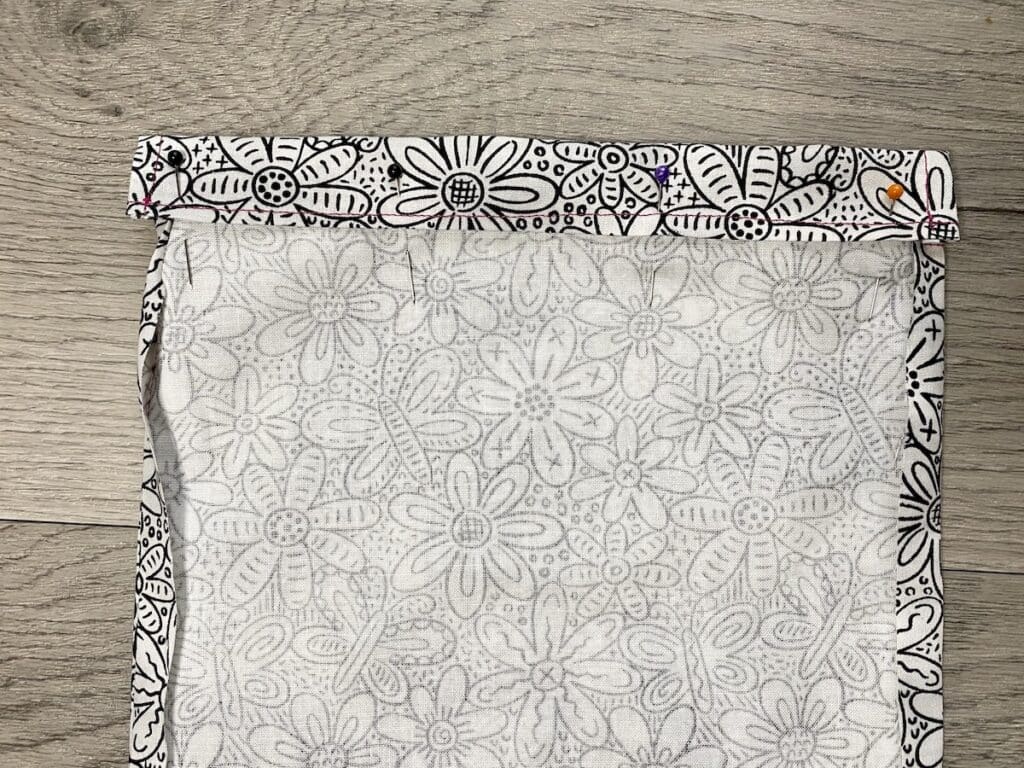
Turn the top down ⅞” and press.
Step 11
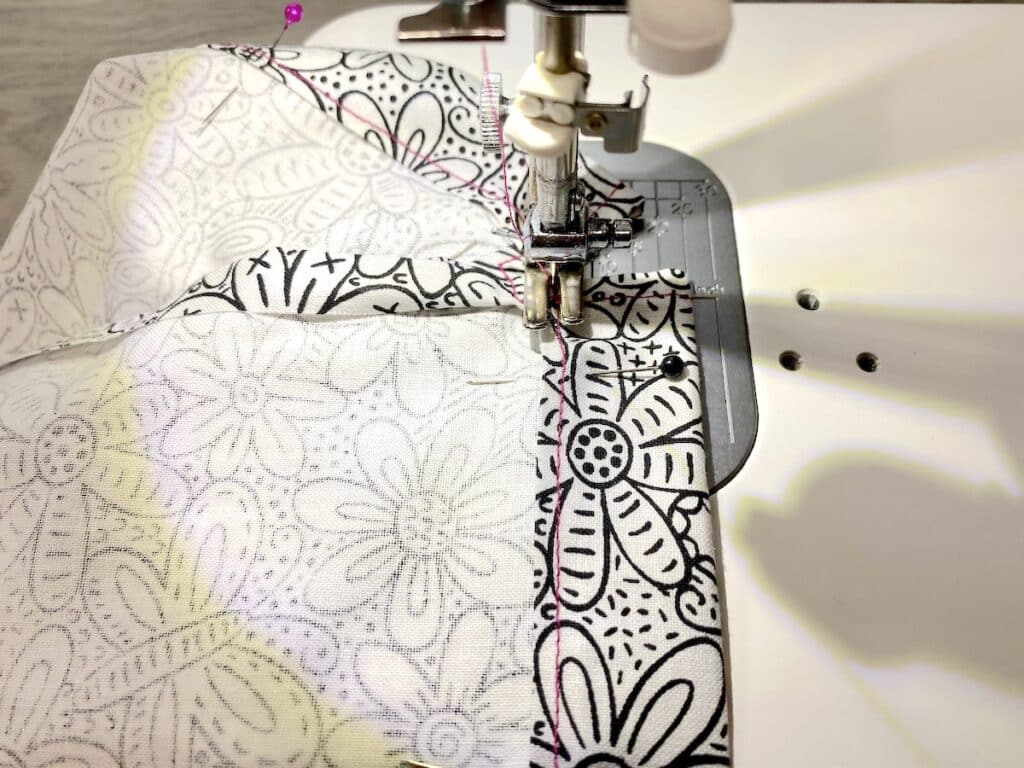
Sew the bottom of the turned edge. You can either stitch along the same line you stitched in Step 3, or make another line to the immediate top or bottom of that row of stitching to form a double stitch.
Step 12
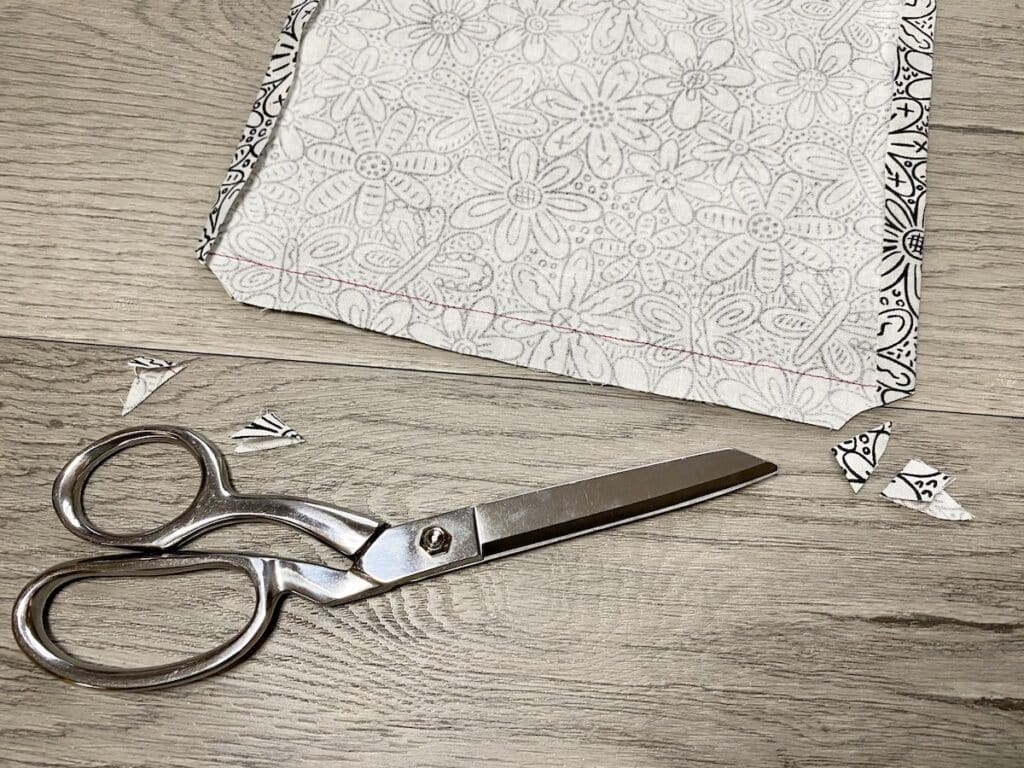
Cut extra fabric off the bottom corners in a diagonal cut. Be sure not to cut through the stitches! This is to remove some bulk from the fabric and make it easier to turn inside out and create corners.
Step 13
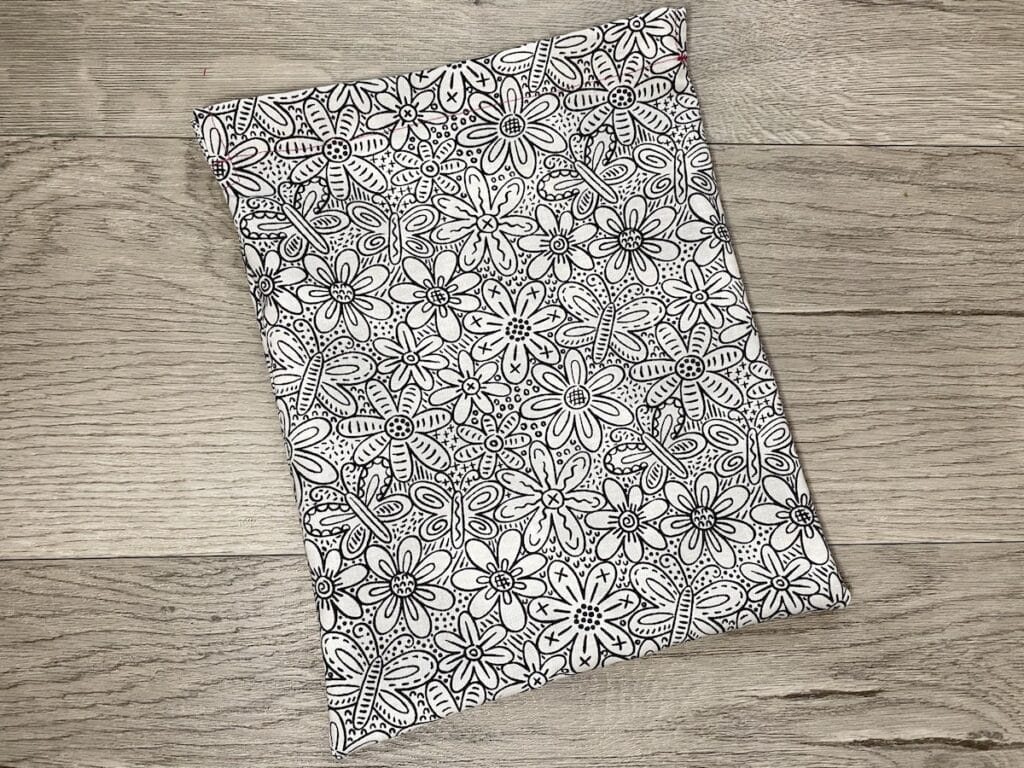
Turn the bag right side out.
Step 14
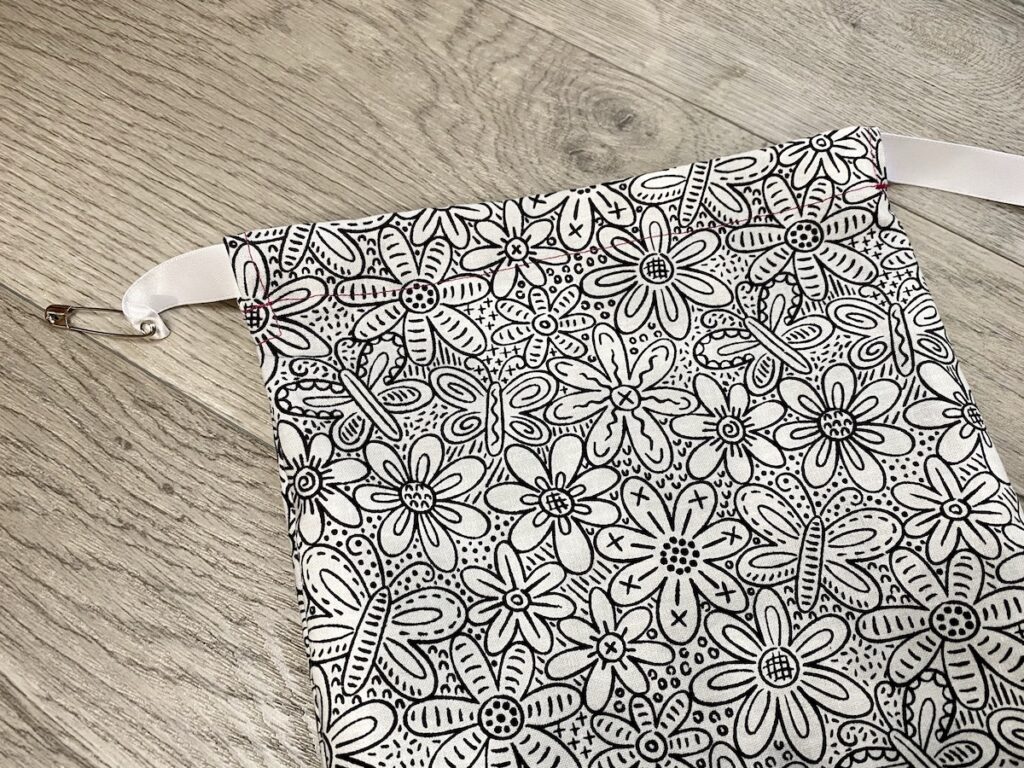
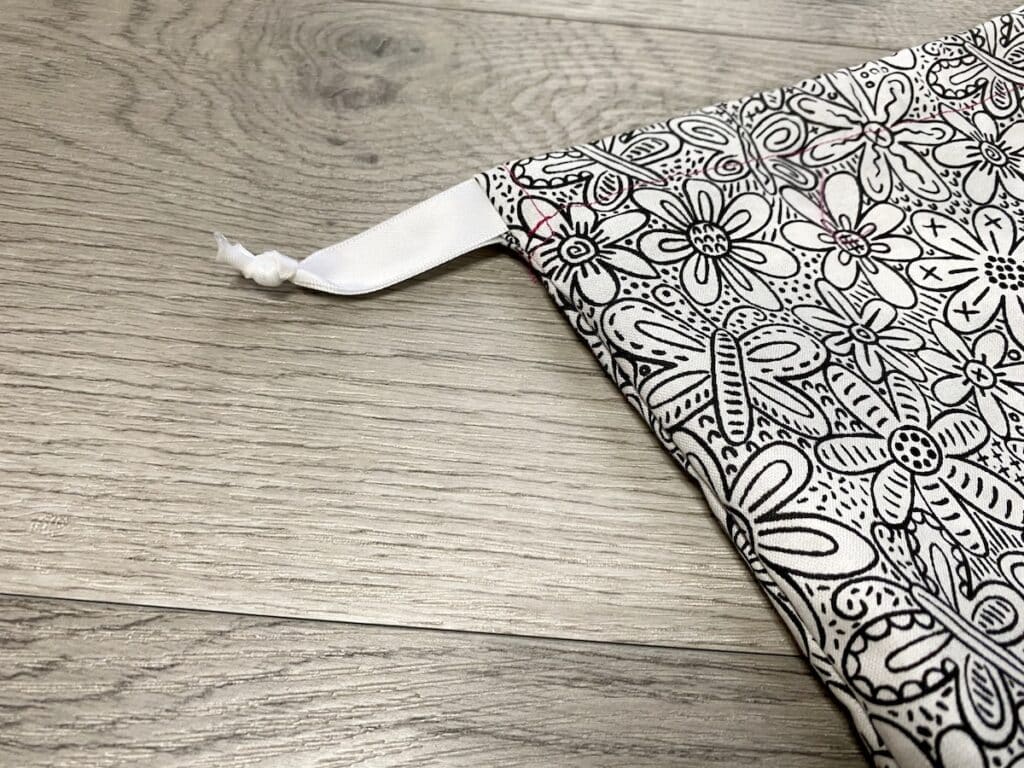
Cut two lengths of ribbon 25” each. Fold one end under ¼” twice. Then insert a safety pin into the folded end. Leading with the safety pin, thread one ribbon through the casing.
Step 15
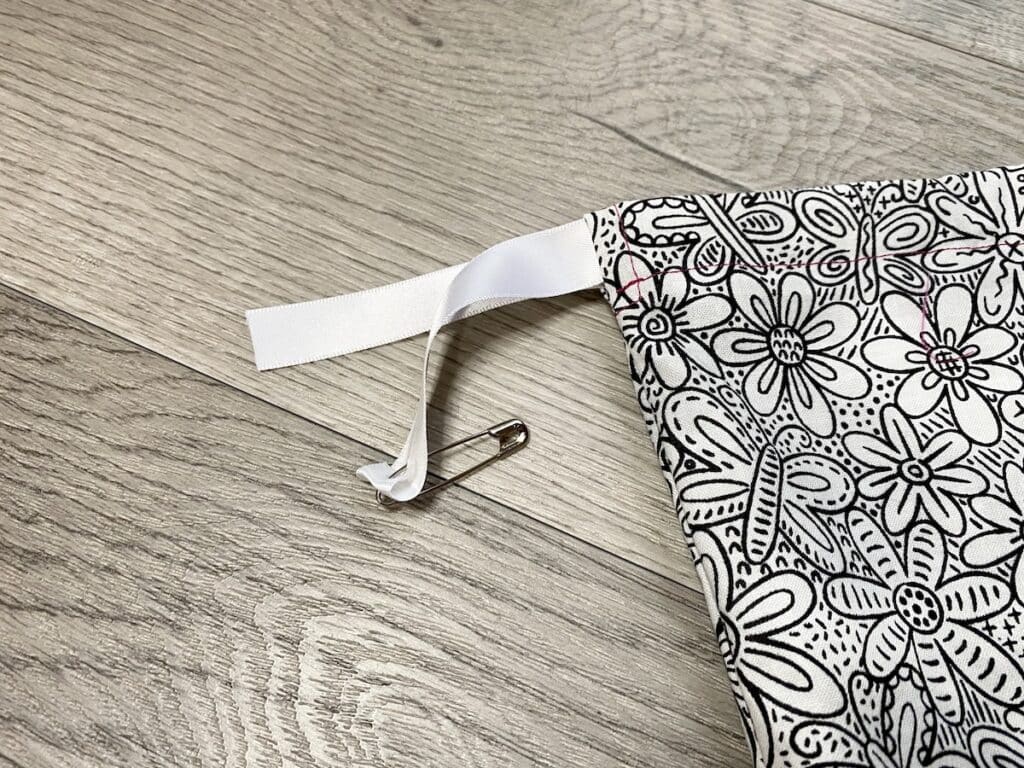
Flip the bag over and continue threading the ribbon through the other side. Both ends of the ribbon should extend out of the casings on the same side.
Step 16
Remove the safety pin. Tie the ribbon ends into a knot. If you wanted, you could sew the ribbon ends together.
Step 17
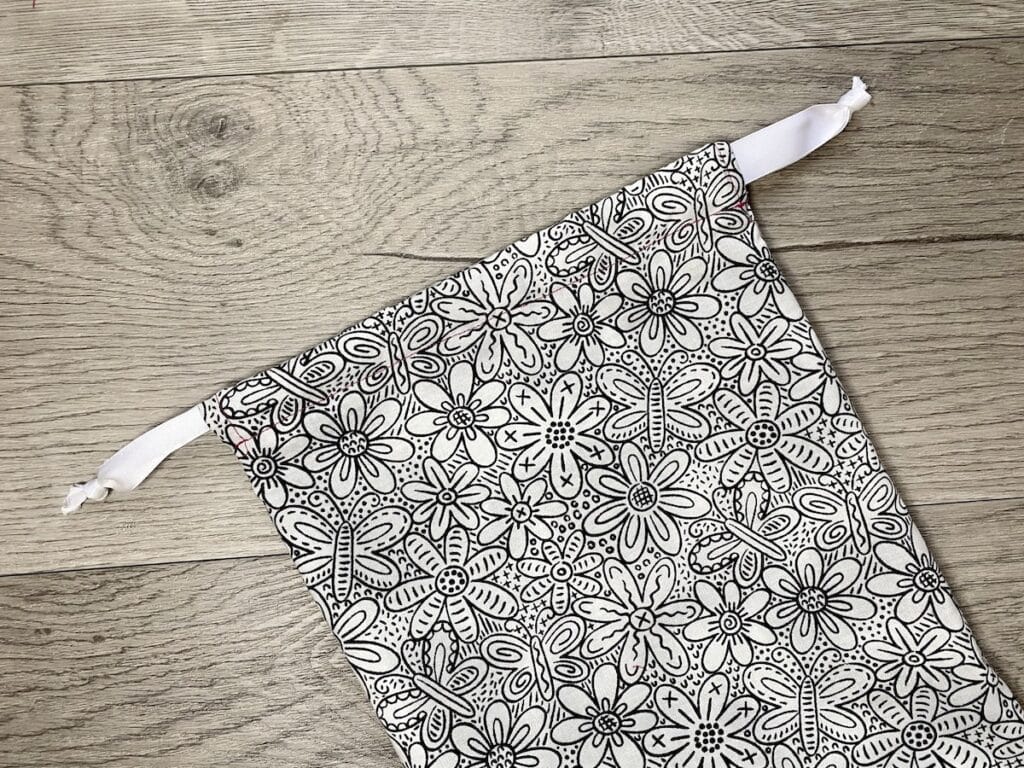
Insert the remaining ribbon by beginning at the opposite side of the knot. Flip and continue threading. Then finish with another knot.
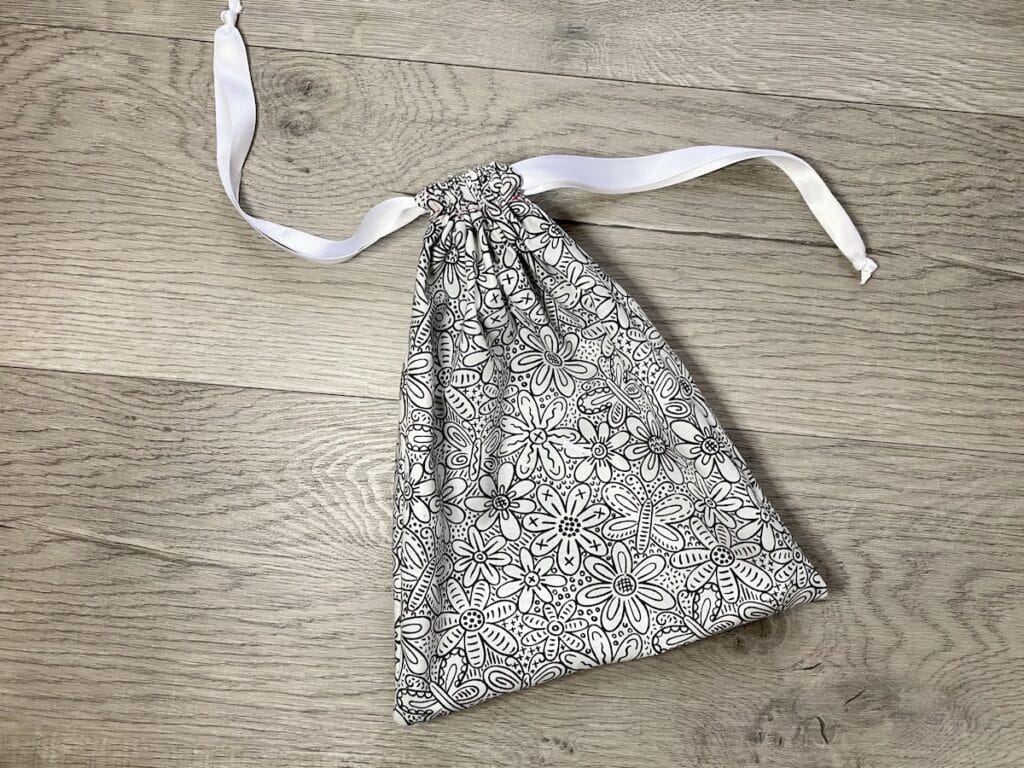
Pull both ribbon knots to cinch the drawstring closed.
Be sure to Pin This tutorial to save for later!
Want more unique gift wrapping ideas? Check these out:
You might also like these sewing projects: