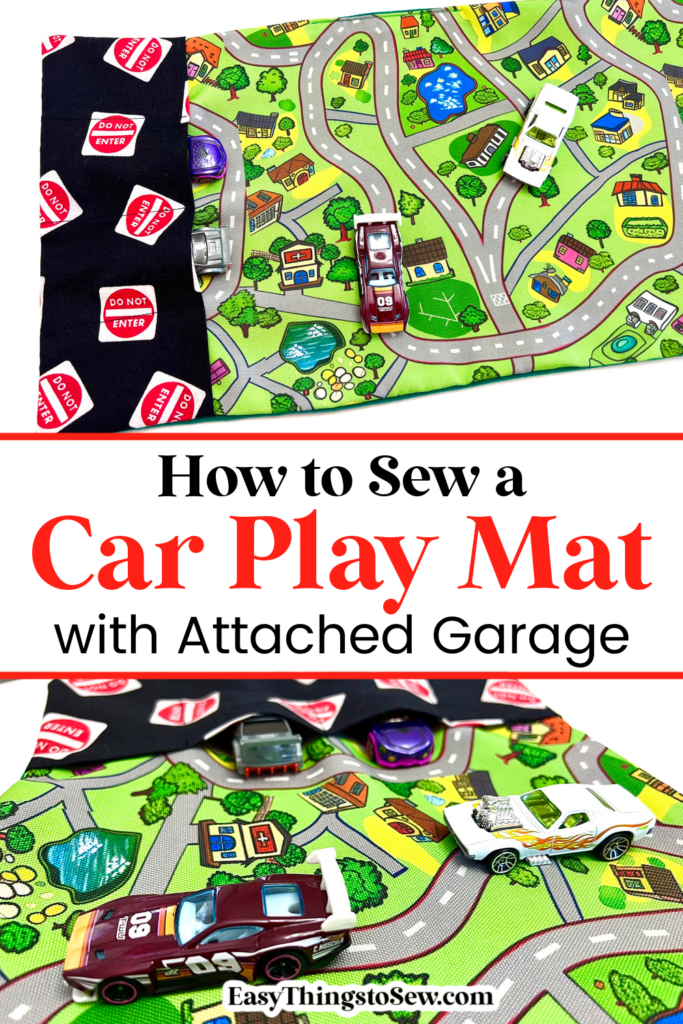
DIY Roll Up Car Play Mat (with Video Tutorial)
Kids love playing with toy cars and our easy DIY road play mat is the perfect backdrop to unleash their imagination for old-fashioned play suitable for younger children.
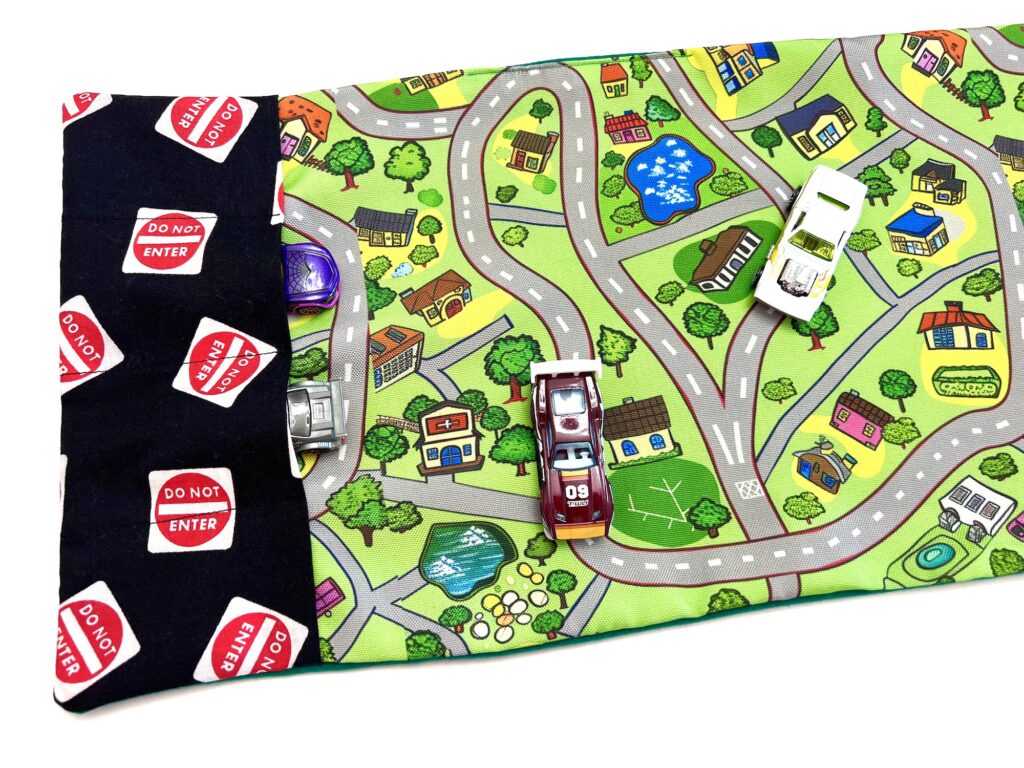
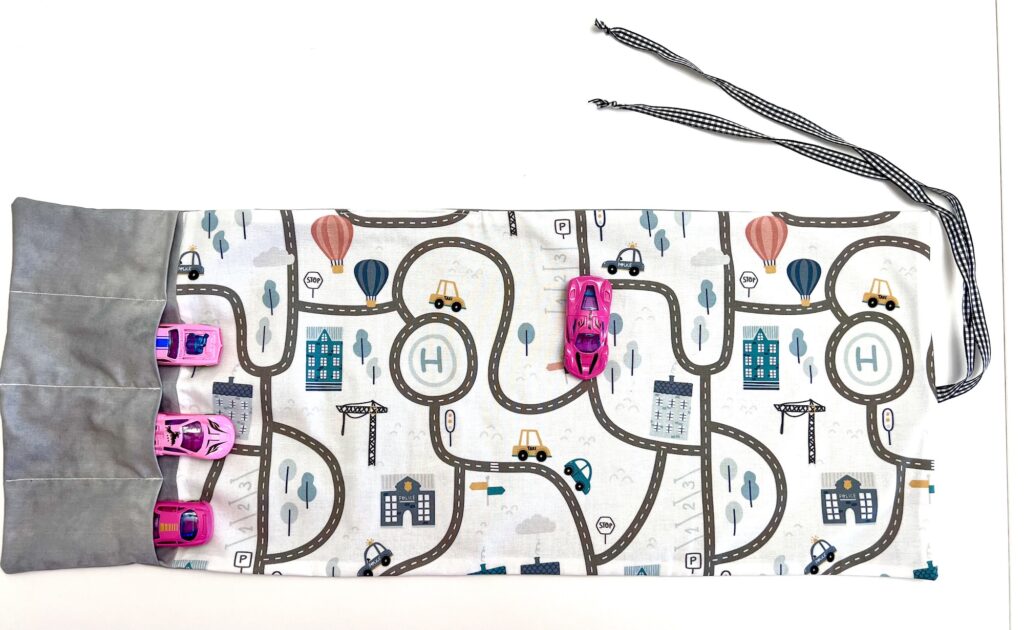
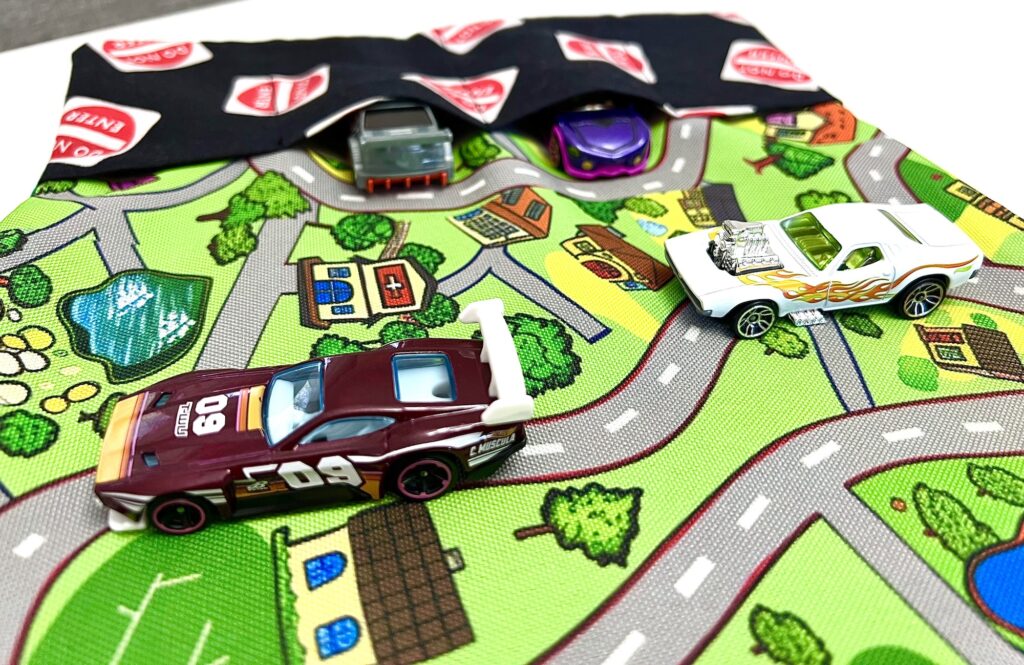
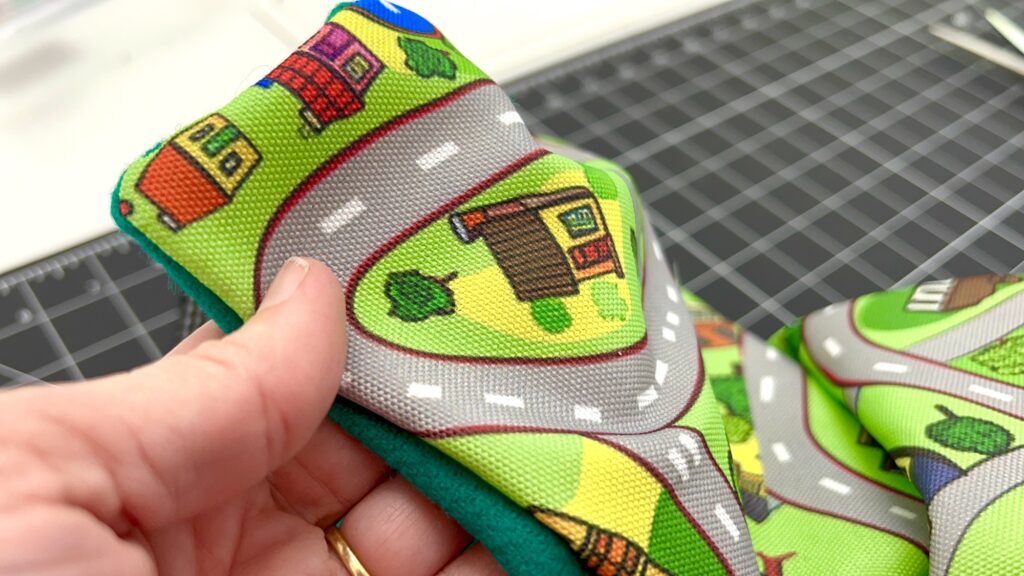
Our foldable road play mat is designed to use with Hot Wheels or Matchbox cars, or other similar small toy cars.
The attached “car garage” will hold 4 cars.

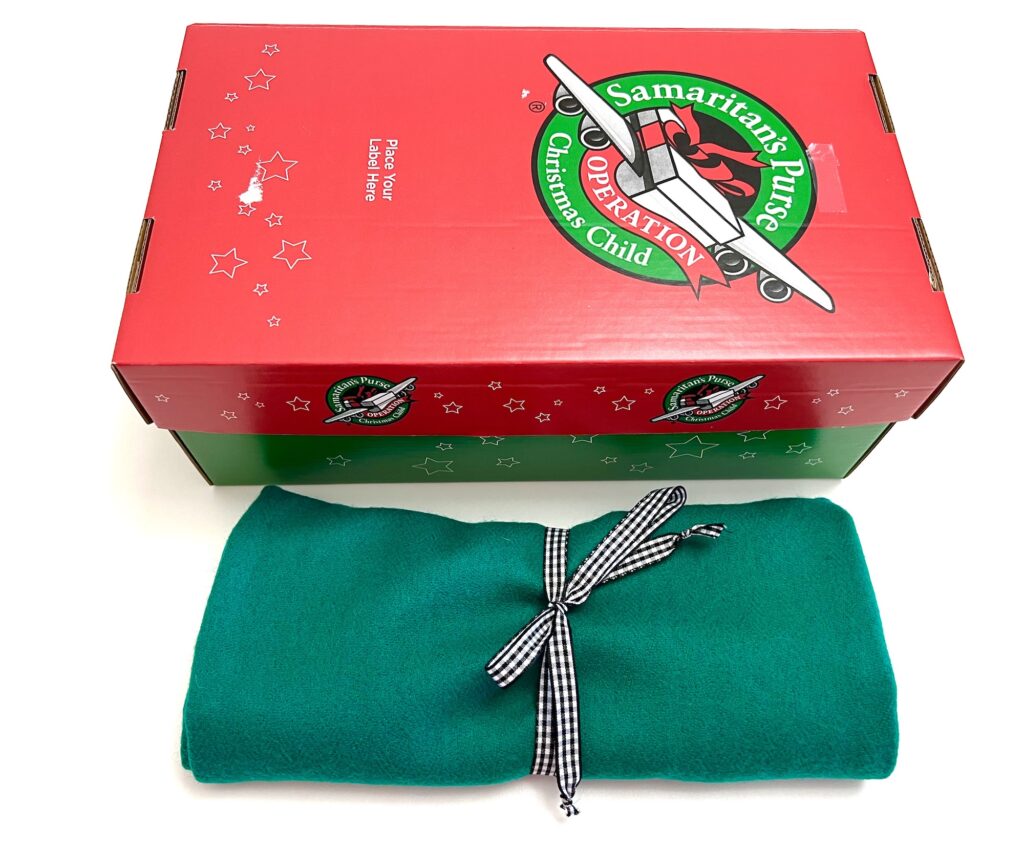
The size is perfect for carrying in a purse or backpack. It also fits easily into a shoebox for Operation Christmas Child shoebox ideas.
This tech-free toy does not need batteries and encourages creativity and quiet play. The portable design is easy to take anywhere, revealing a fun world of imaginative play at home or on the go.
*We created this size to make the largest play mat possible that will easily fit in a shoebox, while also maximizing a yard of fabric to get as many play mats as possible. We were able to get 6 play mats from a yard of quilter’s cotton or 9 play mats from the Amazon fabric listed below.
Want an ad-free tutorial that can be used without internet? Get our 20-page ebook with step-by-step photo instructions that can be downloaded and used on your phone, tablet or computer, even if you don’t have Wifi.
How to Make a Road Play Mat with Attached Storage Garage for Toy Cars
Supplies
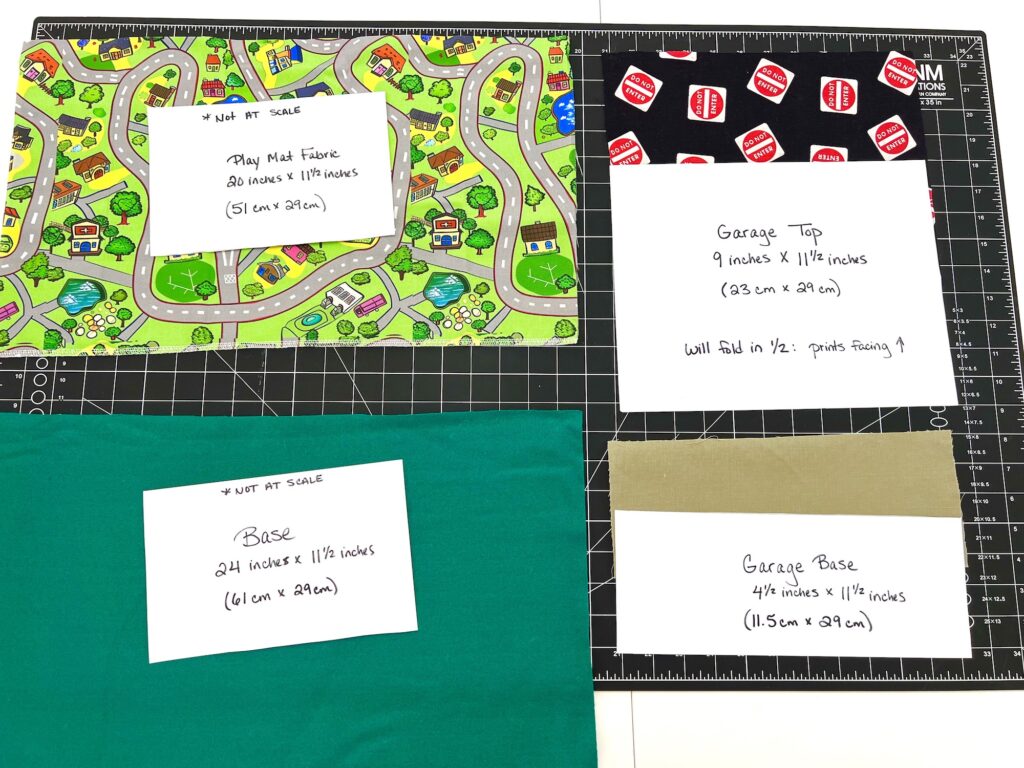
- Play Mat fabric (20 inches X 11 ½ inches)(51 X 29 cm) (I used this play mat fabric on Amazon)
- Garage Top fabric (9 inches X 11 ½ inches)(23 X 29 cm)
- Garage Base fabric (4 ½ inches X 11 ½ inches)(11.5 X 29 cm)
- Base (24 inches X 11 ½ inches)(61 X 29 cm)
- Matching Thread
- 30 inches Ribbon (76 cm) (I used this 3/8 inch ribbon)
- Iron
- Fabric clips or pins
- Pen or pencil
- Turning tool (optional)
Directions
Step 1
Measure and cut out the fabrics.
Fold the Garage Top fabric in half with wrong sides together, creating a 4 ½ X 11 ½ inch rectangle.
Iron the folded edge of the Garage Top fabric to be a crisp fold.
Then iron all other pieces to remove wrinkles, if needed.
Step 2
On the wrong side (back side) of the Garage Base fabric, measure these three points, starting from the left side of the fabric and moving towards the right side:
- 3 inches
- 5 ¾ inches
- 8 ½ inches

Mark lines at these measurements with a pencil, pen or chalk. These marks will not be seen in your finished play mat so there is no need to worry about disappearing ink.
Step 3
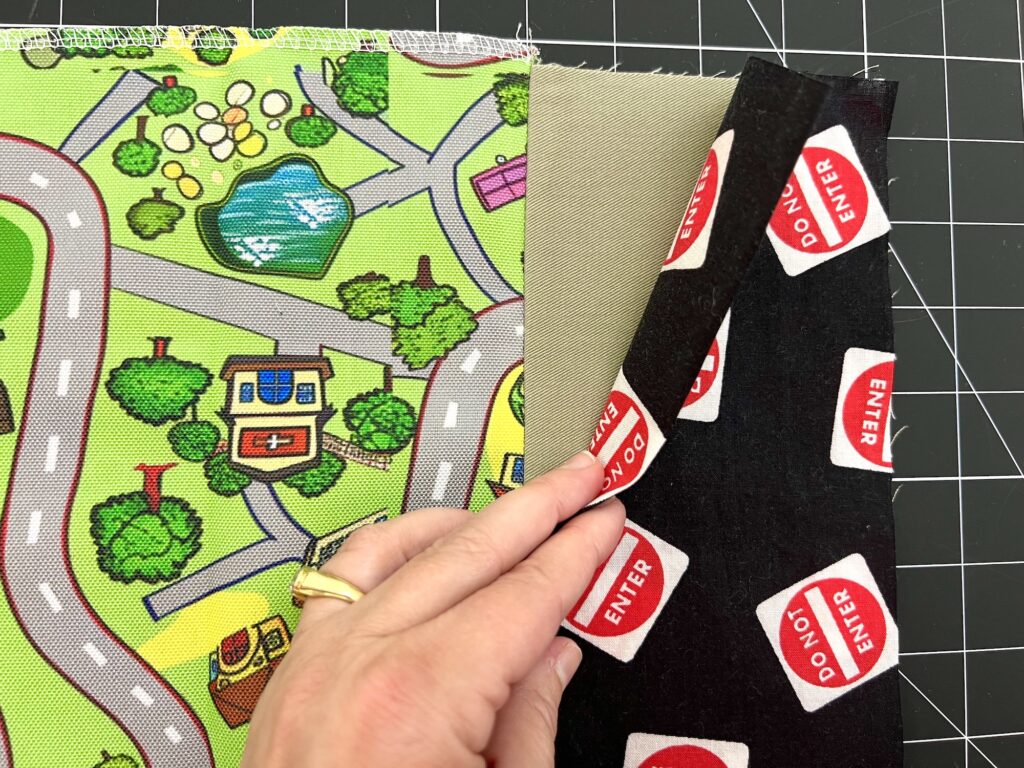
Place the Garage Base fabric on the edge of the Play Mat fabric, matching the 11 ½ inch raw edges. Right sides should be facing each other.
It does not matter which side of the Play Mat fabric you put the garage. I chose to put it on the left side.
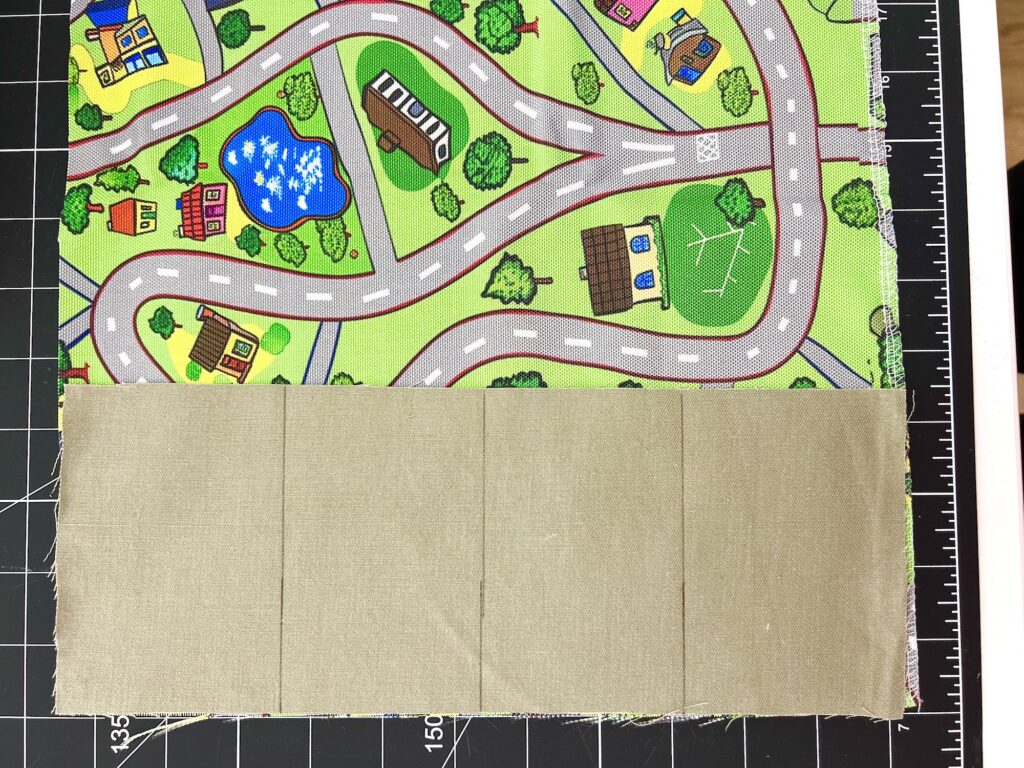
Sew the pieces together with a ¼ inch seam allowance. There is no need to backstitch at the beginning or end of this stitching.
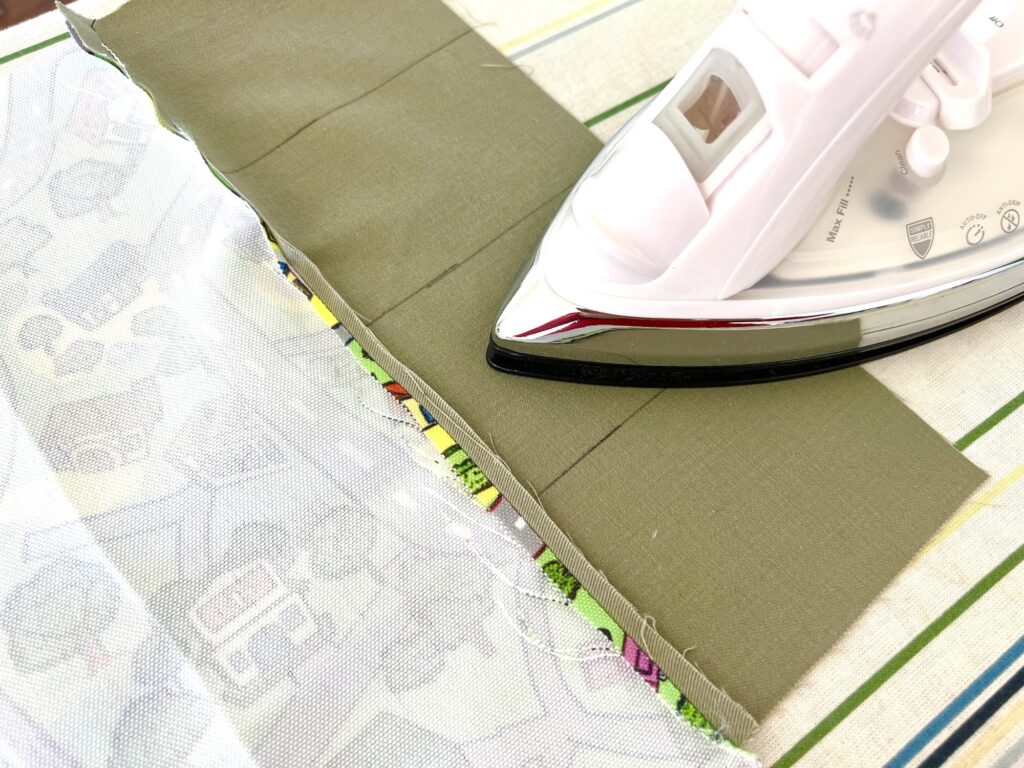
Press the seams open with a hot iron.
Step 4
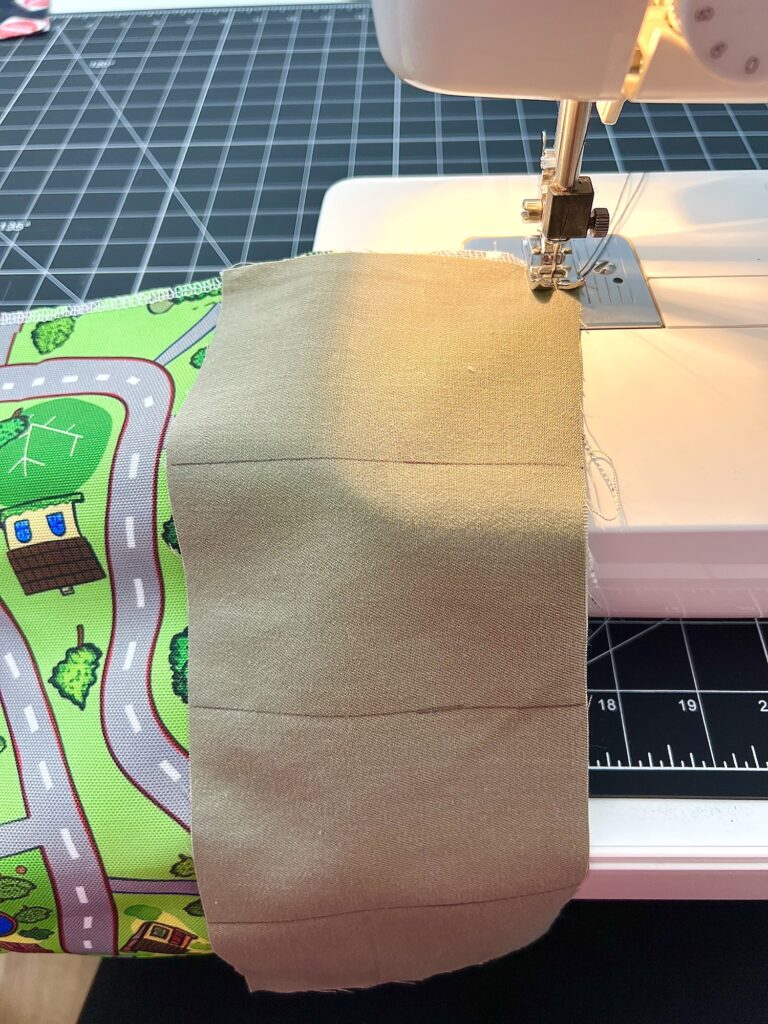
Lay the folded Garage Top fabric on top of the Garage Base fabric, with the folded edge pointed towards the play mat fabric and the raw edges matching.
If there is a right side and wrong side of the Garage Top, the right side should be facing up.
Clip together.
Now turn over the entire fabric piece (with the garage and play mat fabric connected) so that the backside is showing.
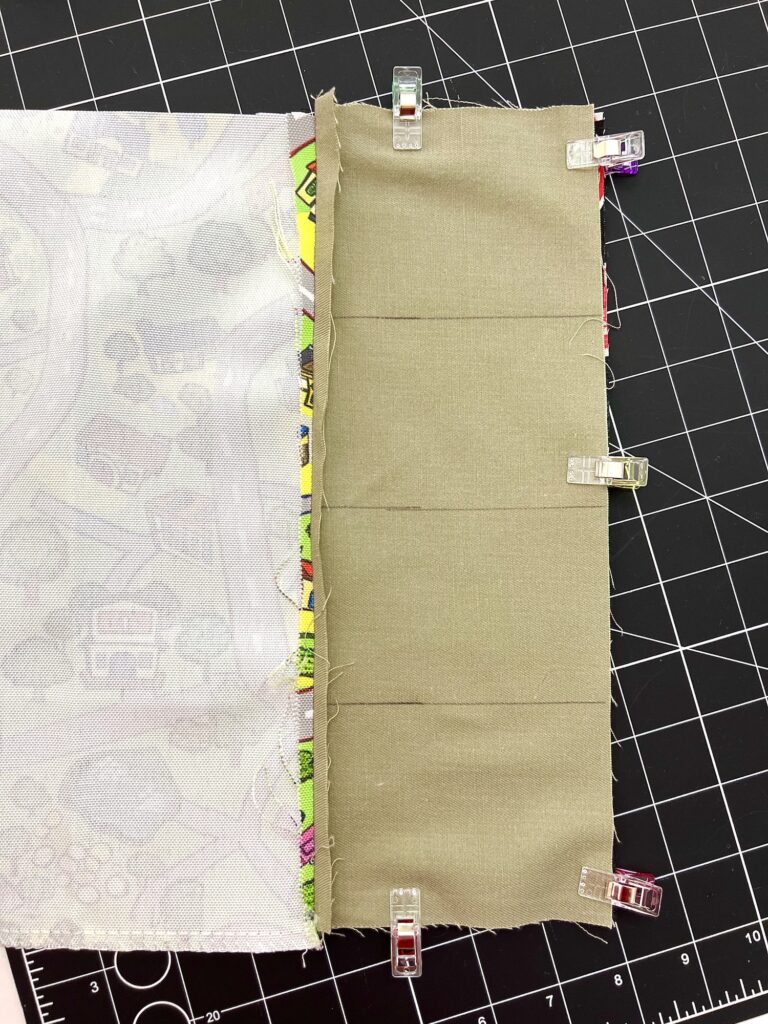
Stitch over the three drawn lines on the backside of the Garage Base fabric. Sew along the line and then sew across the pressed open seam. Do not sew past the pressed open seam.
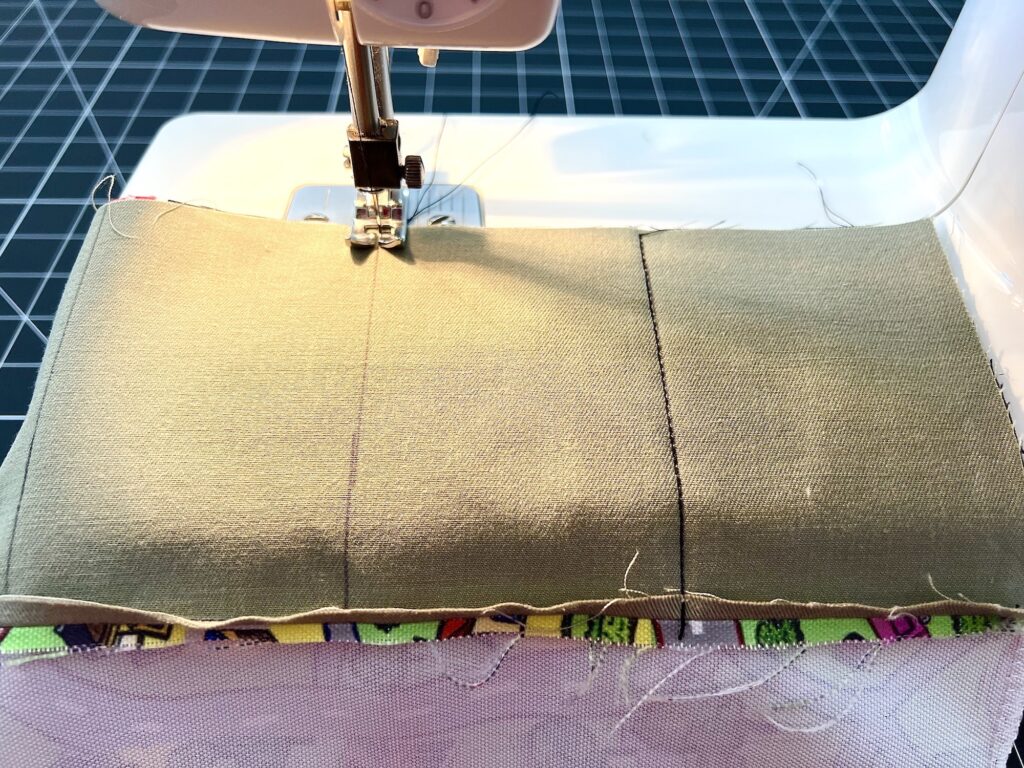
While you don’t need to backstitch at the raw edges side, it is wise to backstitch at the end over the pressed open seam, as this will be the top of the car garage and will get some wear and tear.
*Keep in mind that this stitching will be seen, so choose a color that matches the garage top fabric.
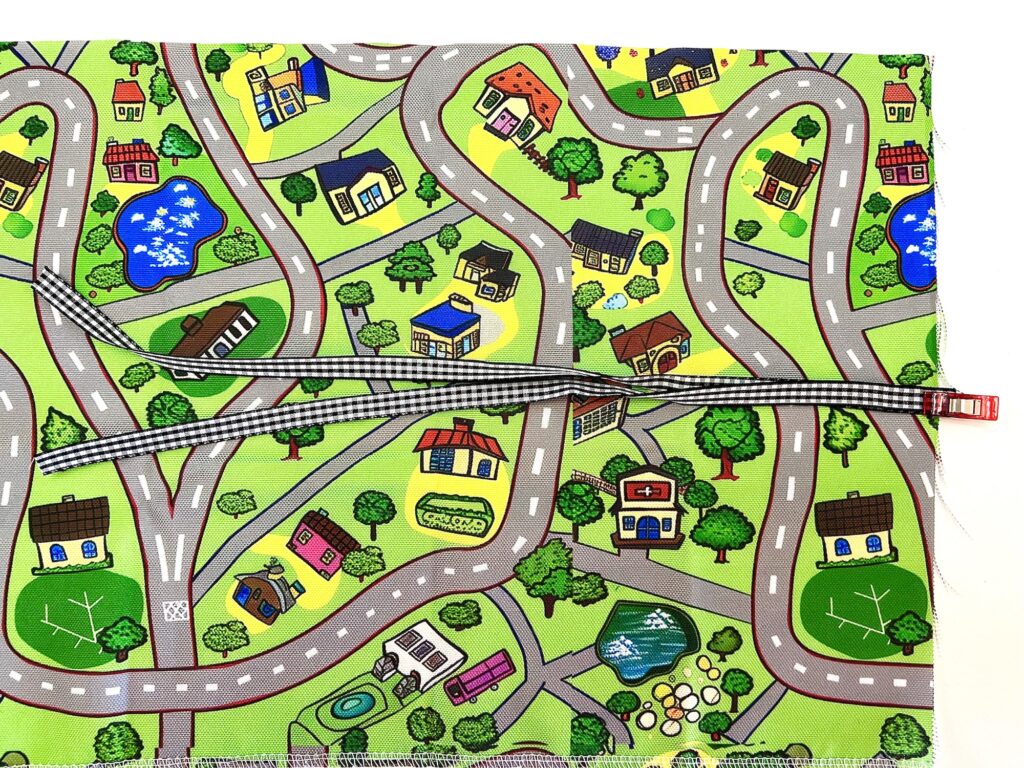
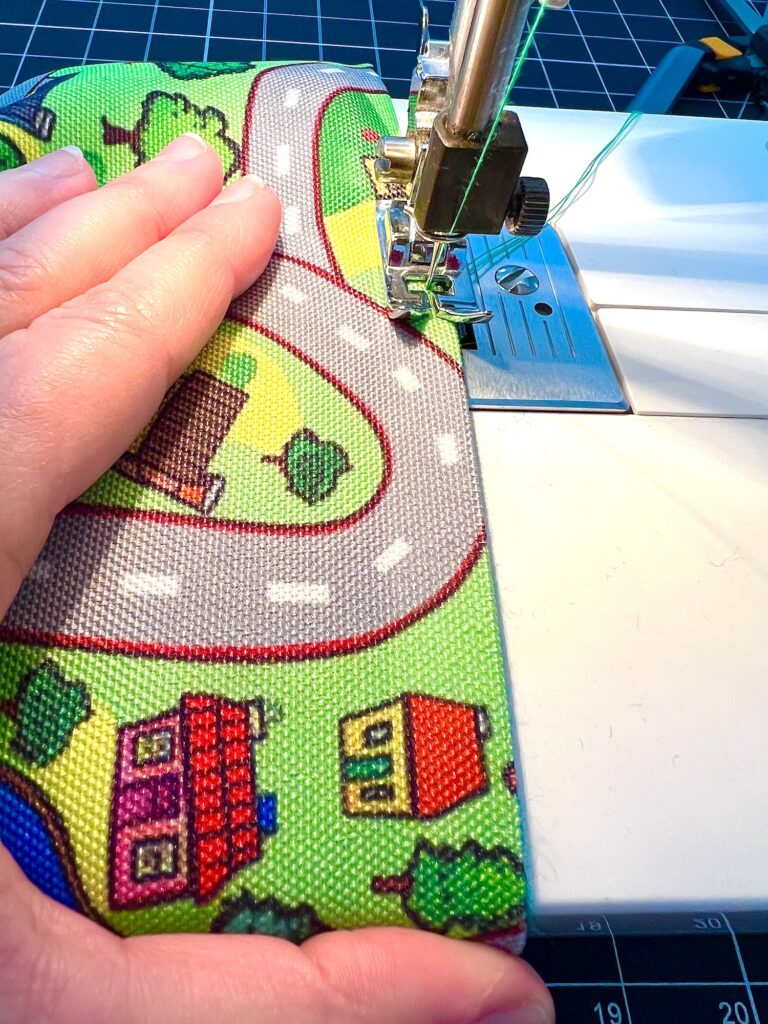
Step 5
Flip the fabric over so that the right side of the play mat is facing up.
Fold the ribbon in half. Place the folded edge of the ribbon on the raw edge of the play mat fabric across from the garage. Pin it halfway down the fabric, about 5 ¾ inches from the top edge.
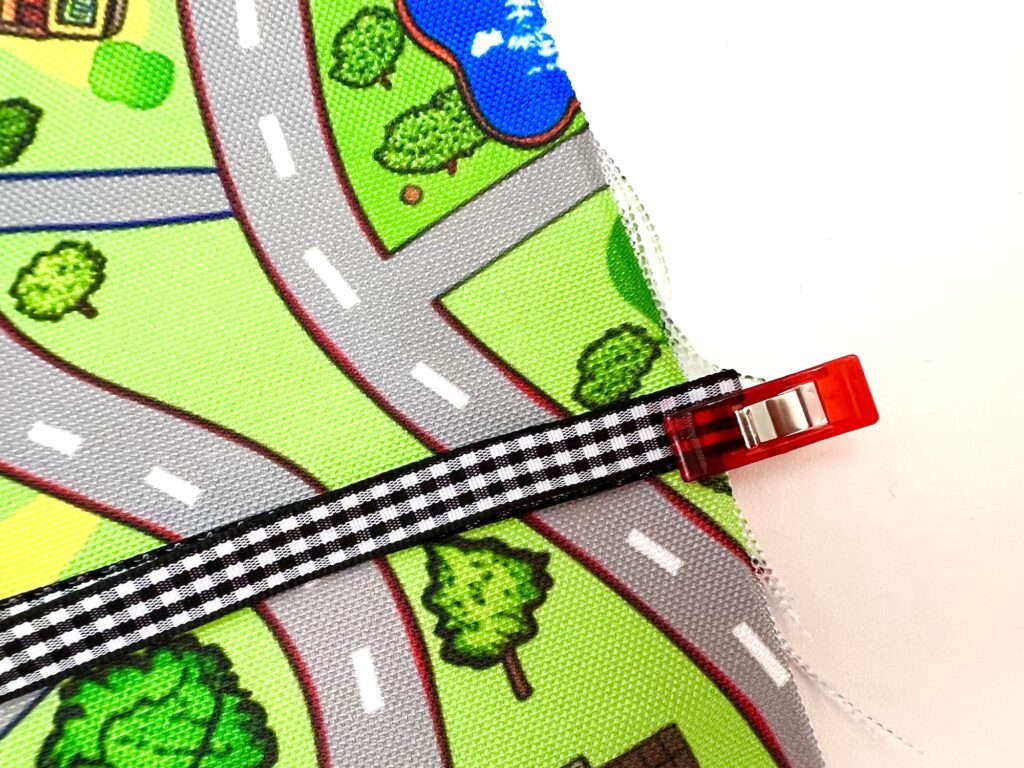
I choose to overlap the ribbon fold a little over the edge of the fabric, just to be sure it gets secured in the seam.
Make sure the cut ends of the ribbon are placed in the middle of the play mat and could not get sewn inside the seams later on.
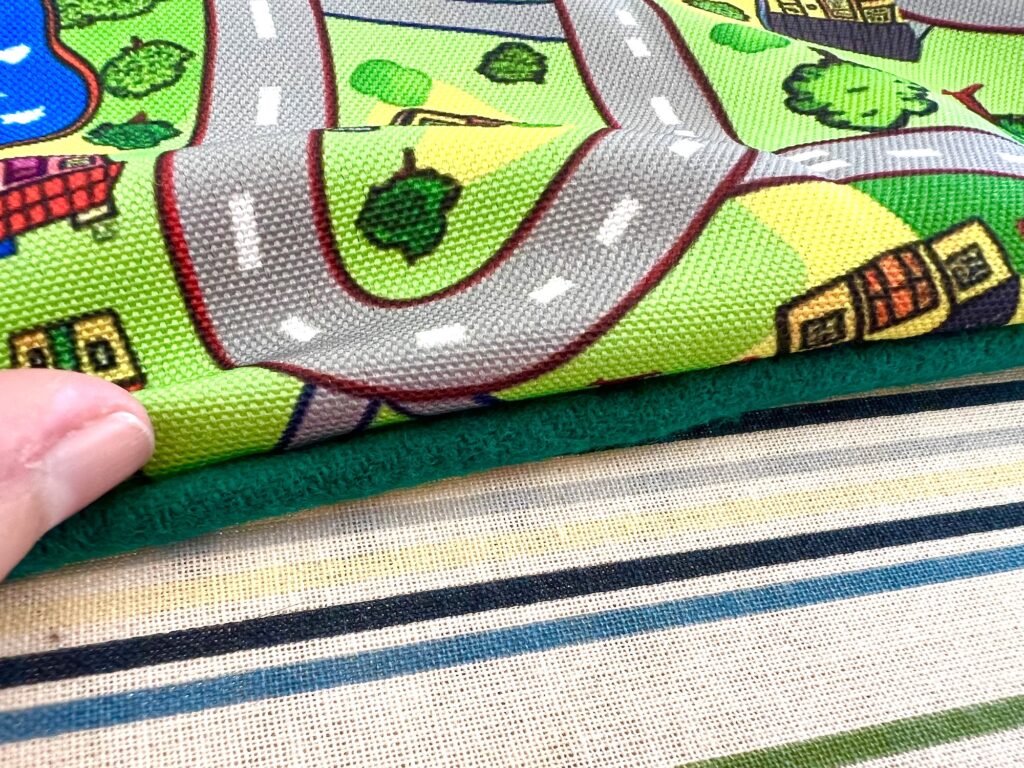
Now place the base fabric on top of the play mat, with the right side facing down so that the right sides are together.
Pin or clip the pieces together all around the edge, leaving a 3-4 inch gap opening.

If your fabric edges aren’t lining up evenly, as seen in the photo below, go ahead and trim them now before stitching. The ¼ inch seam allowance won’t give you a lot of room to secure uneven edges together if they aren’t lining up closely.
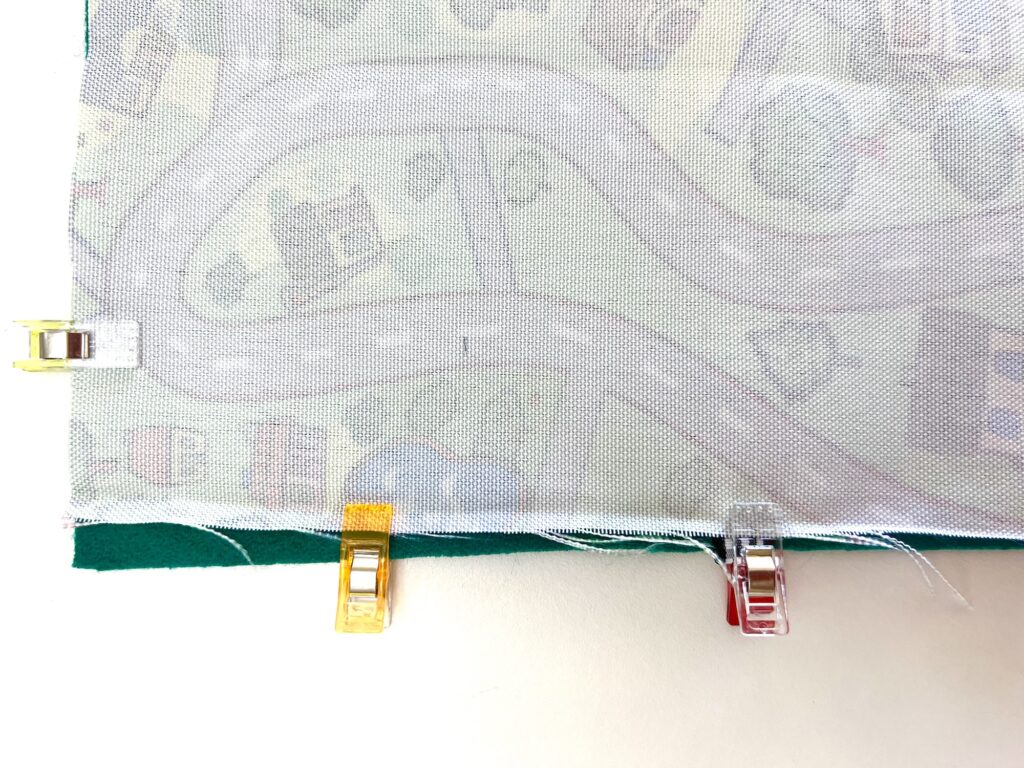
Using a ¼ inch seam allowance, sew along all of the edges of the play mat, being sure to backstitch at the beginning and end of your stitching and leaving a 3-4 inch opening.

I like to backstitch over the ribbon, as well, because it may get more pulling on it as kids and adults tie the play mat closed.
Step 6
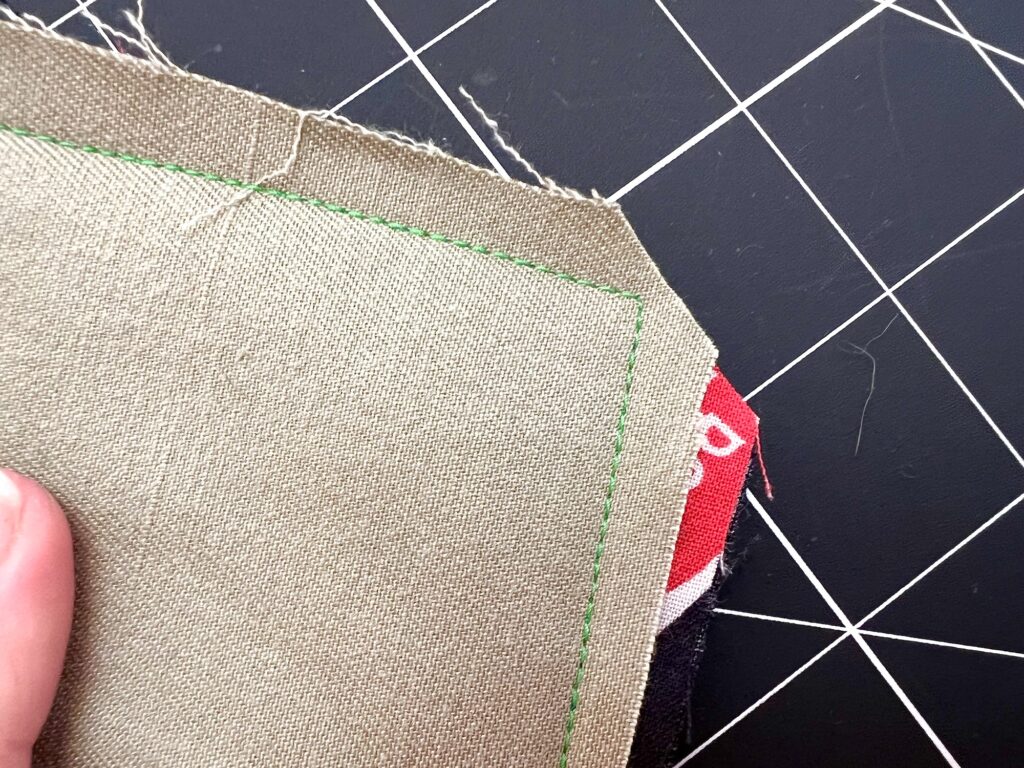
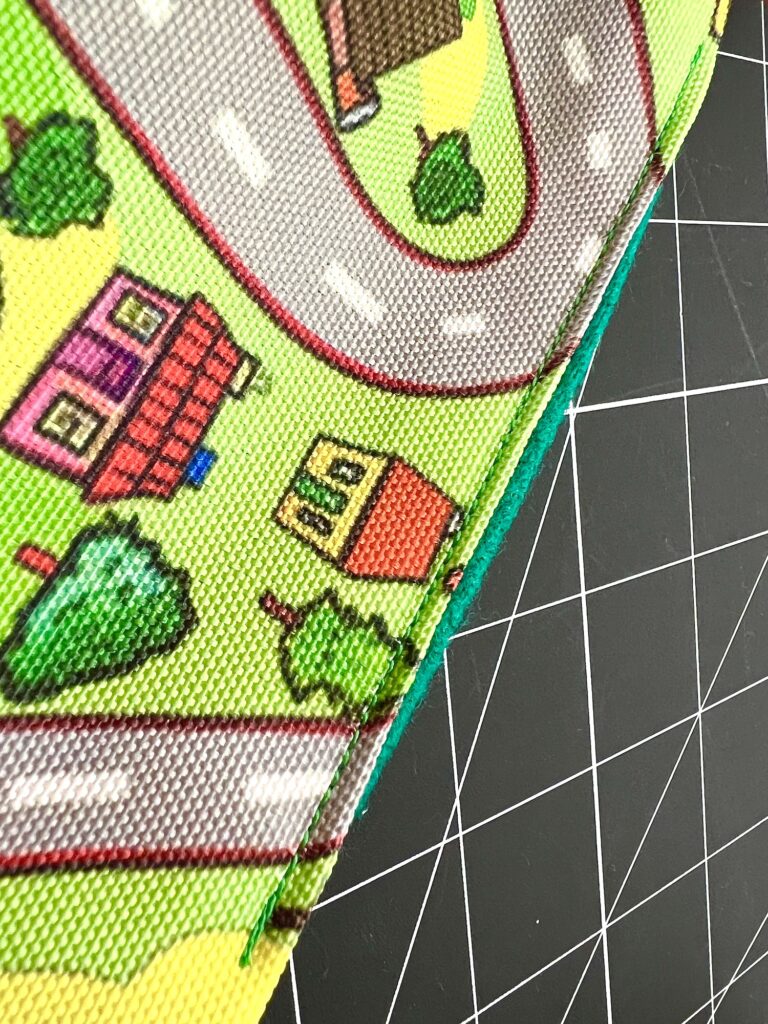
Clip off any long threads or loose threads.
Then clip each of the four corners. You will cut a diagonal across the fabric, close to the stitched seams, to remove the excess bulk so that the fabric can be turned inside out more easily.
Turn the play mat inside out through the opening.
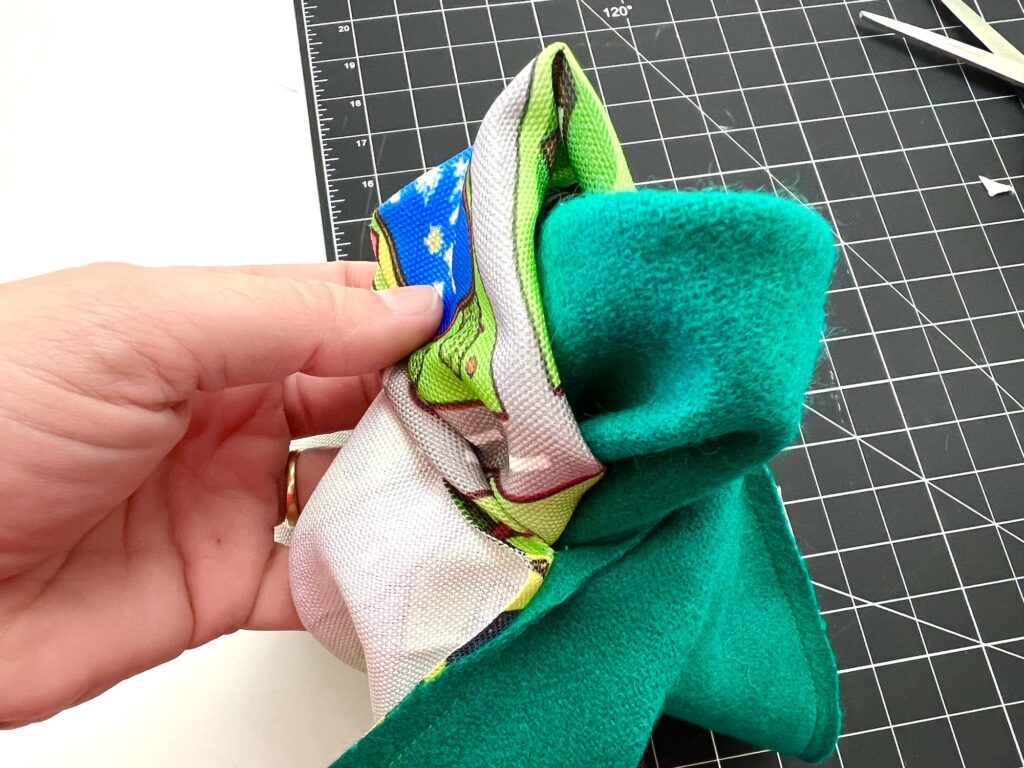
Using your fingers or a turning tool, push out the corner edges to be square.
Fold under the edges of the opening to match the edges of the play mat. Then press with a hot iron to stay in place.
Iron the rest of the fabric to remove wrinkles and to press down the seams.
Step 7
Bring the play mat back to the sewing machine and top stitch the opening closed by stitching close to the edge.
Alternatively, you could hand stitch the opening closed, especially with a ladder stitch which wouldn’t show on the fabric.
If you would like, you could continue to top stitch all around the play mat for a cohesive look.
While it is optional, if you are using this play mat fabric from Amazon, I highly recommend topstitching. The fabric has a tendency to pouf up, so topstitching gives it a more polished look.
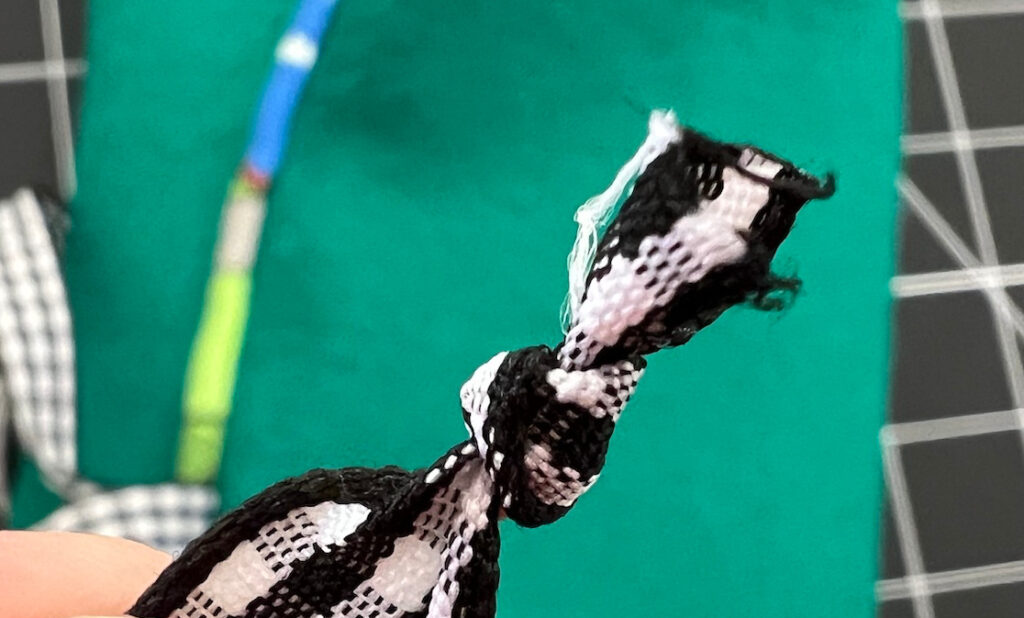
Finally, tie a knot at the end of both cut ends of ribbon to prevent them from fraying.
Want to watch me make this easy roll up play mat for toy cars? See our YouTube video below:
How to Use
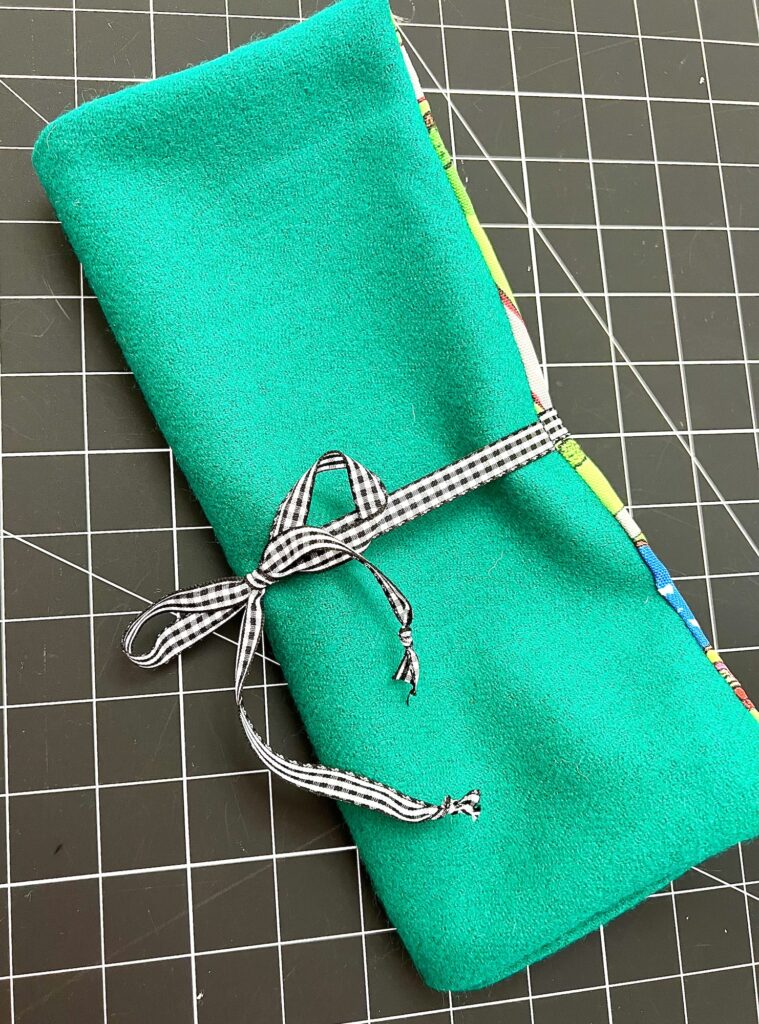
Toy cars, such as Hot Wheels or Matchbox cars, can be put inside the “car garage” and stored. Then roll up the fabric over and over until it is fully enclosed. Wrap the ribbons around the rolled up fabric and tie in a bow to secure.
If you use washable fabrics, you can wash this play mat if it gets dirty or stained. For the best results, place the mat inside a mesh bag or pillowcase and secure, so that the ribbons don’t get tangled while washing. Dry the mat on a flat surface, rather than using a dryer.
If you think you will be washing the play mat, I highly suggest pre-washing your fabrics first before starting this easy sewing project.
Fabric Choices
This DIY play mat for cars is easier when you purchase ready-made play mat fabric.
Not only will you save yourself a lot of time and hassle while making the mat, but you will also get more roadway on the roll-out fabric compared to making roads yourself with felt or appliqués.
I chose this colorful cartoon road play mat fabric that is available on Amazon. It is a pretty good price compared to other options. Plus, it is a wider fabric (the website states 59 inches but I measured 61 inches) than others that I considered, which means you get more fabric with each yard than you would with most quilter’s cotton fabrics.
You can see a more detailed review of this fabric in our YouTube short video.
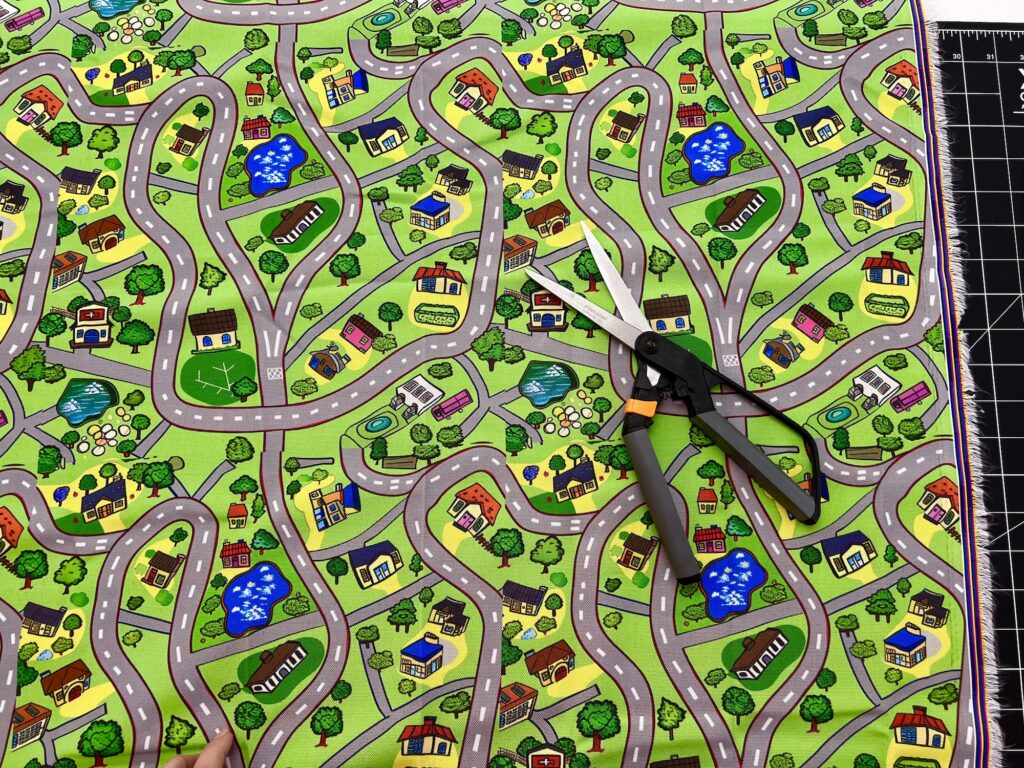
The size of the roads are the perfect scale for toy cars such as Hotwheels and Matchbox cars.
However, it is not without fault. The polyester fabric easily frays. So you may want to serge or stitch a zig-zag stitch along the edges to prevent fraying while you are working with it.
And I feel like the fabric doesn’t lay flat as much as a cotton one does.
Regardless, I choose this fabric to make Operation Christmas Child shoebox gifts because I can get up to 9 play mats with each yard, which is more than any other fabric option.
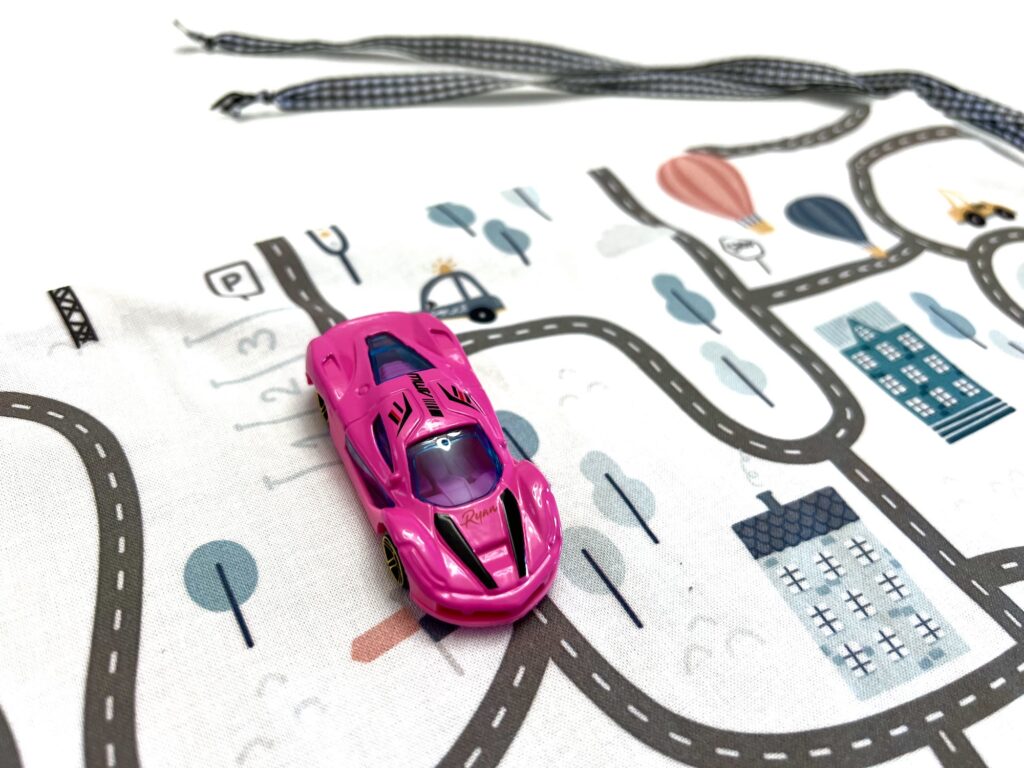
I have also tried out Spoonflower’s play mat fabrics. I do really like these fabrics a lot, however they aren’t as wide (around 42-44 inches). Plus, you have to pay for shipping, which just adds to the cost.
With Spoonflower’s custom printed fabric, you can choose which type of fabric that you want. I chose the least expensive Petal Signature Cotton, which was fine enough. However, it seemed to feel a little thin and the white fabric could be seen through. You can choose a heavier weight fabric, which I recommend.
Even so, I might order more of these play mat designs that I fell in love with while sewing because they lay flat after ironing:
- Scandinavian City Roads (as seen in the pictures above)
- Driving Through Town
Helpful Tips I Learned from Making a Road Play Mat
This DIY road play mat can be customized in many ways to save money or add a personal touch.
These are the smart tips and tricks I learned while making many of these car play mats for charity shoeboxes:
- Use a less expensive fabric for the Garage Base because it won’t be seen. This could be scrap fabric pieces, fabric cut from clothing or tablecloths, etc.
- The base of the playmat should be a more sturdy fabric, such as cotton twill, canvas, corduroy, drop cloth, felt or denim.
- Repurposing sturdy fabrics can really save a lot of money while making these rollable playmats. Consider using a pants leg from jeans or cotton twill pants. Tablecloths, flannel or fleece throw blankets, sheets and curtain panels found at thrift stores also make great backings and will give you larger pieces of fabric. (This is just one of my tips for where to find inexpensive fabric)
- If you would prefer a cotton fabric base, you can add a layer of light to mid-weight interfacing on the base pattern piece before sewing all of the fabrics together. Just don’t use a heavy-weight interfacing because you need the fabric to roll. (See our guide to interfacing to learn how to attach it.)
- Using a layer of fusible fleece on the base fabric is also an option for some more thickness.
- I used ribbon to make the tie closures because it was quicker and easier than making custom ties. However, you can make custom fabric ties by using a method similar to making your own bias tape and then sewing the edges closed. (We used this method for making our drawstring backpack ties)
- Alternatives to ribbon or fabric ties include store-bought bias tape sewn shut, shoelaces, twine, cotton twill tape, leather straps, etc.
Want to save this idea? Be sure to Pin It to Pinterest!
This is just one of our many Operation Christmas Child shoebox sewing projects. Be sure to see more of our easy ideas, including:

this is a great project …wow looks great and i know who ever gets one will love it and of course the parent will also for the kids can fold up and carry or put away …thank you ..
You’re welcome!!!