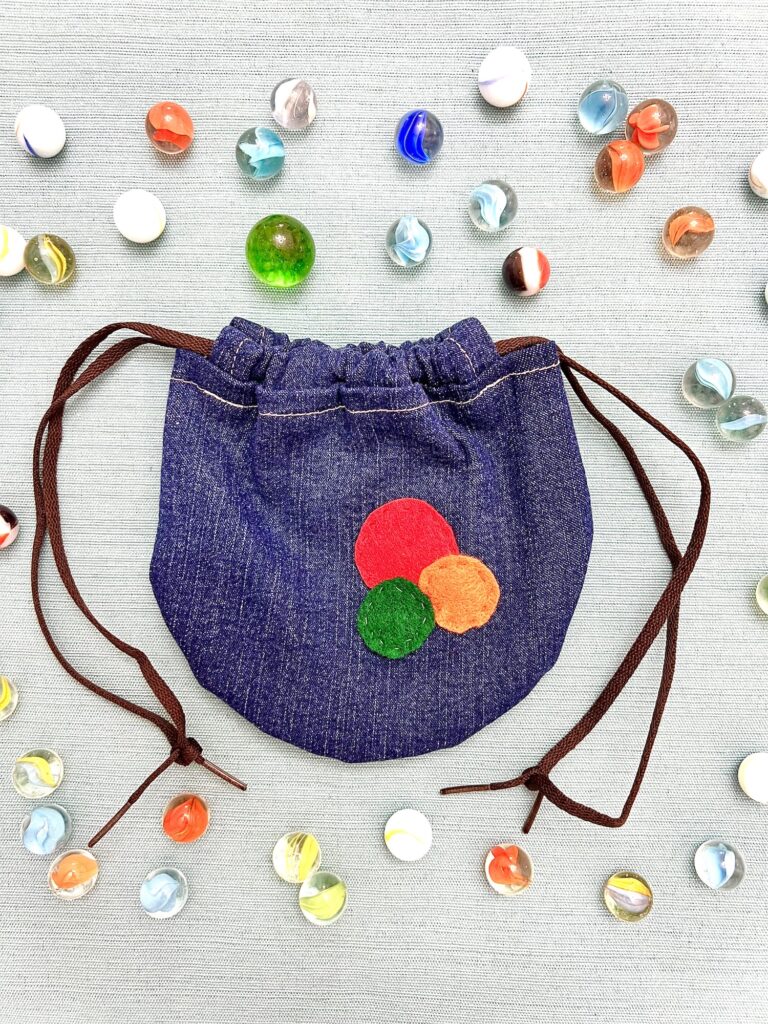
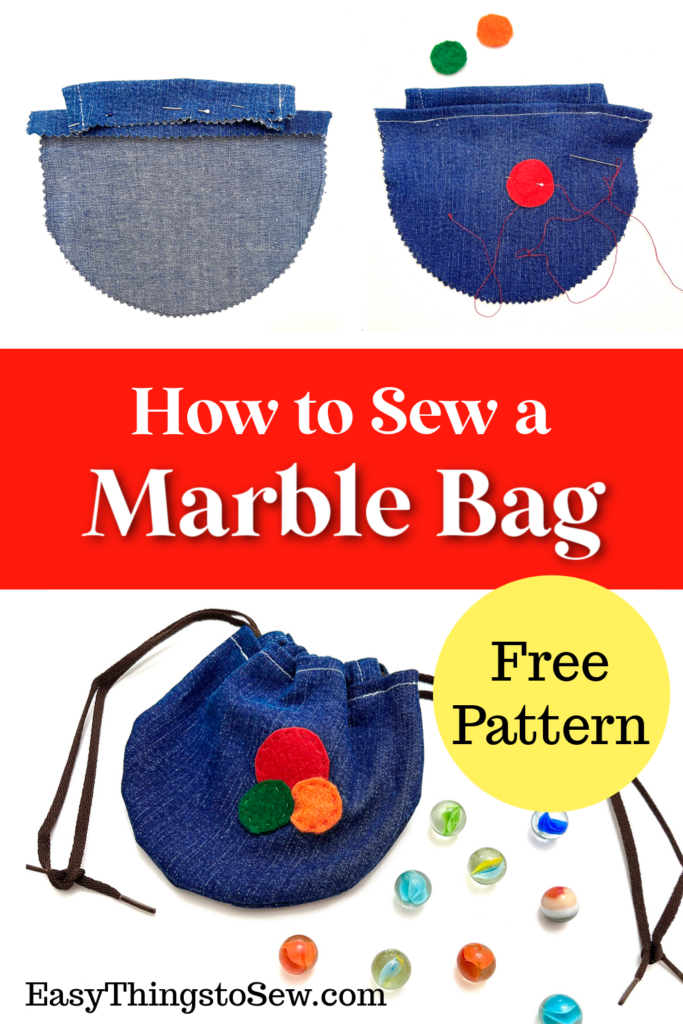
DIY Marble Bag (Free Pattern and Game Instructions)
This easy DIY marble bag is the perfect way to store marbles and an instruction sheet. The small drawstring pouch with marble embellishments is a great stocking stuffer or fun Operation Christmas Child shoebox gift idea.
Use our free pattern and free printable marble instructions to quickly make a game bag. This beginner sewing project can be made with scrap pieces of fabric since it is so small.

Helpful Tips for Sewing a Marble Bag
- I used an old pair of jeans for the fabric to hold the heavy marbles. Any heavyweight fabric will work, such as cotton, corduroy, or denim.
- This tutorial has raw seams inside the bag. I used pinking shears to cut the fabric to reduce fraying, however you could use a zig zag stitch or serger on the edges if you prefer.
- Sewing on the marble embellishments is easier to do before joining the bag pieces together. However, you could add the felt circles to the outside of the bag after turning it inside out and before adding the drawstrings.
- One of my favorite places to find inexpensive marbles is on Walmart. They are also available on Amazon, however a lot of the options are just small marbles, without the big one. Be sure to buy one with at least one huge marble in it, such as this bag. Five Below is also a great place to get marbles.
Want to watch us make this marble bag? See our YouTube video below:

DIY Marble Bag
Supplies
- Free DIY Marble Bag Pattern
- Fabric
- Felt
- Matching Thread
- Straight Pins or Sewing Clips
- Pair of 27-in Shoelaces (or two 27-in pieces of ribbon, cord, etc.)
- Felt Scraps
- Hand-Sewing Needle
- Pinking Shears
Directions
Step 1
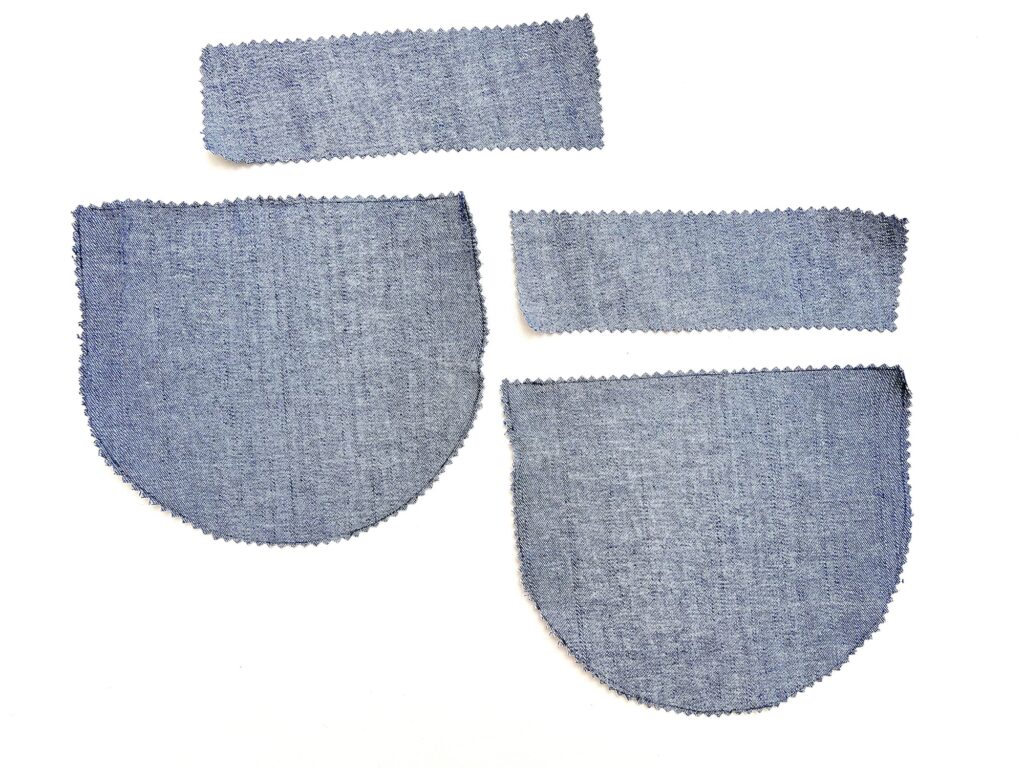
Download, print and cut out the free marble bag sewing pattern.
Trace the curved bag pattern twice on fabric, and then trace two rectangle patterns.
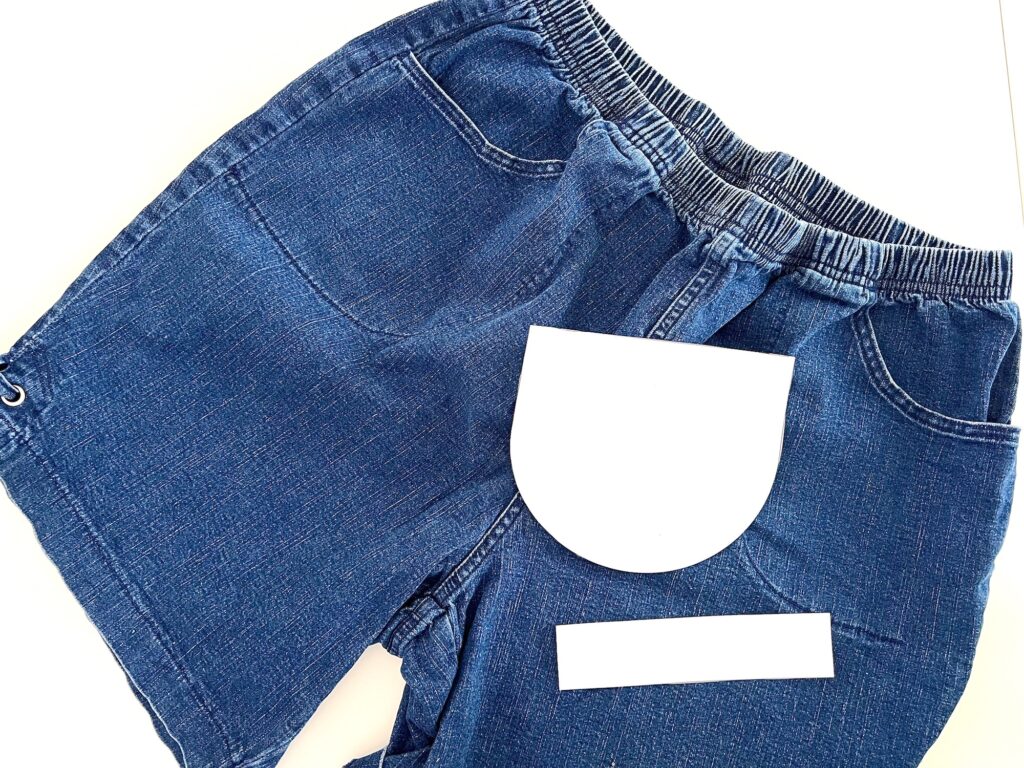
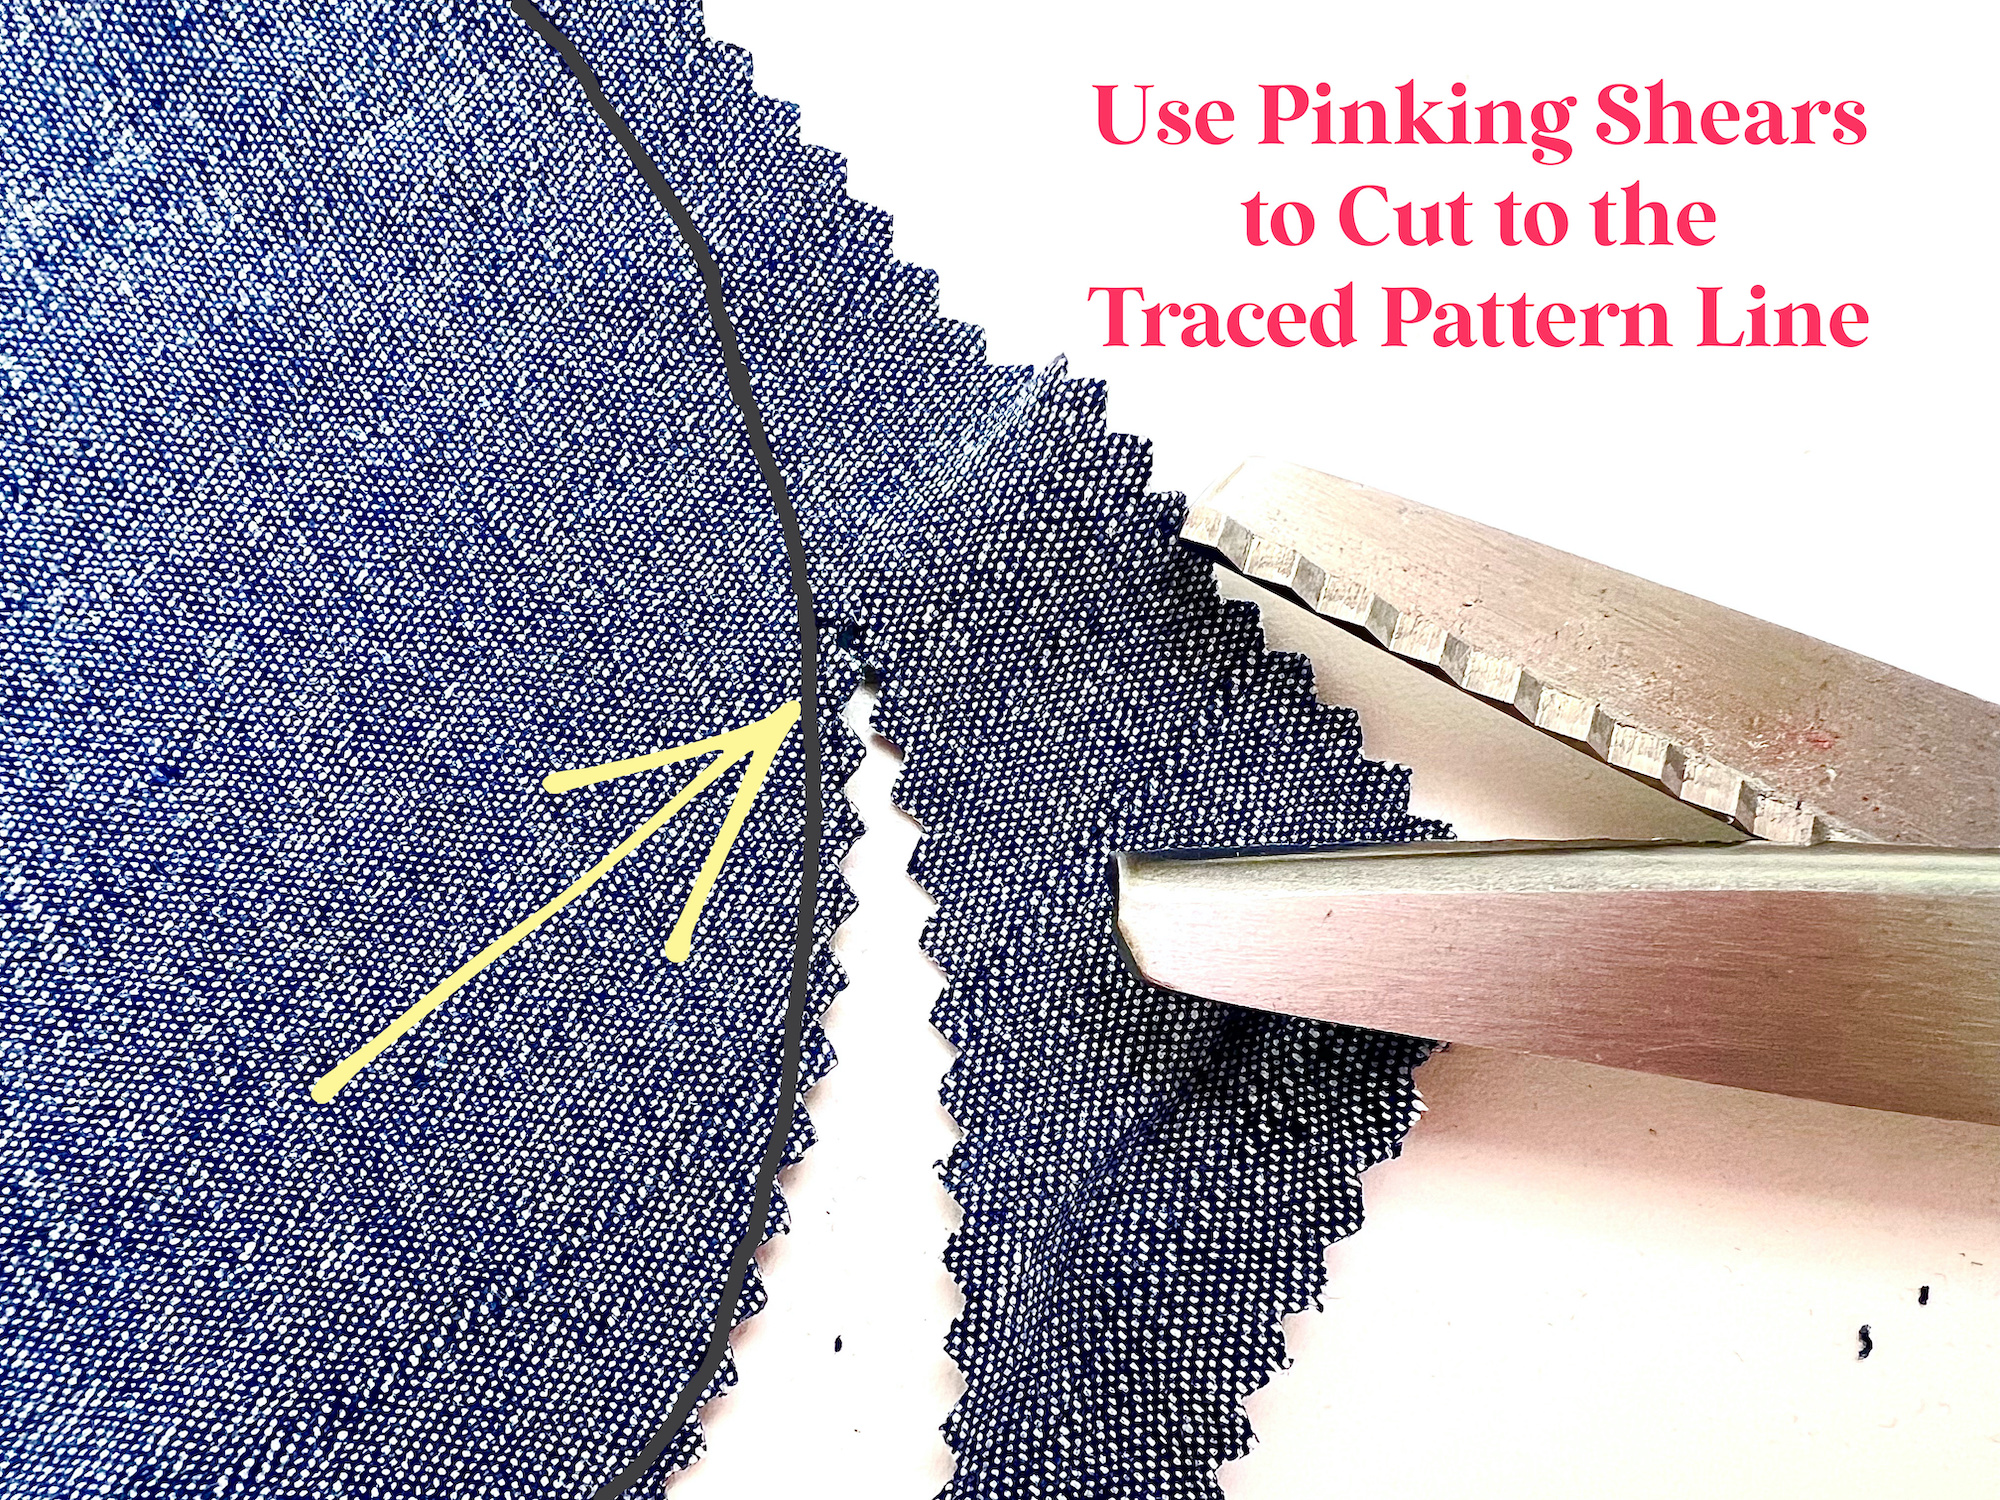
Cut out the patterns using pinking shears.
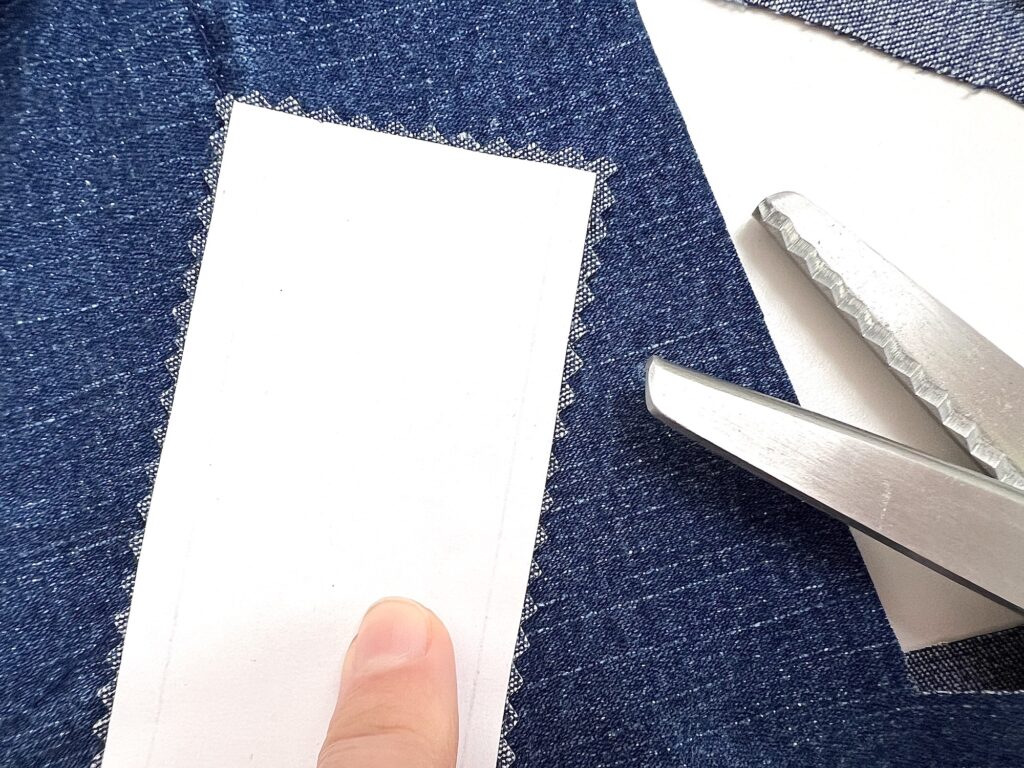
Cut the pattern pieces so that the zig zag cuts go up to the traced line. Do not start cutting with the pinking shears on the traced lines because your bag will be smaller.
Step 2
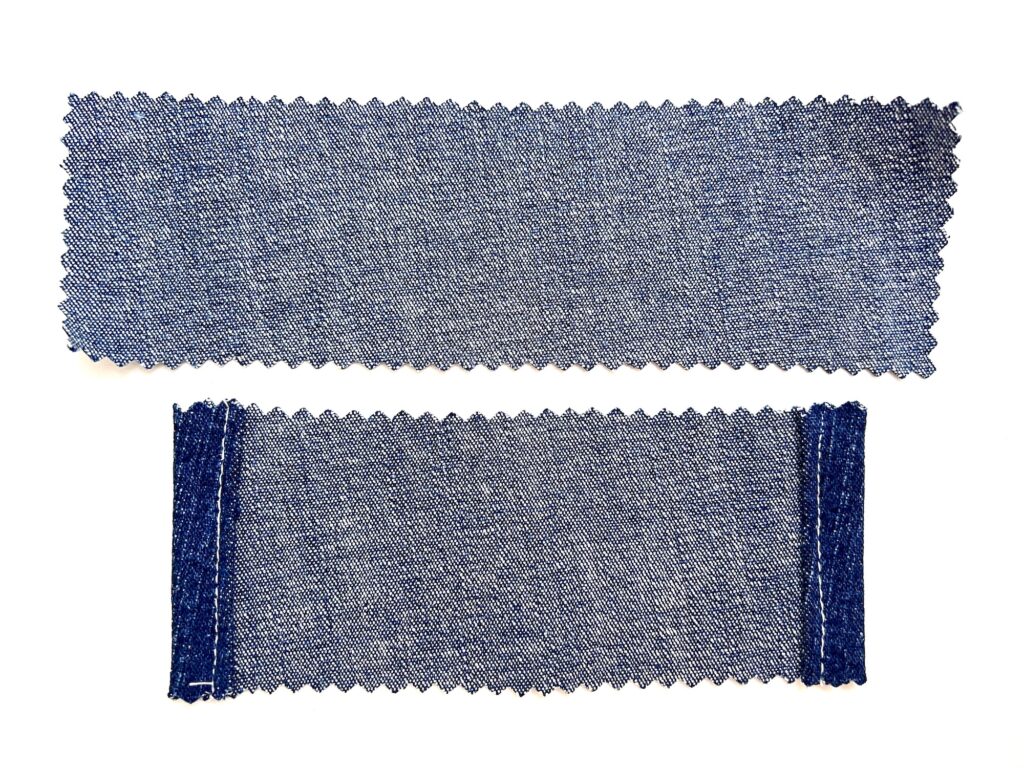
Fold the short end of one side of the rectangle inwards about ¼ inch, bringing the right side of the fabric towards the wrong side.
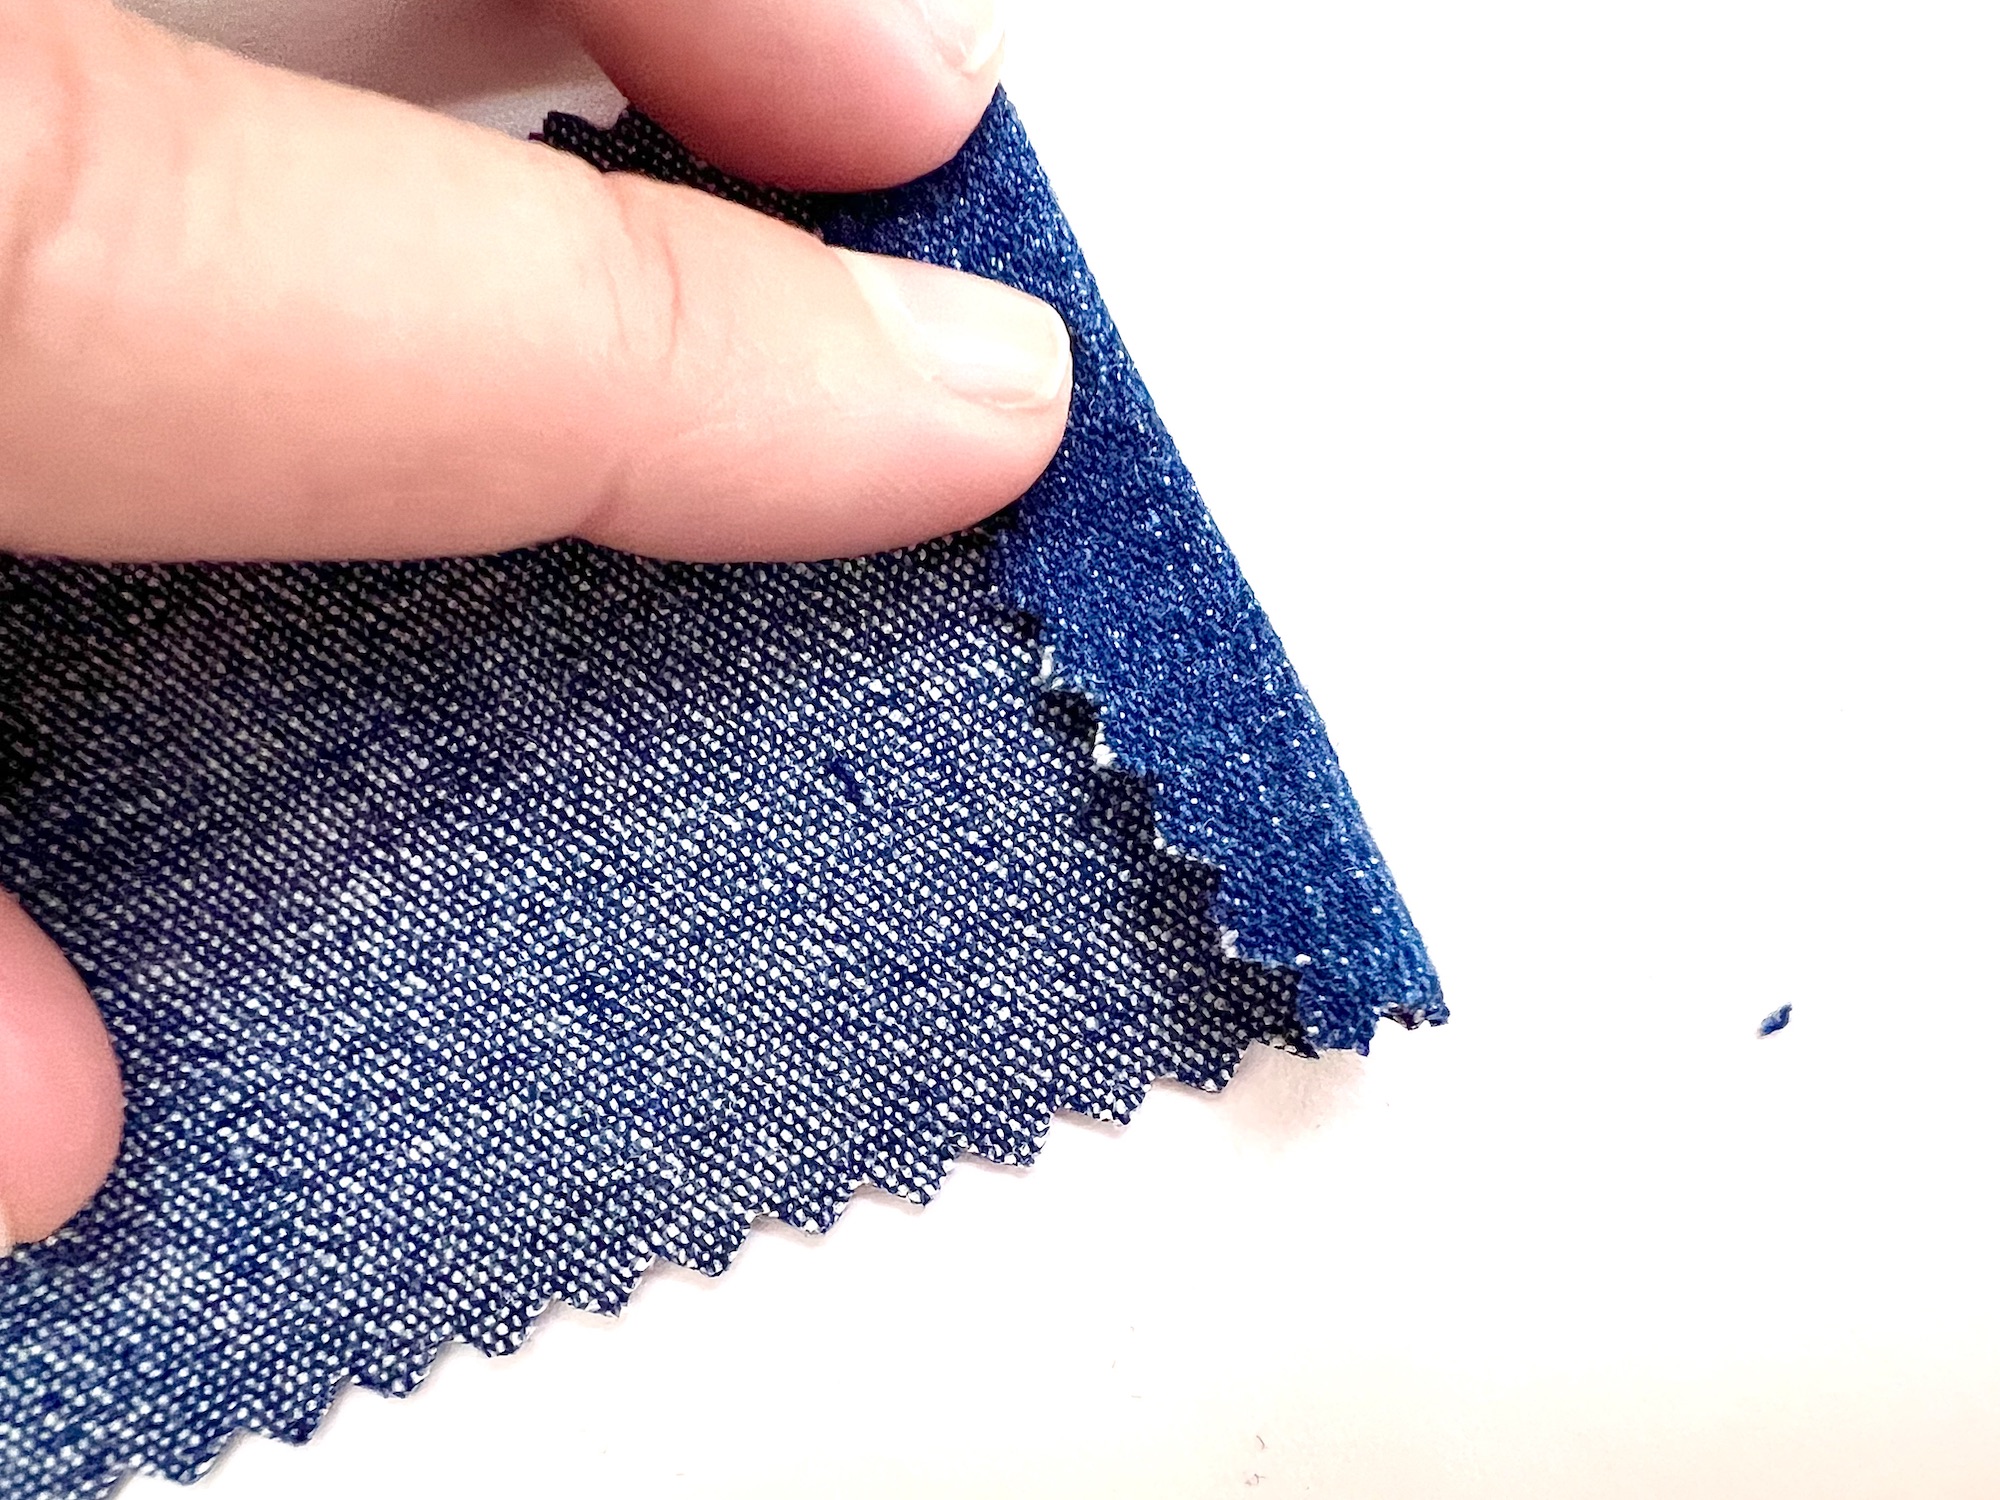
Then fold over again, making a rolled hem. Pin in place.
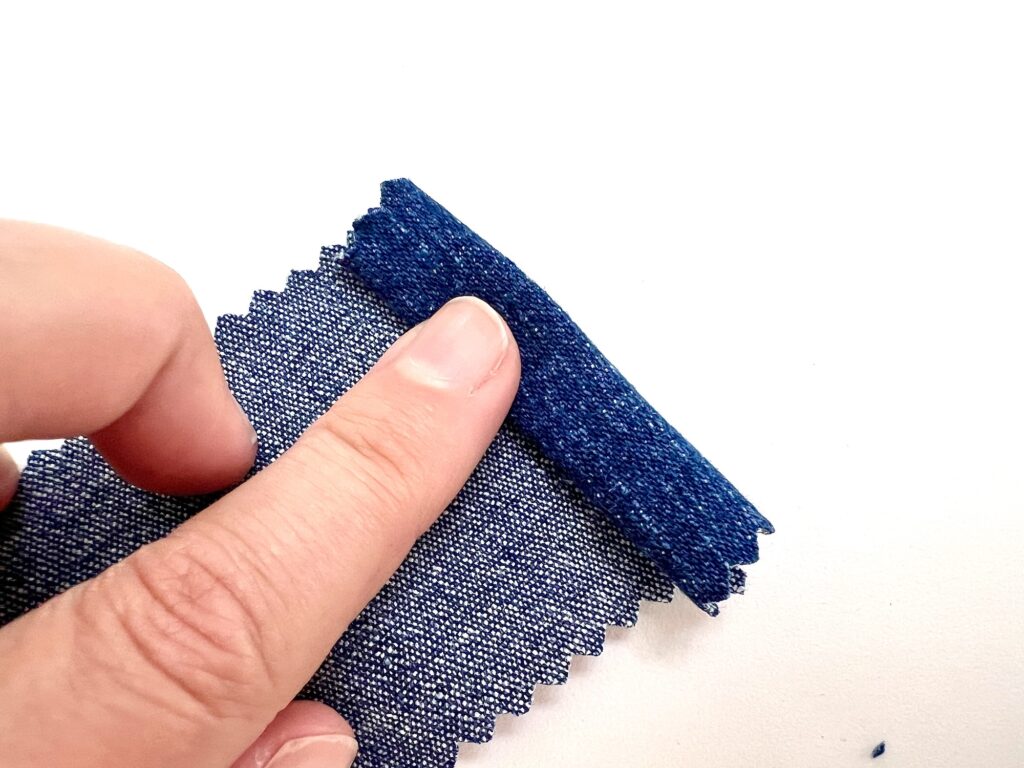
Repeat this process on all four short sides of the two rectangle pieces.
Step 3
Sew the seams by sewing along the edge of the rolled hem. You do not need a specific seam allowance here, just sew along the edge.
Step 4
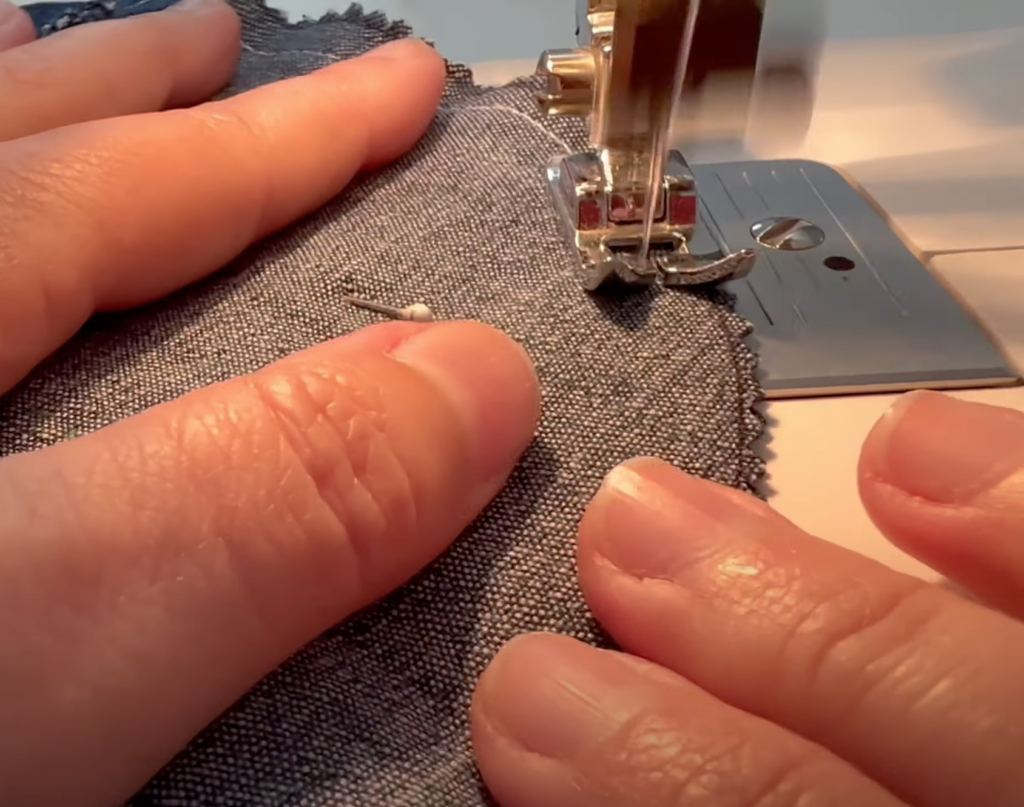
Lay one of the bag patterns with the wrong side facing up. Then fold the top straight edge downward ½ inch. Press to lay flat with your fingers or with an iron.
Place the stitched rectangle over the top of the folded edge, centering it in the middle of the bag. There should be about ¾ inch on each side of the rectangle casing.
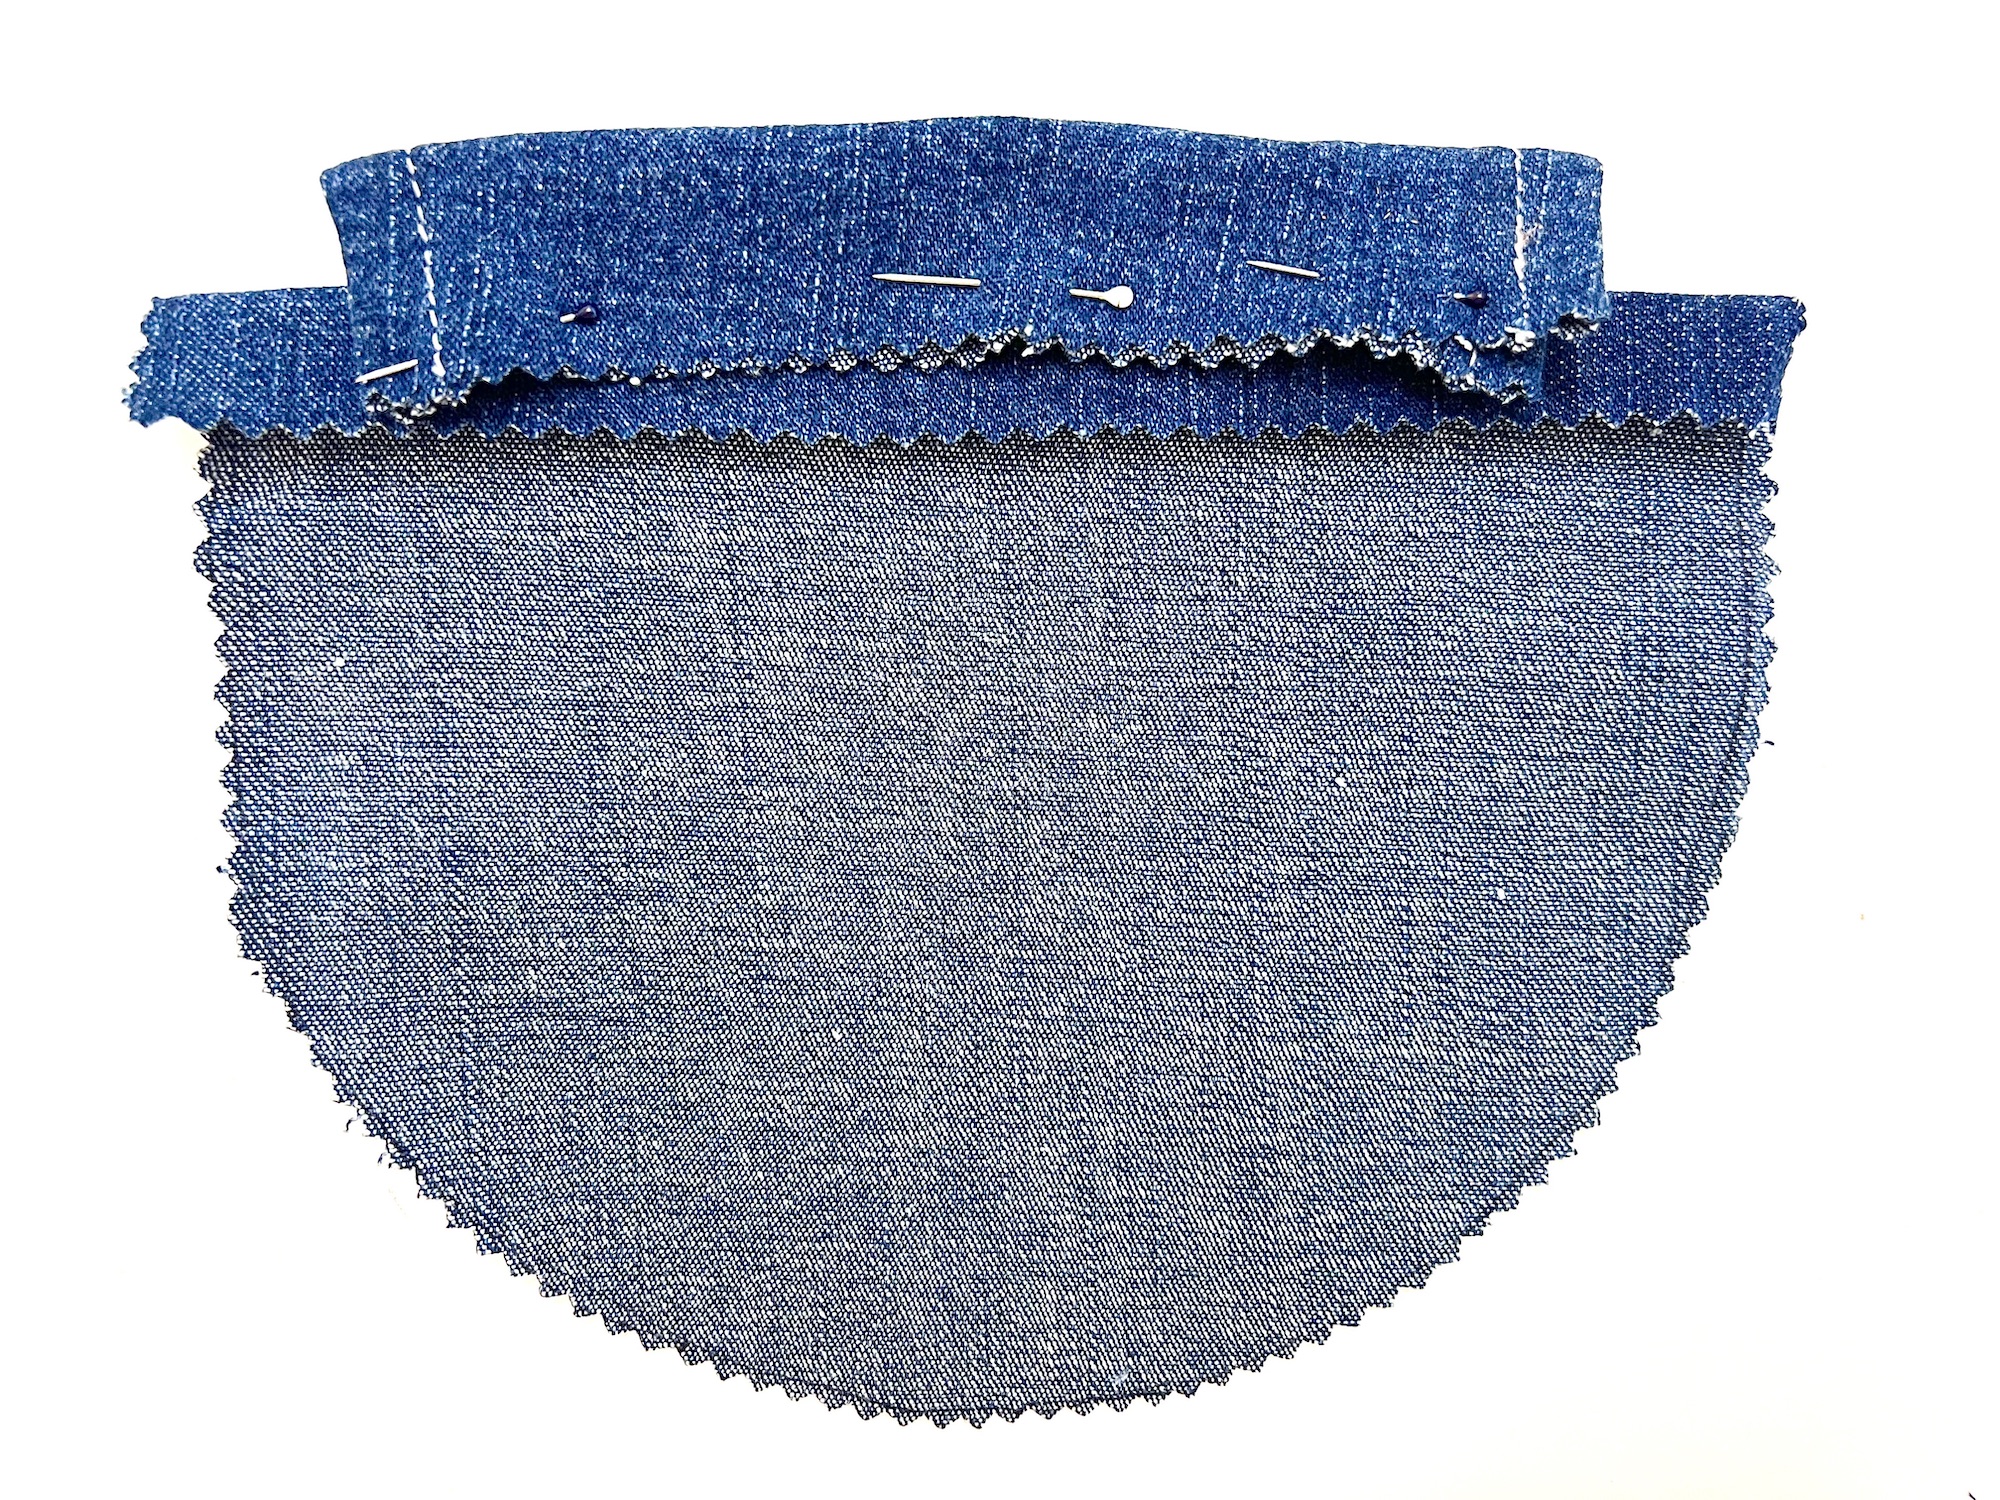
The rectangle casing should be overlapping the folded edge about ⅔ of the way. Pin in place.
Repeat the same process on the other bag pattern.
You can lay the two bag patterns on top of each other (as seen in the video) so that you can make sure the casings will match up when the bag is sewn.
Step 5
Sew across the top edge of the bag, close to the fold. There is no specific seam allowance you need to use here.
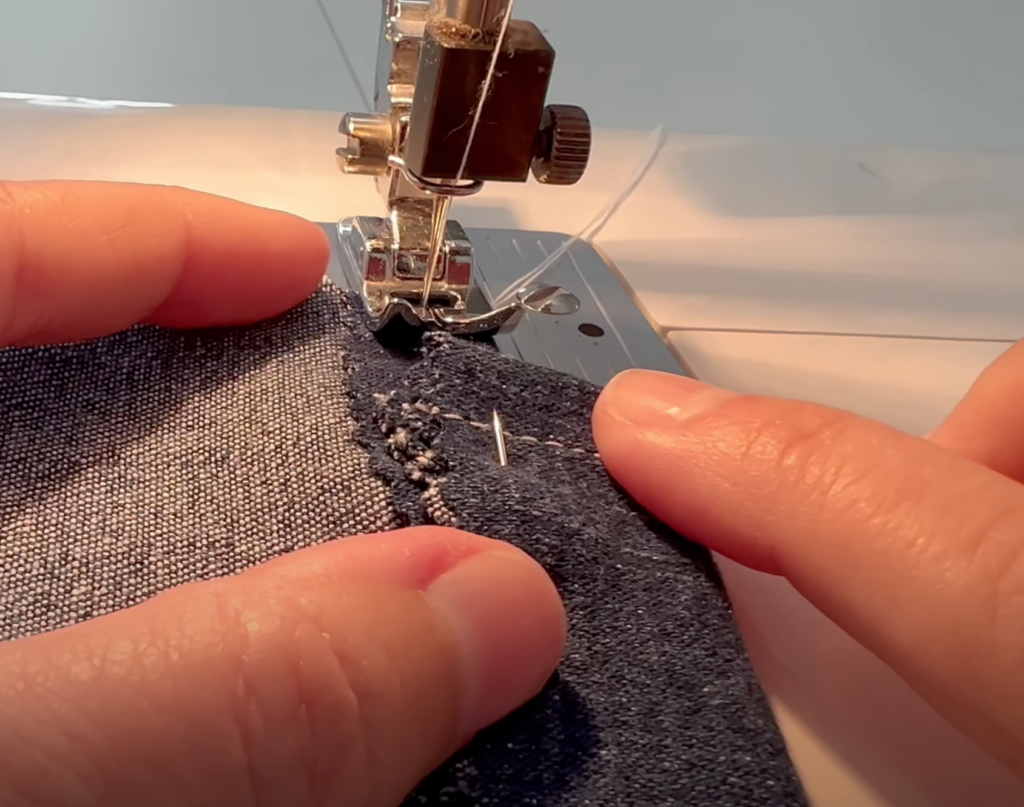
Repeat on both bag pieces.
Step 6
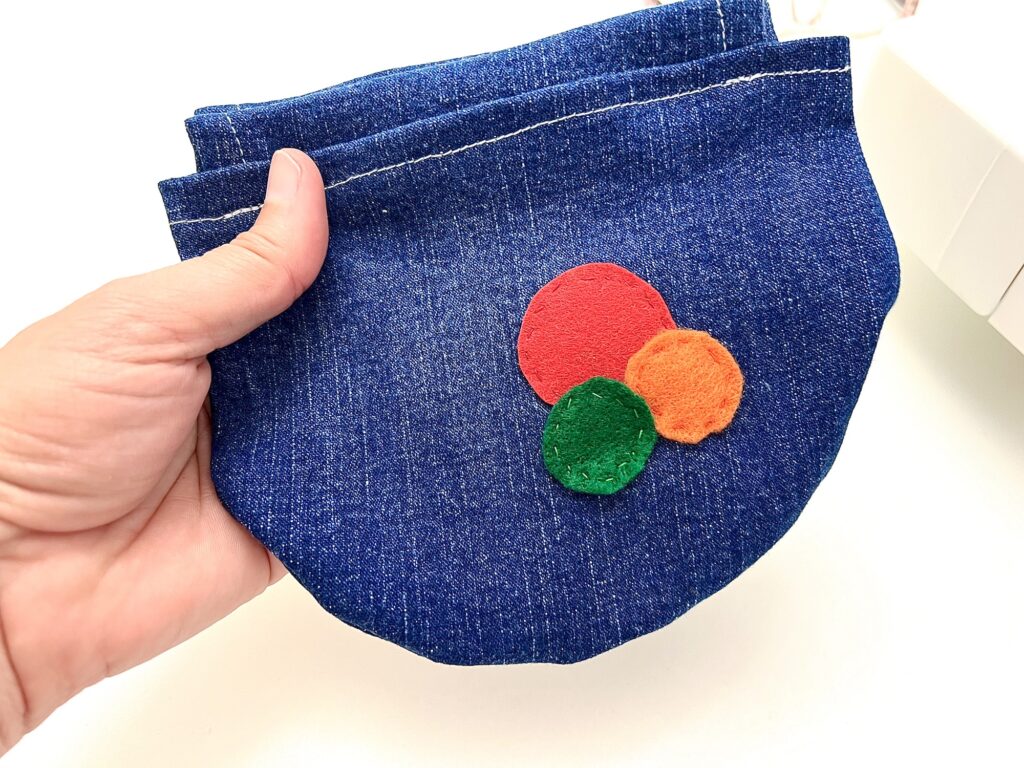
If you are adding marble accents to the outside of the bag, stitch those on the front of a bag piece.
Arrange the felt circles in a way that you like, being sure that they are not too close to the edge of the fabric. Otherwise, they could be caught up in the seam allowance.
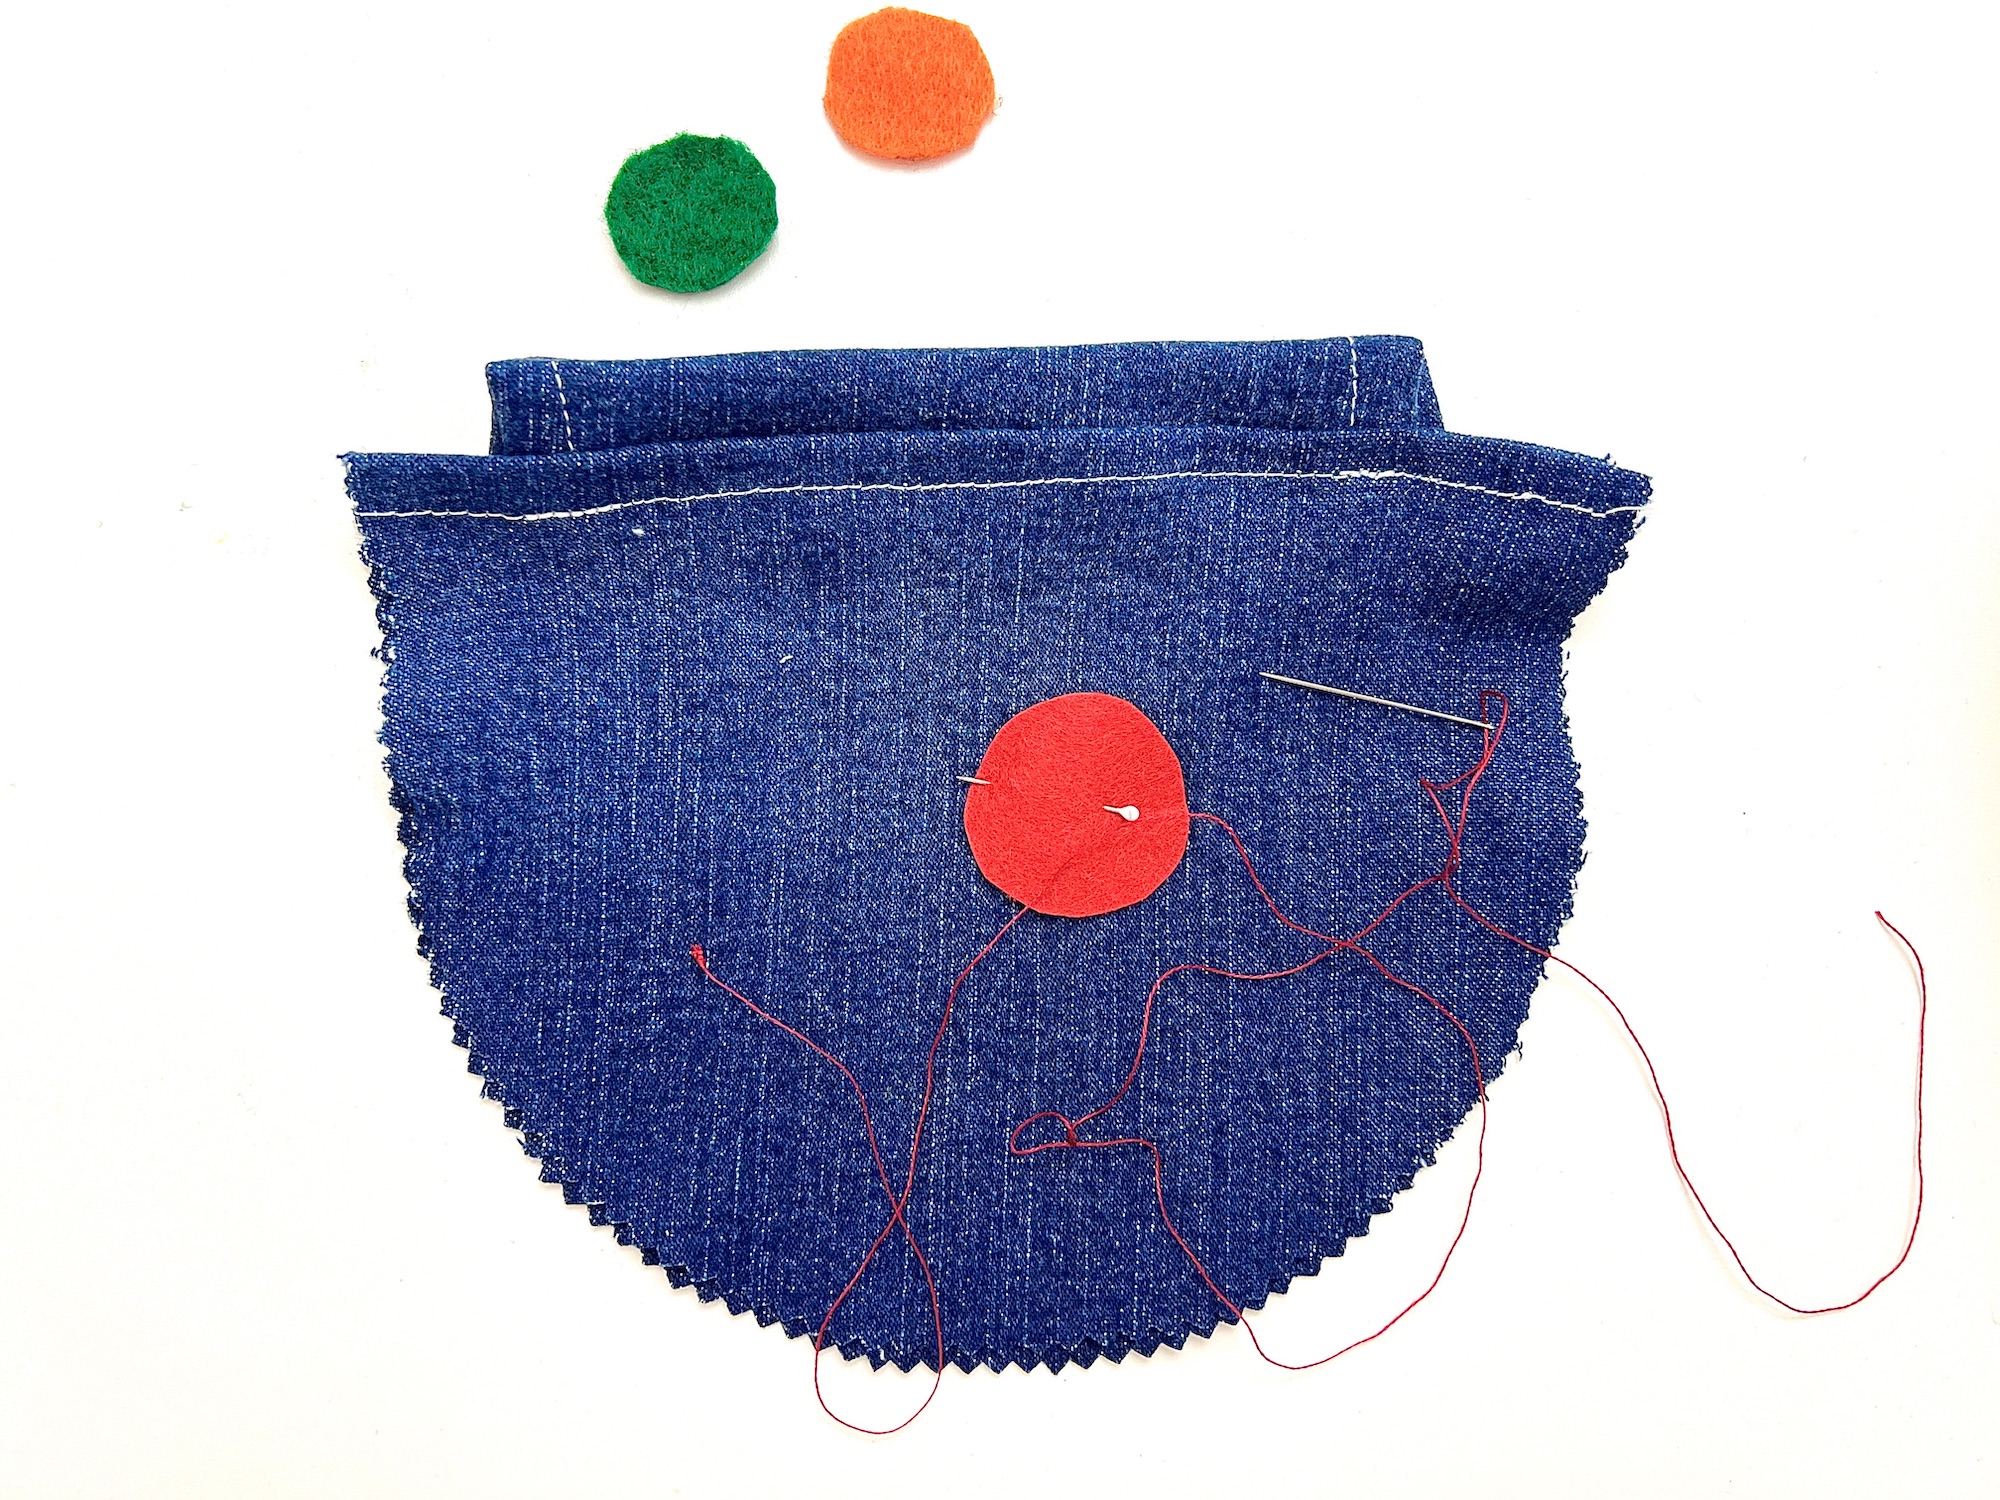
I used basic straight hand stitches to sew each felt circle on.
Step 7
Place the two bag pieces together, with right sides facing each other. Stitch around the edge of the bag, being sure to backstitch at the beginning and end of your stitching.
Turn the bag inside out. Be sure to push out the seams with your fingers.
Step 8
Add the drawstrings by inserting one shoelace through an open end of the casing.
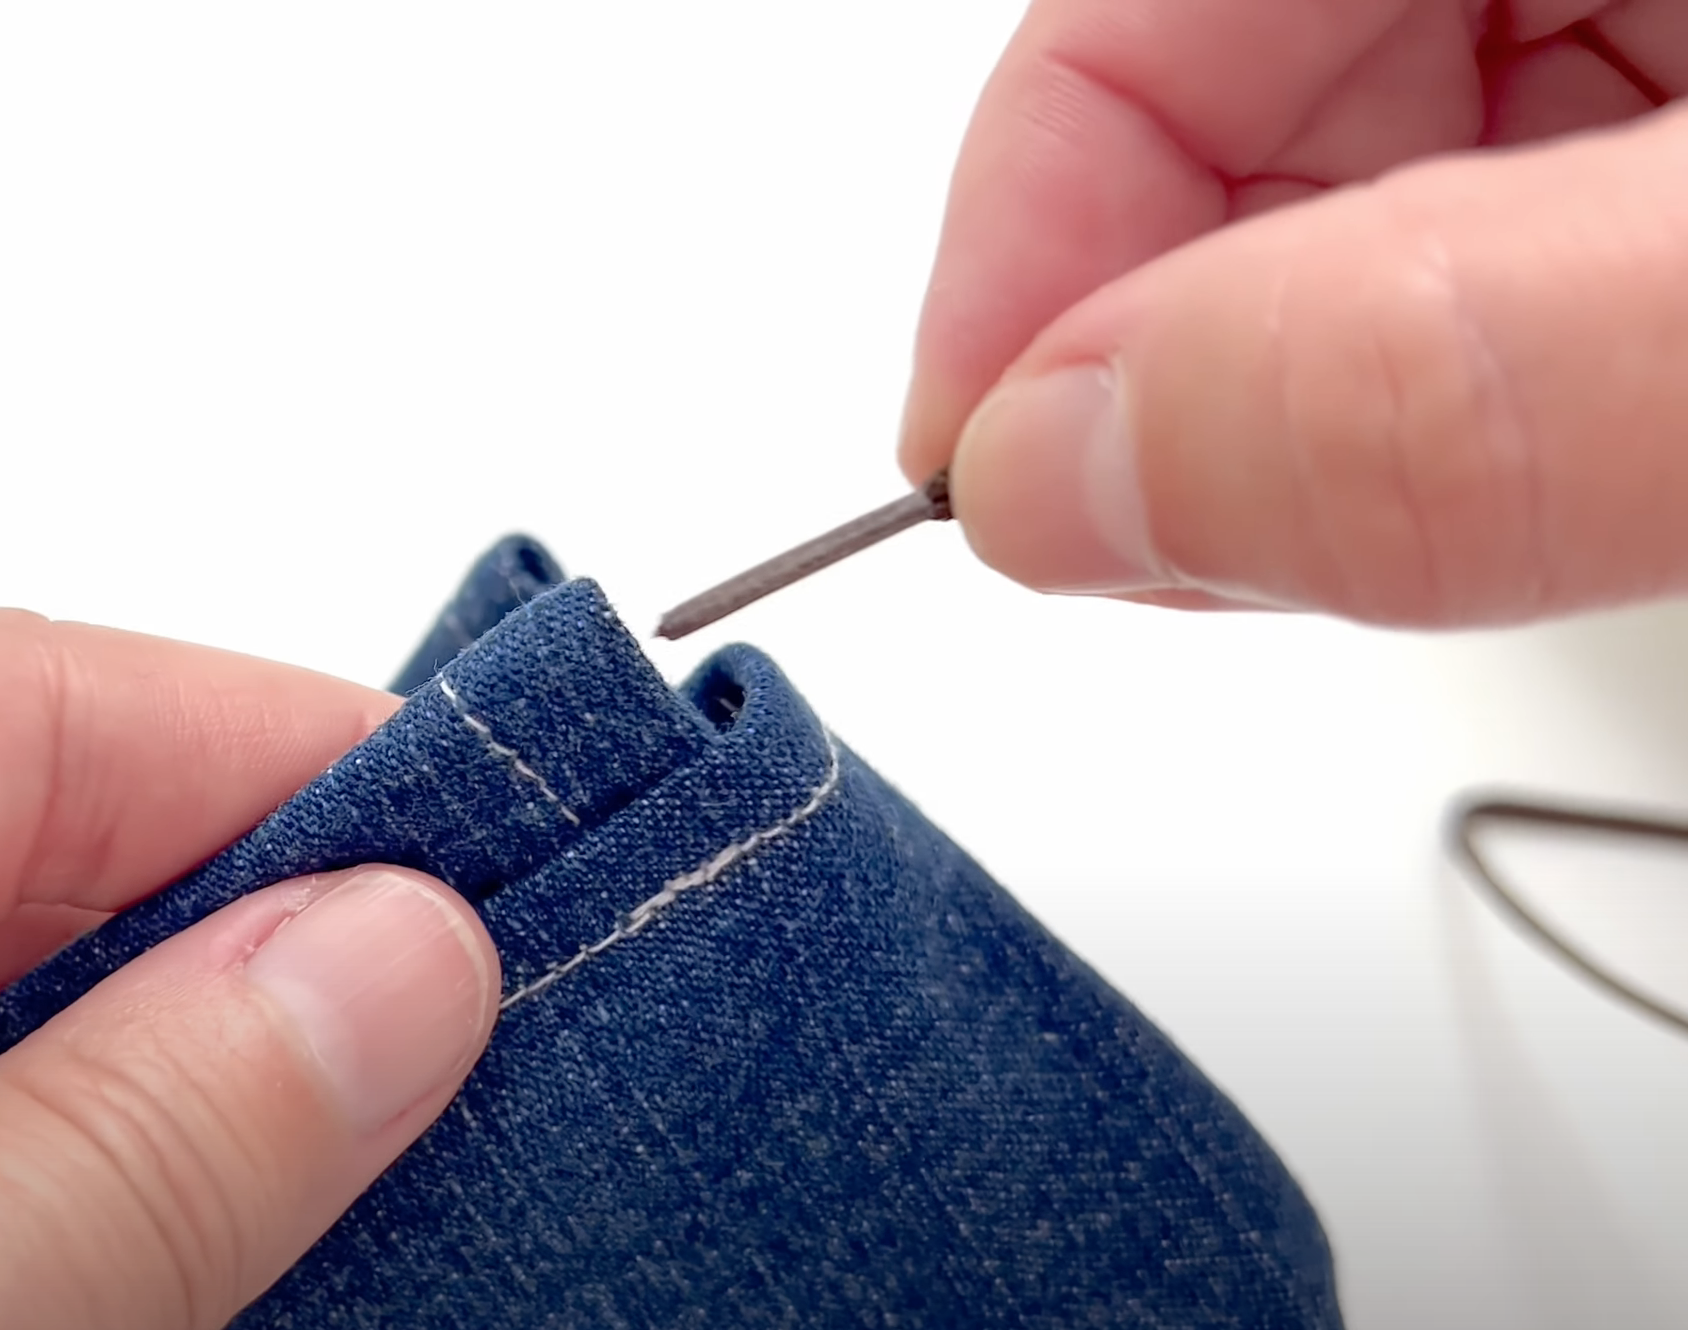
Push and pull it with your fingers through the casing opening until it can be drawn out the other side.
Be sure to leave a long tail on the side you started with so that you don’t accidentally pull the entire shoelace through the casing.
Then bring the shoelace through the open end of the other casing on the same side.
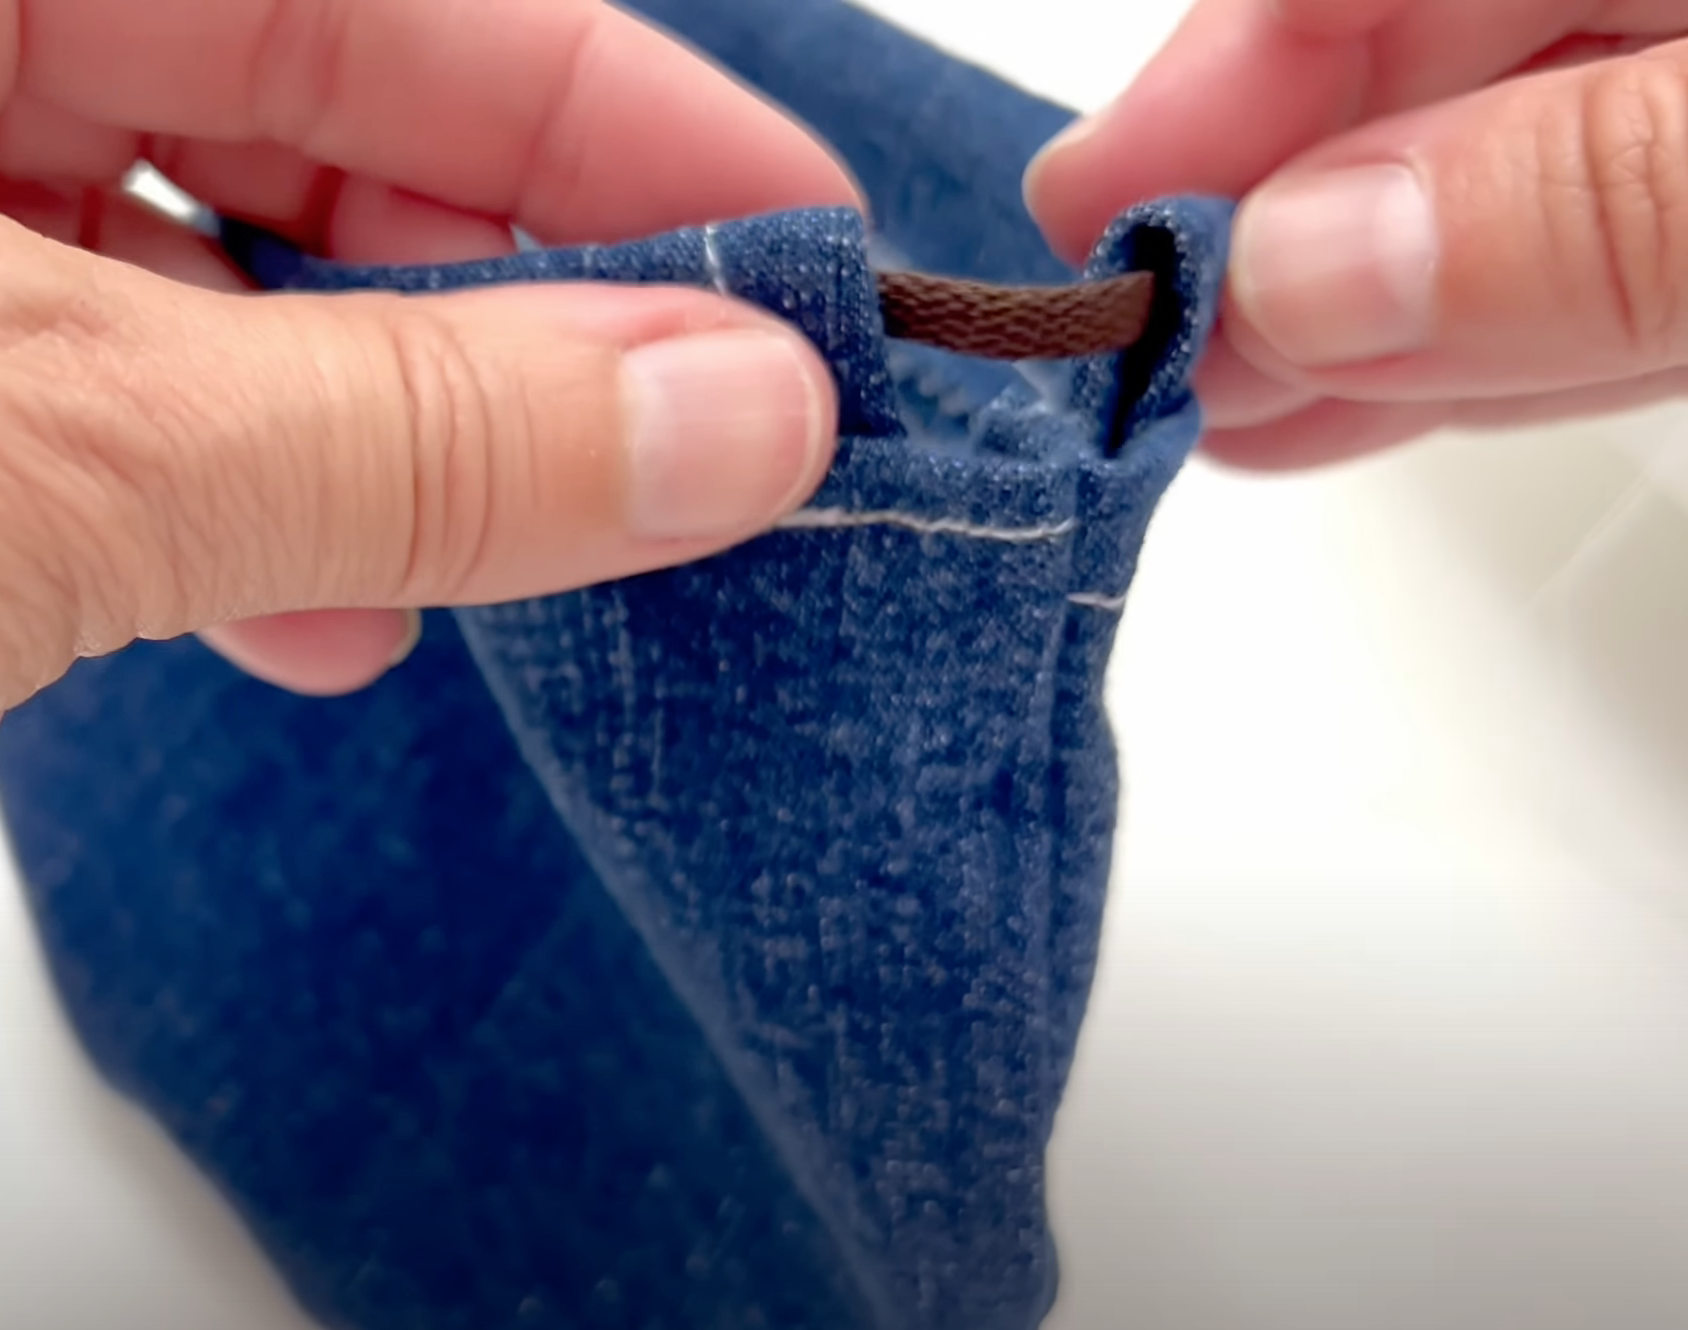
Repeat the pushing and pulling method to get the cord through the casing, bringing it out on the other side.
Repeat this process with the other shoelace, however you want to go in the opposite direction. Insert the shoelace in the open end of a casing where the first shoelace is wrapped around.
Step 9
Tie a knot at the end of both laces on either side of the bag.
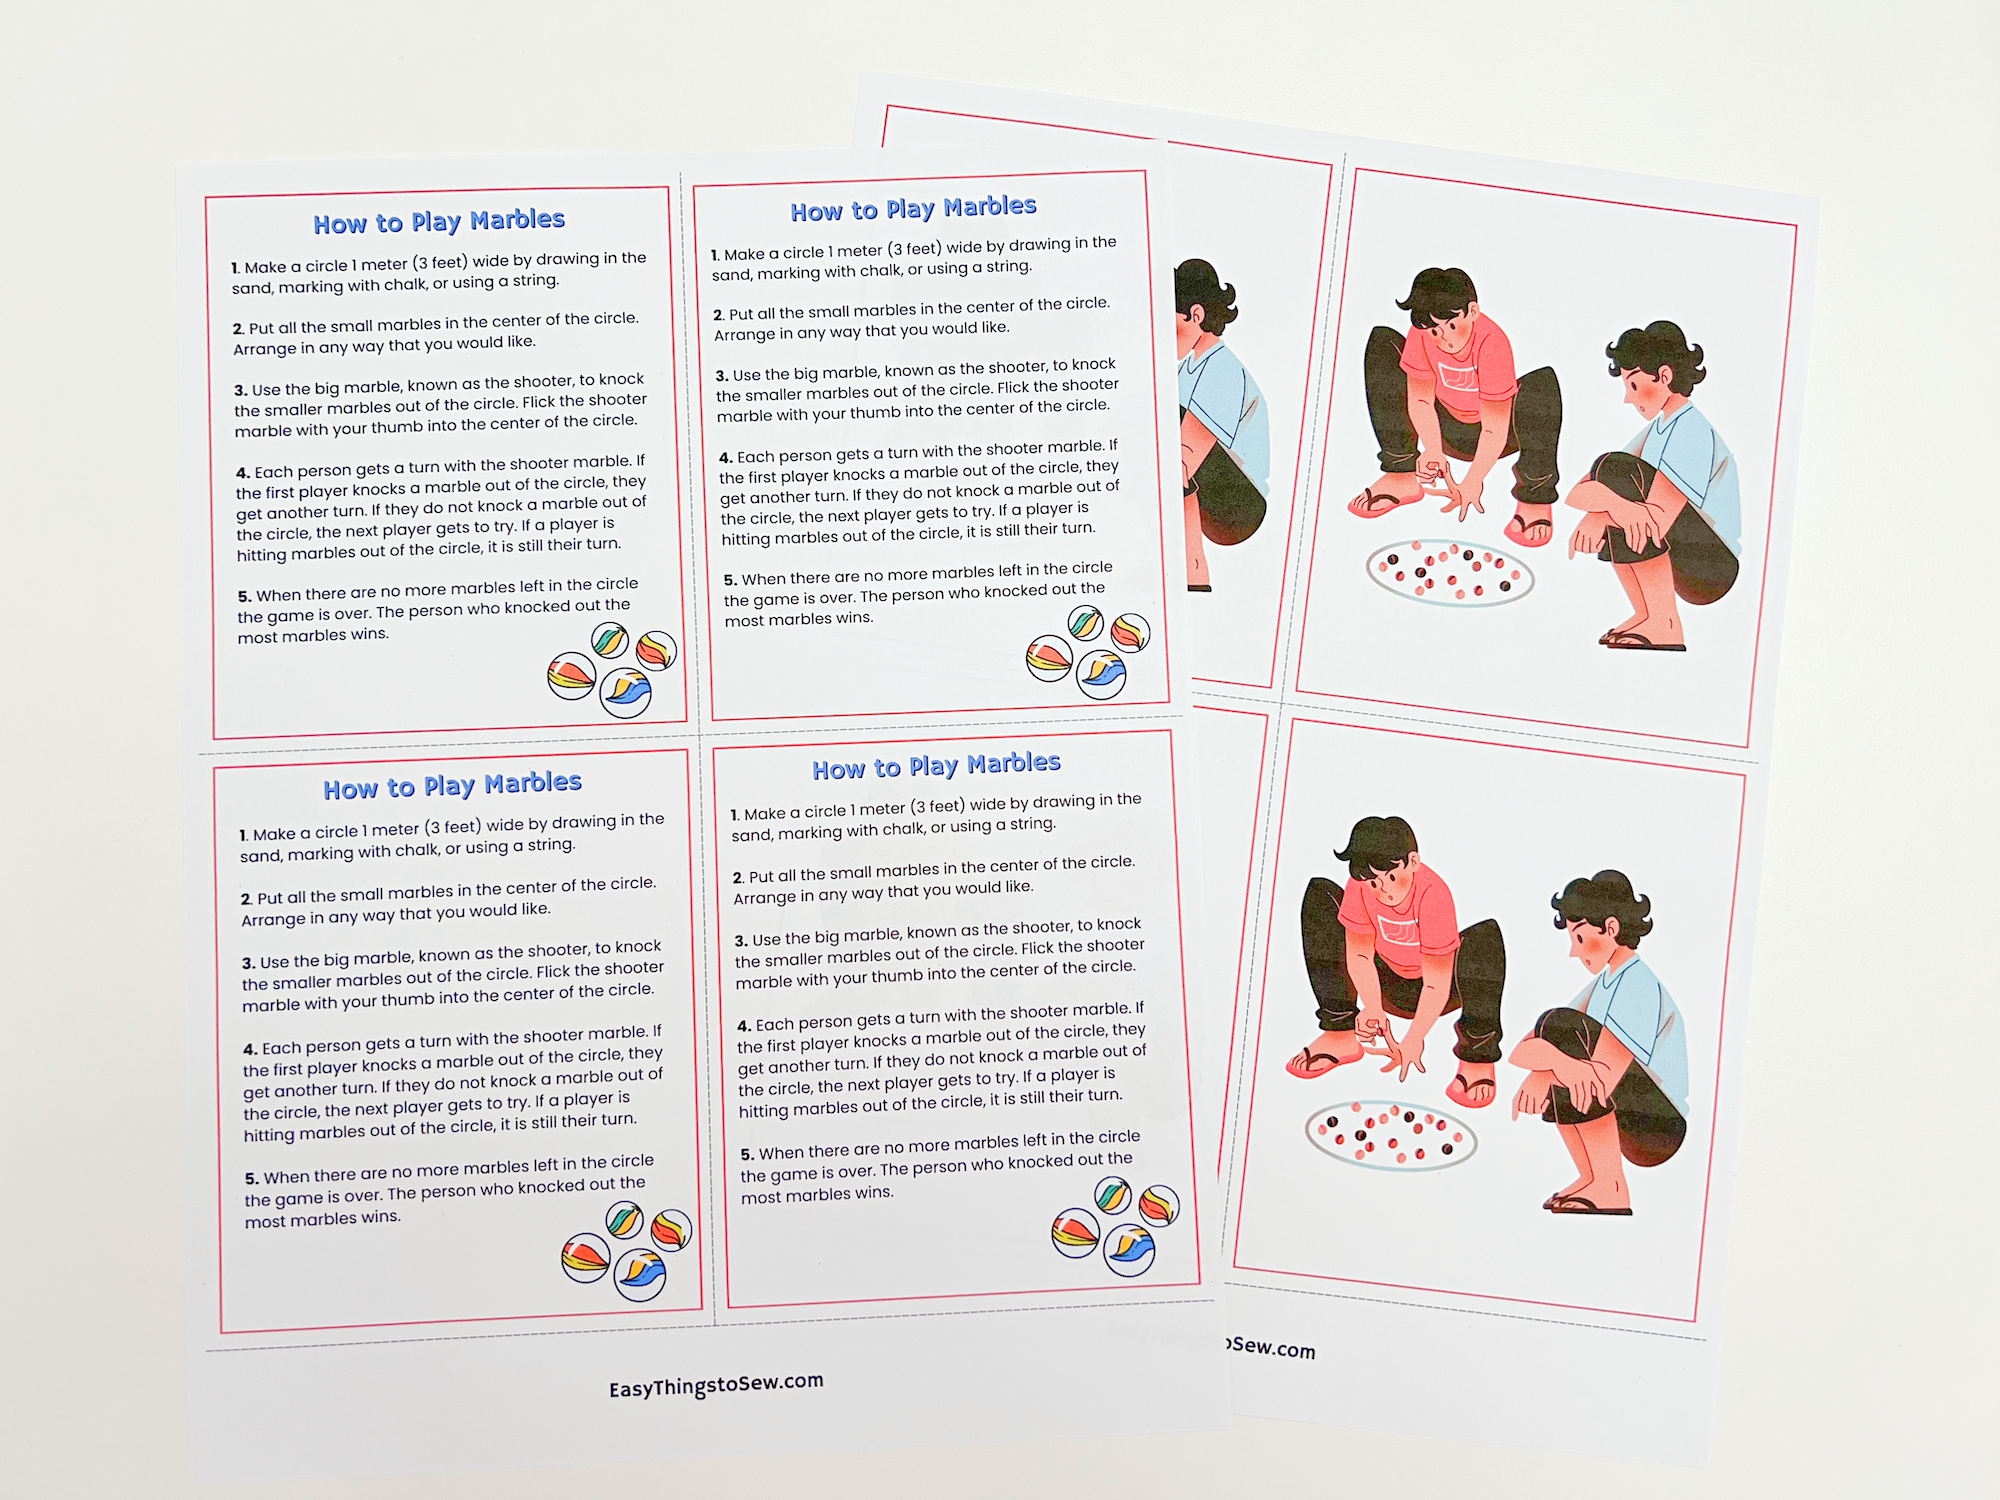
Use our free marbles instruction sheet and visual guide to insert into the marble bag, along with the marbles.
The instructions can be sized down smaller if needed. We suggest laminating the marble instruction sheet. You can bring the file to an office supply store or use self laminating sheets.
Be sure to Pin This easy sewing project to save for later!
Lessons I Learned Sewing This Marble Bag
- I used old denim shorts that had some stretch in the fabric. Sewing with stretchy denim is not hard, but you do need to be careful because the patterns pieces stretch easily. I found that my hems and seams weren’t as straight as I’d like because the fabric was stretching as I was pinning or sewing.
- Denim does fray, though I thought it wouldn’t fray as fast as it did while I was sewing. I don’t know if this is because it was a stretchy denim.
- Placing the bags and casings on top of each other to make sure they line up is crucial. I didn’t do this and my casings are slightly off centered.
This DIY marble bag is an easy beginner sewing project. See our other easy sewing patterns for bags next:


Where is the download please, of the how to play marbles?
Hi Cindy, it is the link in the supplies list. The pattern and the instructions are all on the same download.