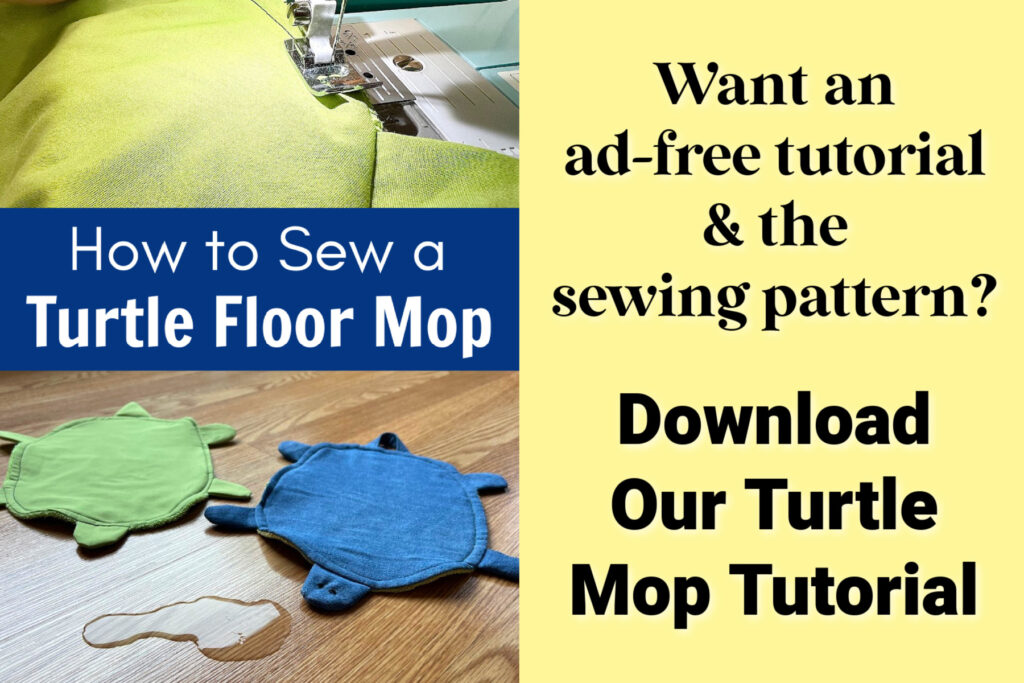
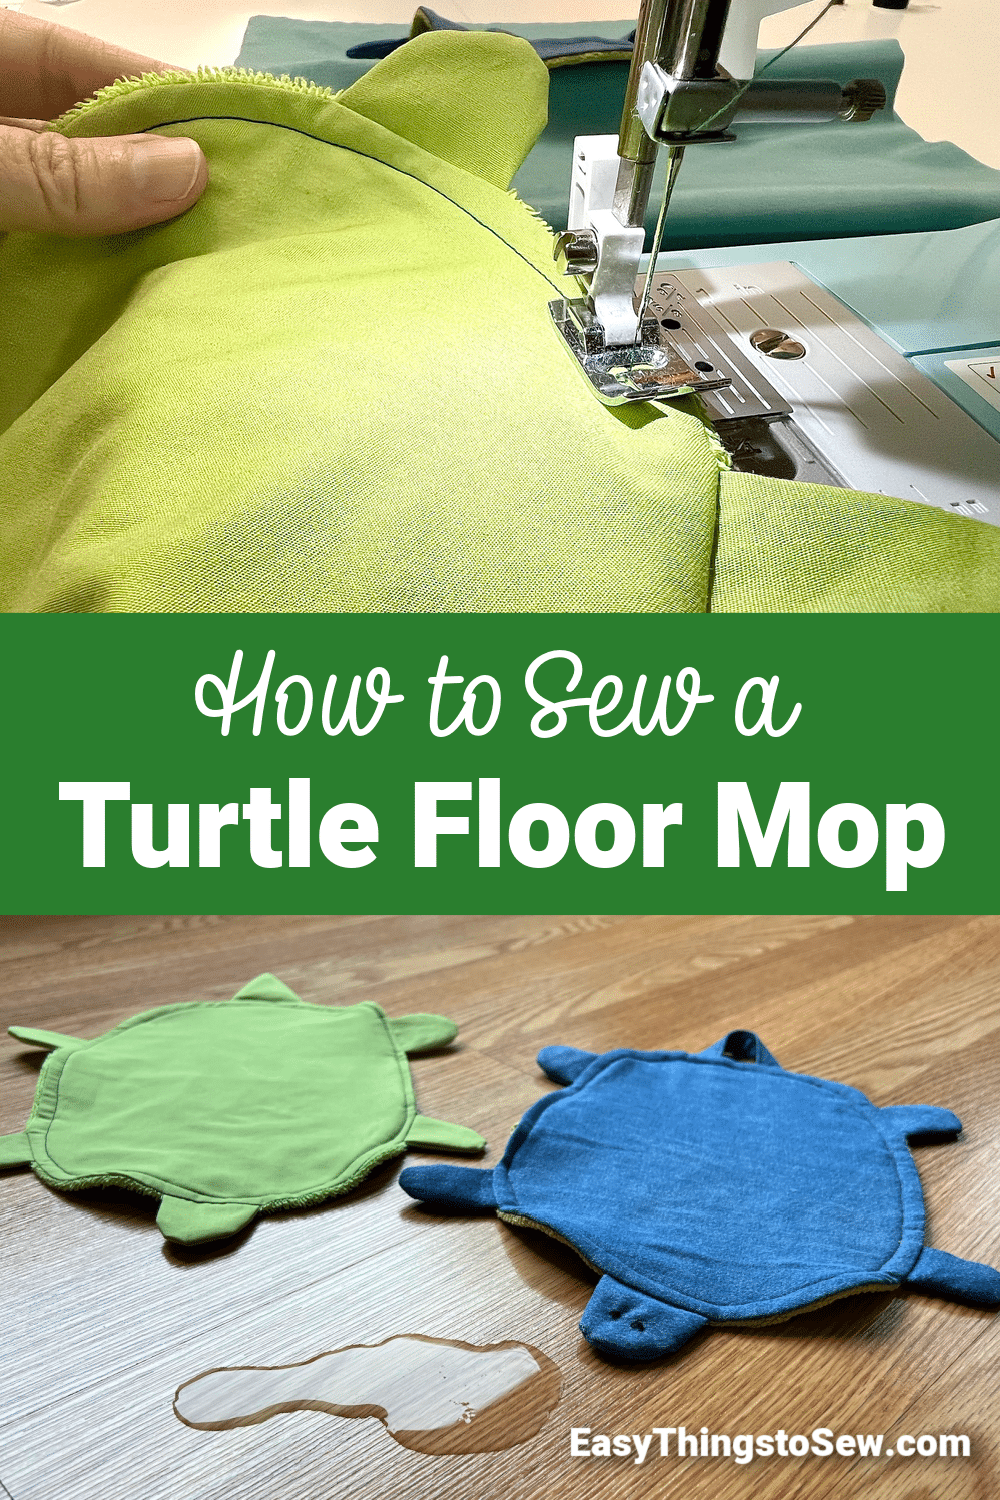
Turtle Mop Sewing Pattern: How to Make a Foot Mop
Our turtle mop sewing pattern if perfect for making a foot mop to sop up spills on your floors. This reusable floor mop can be washed in the washing machine, reducing your use of paper towels to wipe up the floor.
Not only is this turtle mop pattern easy to make, it is also a great way to upcycle old fabrics and linens.
Use these mops around the house in places such as:
- Kitchen
- Bathroom
- Around Pet Feeding Areas
These are excellent crafts to make and sell at craft fairs! They are also fun gifts to give, too, because everyone needs to clean up spills on their floors!
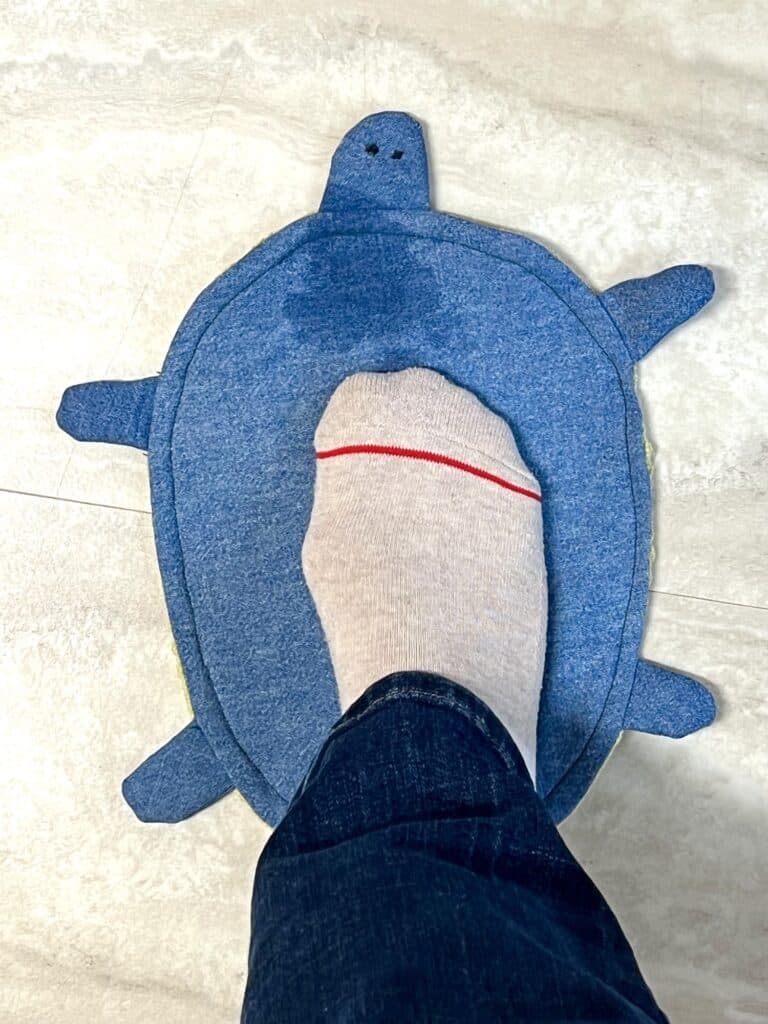
If you have been wondering how to make a foot mop after seeing the viral sewing projects online, this is the step-by-step photo tutorial you need!
How to Make a Turtle Mop
Supplies
- Floor Mop Sewing Pattern
- 12″ X 14″ Piece of Fabric
- 9″ X 11″ Piece of absorbent fabric, such as a towel, terry cloth or flannel
- Thread
- Scissors
- Sewing Machine (see my YouTube video for the sewing machine I used)
- Polyfil or material scraps (optional)
Floor Turtle Instructions
Step 1
Pre-wash your fabric if it is brand new. Pre-shrinking the fabric is necessary because these foot mops will be put in the wash quite frequently and you do not want them to shrink and change shapes.
Step 2
Download, print and cut out the turtle mop sewing pattern.
Trace all of the the pattern pieces, except for one body pattern, on the fabric you will use on the top of the turtle mop. Then cut out. You will have these pattern pieces:
- 1 body pattern
- 2 head patterns
- 2 tail patterns (unless you choose the tail hook option, then one pattern piece)
- 8 leg patterns

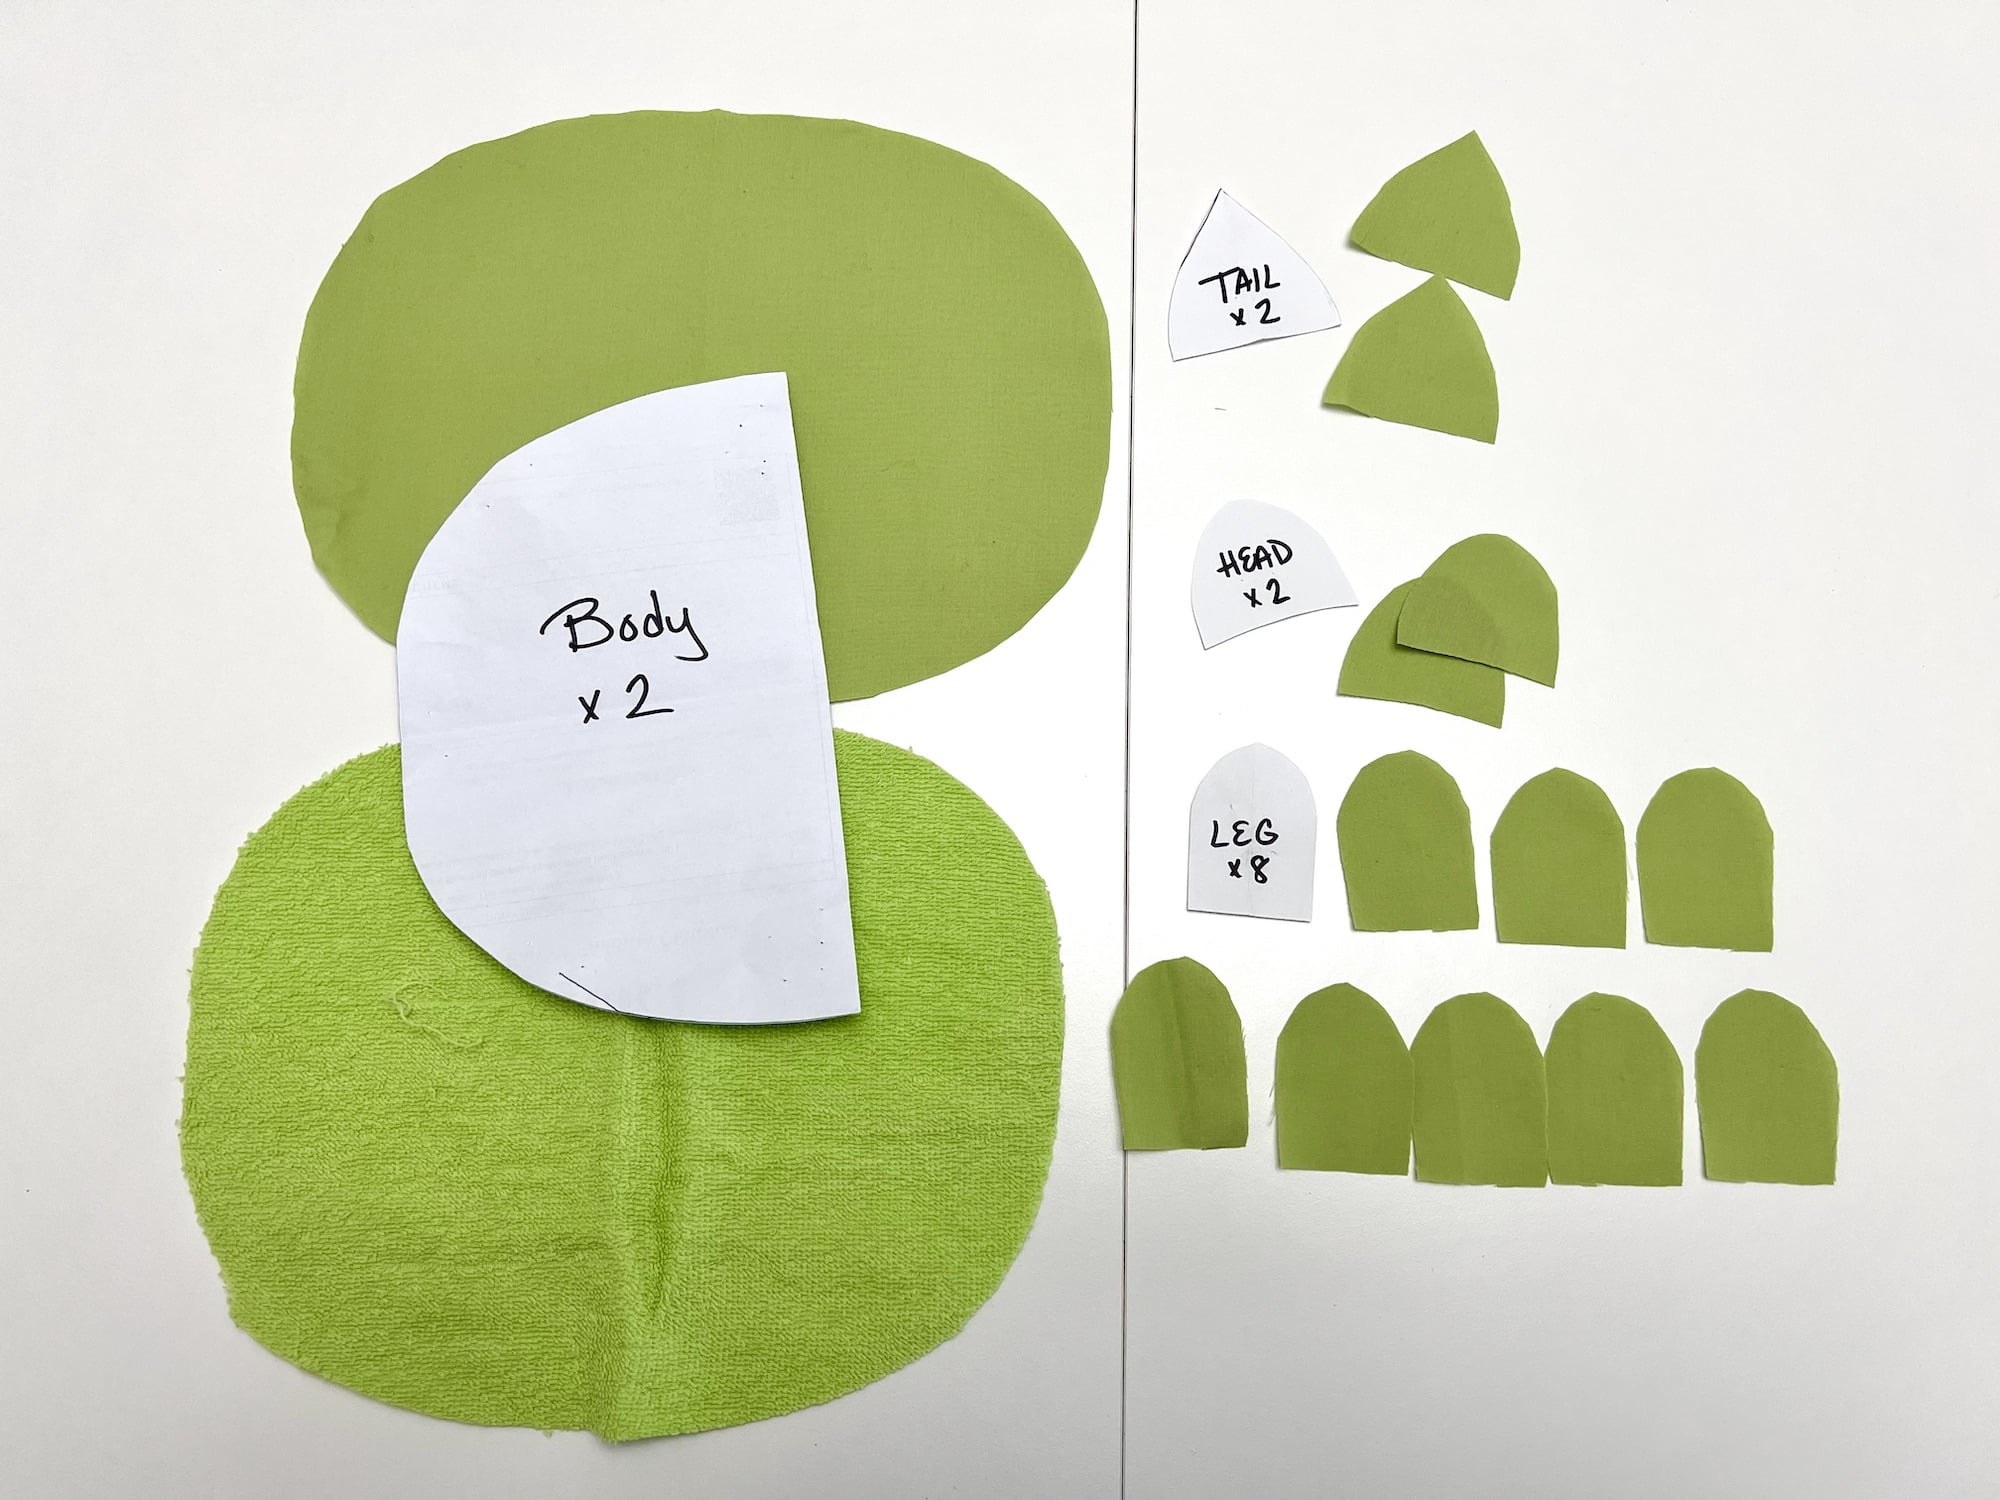
The body pattern piece is designed to be placed on folded fabric. However, if you are not able to fold the fabric, just print out the piece twice and tape together to make one large body pattern.
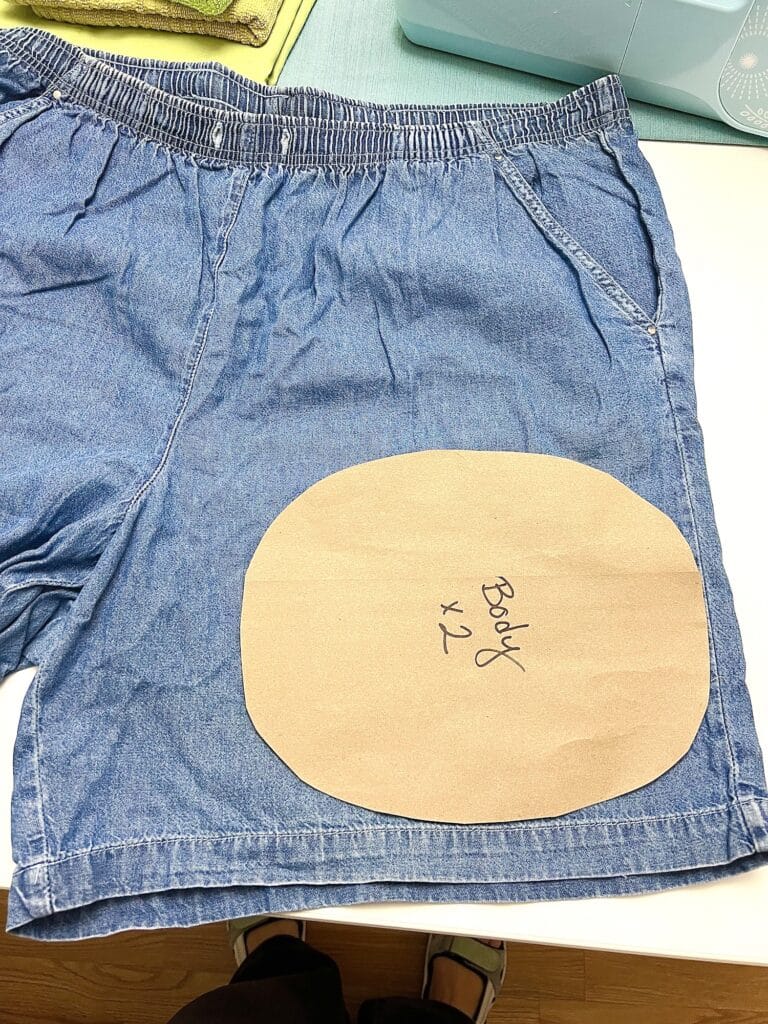
Trace one body pattern from an old towel or terry cloth fabric.
Step 3
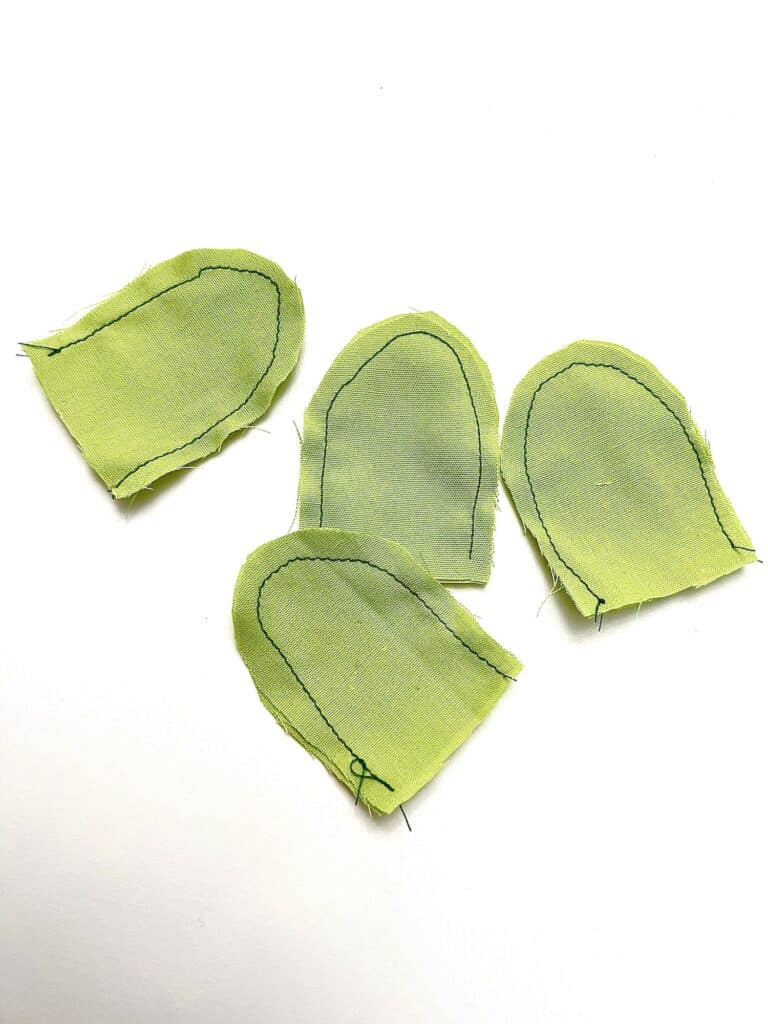
Sew the head, tail and leg patterns together.
Put the right sides together and sew around the edges. I used about ¼ inch seam allowance on the head, tail and legs.

Once sewn, turn the pattern pieces right side out.
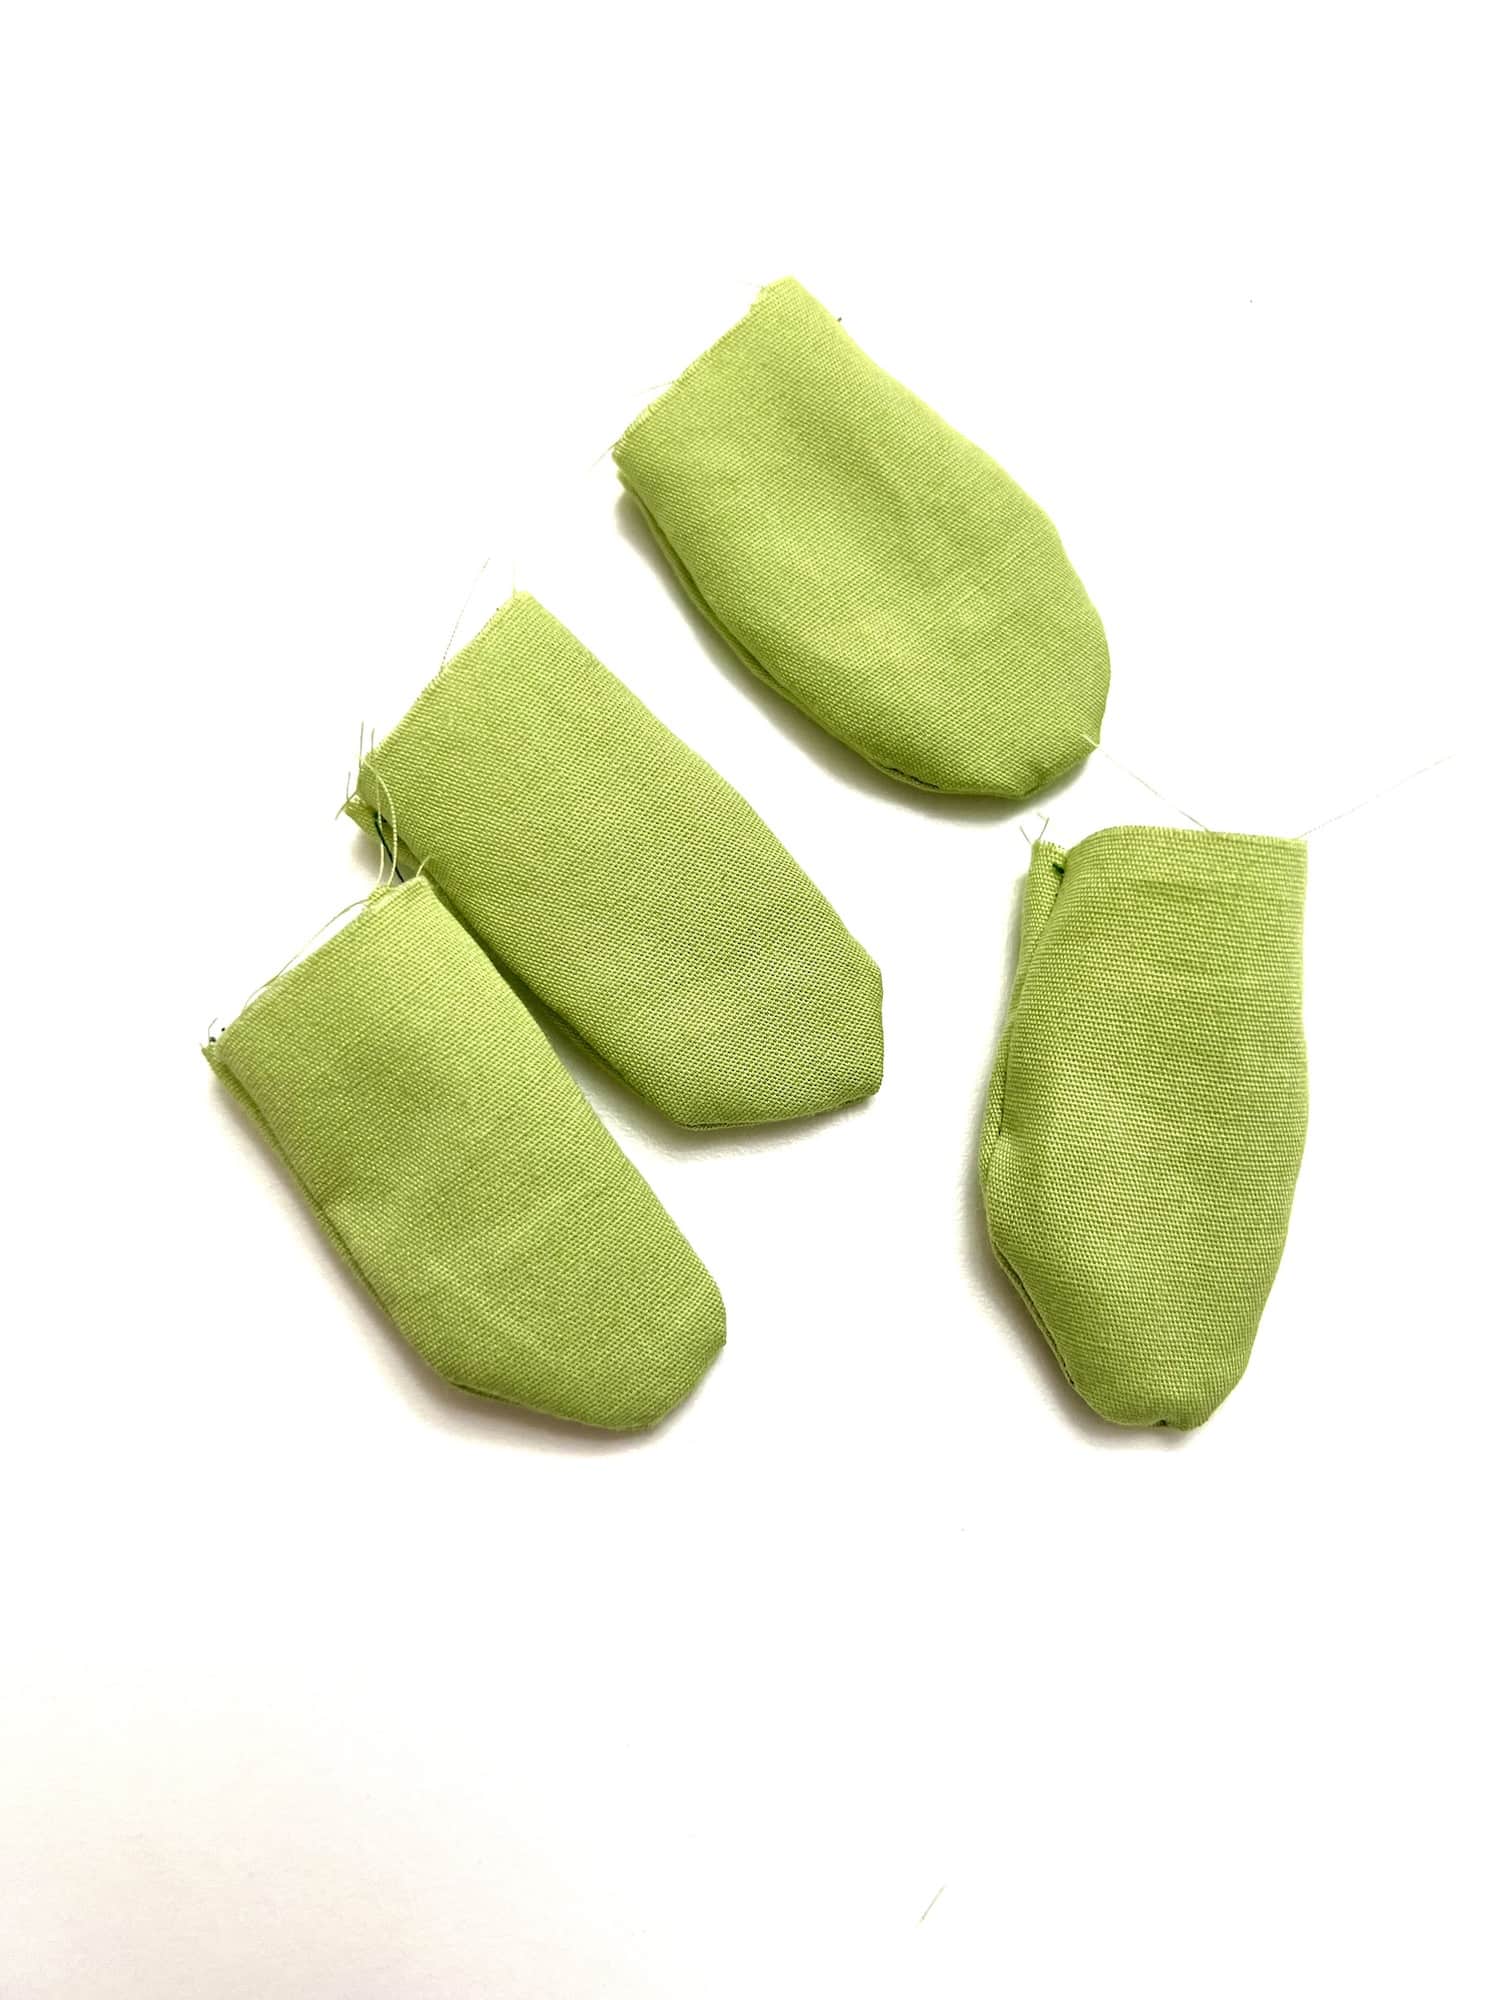
If you would like to stuff the legs and head, add a little bit of Polyfill or pieces of scrap fabric into each piece. Fill the legs and the head about half way so that you have flat fabric to sew the seams later.
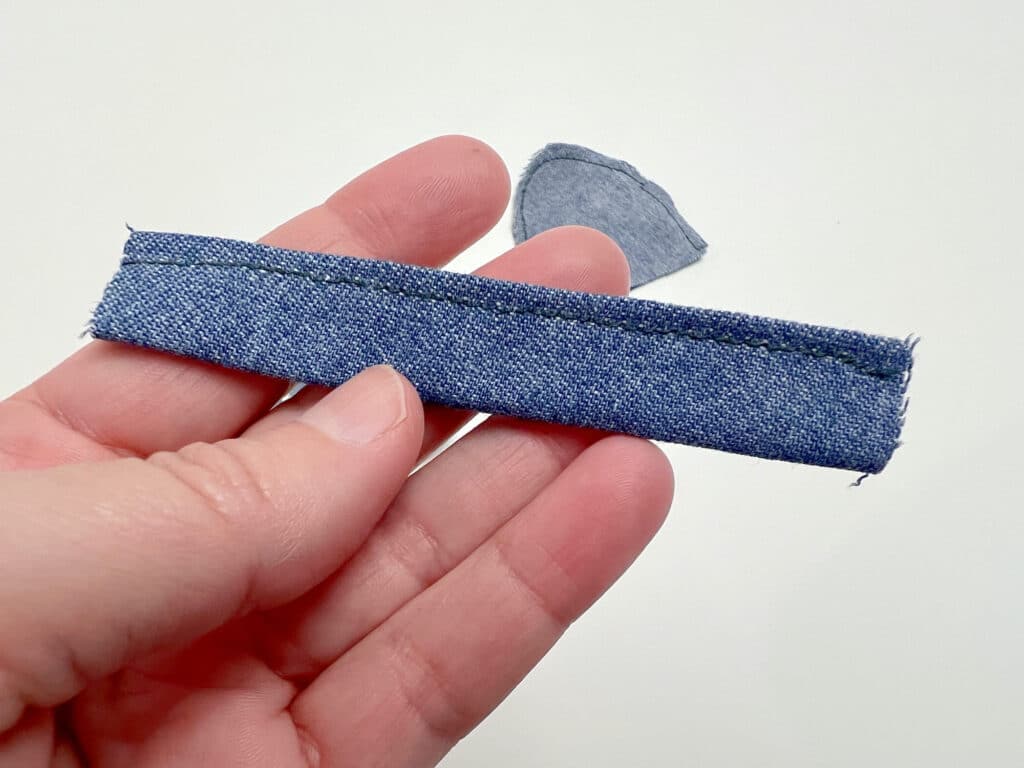
For a Hook Tail:
If you would like a hook for the tail, use the hook pattern piece. Fold the edge of the pattern inward ¼ of the way. Then fold the other edge inward ¼ of the way.
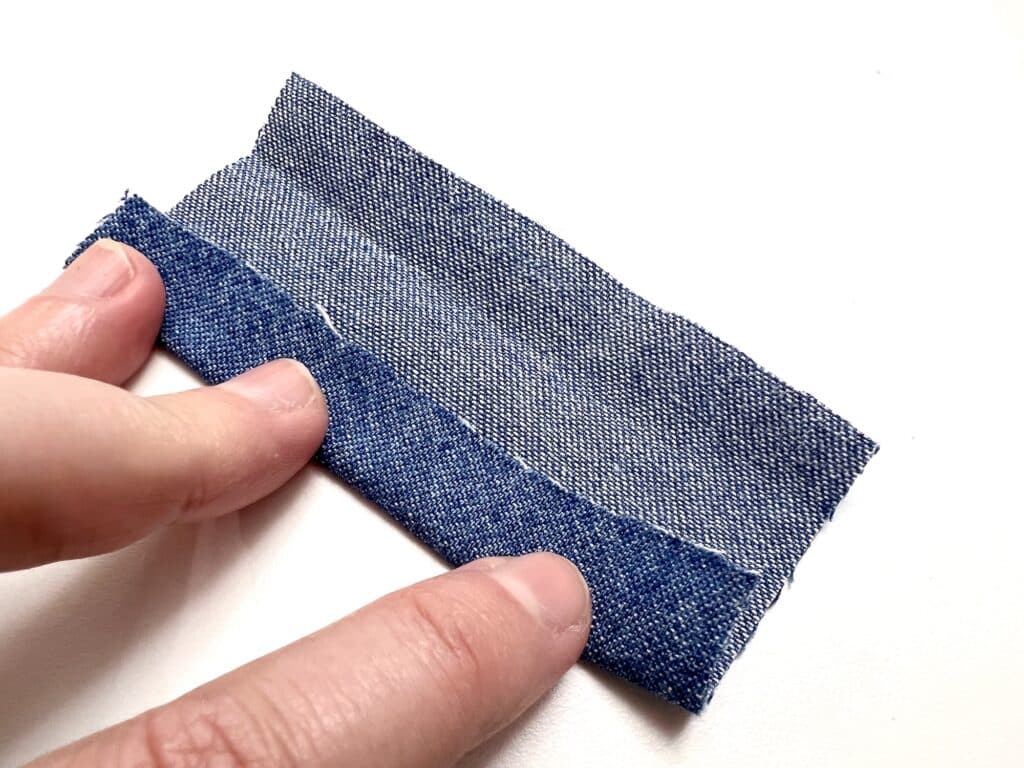
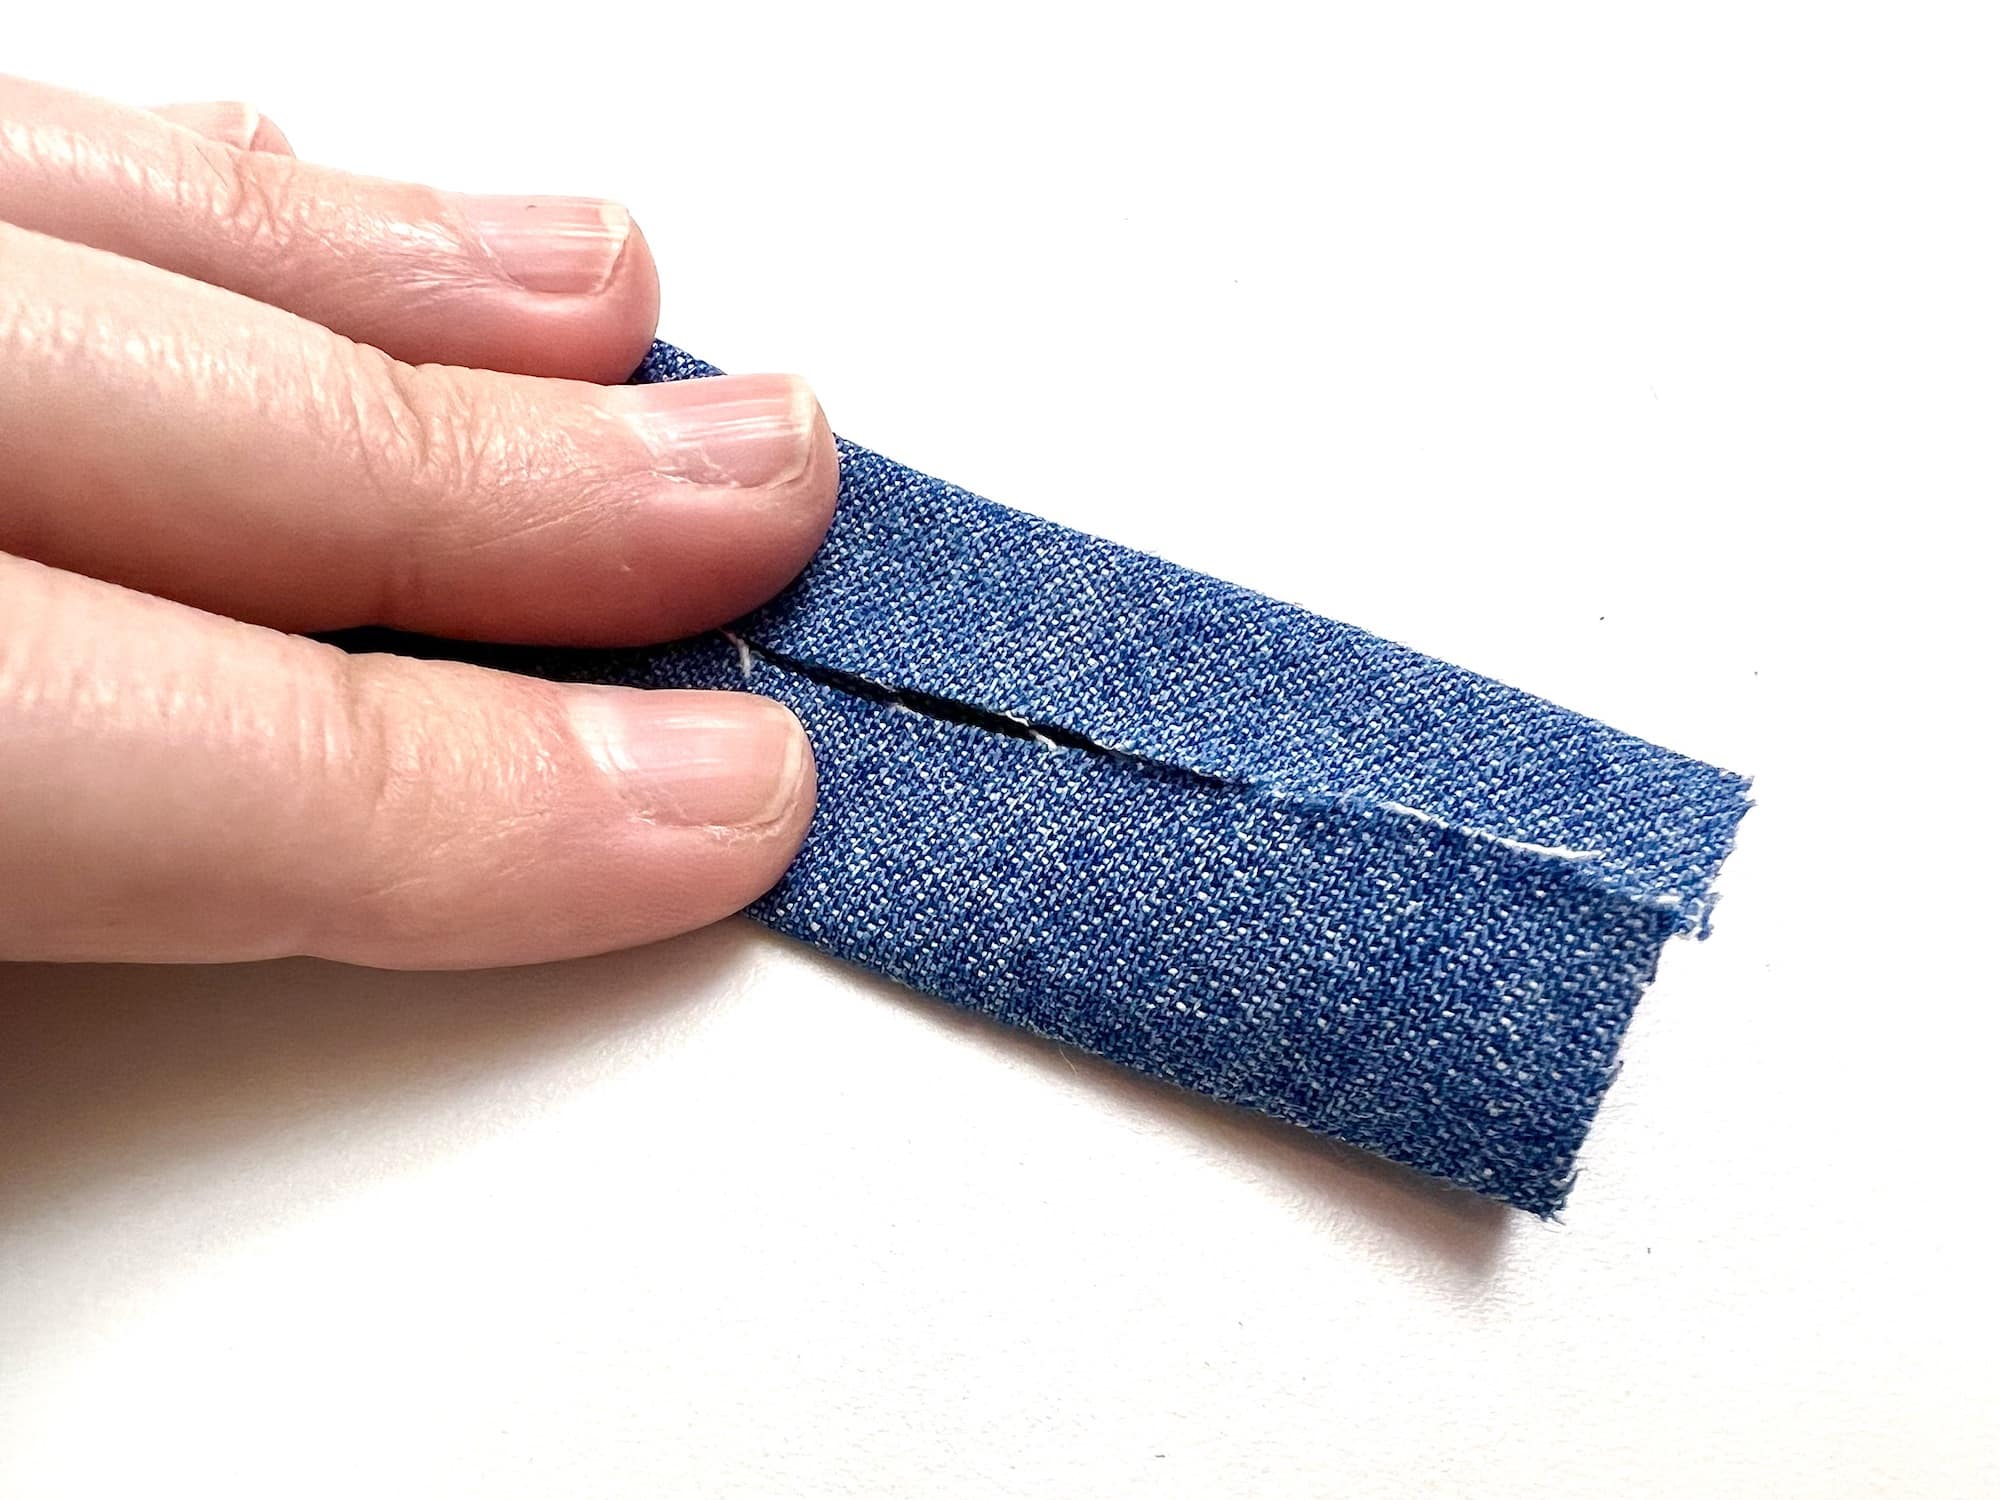
Then fold the pattern in half, with the unfinished edges inside.
Sew along the edge to secure the long straight piece.
Step 4
Place one body pattern piece on your work surface, right side up.
Lay the head, tail and leg pattern pieces along the edge of the body pattern, with the pattern pieces pointing inwards.
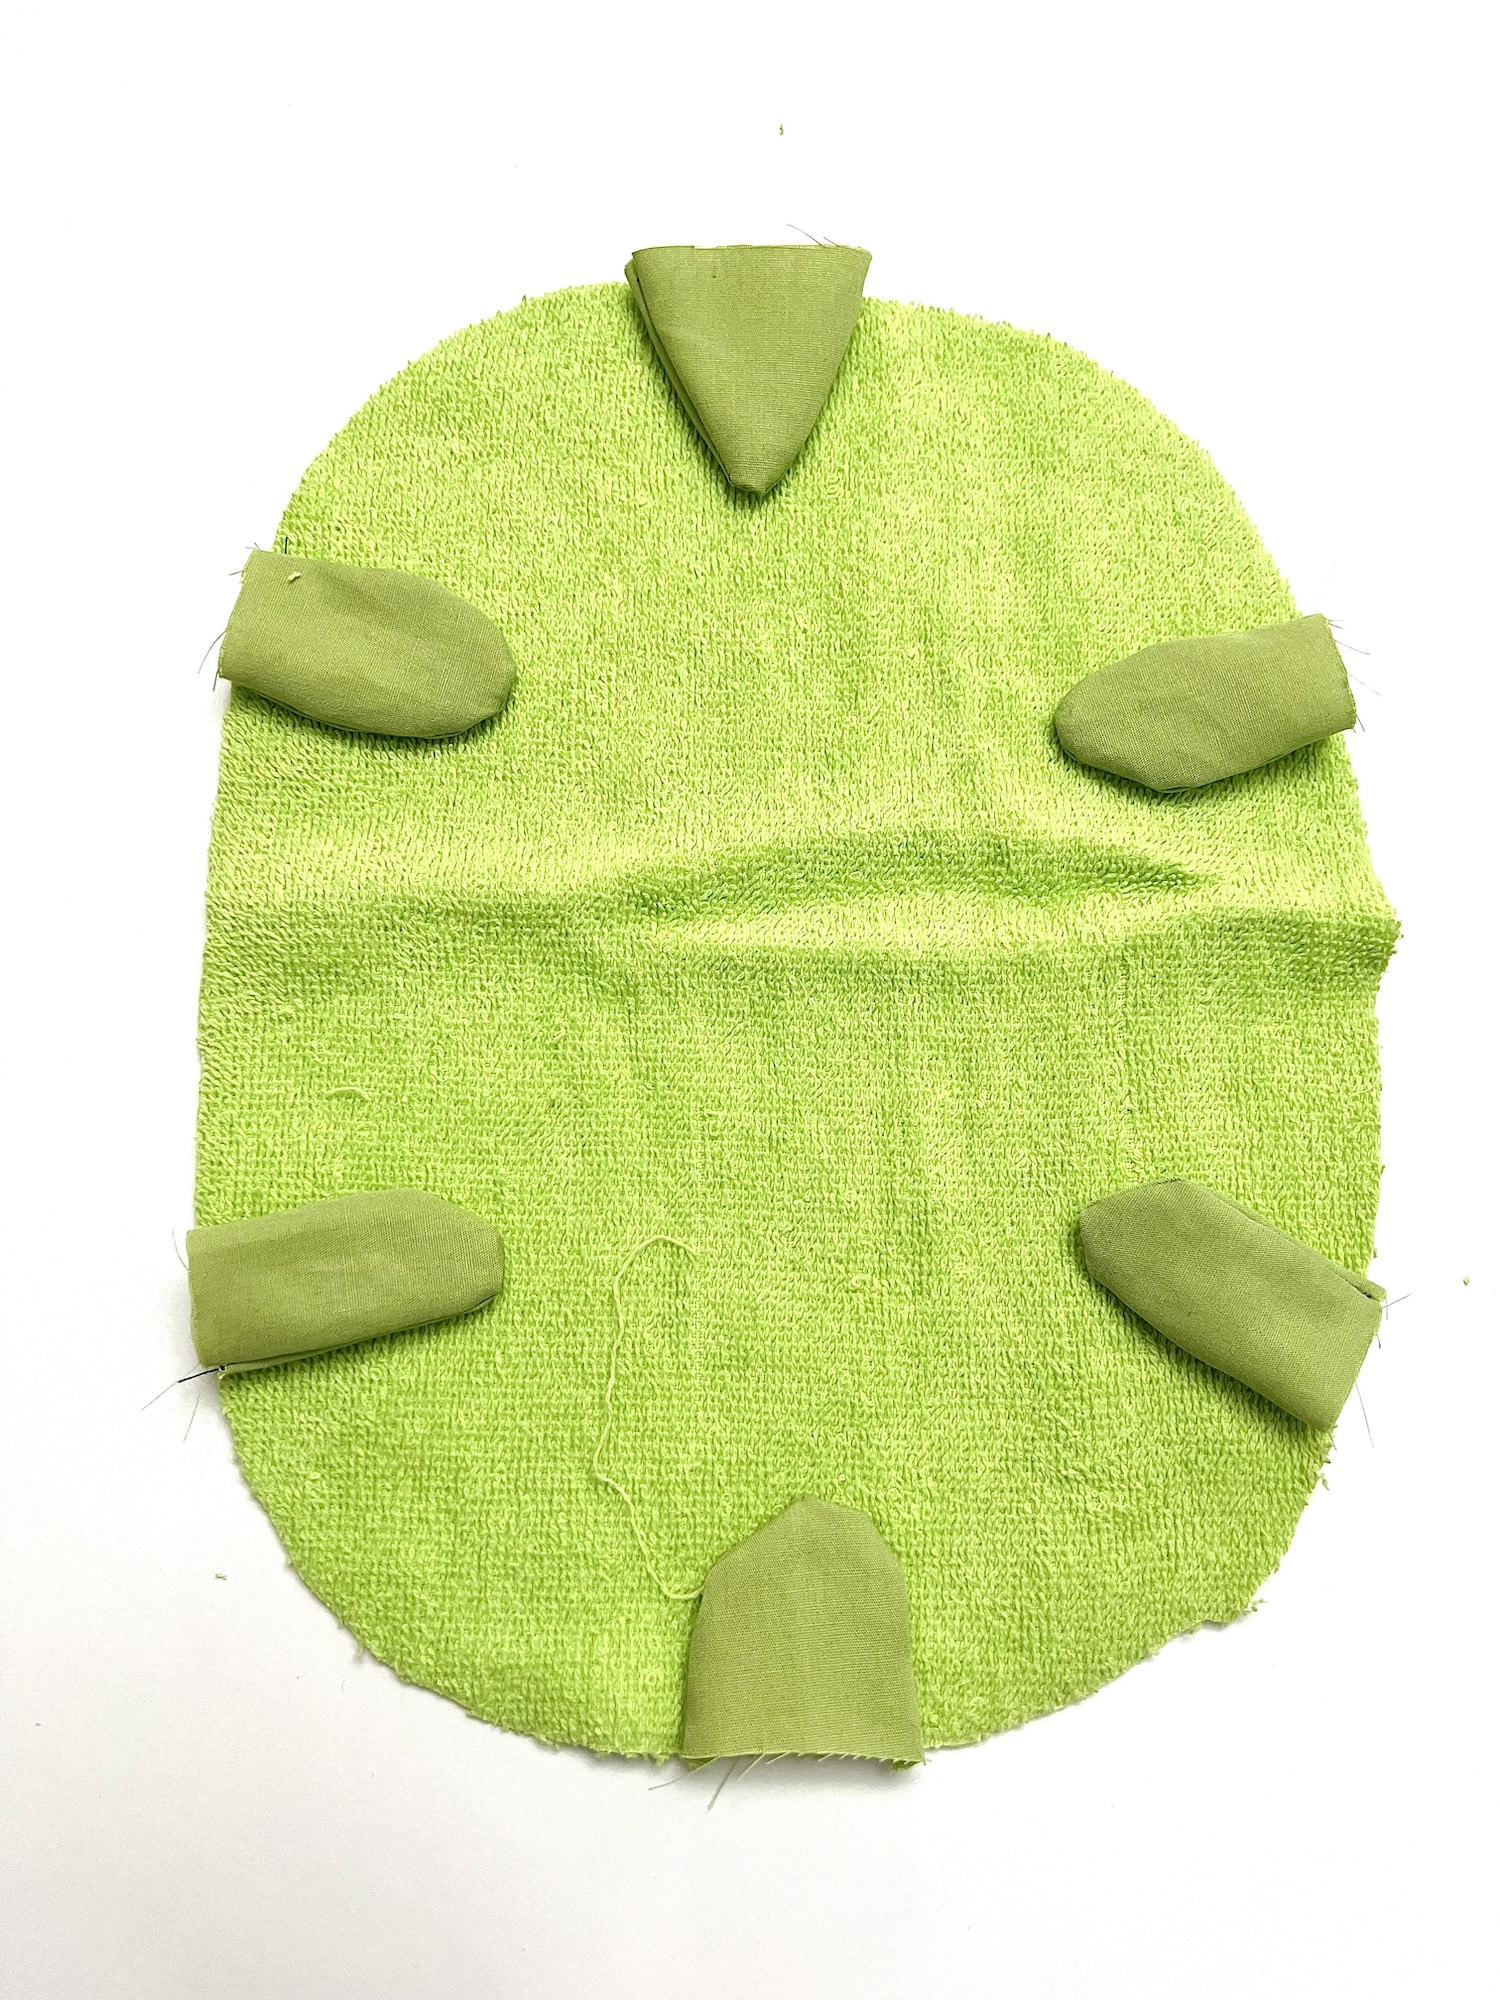
Make sure the edge of the pattern pieces lines up with the edge of the body pattern.
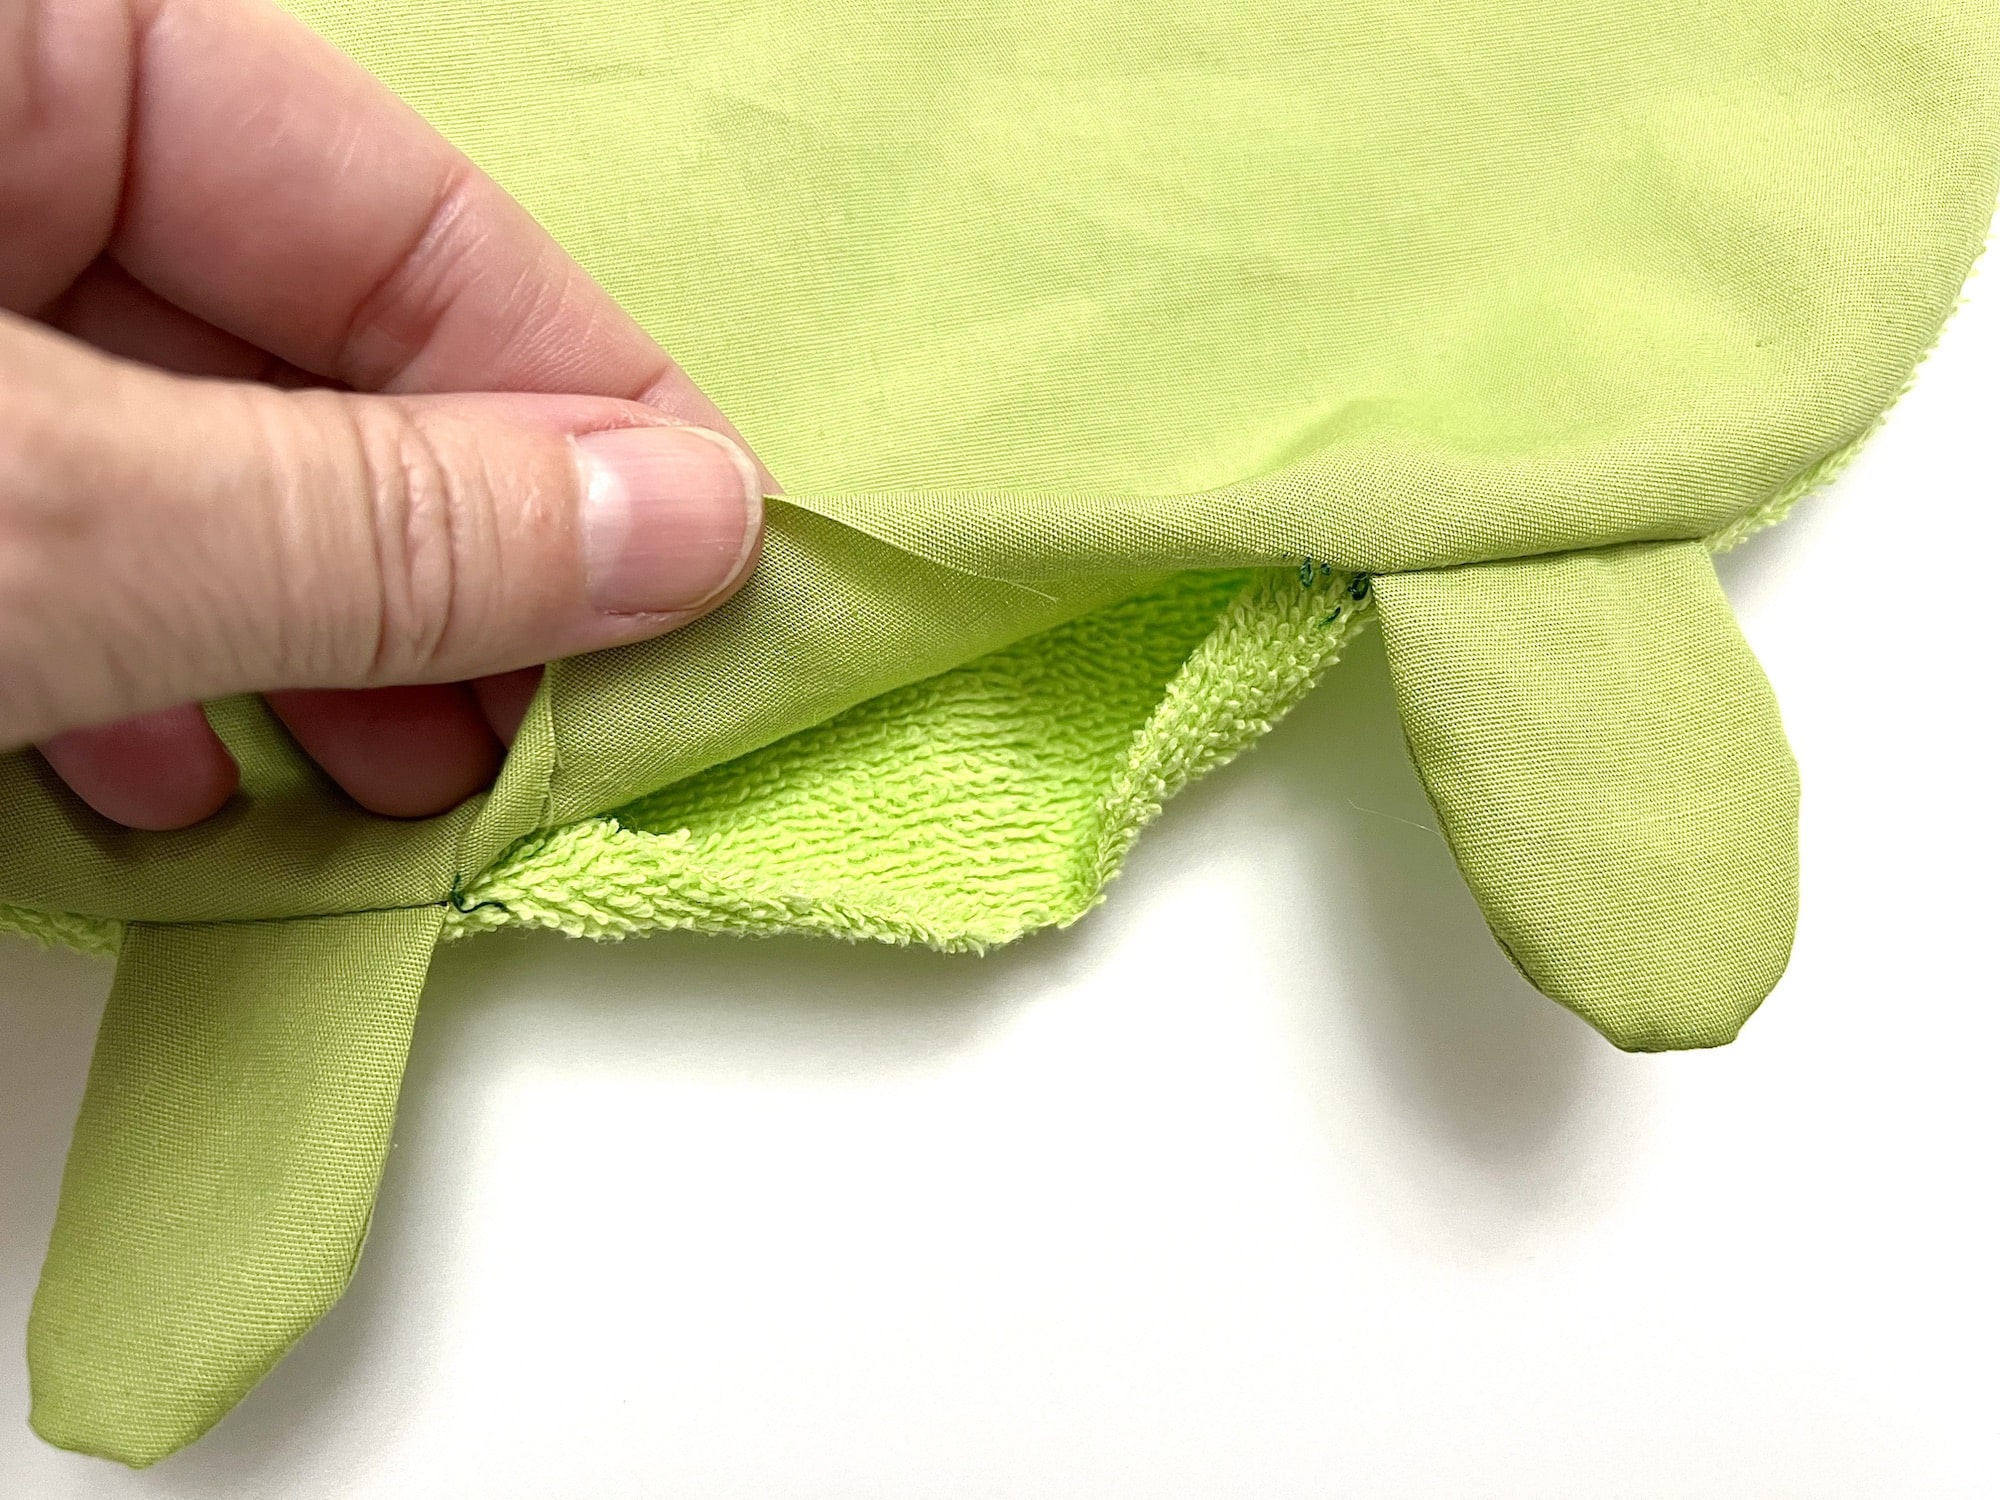
Next, lay the other body pattern piece over the first body pattern, right side down. Be careful when placing the fabric down as the leg, head and tail pieces could move around.
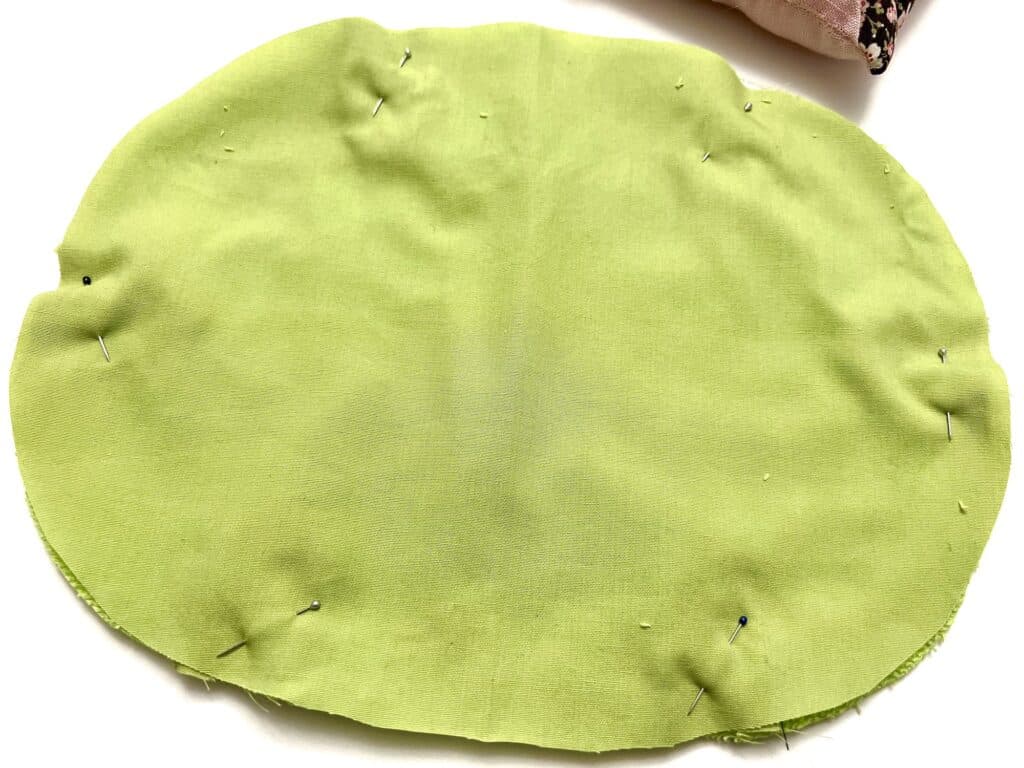
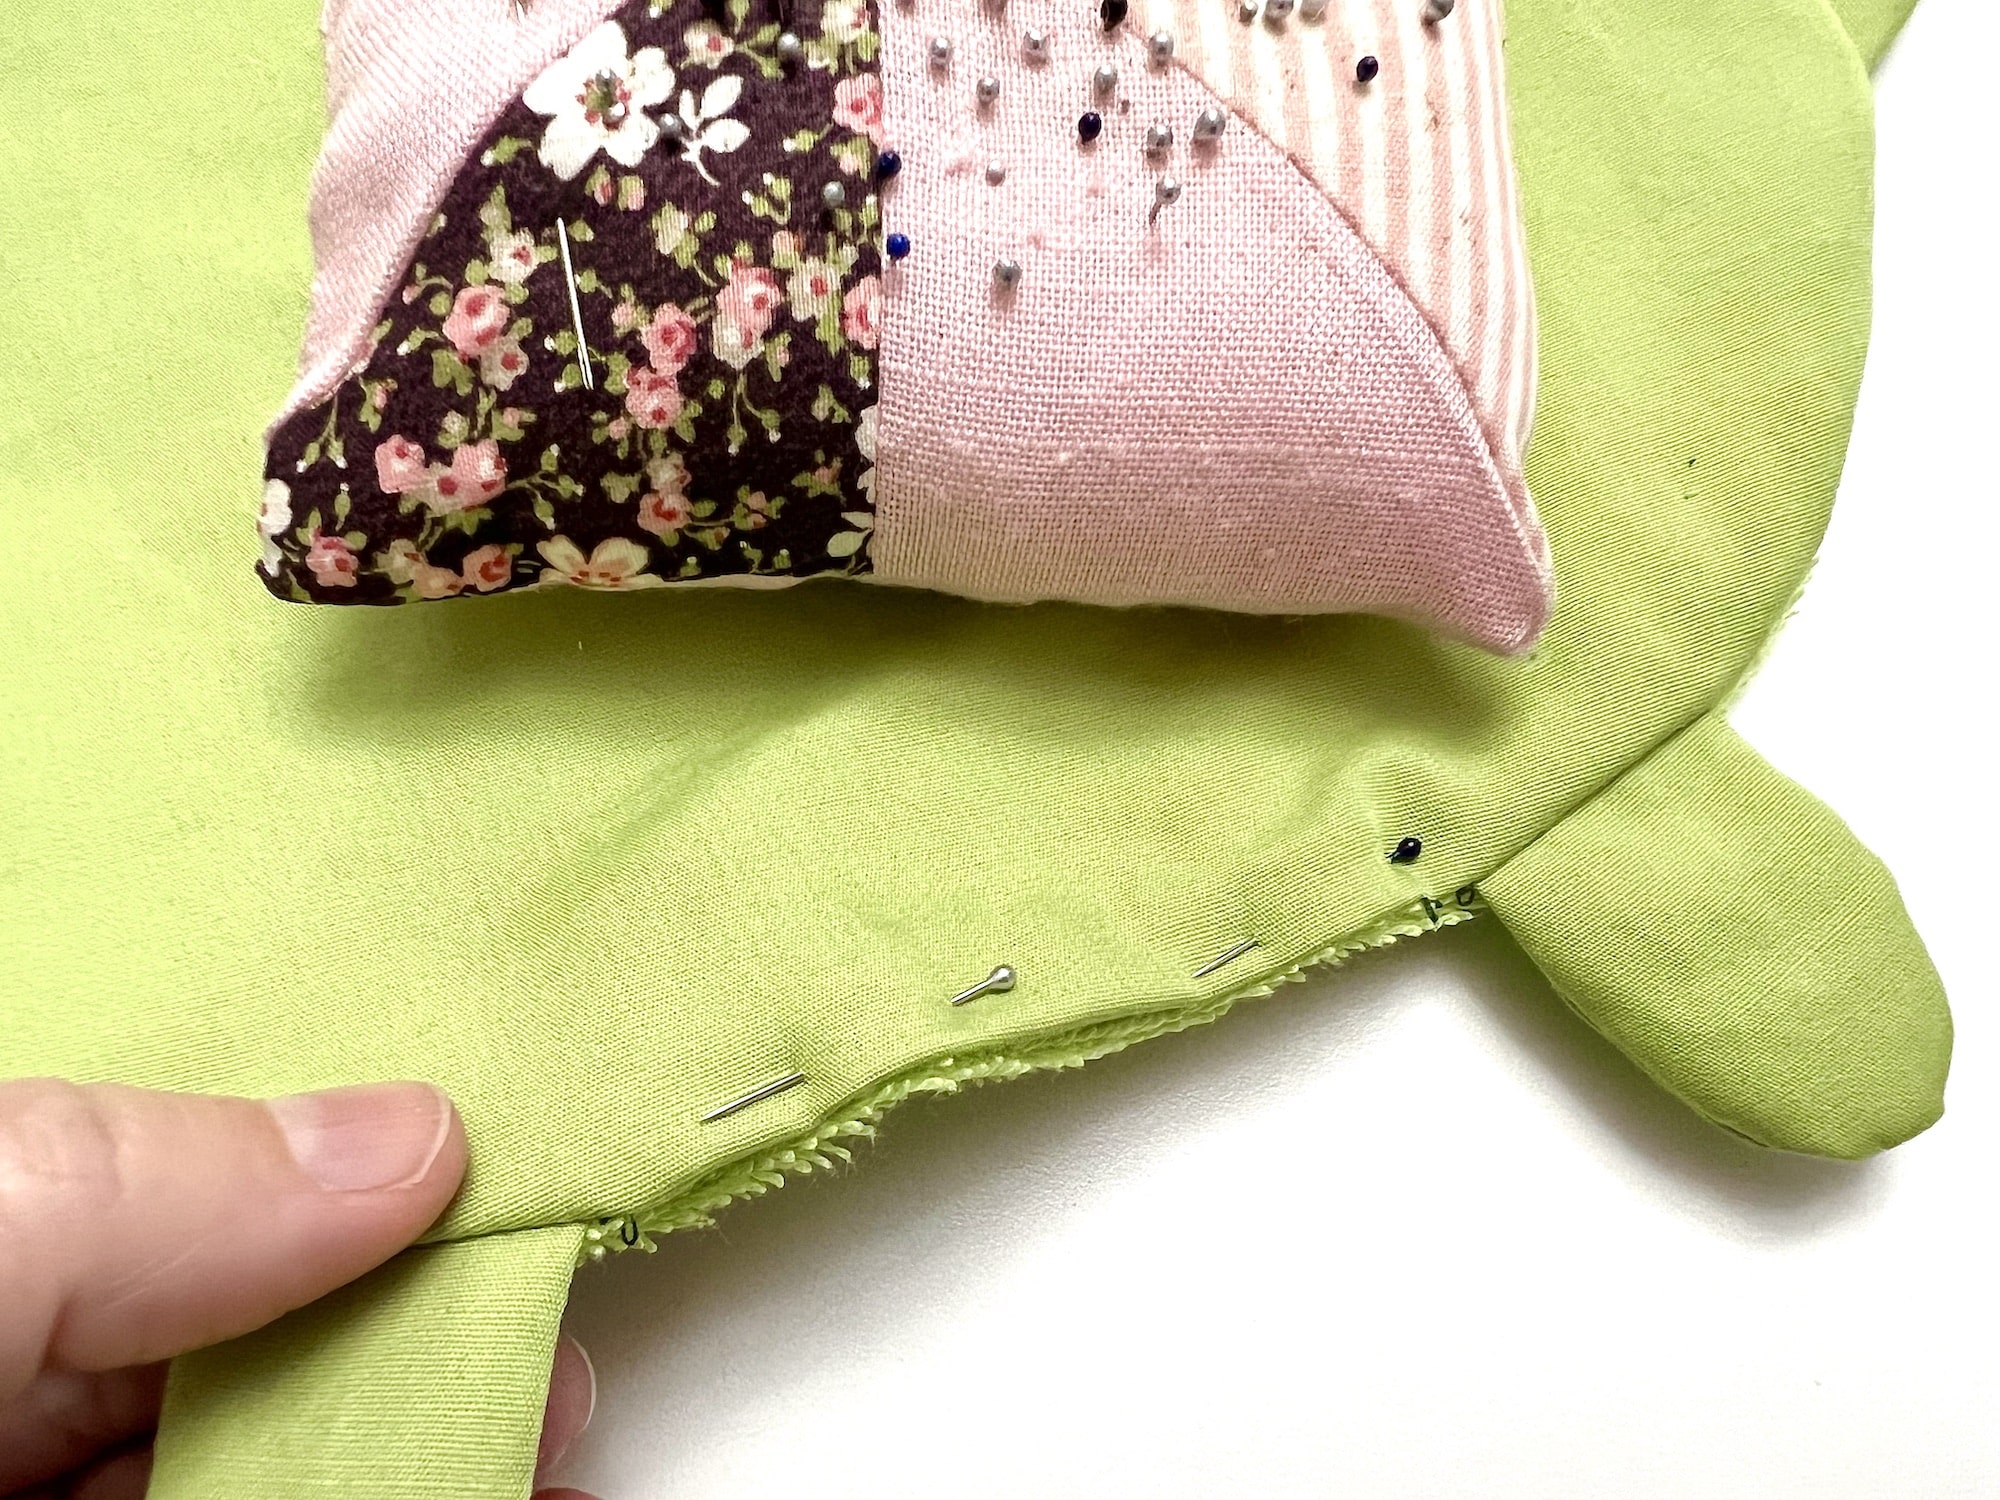
Pin the pattern together, especially where the legs, head and tail pieces are.

Step 5
Sew around the edge of the body with a 3/8 inch seam allowance.
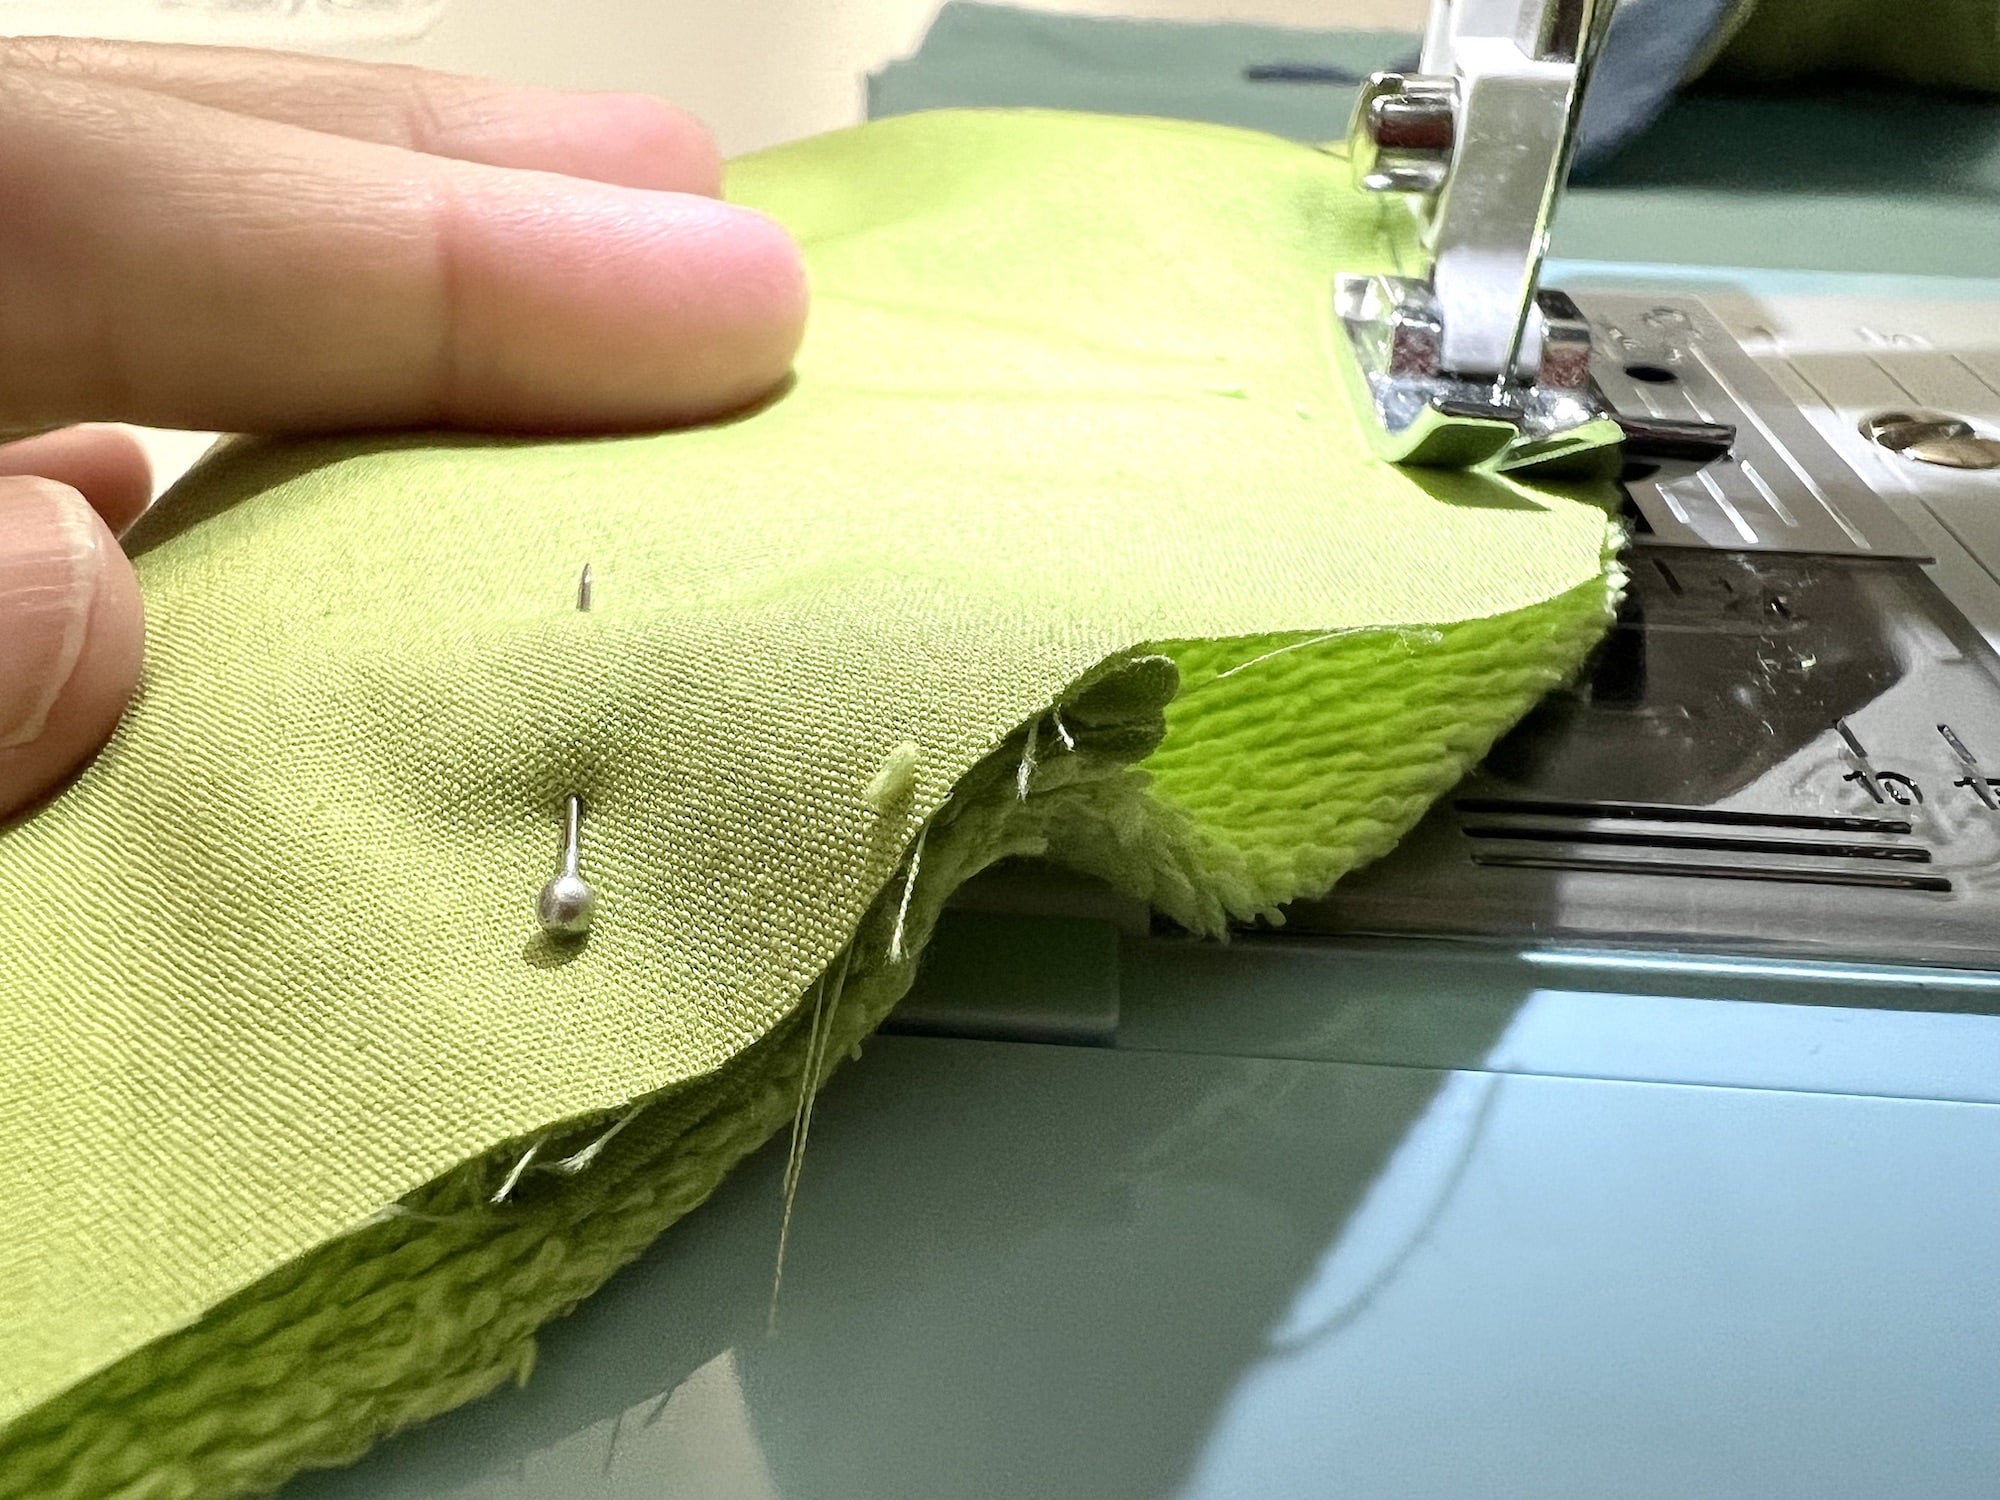
Keep a 3-4 inch opening along the edge of the body in between two legs for turning out.
Sew slowly over the places where the legs, tails and head are attached, especially if using denim. Using thicker fabrics and having multiple layers can break the needle, so just slow down the pace of your sewing at these points.
Step 6
Turn the mop turtle inside out through the opening.
Using a turning tool, chopstick or your fingers, be sure to push out the seams all around the turtle body to make sure it lays flat.
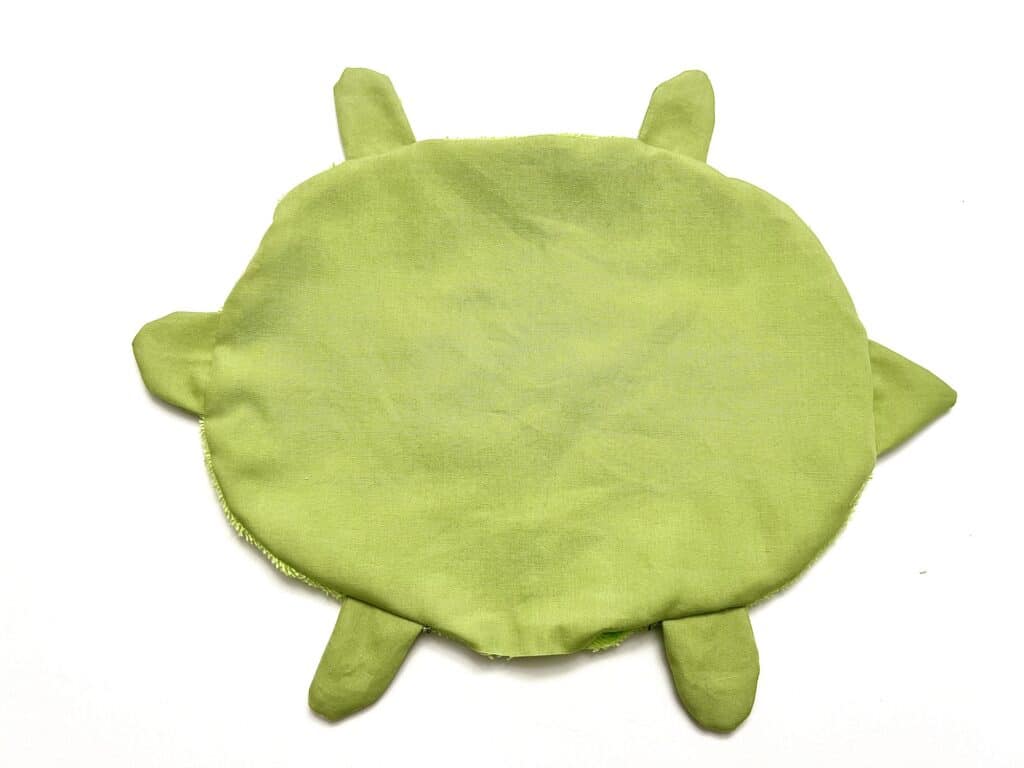
You can iron the body to flatten the seams at this time, if you would like.
Step 7
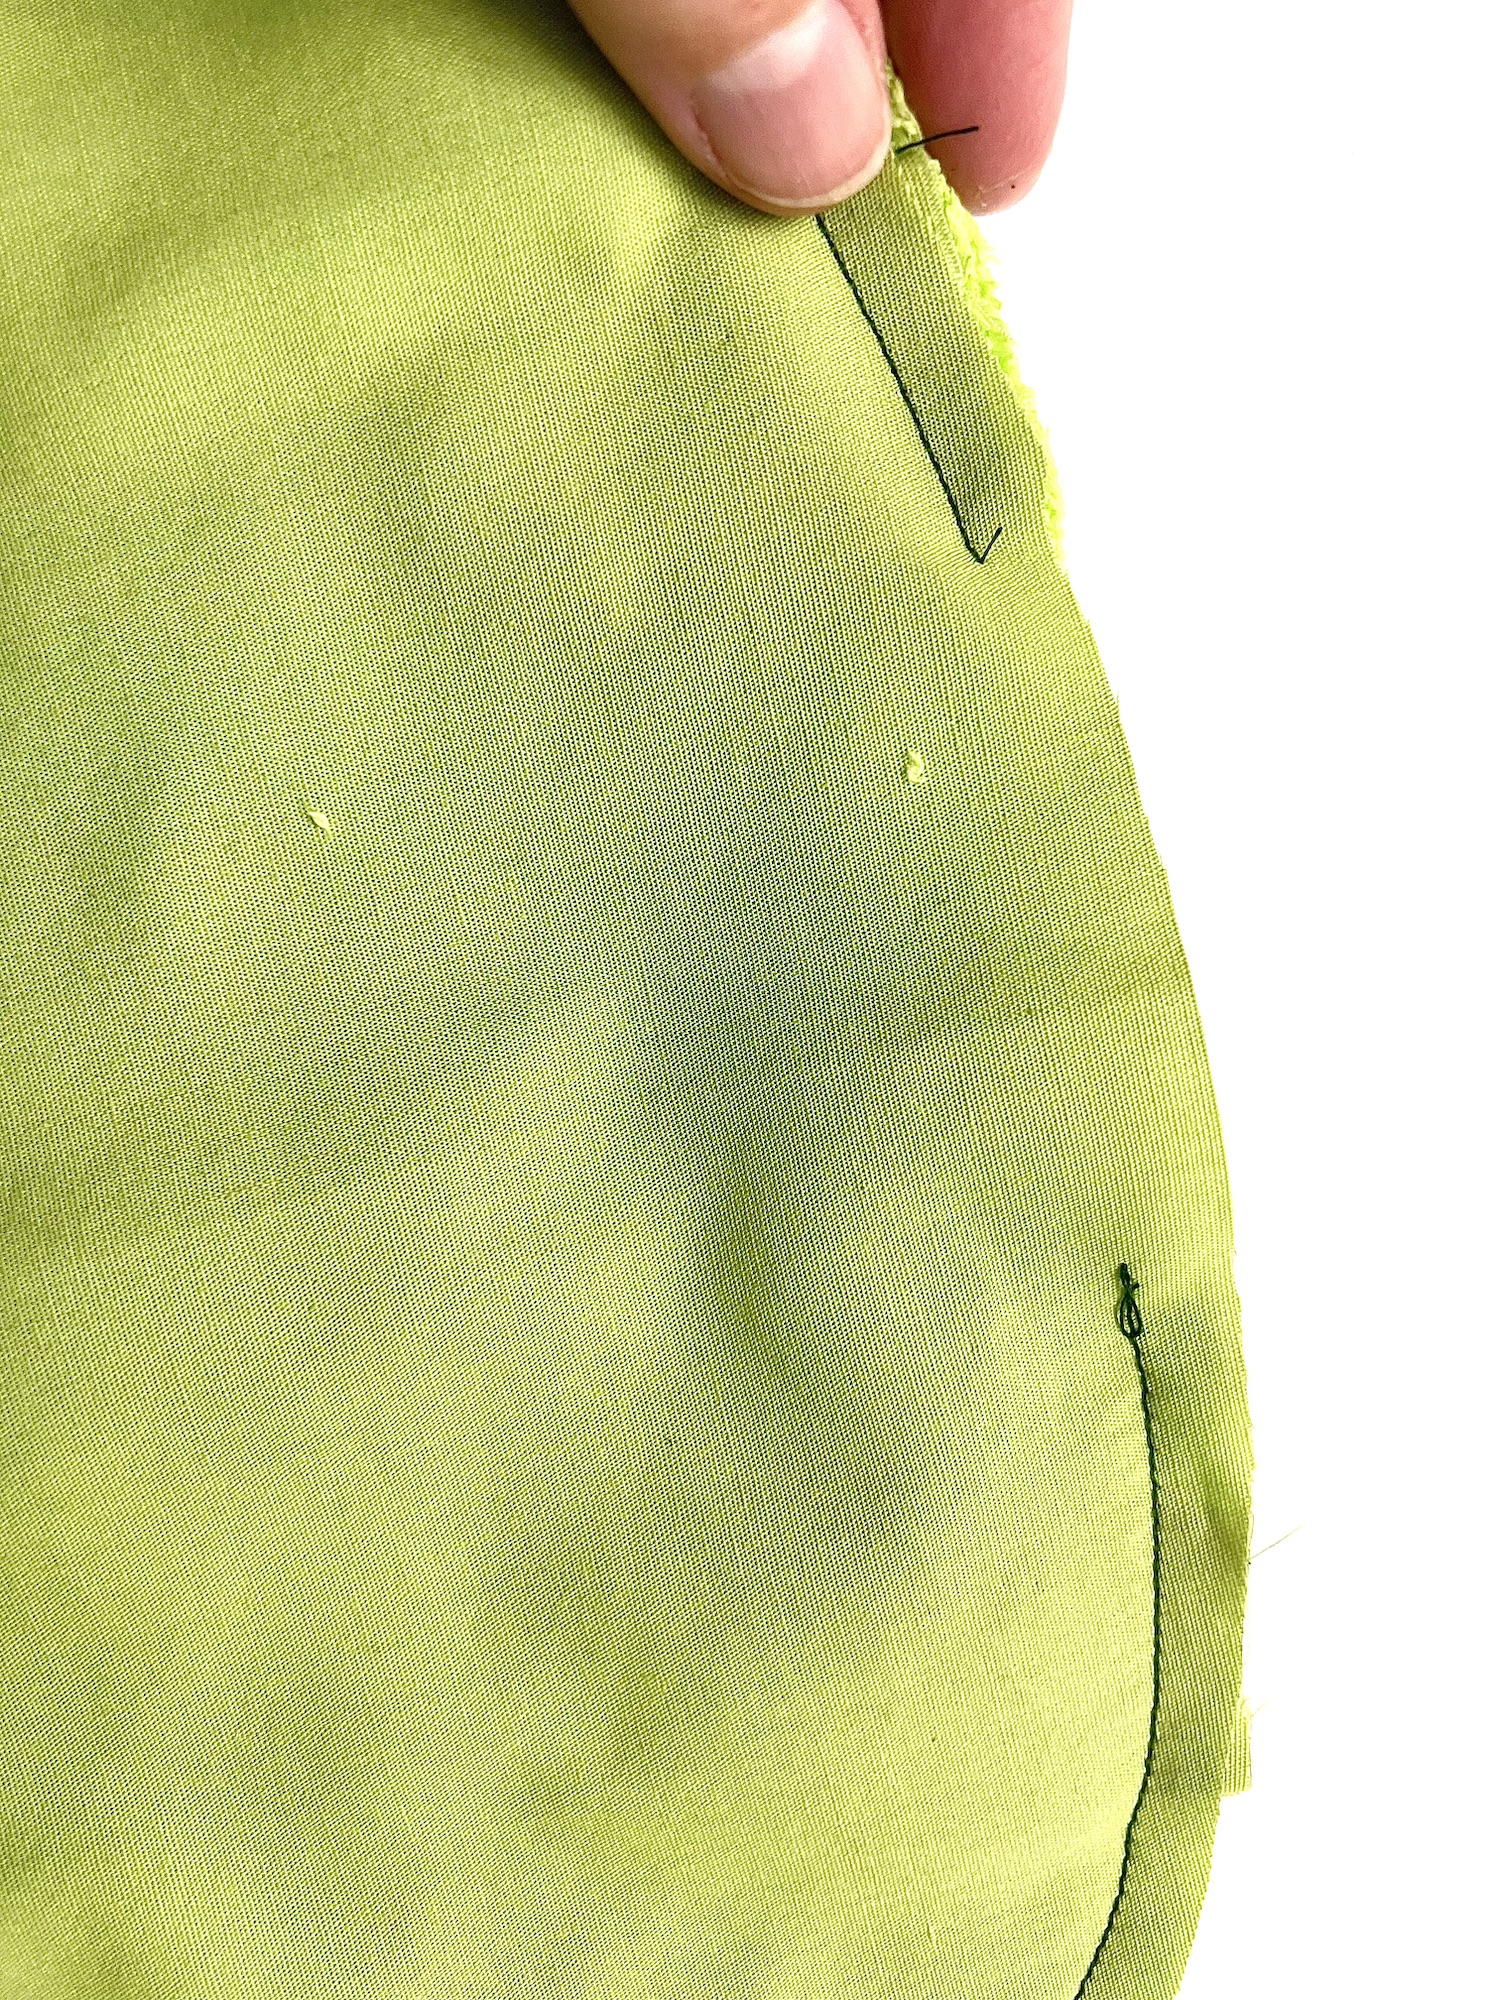
Fold under the open seams and pin together.
Sew a top stitch all around the top of the body, being sure to secure the open seams as you sew.
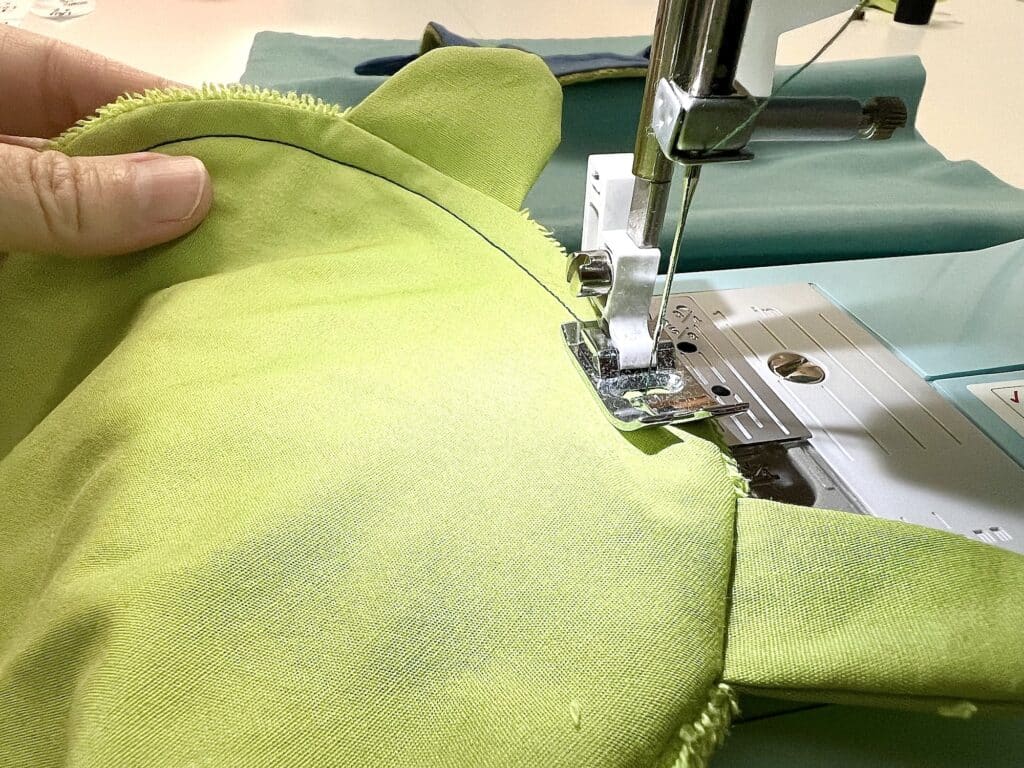
For the seam allowance, ¼ inch to 3/8 inch is ideal.
Step 8
For anyone with mobility impairment or who cannot easily bend over to the floor, you can make this turtle mop more accessible in one of these two ways.
First, tie a long piece of ribbon or string in a bow around the turtle’s tail. Lower the turtle to the floor to use as a foot mop, then pick it back up by pulling on the ribbon.
This ribbon can be untied from the tail before putting the mop in the washing machine.
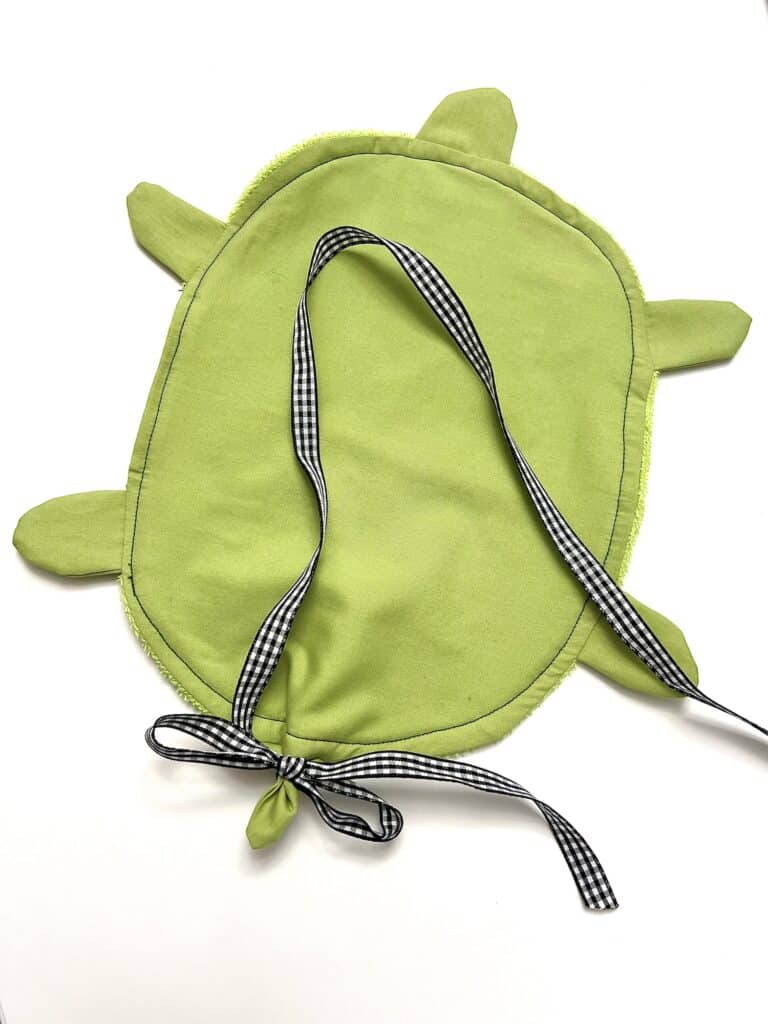
Second, sew a piece of velcro to the back of the turtle’s tail and to the end of a long piece of ribbon. This reduces the need of dexterity to make a bow on the tail each time.
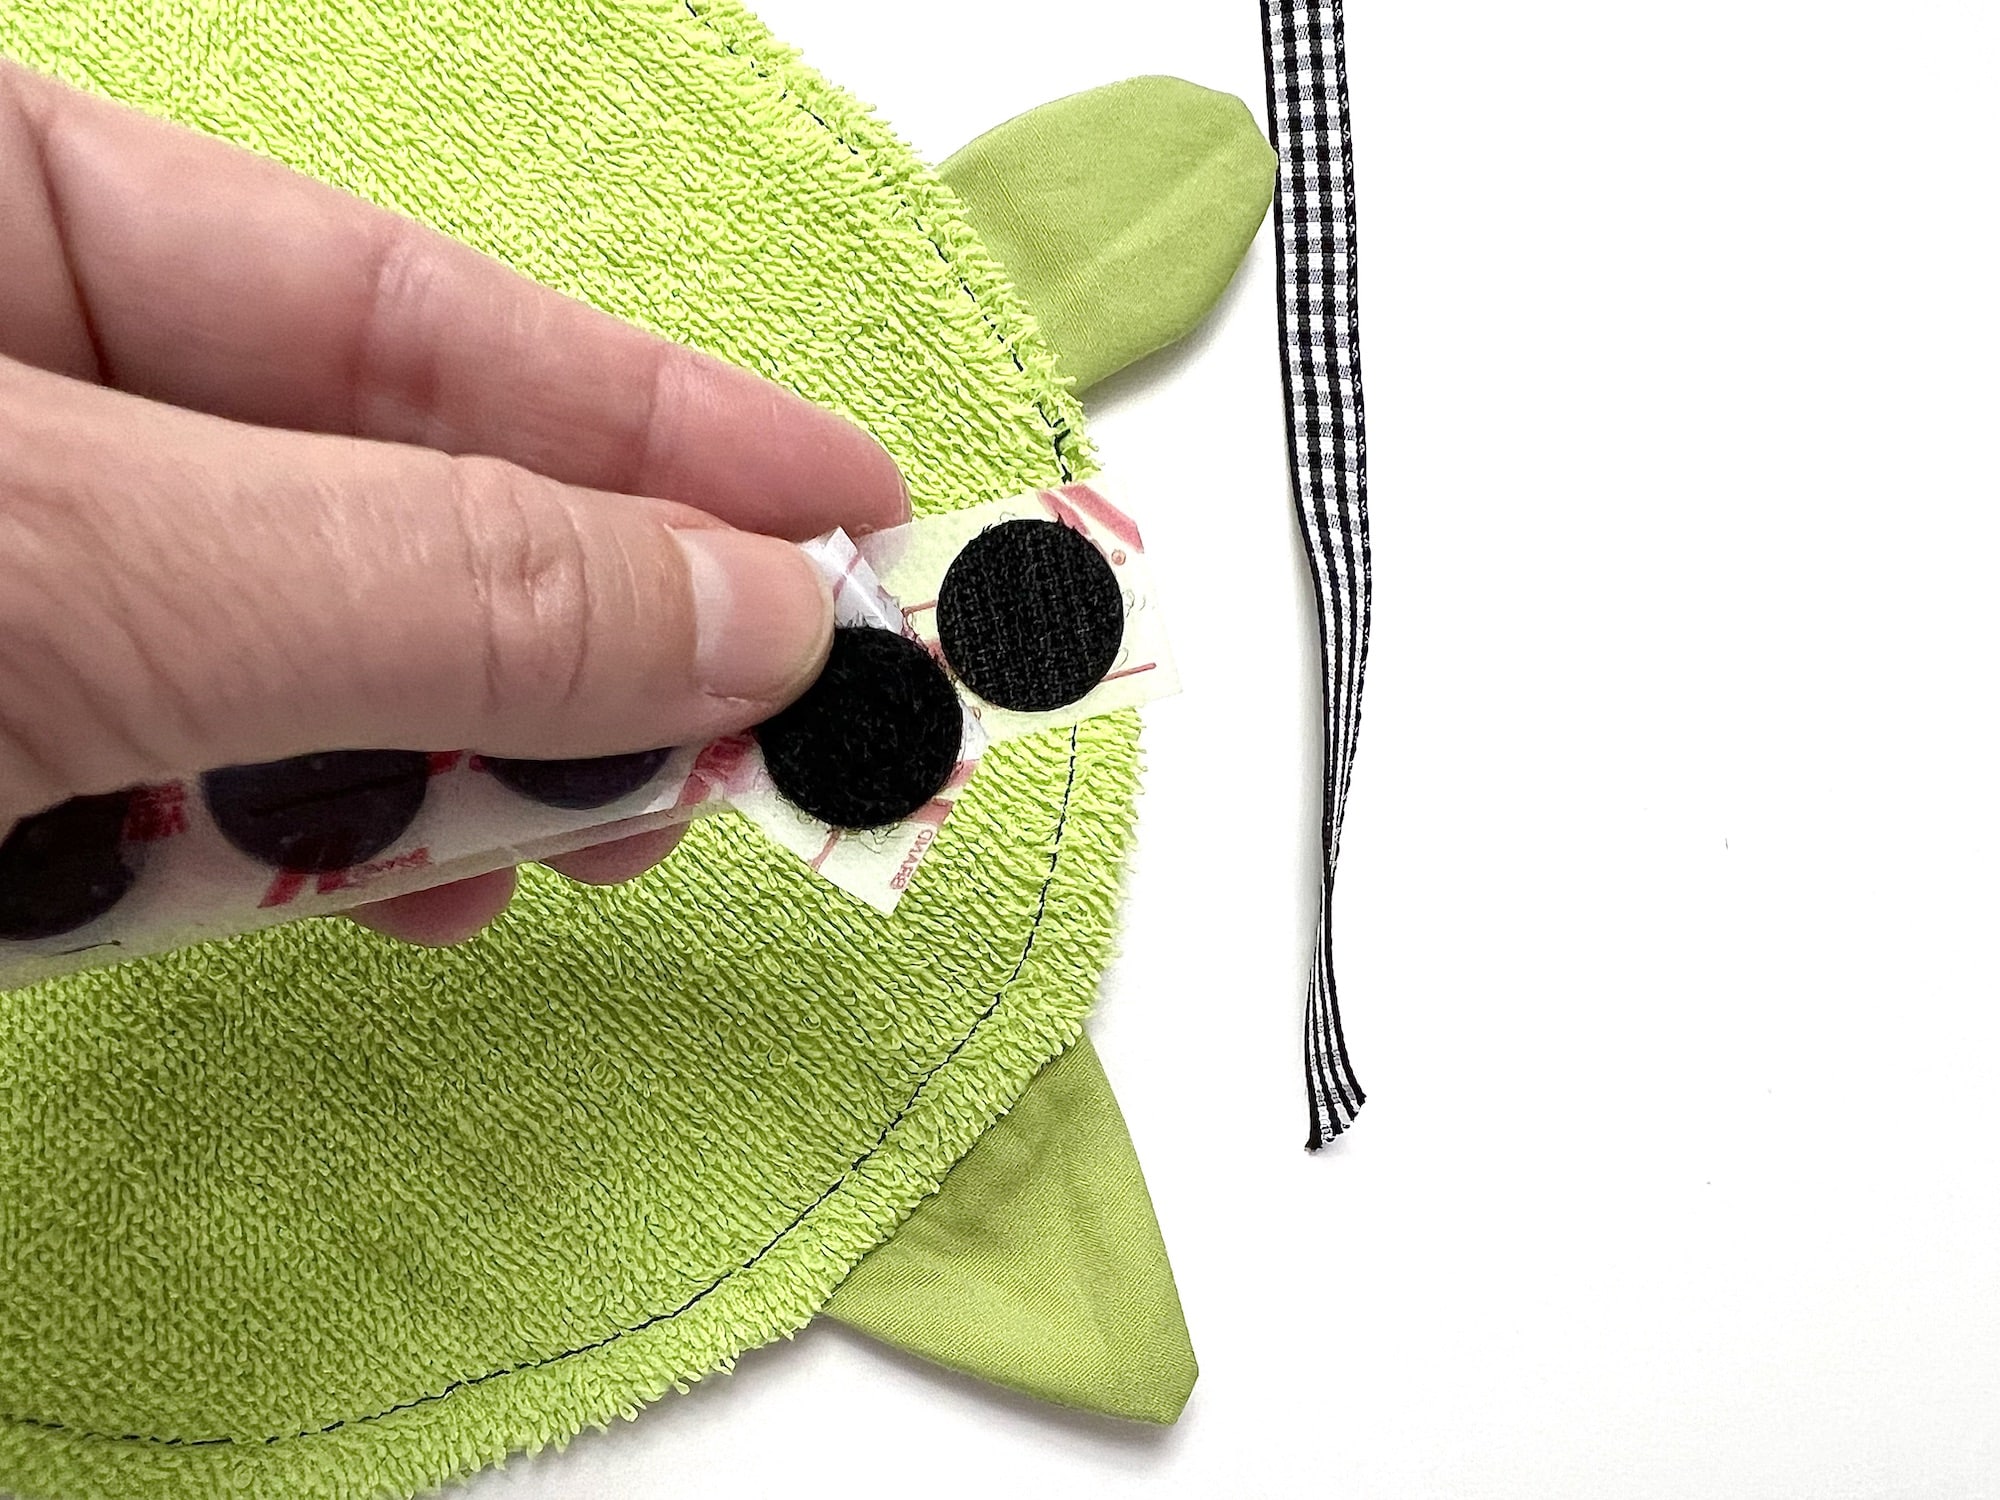
Remove the ribbon from the turtle before washing because it can get caught up in a tangle in the washing machine. If you do need to keep it on the turtle, then put each turtle mop in a separate garment bag when washing.
See our video tutorial on YouTube to watch me make two different types of turtle mops.
Helpful Tips I Learned From Making Floor Mops
- It is necessary to pre-wash and pre-shrink any fabric you are using. If you are using upcylcled towels, clothing or linens, those will already have been pre-shrunk.
- Old washcloths, hand towels, beach towels and bath towels are great to use for the base.
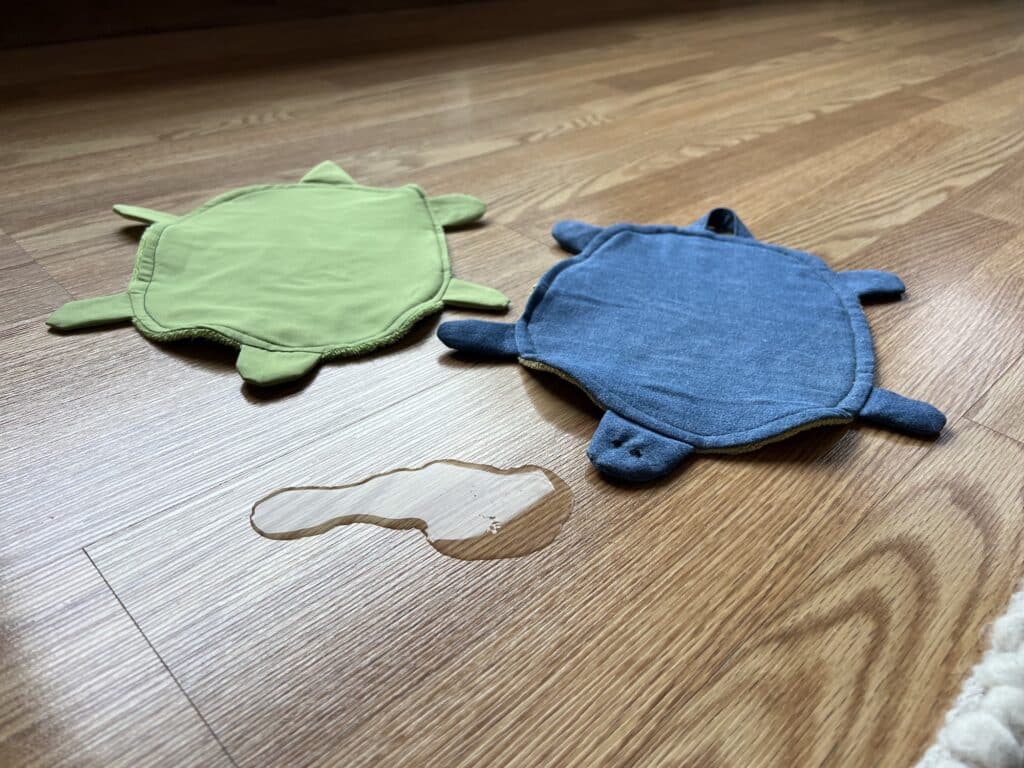
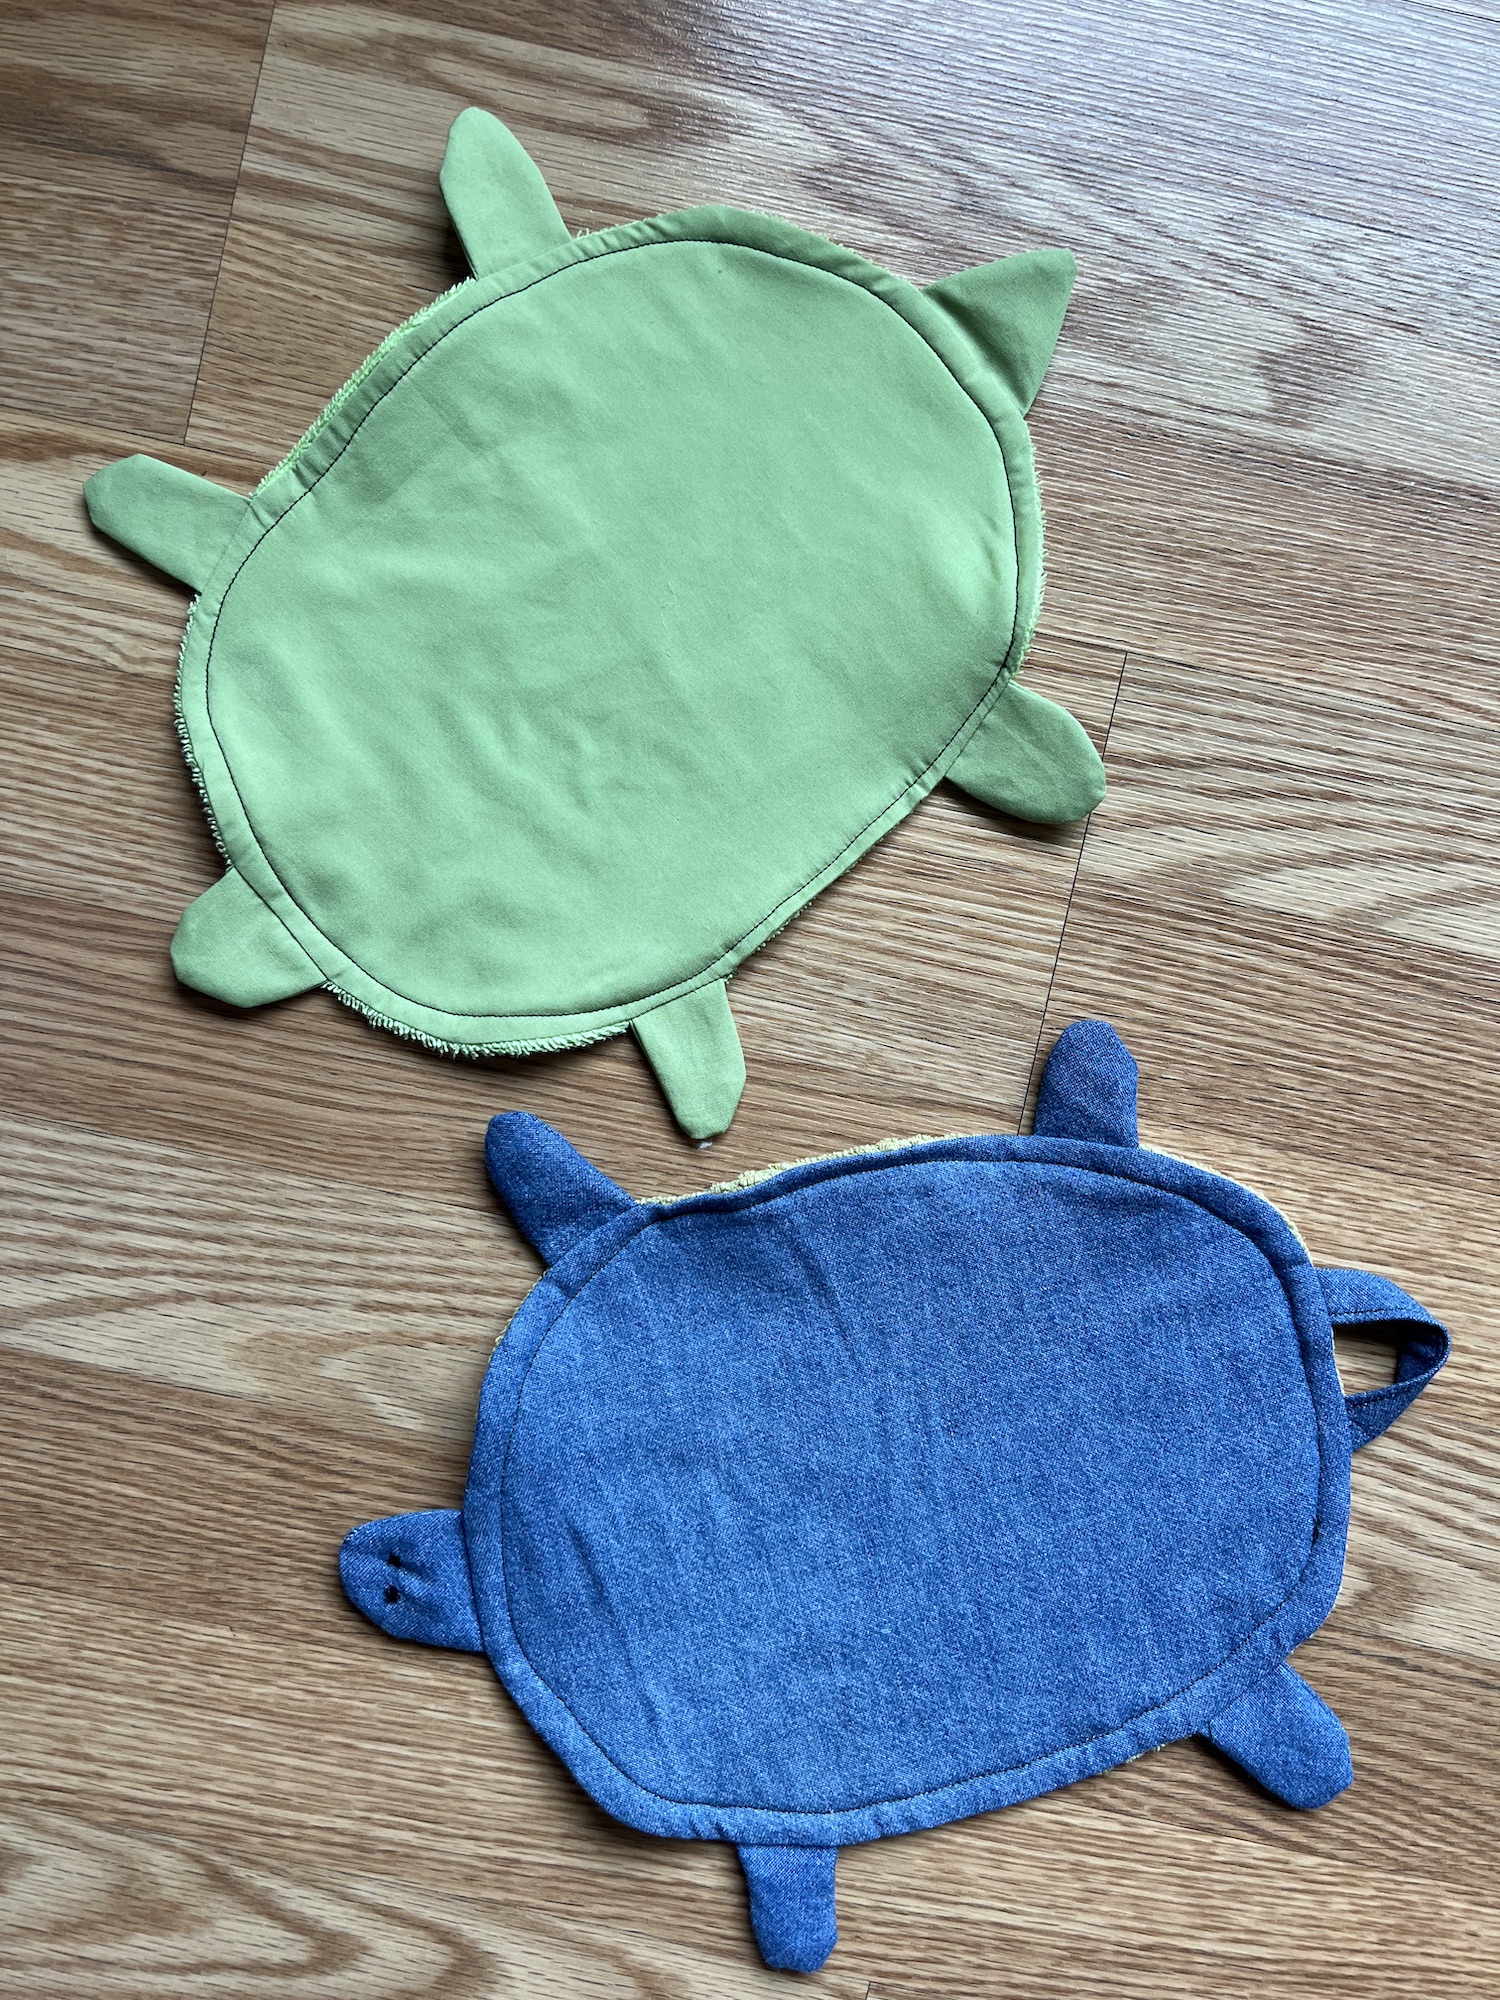
- I personally used an old green sheet, two hand towels, and a pair of denim shorts for my material for the two turtle mops I made.
- Any washable and durable fabric can be used on the top and for the legs, head and tails. This includes cotton fabrics, denim, old clothing, etc.
- Adding eyes to the head of the turtle is not necessary. However, it does make them cute! If you would like to add eyes, sew on tiny buttons, use embroidery thread to stitch two circles, or draw on eyes with a permanent fabric marker.
- Drawing or sewing on “toes” on the tips of the legs is also another way to customize these turtle mops.
Want to save this turtle mop pattern for later? Be sure to pin it to a sewing or craft board on Pinterest.
For more sustainable sewing ideas, see these DIY projects next:
I think this is a real cute pattern and I am sure I will b making some for not only myself but for quick gifts for friends but I am a little confused. In the picture with you foot it looks large but watching the video it looks a lot smaller (just a little bit bigger that your hand. Would it be possible to give some dimensions for the pattern pieces. I’m more of a detail person when it comes to sewing.
They are both about the same size of 7 1/2 inches wide. It may be the camera angle that makes them look different!
Thank you. I plan on making a couple of them
Awesome! Enjoy!!!
do you have a pattern to print off for the turtle?
Yes, there is a pattern that you can download at https://singlegirlsdiy.podia.com/turtle-mop-pattern. There’s also a link to the pattern in the supplies list.
Thanks for the tutorial. Your directions were easy to follow. I made this specifically for my sewing/craft area.
Lane, That is great to hear! Glad the pattern was easy to follow!
Wonderful idea. I’m making 20 of them for friends and family for Christmas. I love gifts that are usable.
Debra, I love this idea!!! That’s a lot of turtles, and I know everyone will find them useful!
I tried to get the pattern but I was blocked. Can you tell me what I am doing wrong?
Hmmmmm, I’m not sure. You shouldn’t be blocked. Here is the direct link https://singlegirlsdiy.podia.com/turtle-mop-pattern You can email me at easythingstosew (at) gmail.com if you’d like.
I love. Love. Love this!
Could you give the measurements of the ‘hook tail’, please. I’m not able to access a printer, but I think I can free – hand all the rest of the pattern pieces. Great idea, I plan to make lots of them.
Hi Barb! The tail is about 2 1/4 inches tall and 2 1/4 inches wide. Hope that helps and happy sewing!!!
Can I use microfiber towels as the bottom?
You definitely can!