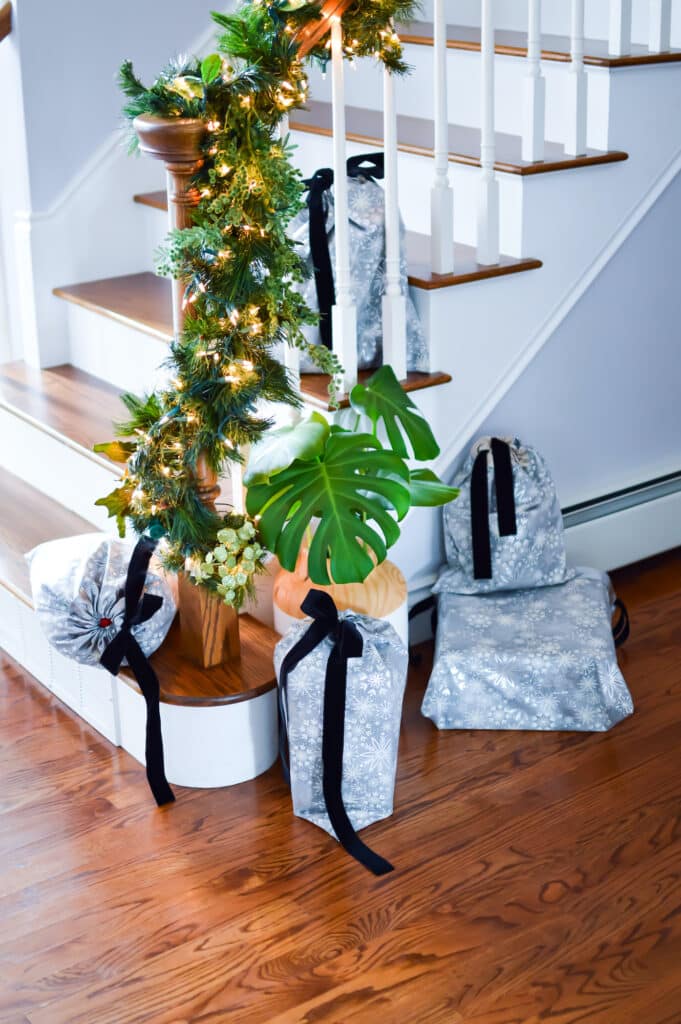
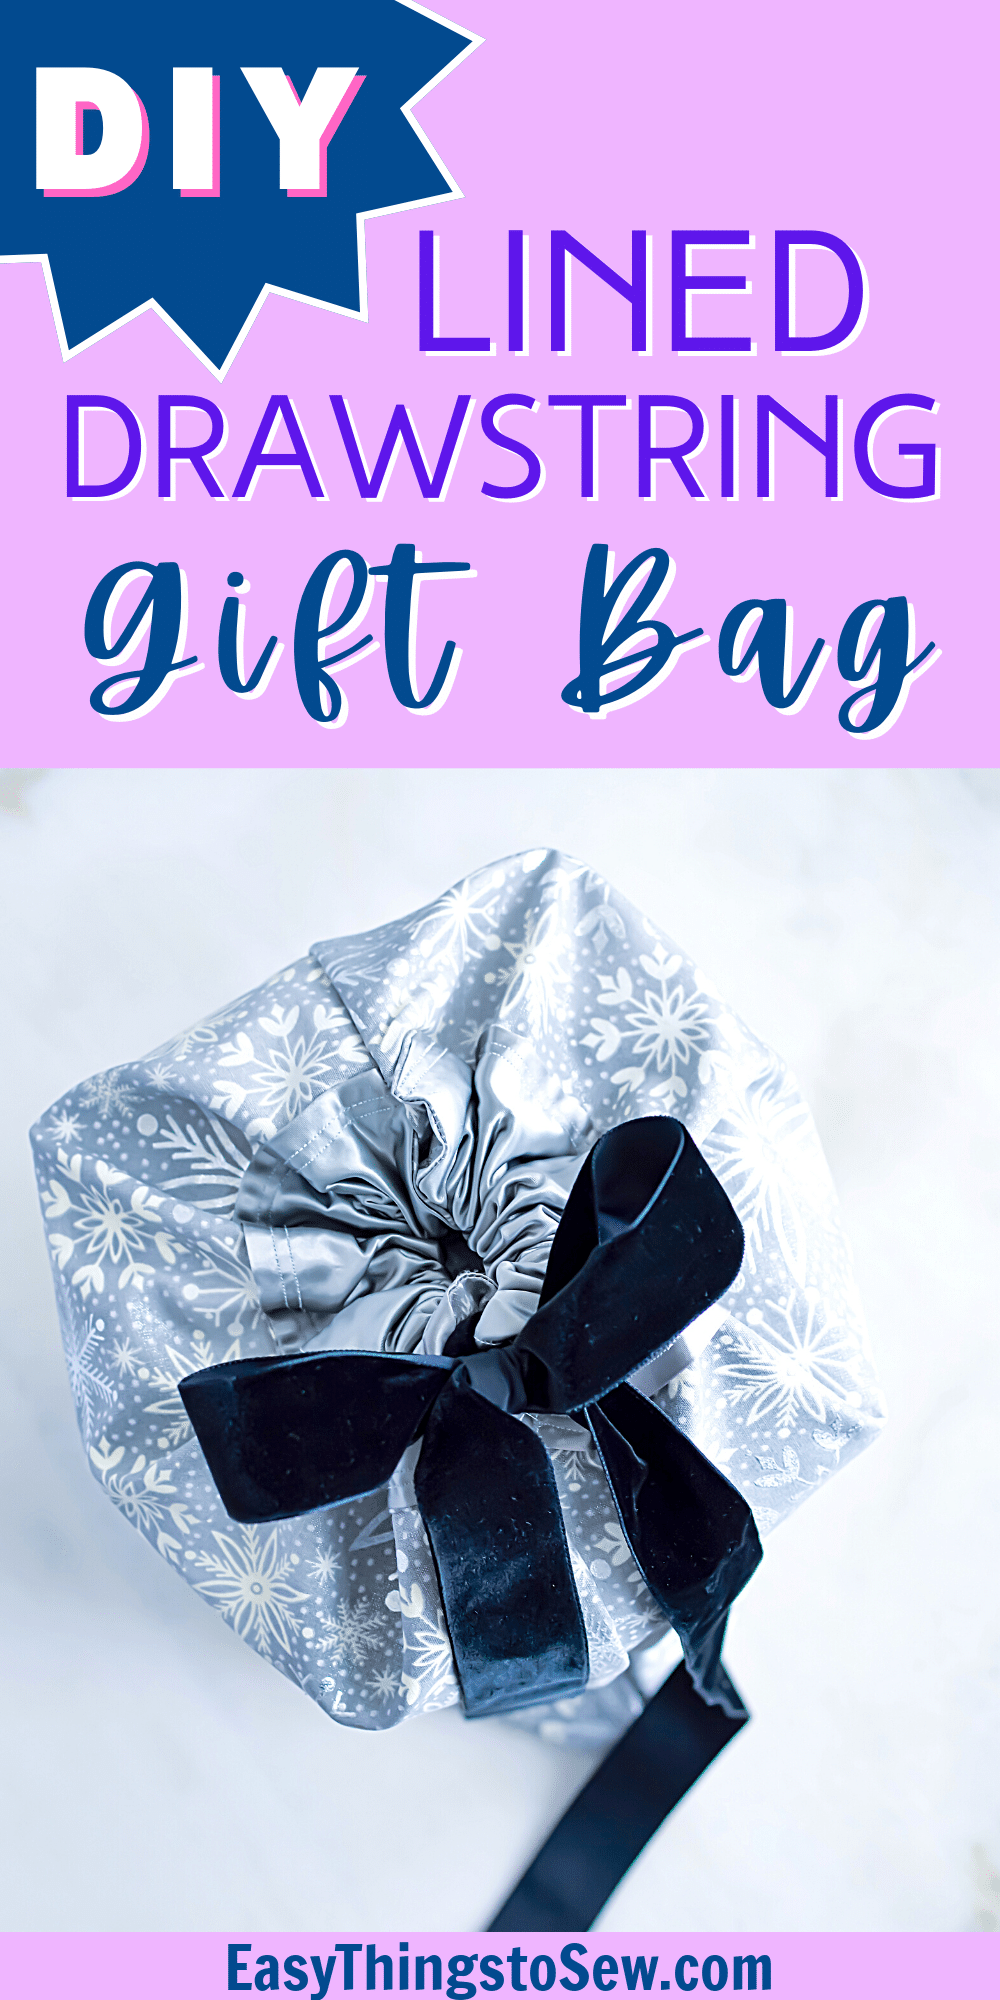
How to Make Lined Fabric Gift Bags with a Drawstring
Our instructions for how to make a lined fabric gift bag with a drawstring will help you create a beautiful gift wrap that will make your present stand out among the rest!

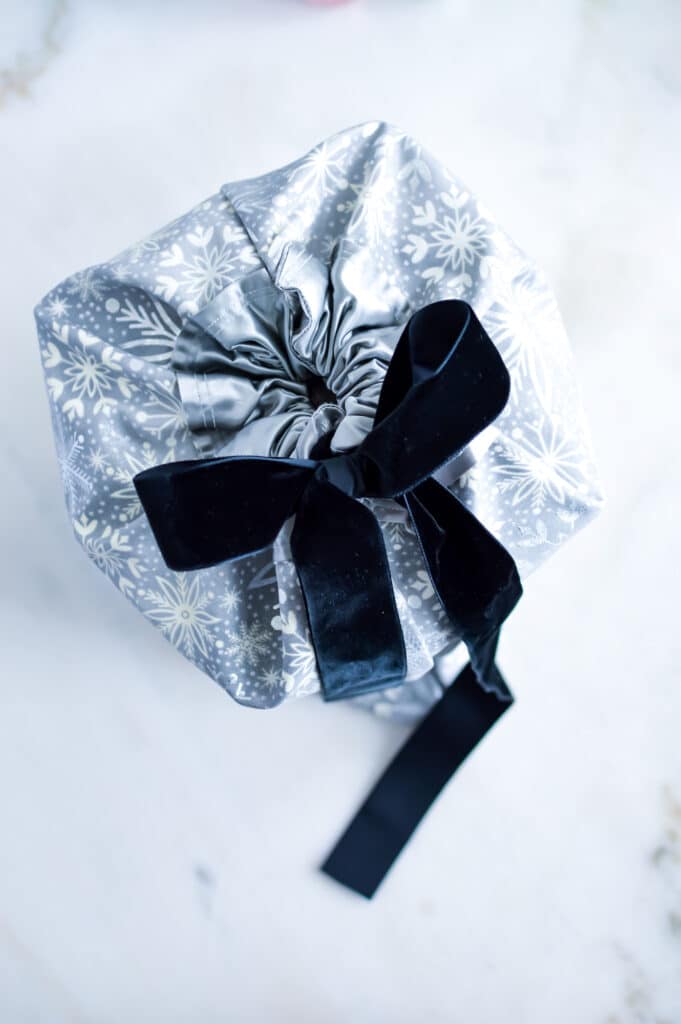
These reusable gift bags can be made with any color or pattern of fabric. While I made Christmas gift bags, you can choose colorful fabrics for birthdays, orange and black fabric for Halloween or pastels for Easter.
Unlike most handmade bags, these gift bags have a decorative liner inside. The inside will be just as beautiful as the outside, instead of seeing unfinished fabrics and rough seams like other DIY gift bags have.
Need more gift giving ideas? See our DIY gift card holder.
How to Sew a Drawstring Gift Bag
This sewing tutorial will make 4 drawstring gift bags.
Supplies
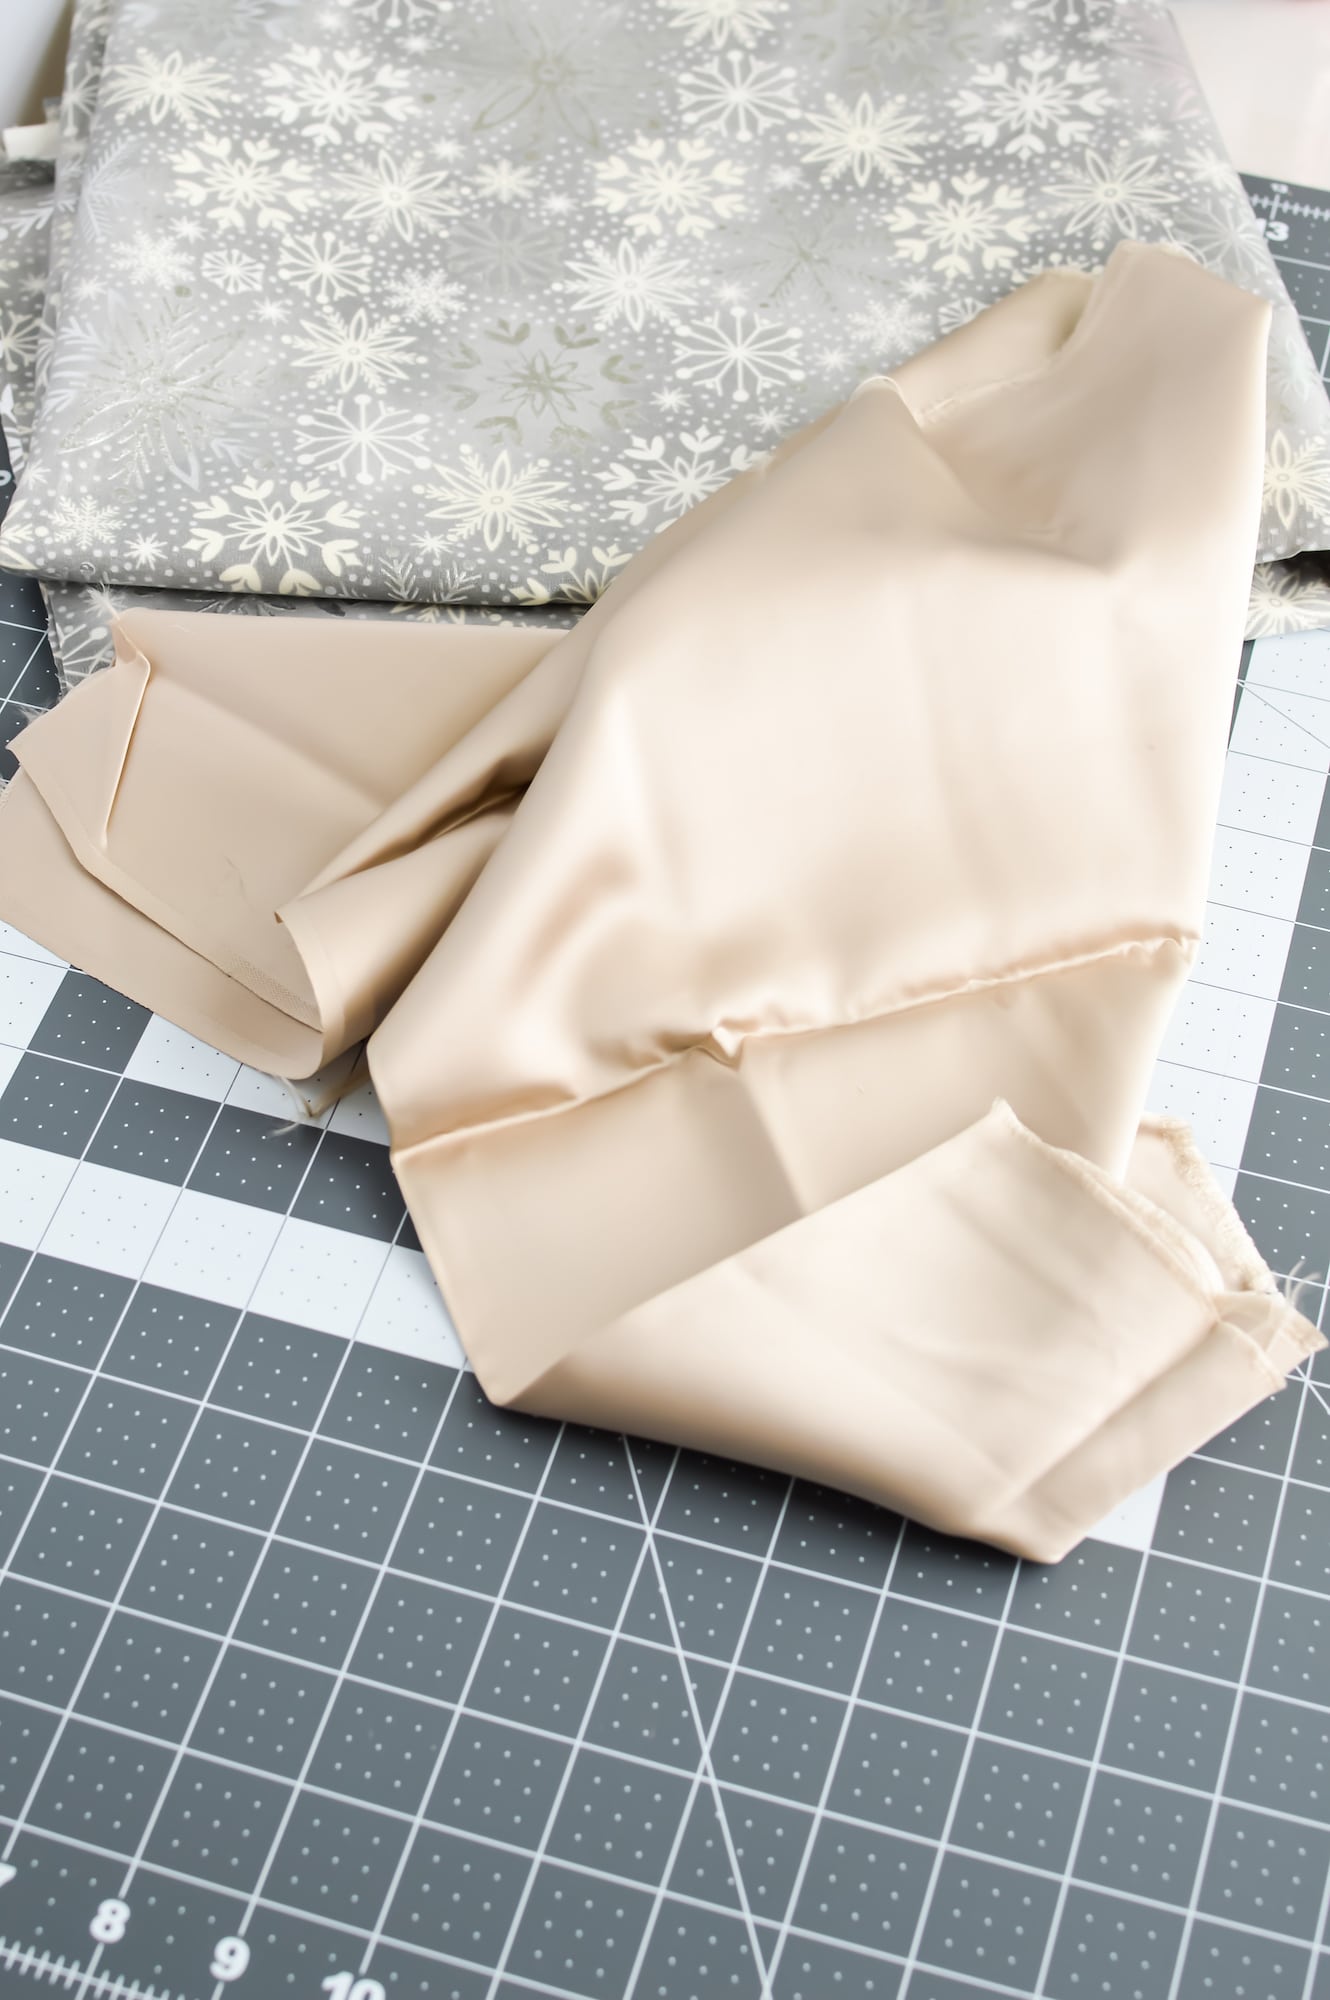
- 1 yard outer fabric
- 1 yard liner fabric
- Coordinating thread
- About 2 yards of ribbon, ideally 1 or 2 inch wide
- Sewing machine
- Scissors
- Pins or sewing clips
- Large safety pin
- Rotary cutter and mat (optional)
- Iron
- Fray check (optional)
Directions
Step 1
Iron the fabrics first, if needed.
Then, make sure that each of the fabrics is the same size.
Step 2
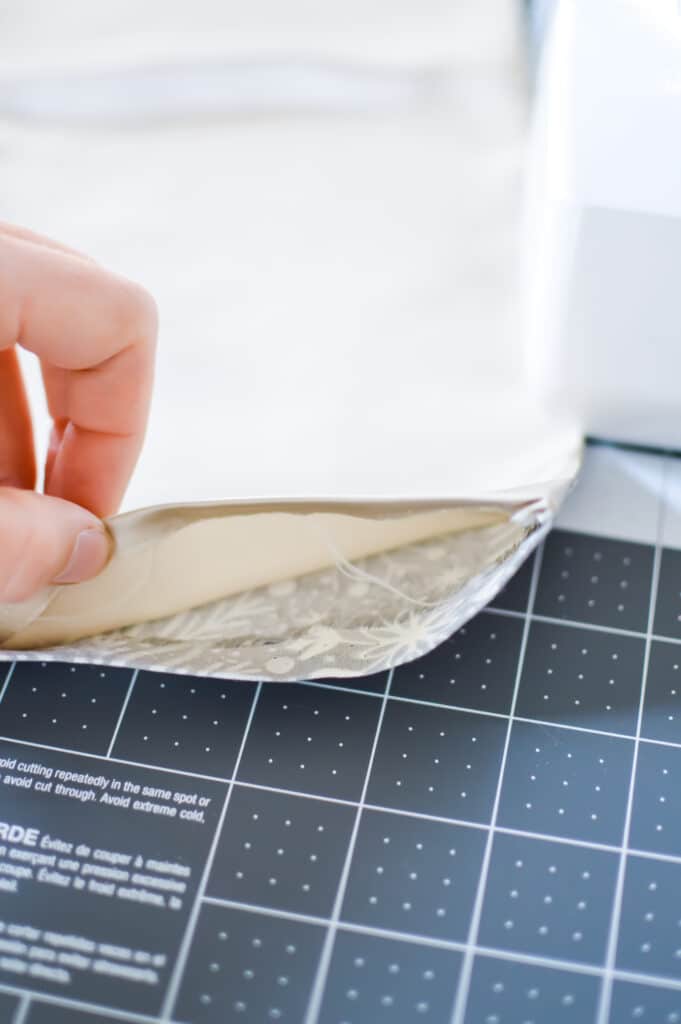
Place the fabrics, the liner and the outer fabric, with the right sides together.
I like to align the factory edges of the fabric with the rights sides together, if possible. That way I know that I have a straight edge on one side.
The factory edges usually have small holes in them or frayed edges as seen in the photo below.
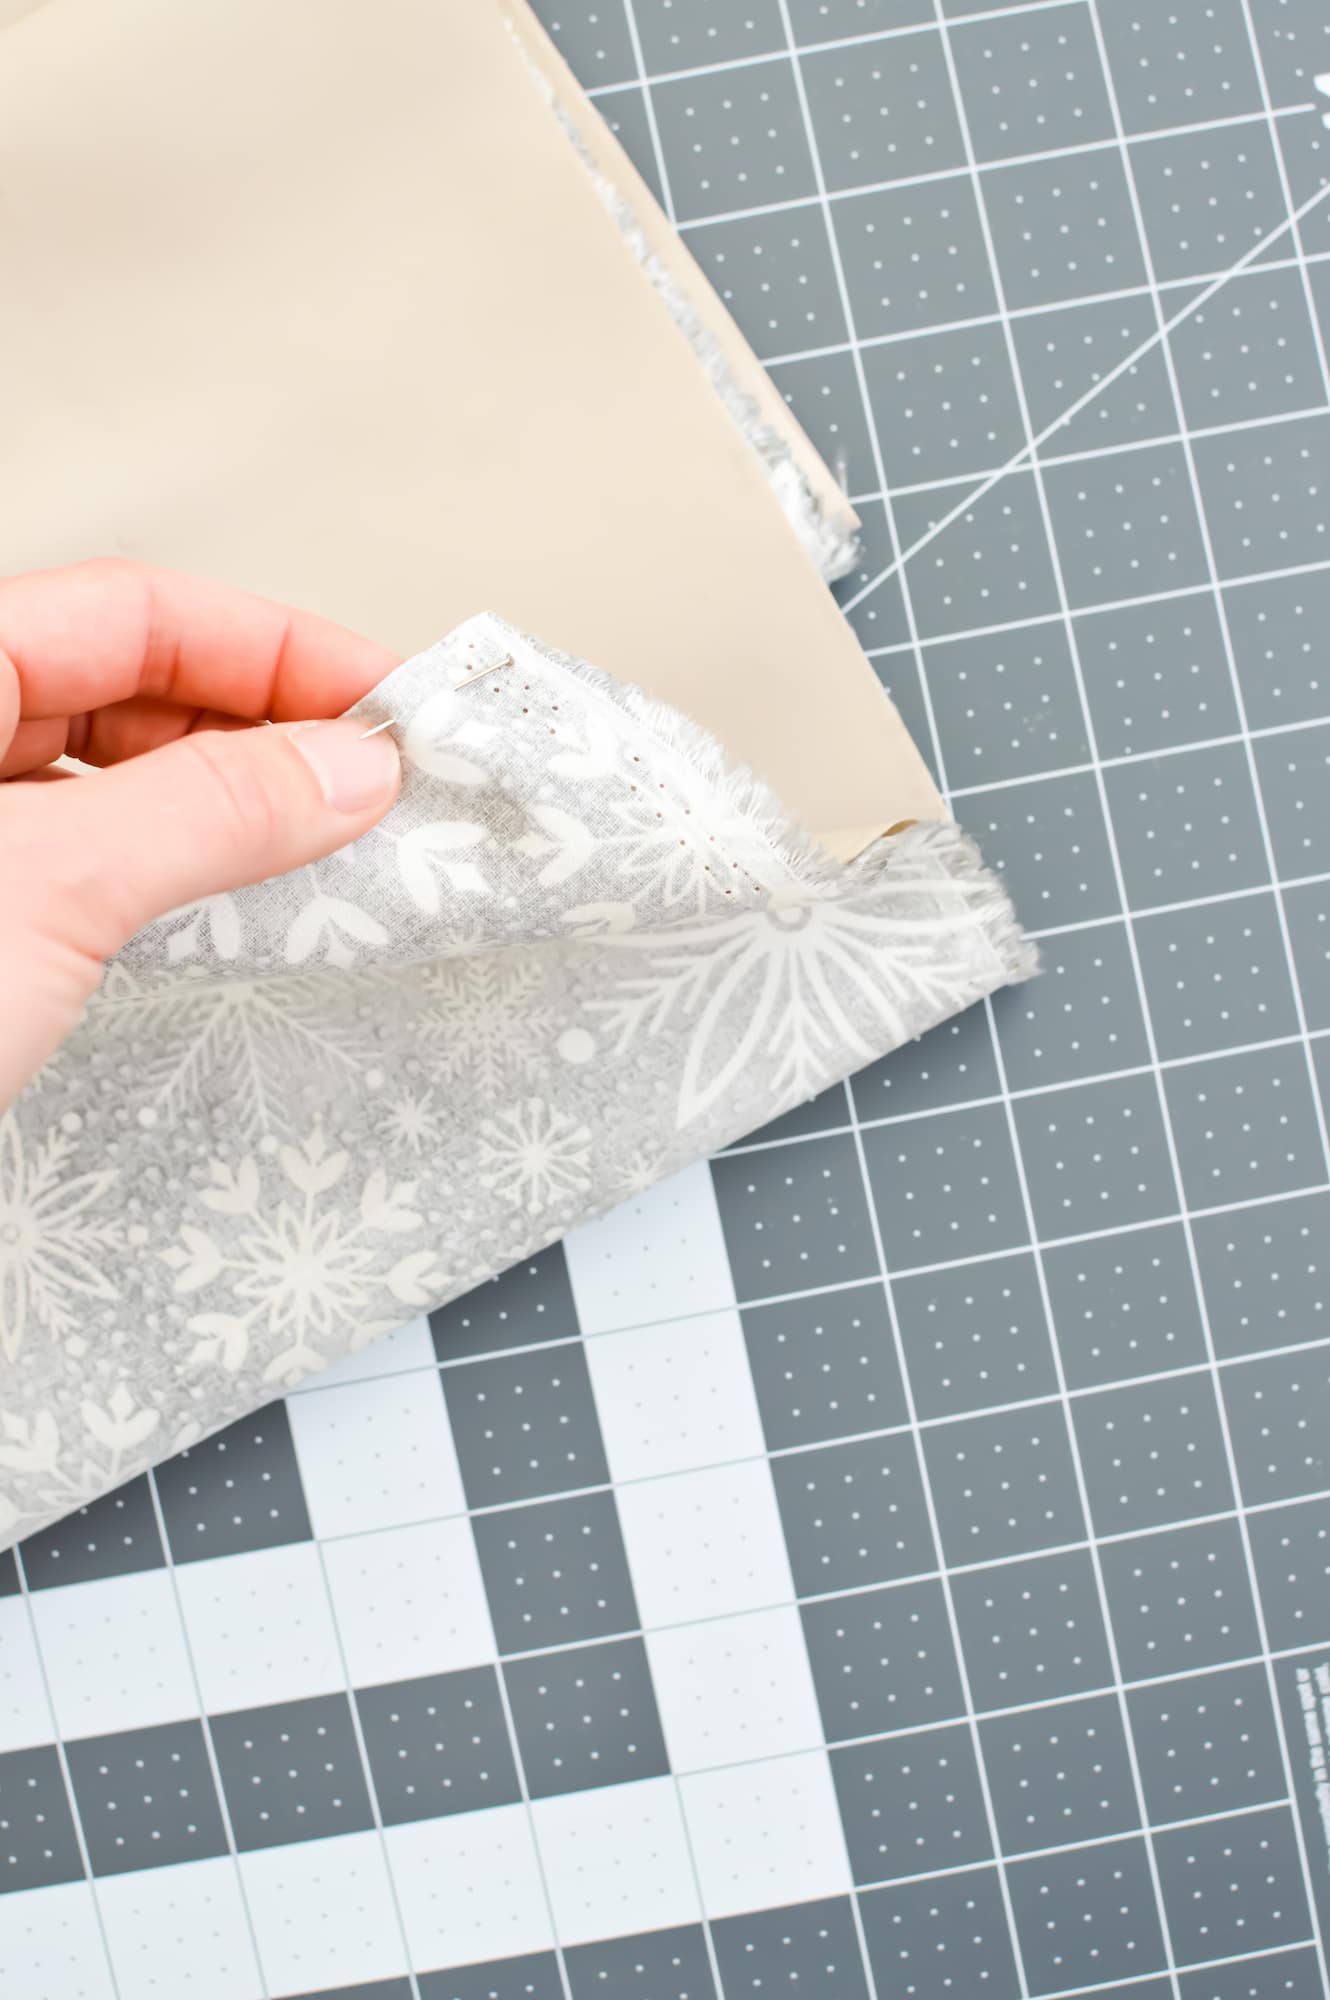
Pin together to keep straight, if needed.
Step 3
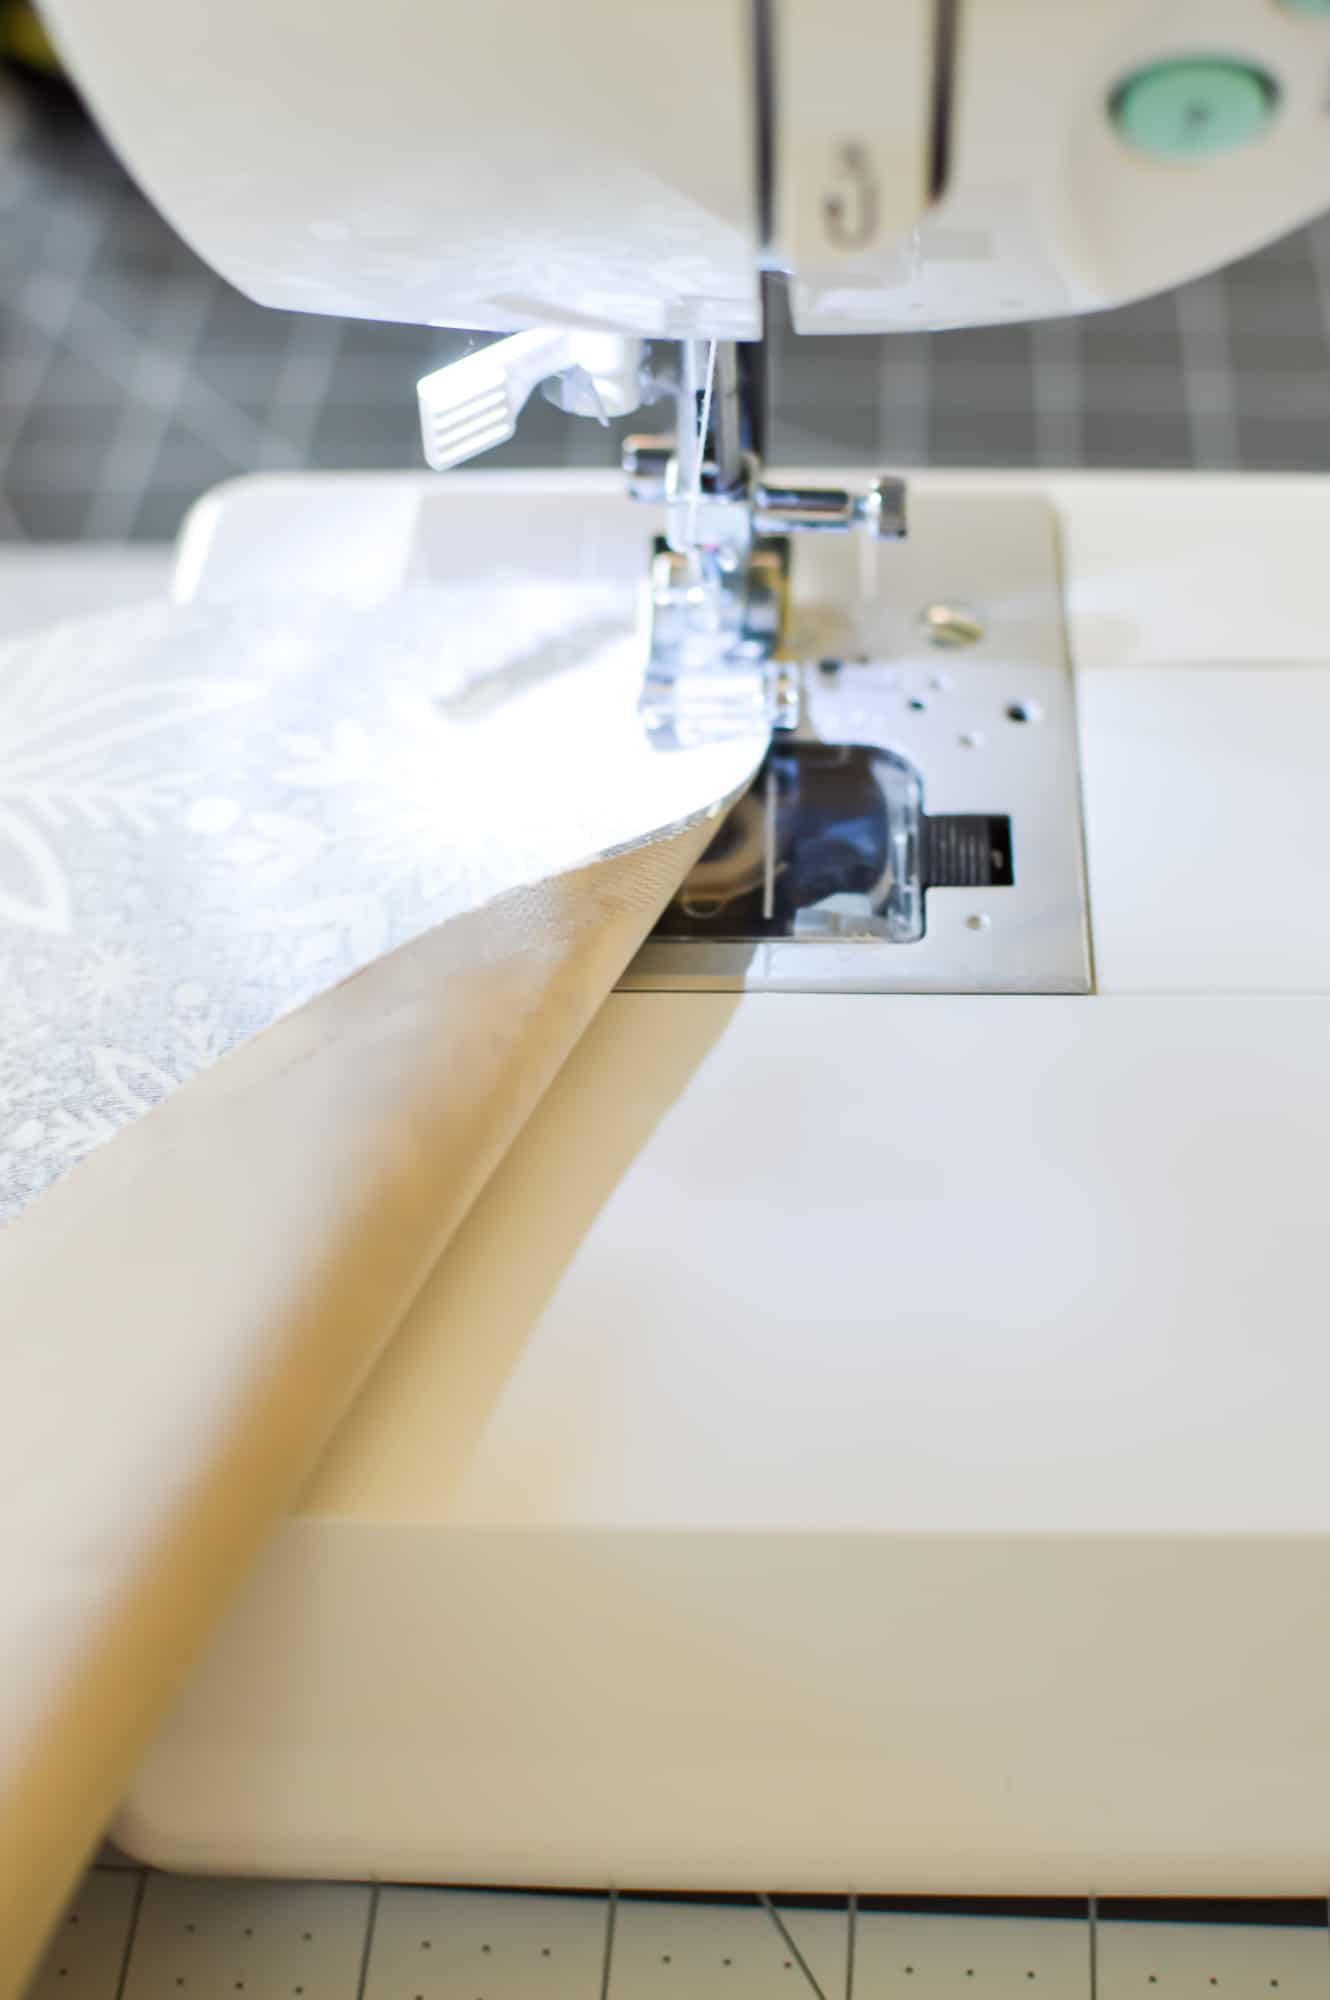
Using a simple straight stitch, sew along one of the long, wide sides.
I always follow with a zigzag stitch to add extra strength to the seams, but you don’t have to.

When you lay the yard of fabric out after sewing, you will have the outer fabric and the liner fabric joined together in one large rectangle that is a yard long.
Step 4
Now it is time to cut the fabric into four equal sections.
I decided to make four bags that are each the same size. Each was about 9 inches wide.
If you wanted to make wider or smaller bags, you can do that now.
Each of the four bags will have the bottom side sewn together after cutting.
With your cut pieces of fabric, pin the un-sewn sides together, leaving about a 3-inch opening on one of the long sides so you will be able to flip the bag right side out after sewing.
Step 5
Straight stitch all three of the seams around each of the bags.
If you would like, add a zigzag stitch on the sides for extra durability.
Step 6
Flip each of the bags right side out via the small opening.
You can use the tip of a chopstick or pencil to push out the corners to make them crisp, if needed.
Iron the seams to be flat.
Step 7
Fold in the edges of the 3-inch opening that you used for flipping the bag inside out. Make sure that they line up to be even with the rest of the seam.
Iron the edges down to stay flat.
You now have a long rectangle that is almost completely sewn closed (other than the 3-inch section) and the right sides are facing out.
Step 8
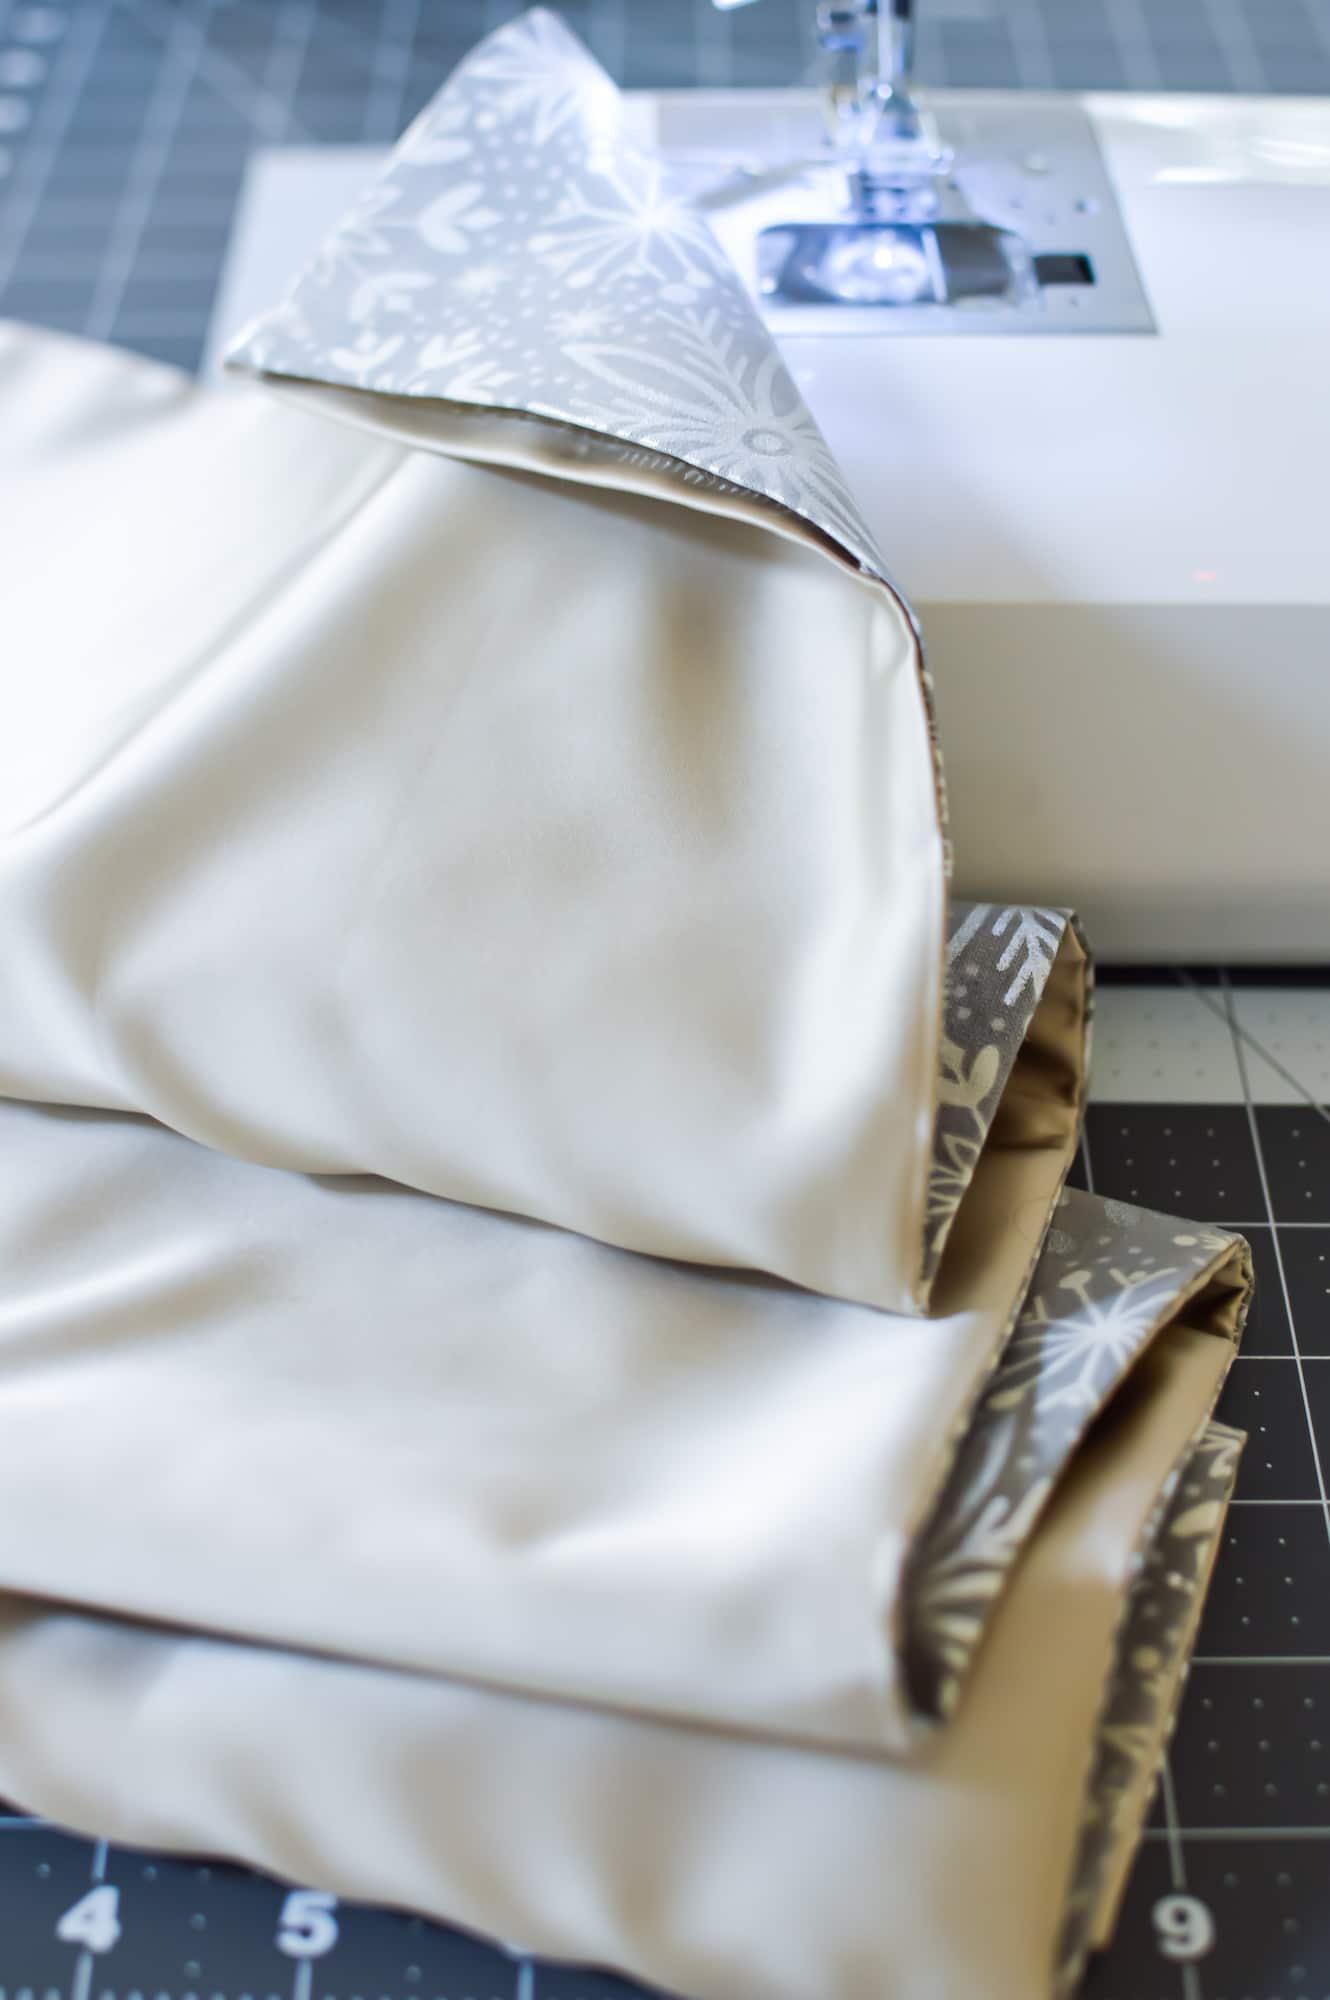
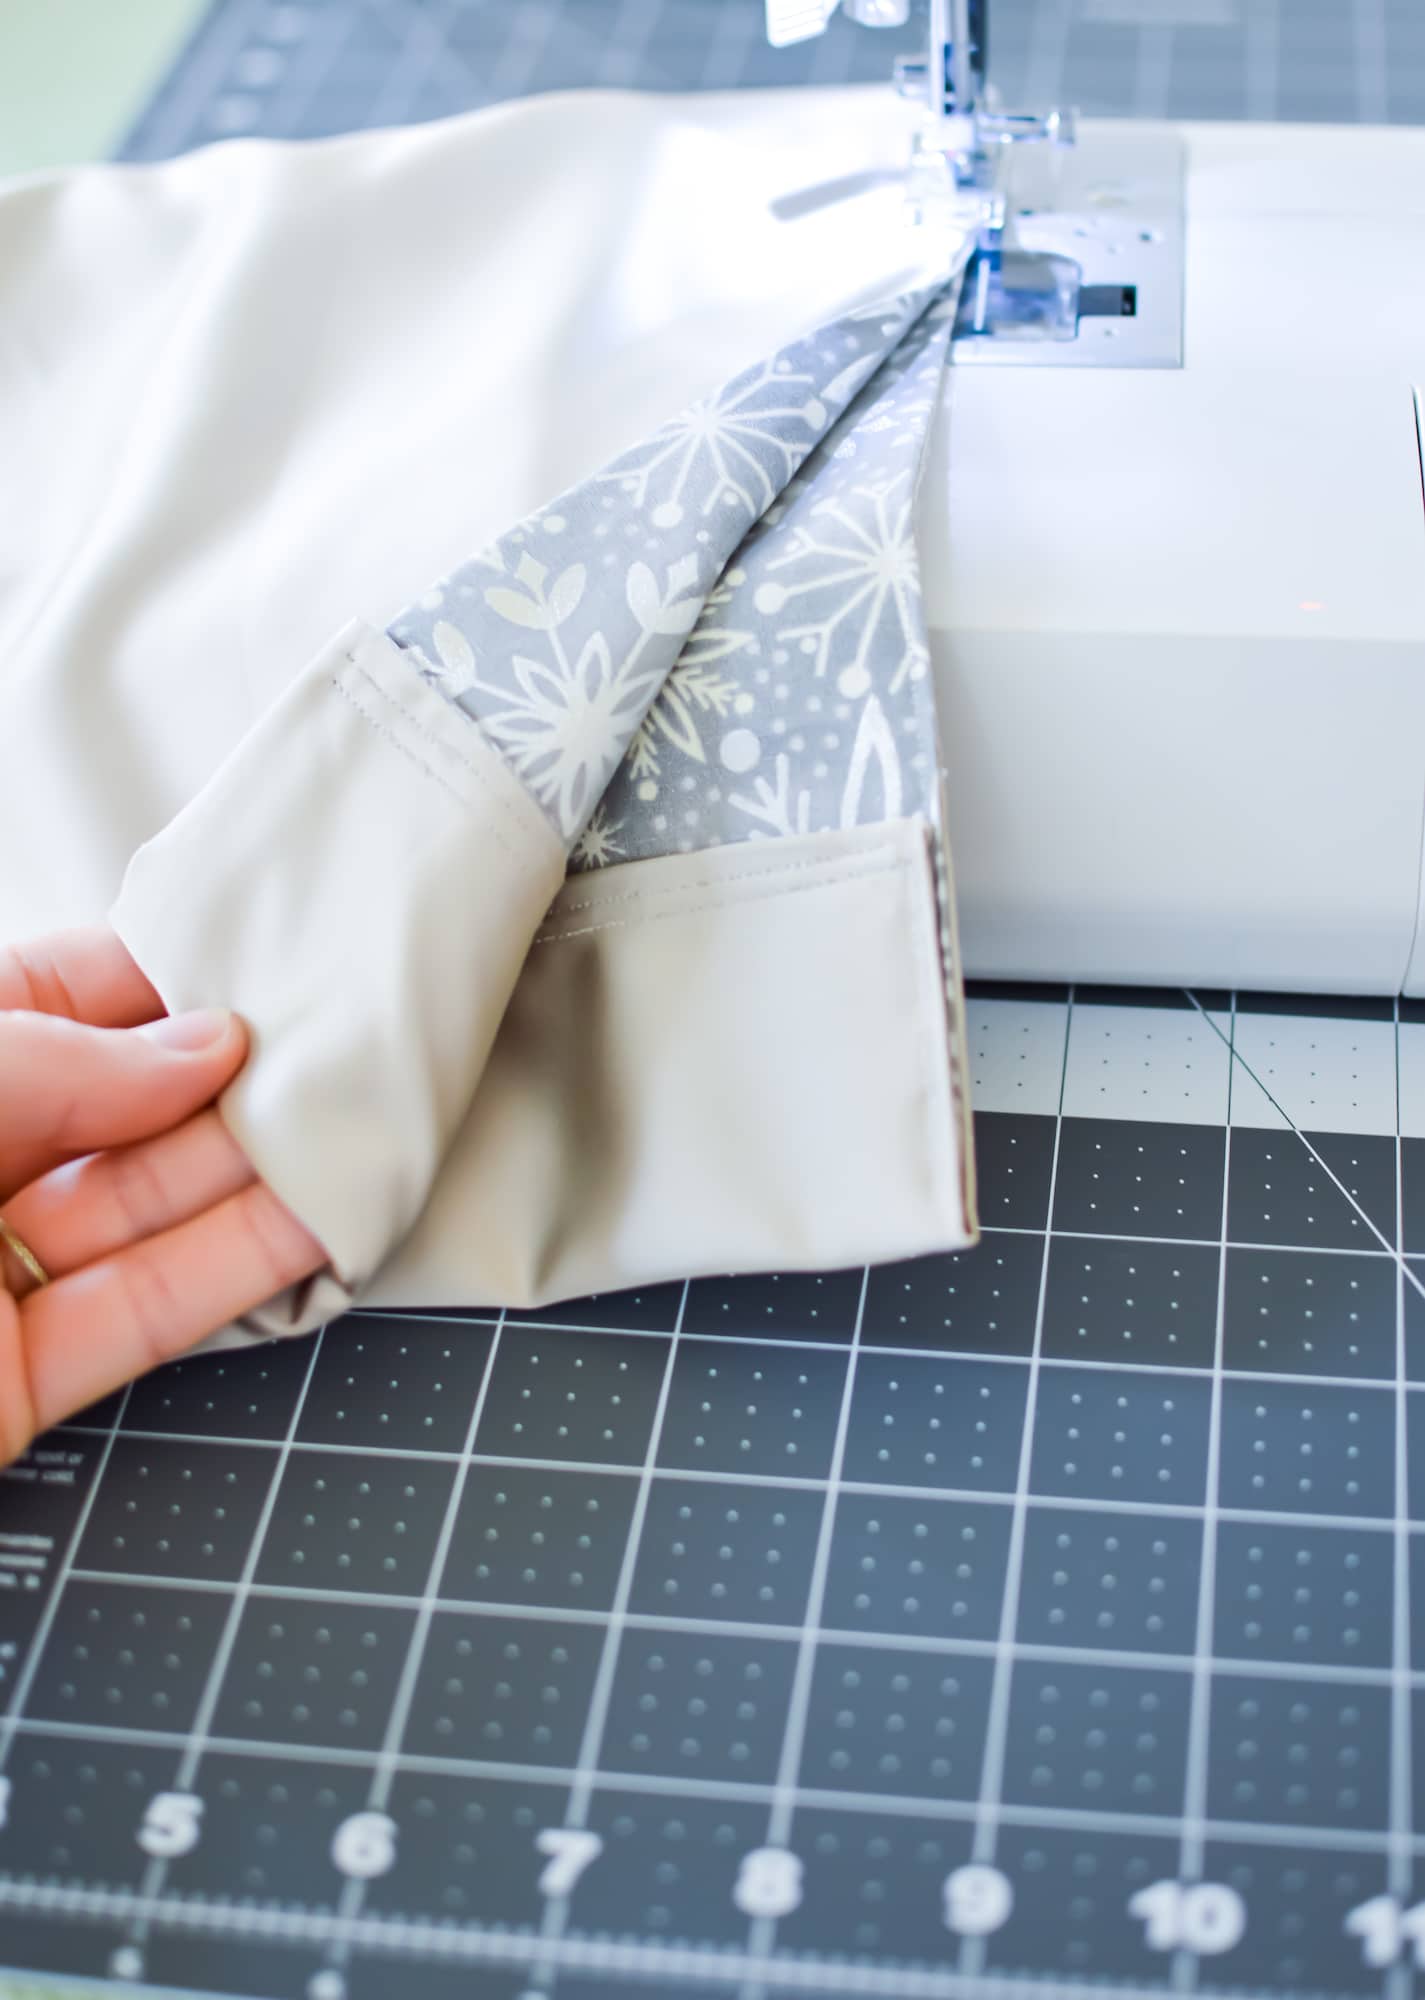
Place the fabric in front of you the long way. Fold the long side inward about 1.5 inches, just like you would fold down the top sheet of the bed. Be sure to fold the outer fabric under and not the liner fabric.
This folded part will be what the ribbon for the drawstring will go through.
Pin or clip the fold down on the fabric.
If you have wider ribbon, you can make a wider fold. If you are using thinner ribbon, you can adjust this fold to be more narrow.
Step 9
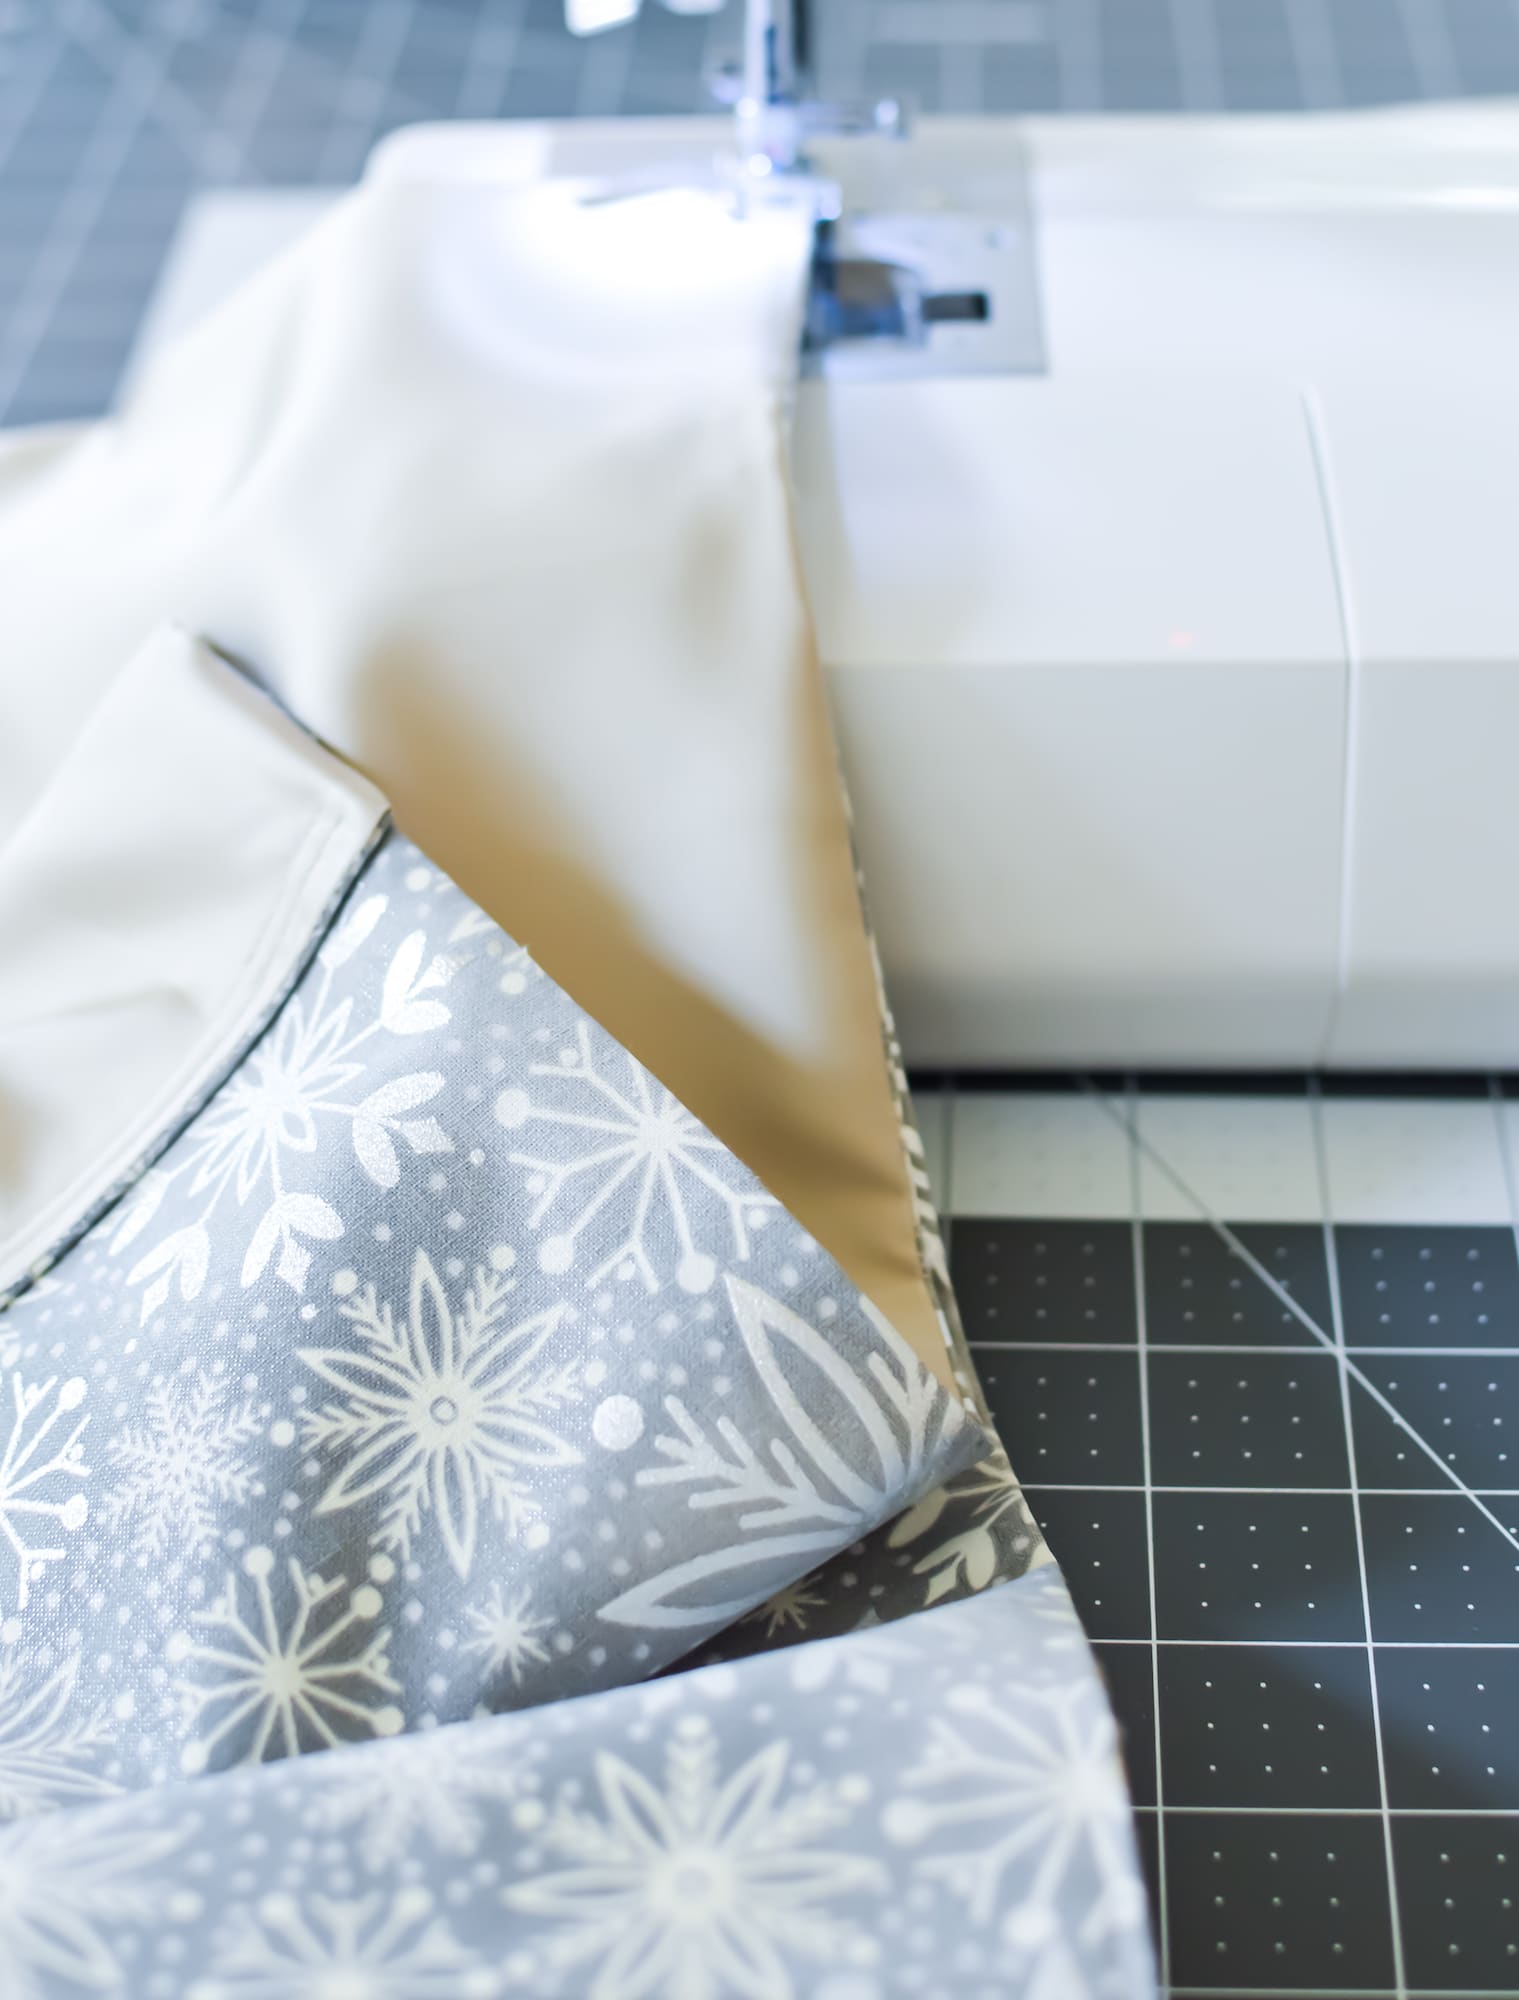
With the liner fabric folded over, sew along the edge of the fold on the bottom. Sew as close to the edge as possible to have enough room for the ribbon to go through the opening.
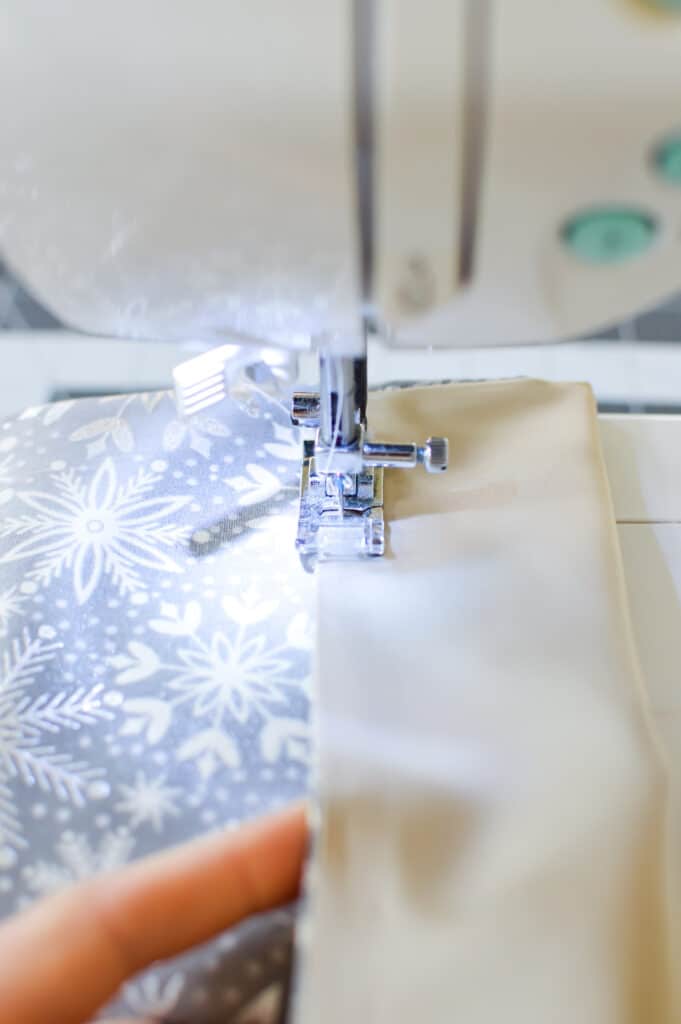
I sewed two straight lines on the edge to be decorative, but you can choose to sew just one.
Step 10
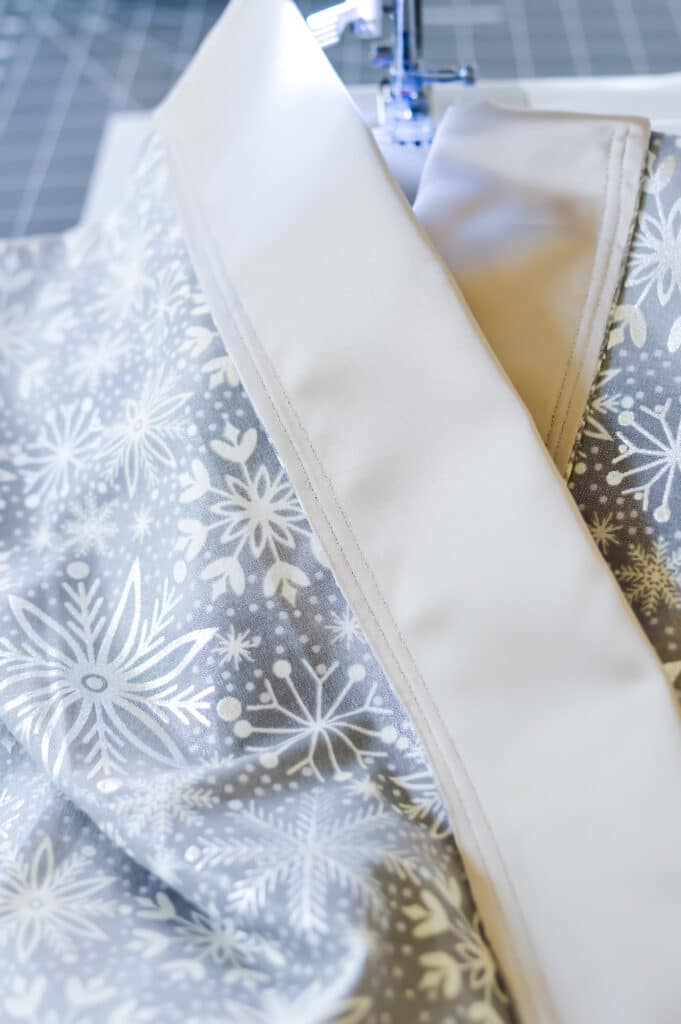
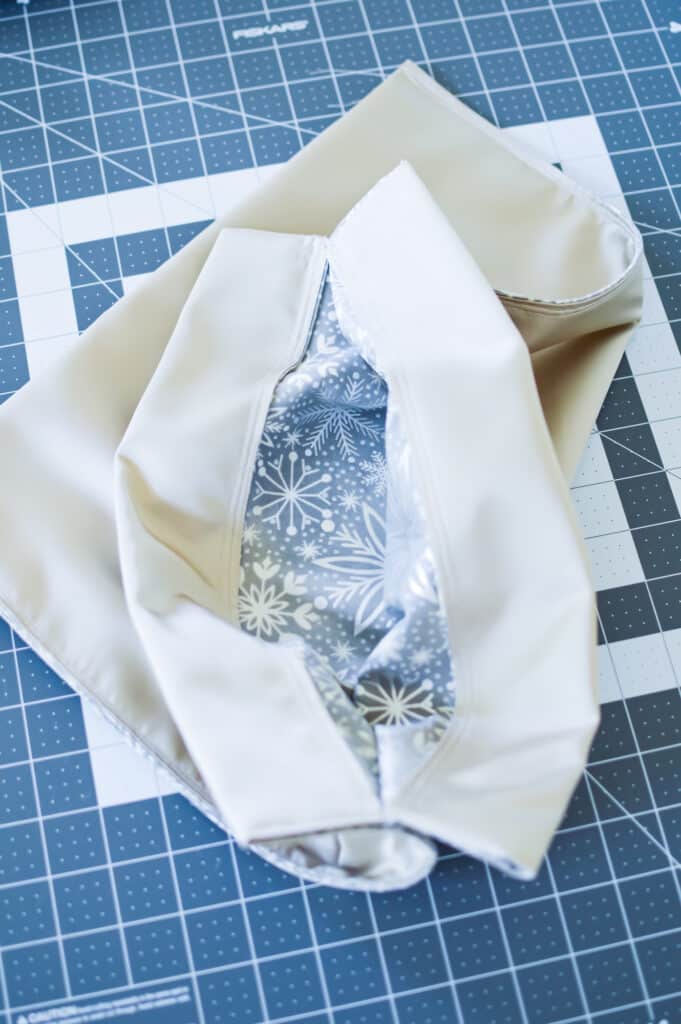
Fold the cloth in half, meeting the short sides together at the top. Have the primary fabric sides touching and the liner on the outside.
Align the edges from the folded top down. You need to leave a ½ inch below the bottom edge of the ribbon channel free and not sewn so that the bag will lay correctly.
Step 11
Pin the fabrics together. Then do another straight stitch down the long sides.
Step 12
Turn the bag right side out. Push out corners with the pointed chop stick or pencil again.
Step 13
Measure out your ribbon. You want it to be twice the length needed to go through the bag to make sure it stays in place and will not easily slip back into the bag.
Attach the safety pin to one end of the ribbon and feed it through the ribbon channel.
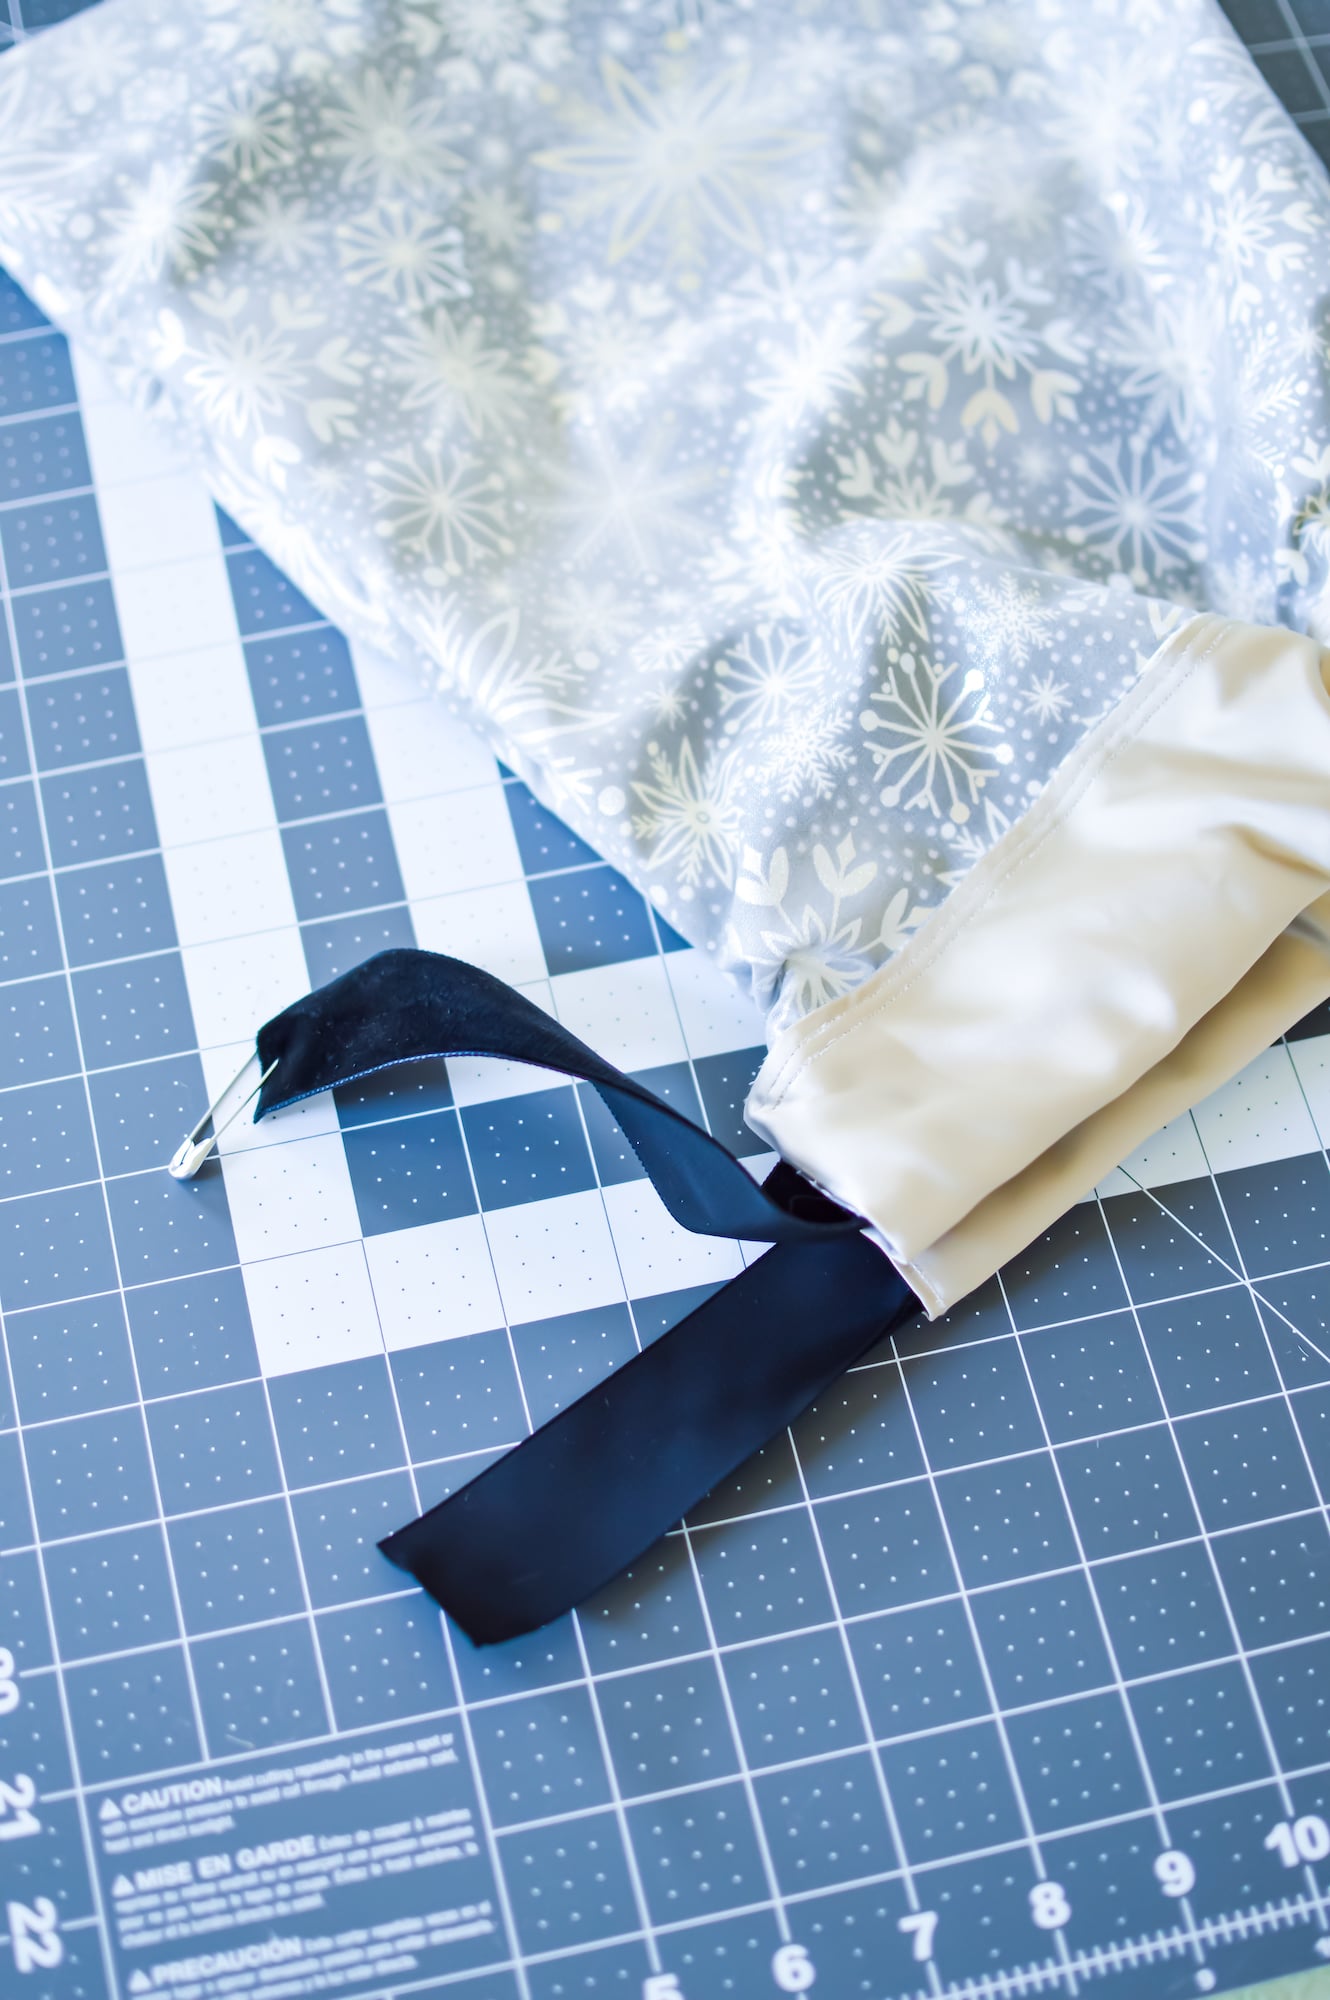
Remove the safety pin and cut a clean edge on both ends of the ribbon.
Step 14
If you want to make sure that the ends of the ribbon will not fray, you have a couple options.
You can sew the edges of the ribbon under with a very narrow seam if you would like.
Or you can use Fray Check liquid to apply to the ends of the ribbon to prevent fraying.
Helpful Tips for Sewing Reusable Gift Bags with a Liner
- I used thick, wide velvet ribbon for a fancy gift bag. The velvet works great with the bags because it slightly grabs the inside of the fabric channel.
- Sizes can be customized. While I made larger gift bags with a yard of fabric, you can use less fabric for smaller bags.
- Thinner ribbon requires a smaller channel. Otherwise, your ribbon will be lost inside a 1.5 inch channel for the drawstring.
Be sure to Pin This craft to save for later!
If you like making pretty gift bags with drawstrings, be sure to see these DIY bags, too:

This looks easier than the ones I have been making! Thanks
Thank you, Lynda!