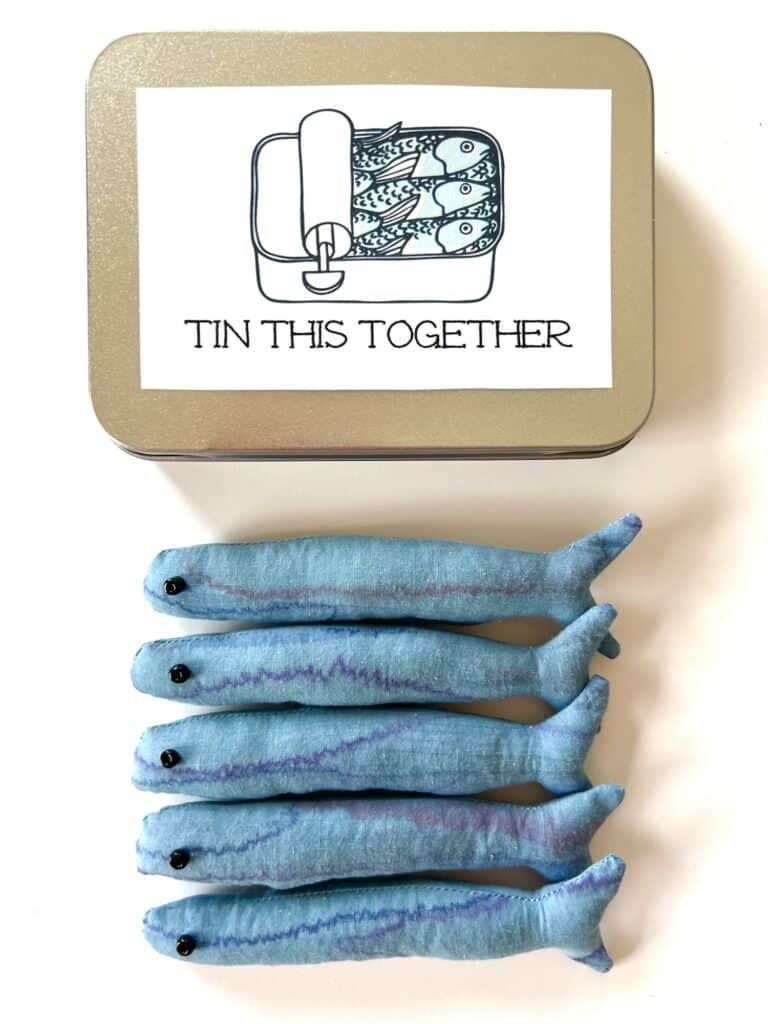
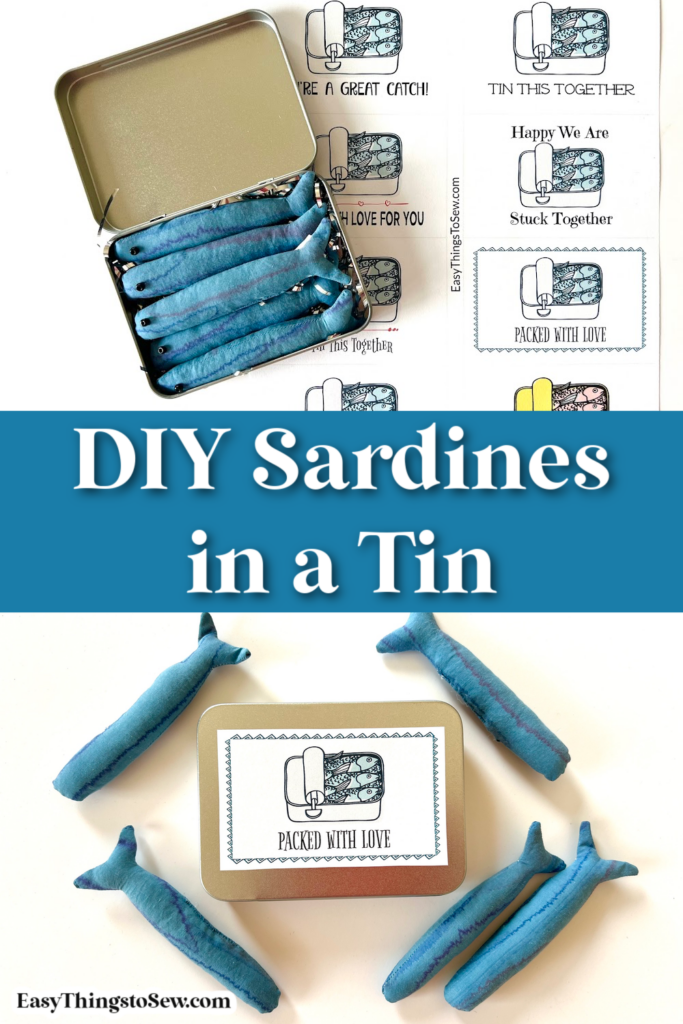
Sardines in a Tin
These plush sardines in a tin are a funny and unique way to show someone you care about them! Our sardine plushies can be sewn in an hour or less, plus we have free labels to download to put on the sardine tin.
This is a great sewing project for Valentines Day, an anniversary or any time you want to make a handmade gift for a boyfriend, husband, spouse or significant other.
While this DIY project can be just a little bit fussy with the small size and turning out small pattern pieces, it does make a heartfelt gift that they will laugh about and cherish!
I chose a blue fabric that reminded me of the ocean. You can choose to make all of the stuffed fish in one fabric, or mix and match.
Our sewing pattern is designed for a metal hinged box with the dimensions shown in the supplies list below. There are a variety of sizes of metal tins, so be sure to use the right size.
If you prefer a printer-friendly, ad-free tutorial, purchase our optional Sardines Sewing Pattern Ebook with the full instructions and photos, pattern template as well as four more BONUS labels.
DIY Sardine Plushies in a Tin
Supplies
- Sardines Pattern and Printable Labels
- Fabric (I used a strip 5″ X 34″)
- Matching Thread (I used white thread to show the stitching and feel it was showing along the seams. Be sure to use a matching color.)
- Pen, tailor’s chalk or tracing pen
- Turning tool
- Poly-Fil or other stuffing material
- Hand needle
- Metal hinged tin box (4.5 in X 3.3 in X .9 in)
- Sheet of printer paper or sticker paper
- Double-sided tape (if using printer paper)
- Embroidery scissors (optional)
- Small black buttons, giant seed beads, black felt circles or black embroidery thread (optional)
Embroidery scissors can be really helpful with this craft because their tiny points can easily do the snipping needed in Step 3. However, if you don’t own a pair of these sewing scissors, you can still snip the curves.
Directions
Step 1
Download, print and cut out the free sardine template.
Trace the template on fabric, cutting out two sardine pieces for each plushie.
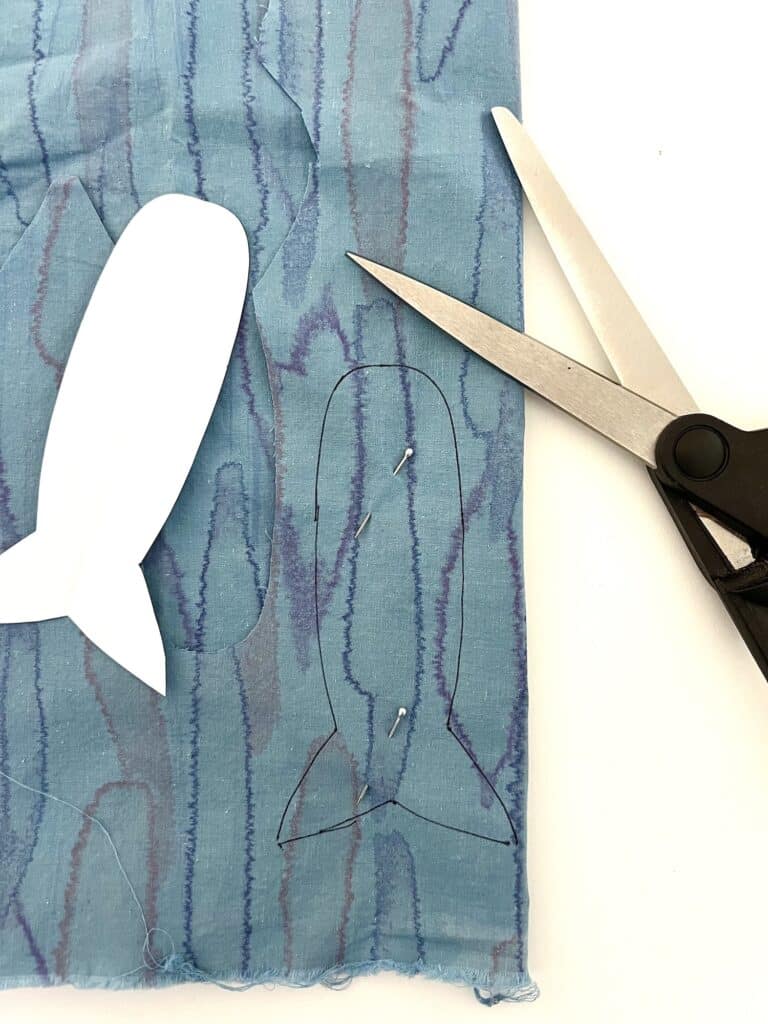
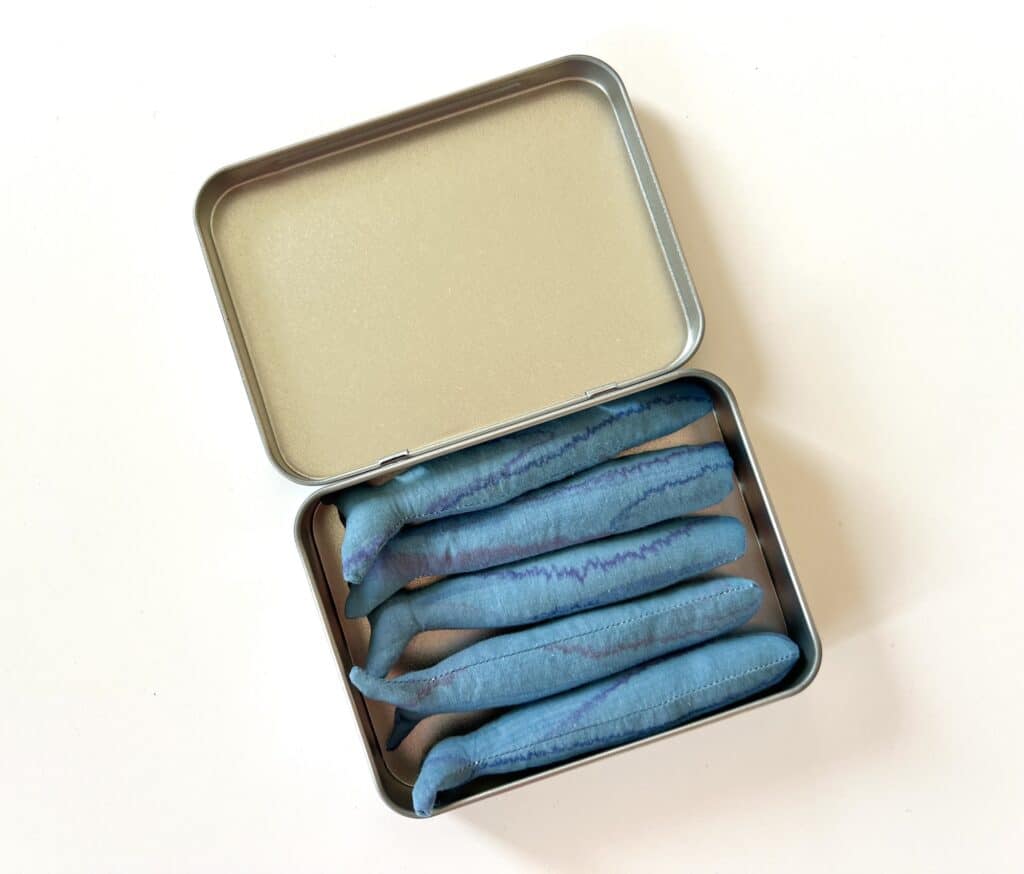
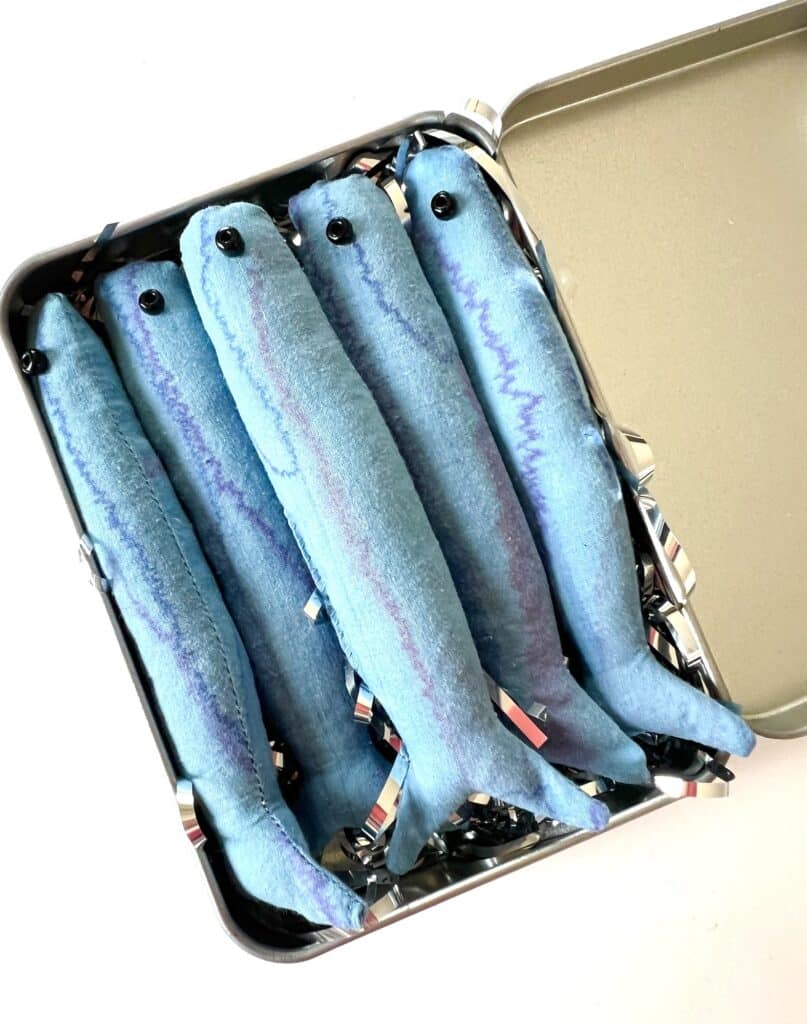
Our pattern piece is perfect to make 5 sardines for this size can, so you would want to cut out 10 pattern pieces in total.
You could probably get away with only 4 sardines in the tin, but it looks better with five!
Step 2
Place pattern pieces right sides together and wrong sides facing out. Pin the fabric in place.
Bring the patterns to the sewing machine and stitch around the pattern using a ¼ inch seam allowance, leaving a two inch gap on one of the long sides of the sardine body.
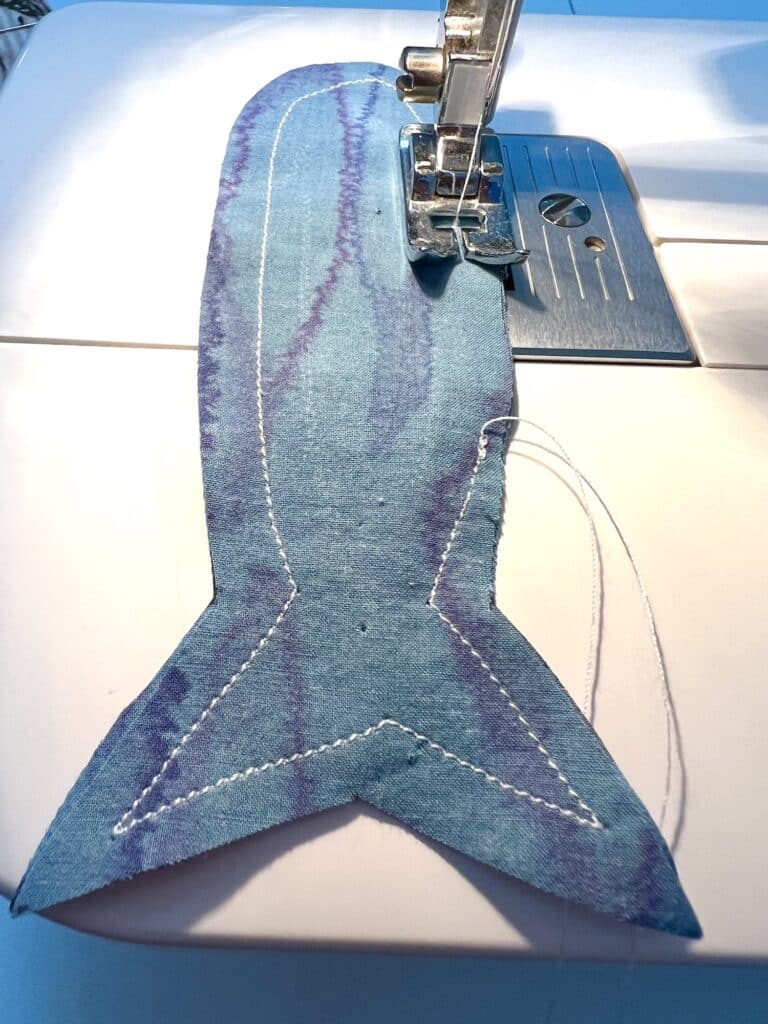
Be sure to backstitch at the beginning and the end of your stitching because you will be tugging on these seams.
Helpful Tips:
- Do not use more than a ¼ inch seam allowance! In fact, if you could use a little bit less, that would be even better.
- You will need to pick up the presser foot and pivot the fabric quite frequently while sewing because of the curve of the head and the shape of the tail.
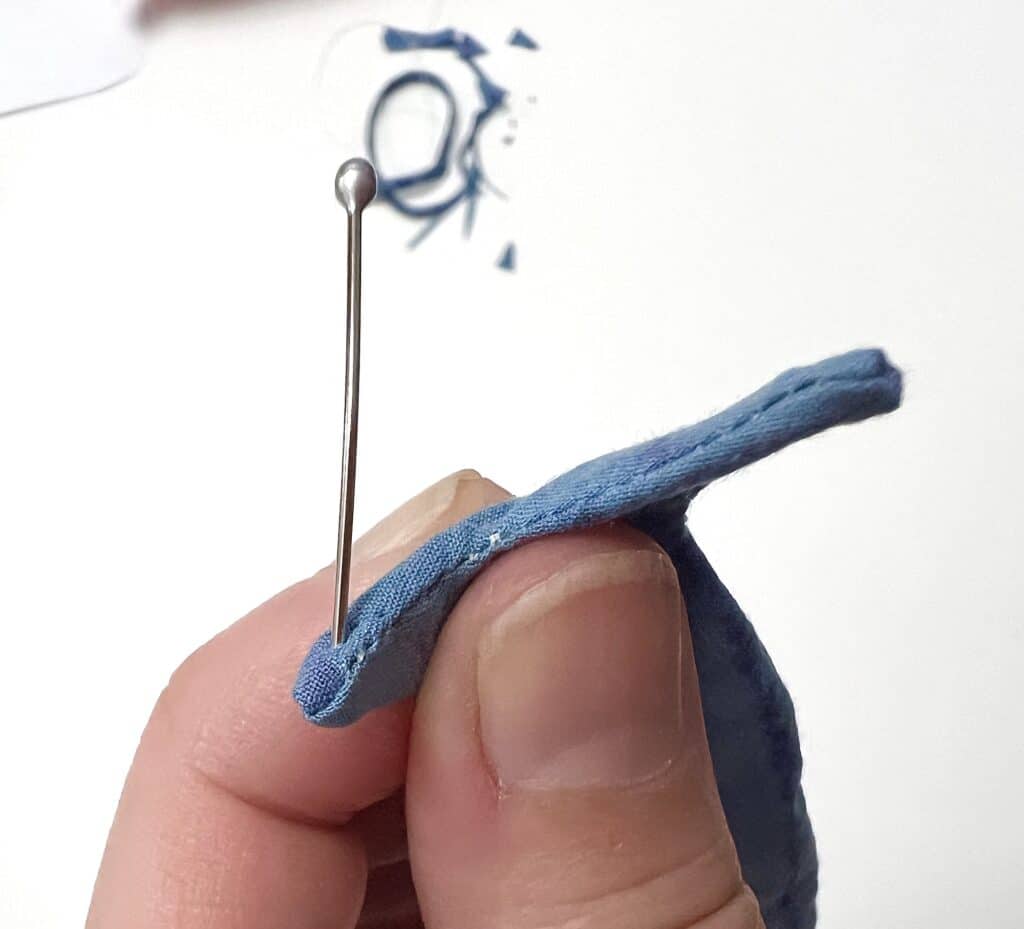
Step 3
Trim the seam allowance if needed so that it is not too bulky when you turn it out later in Step 4, however do NOT trim the seam allowance at the opening because you will need to sew it shut later.
Clip around the curve of the head by doing small snips in the seam allowance, but be sure NOT to cut the seam.
Clip or cut out notches in the corners of the sardine tail.
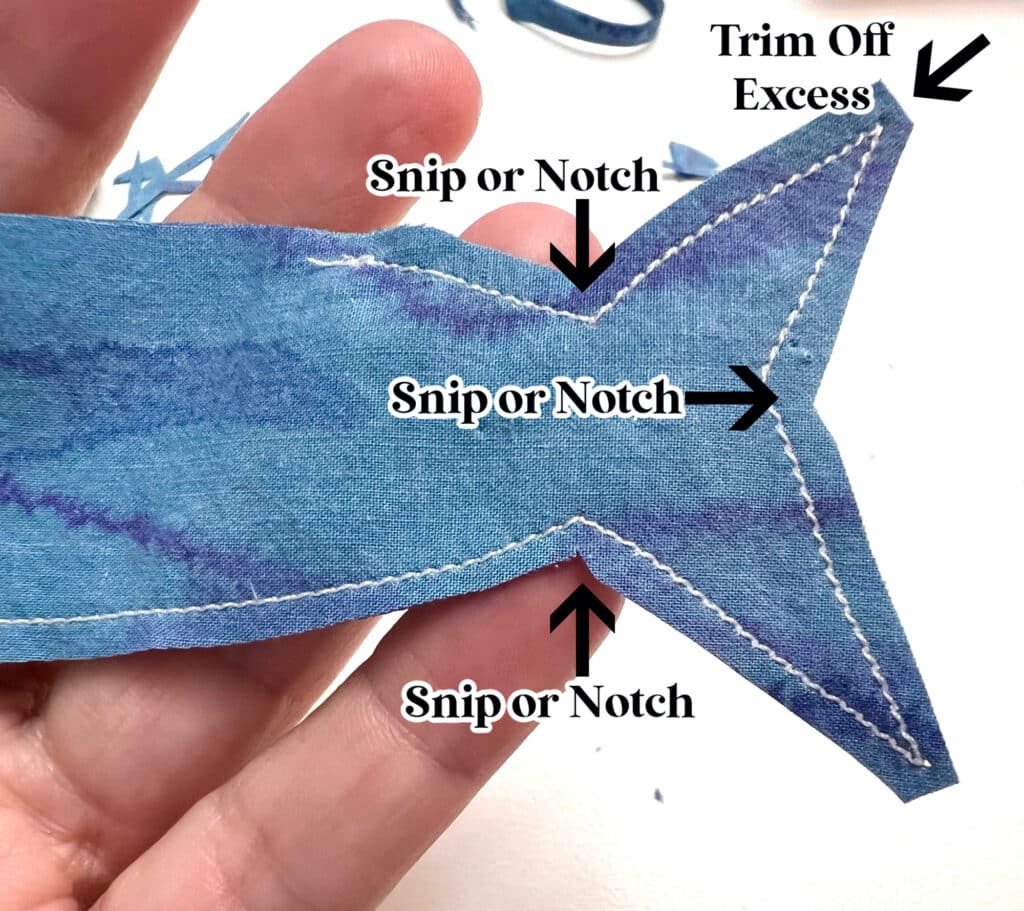
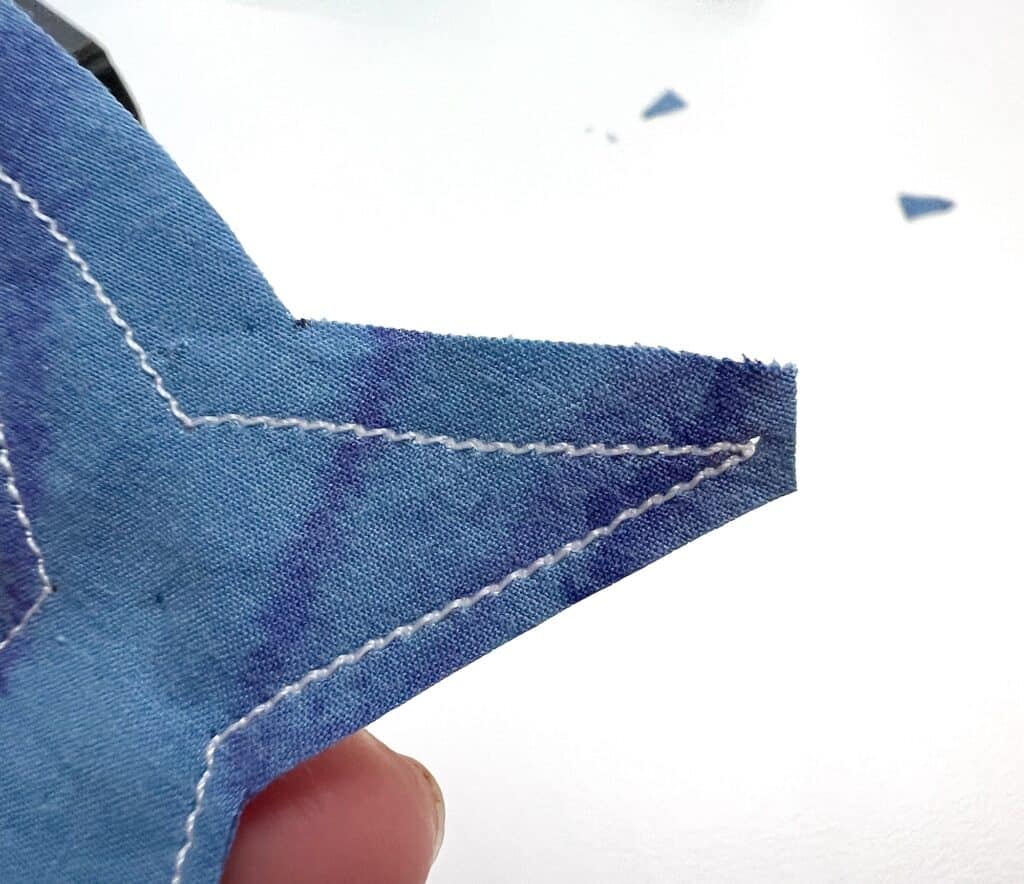
Clipping and notching will allow the shape of the sardine fish to turn out more easily without puckering or bunching.
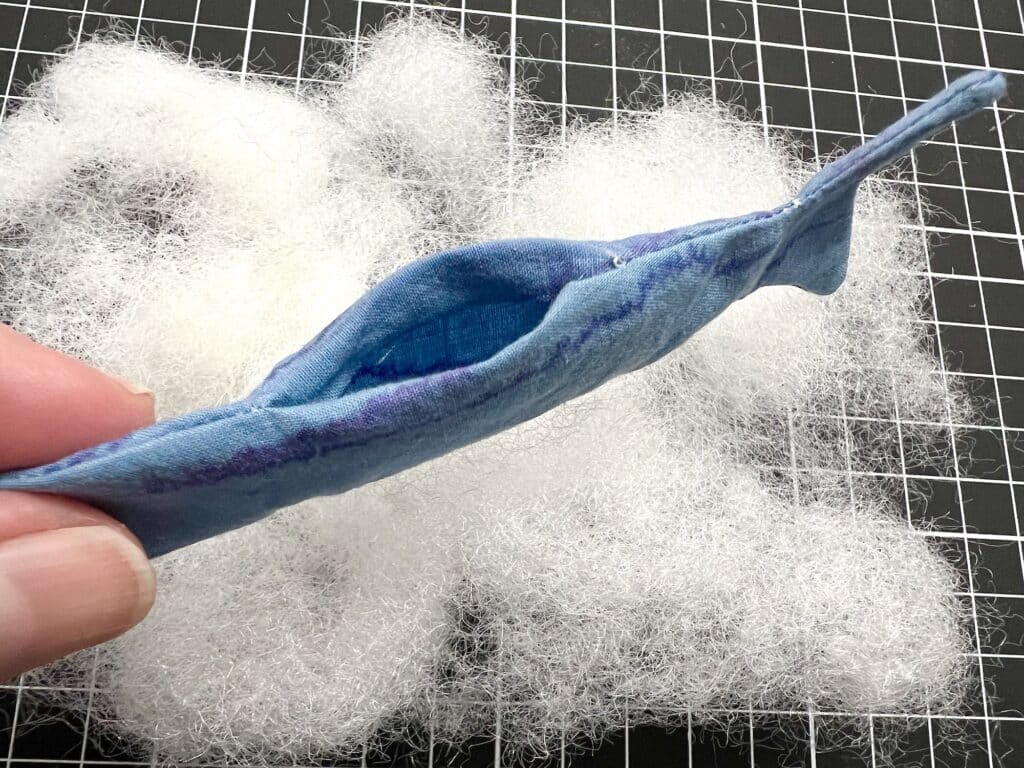
Step 4
Turn the sardine inside out. You will need a turning tool to push out the head shape and the points of the tail.

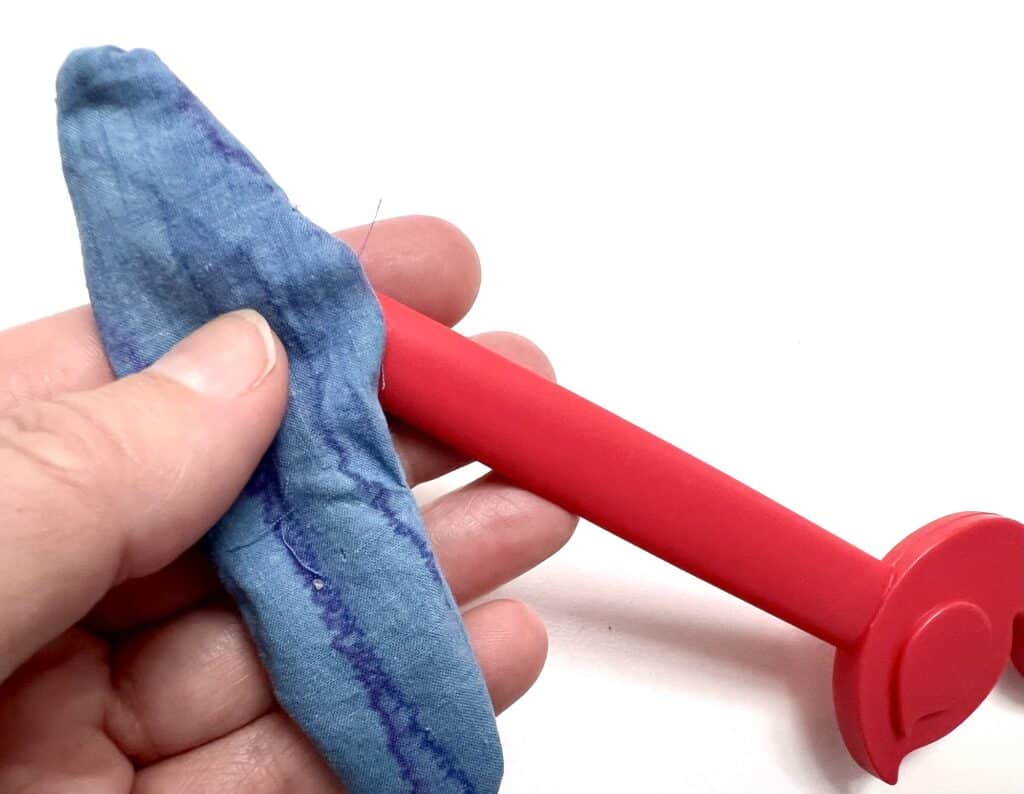
The ends of the tail can be really difficult to push out if you don’t have a very thin pointed turning tool.
I have found that inserting a pin into the fabric at the corner and kind of picking or pulling the fabric out has been one of the best ways to get that corner edge sharp.
Step 5
Add Polyfill or other stuffing into the sardine plushie.
Use a turning tool or the end of a knitting needle or chopstick to get some of the stuffing into the fish tail (it does not need to be completely stuffed, though).
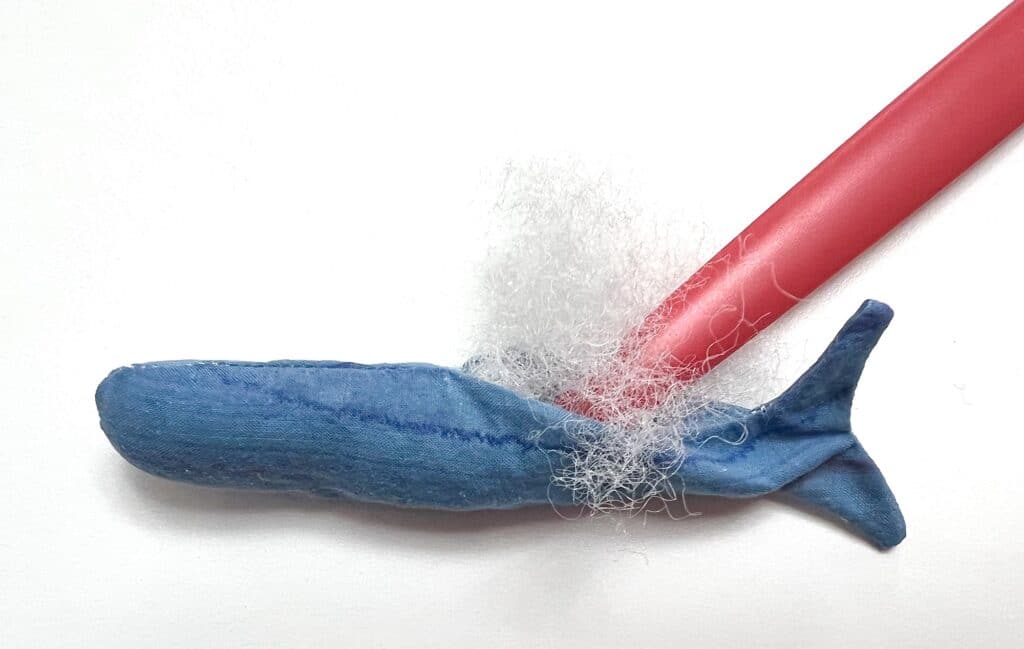
Stuff the fish until it is a softness or firmness that you prefer.
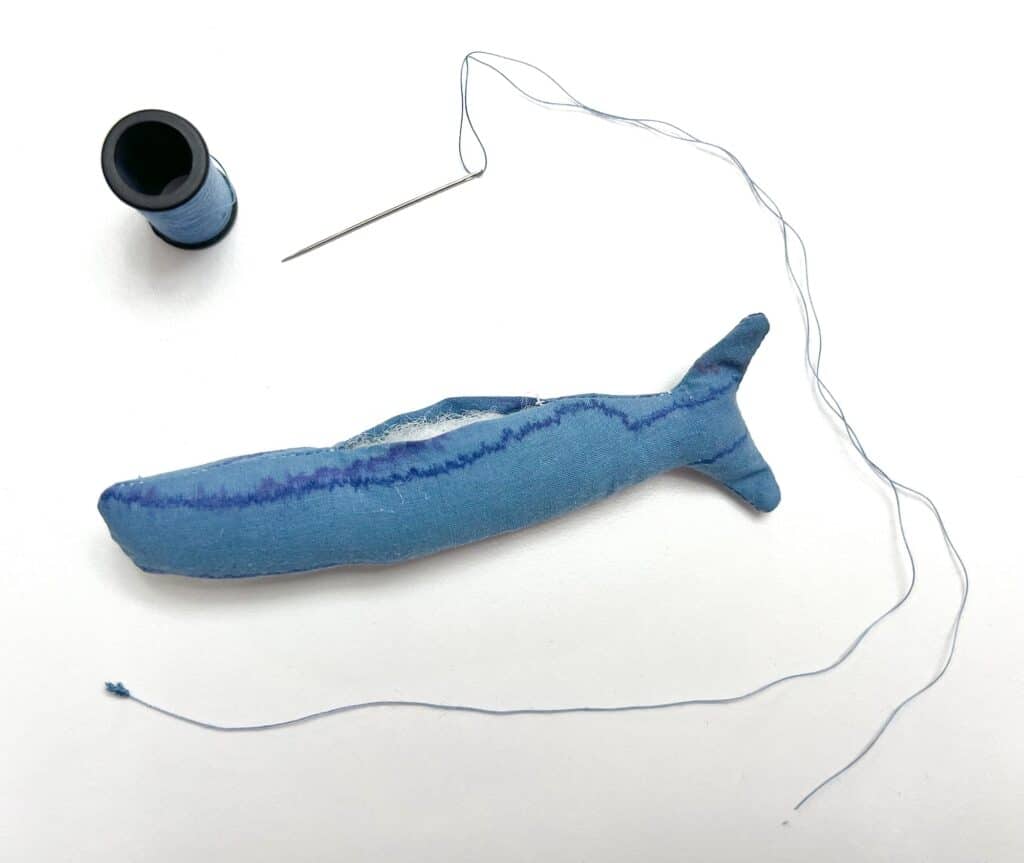
Step 6
Close the seam gap by folding the fabric under to match the seam, pin it together, and then hand stitch the seam closed using a matching color of thread.
A ladder stitch would be ideal so that the stitches do not show. However, you can use any type of basic straight stitch to close the seam.
Step 7 (Optional)
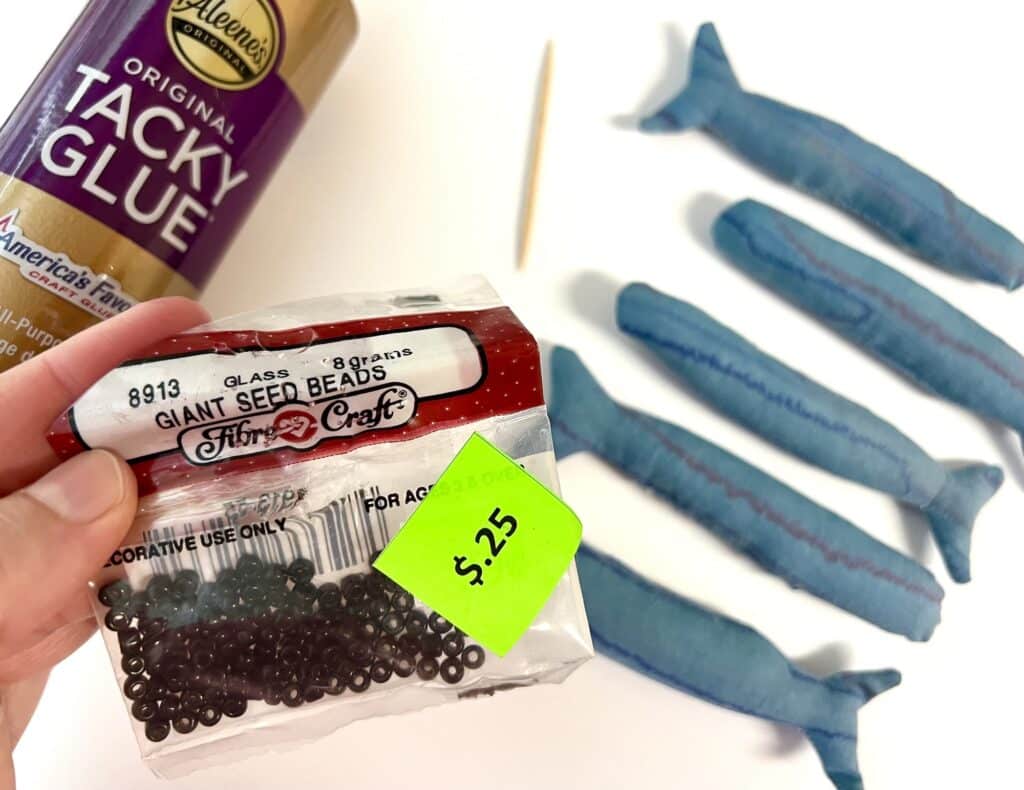
Add eyes to each sardine by attaching a small black button, seed bead or a small circle of black felt. These can be applied with glue rather than stitching, if preferred.
If there is a chance that a child will be playing with these plushies, be sure to sew on the eyes rather than gluing them for safety!
I used a toothpick to add a small drop of glue to the sardine, then placed a giant seed bead that I bought at a thrift store (notice the 25 cent tag!) on top of the glue.

Or you can embroider a fish eye with embroidery thread.
Step 8
Add some metallic shreds to the tin if you would like (this is optional). I bought these silver strands at a dollar store.
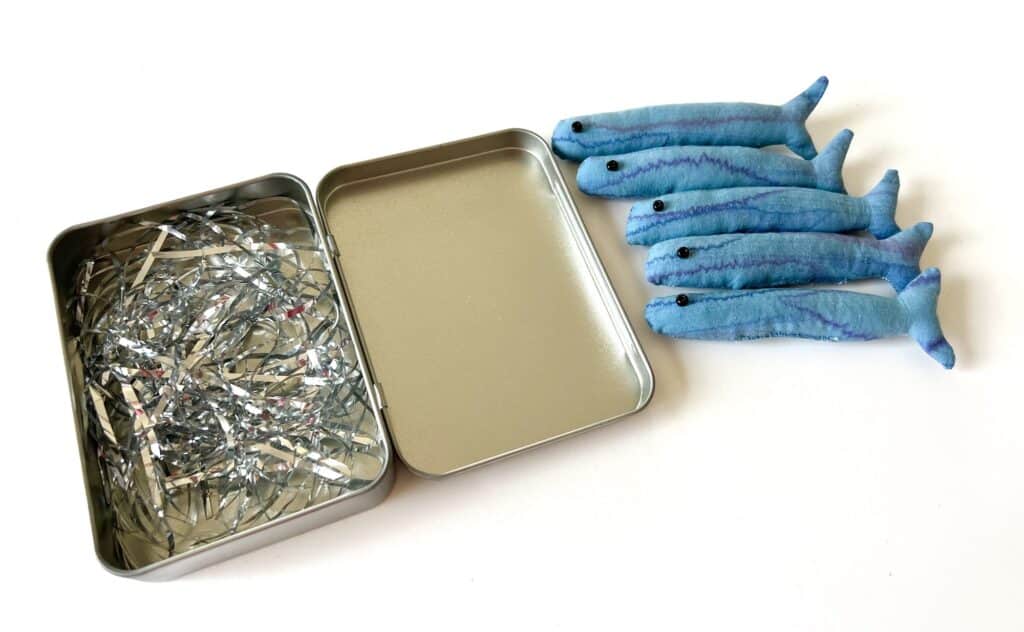
Add the sardines in the tin and close the lid.
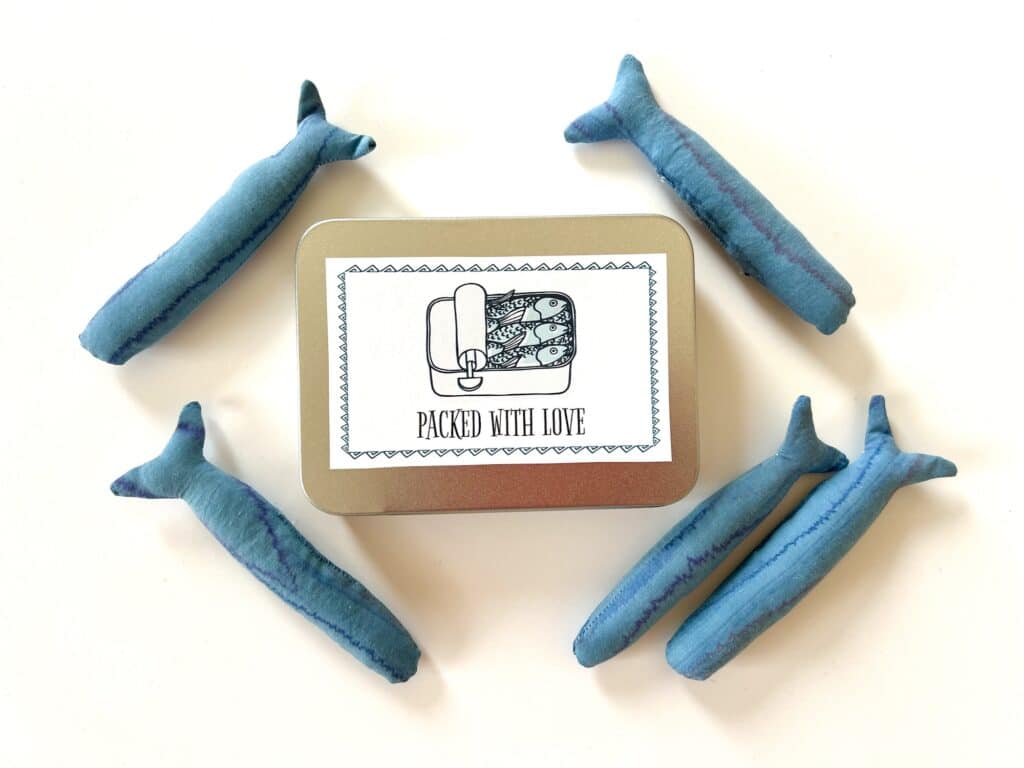
Download, print and cut out the sardine tin label if you haven’t already. Cut out a label and attach it to the top of of the metal tin.
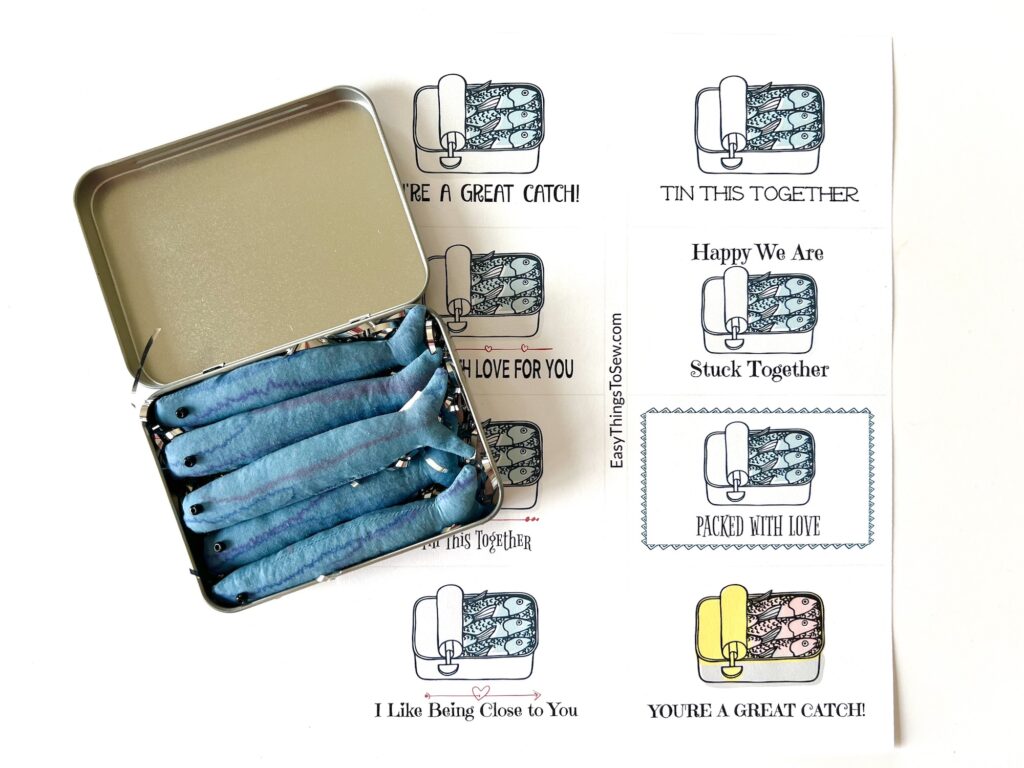
If you used sticker paper, just peel and stick to the lid.
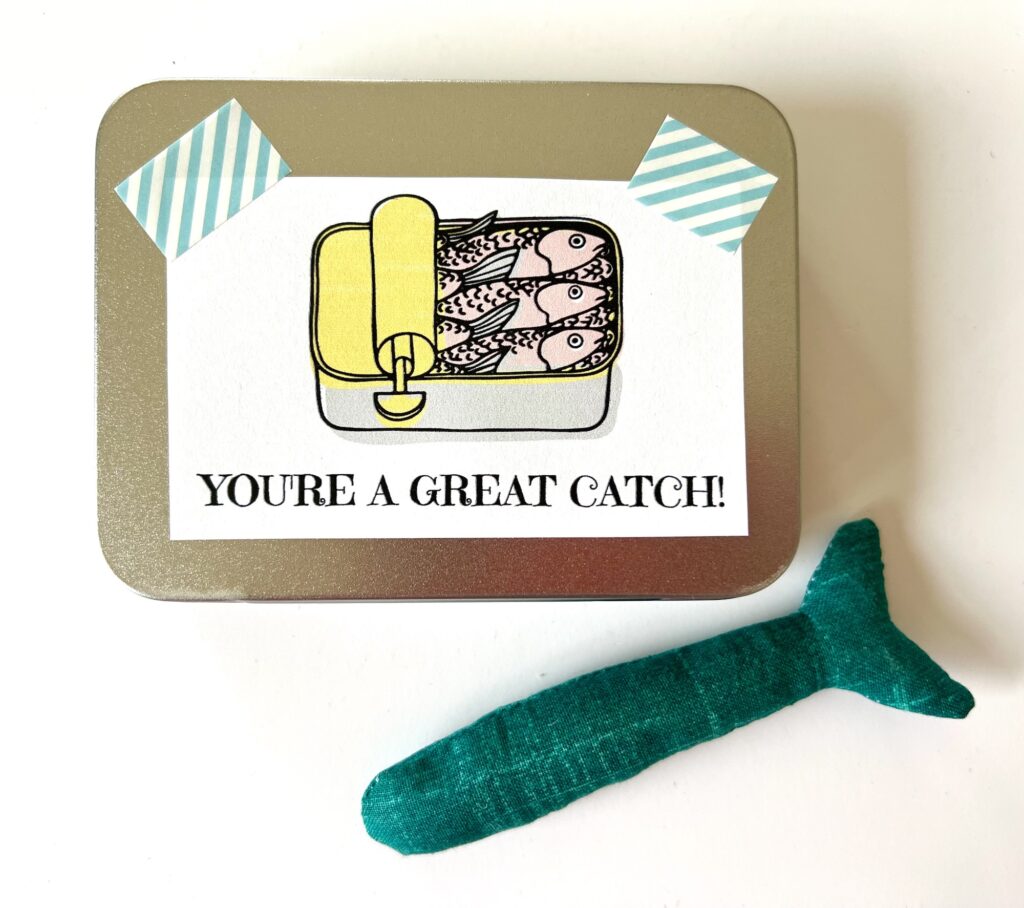
For regular paper, use a double-sided tape on the backside of the label to attach it or a decorative tape (such as wash tape) on the top edges.
If you love this idea, be sure to Pin It on Pinterest!
Want more great sewing projects to share your love? See these free patterns next: