DIY Bandana Dress
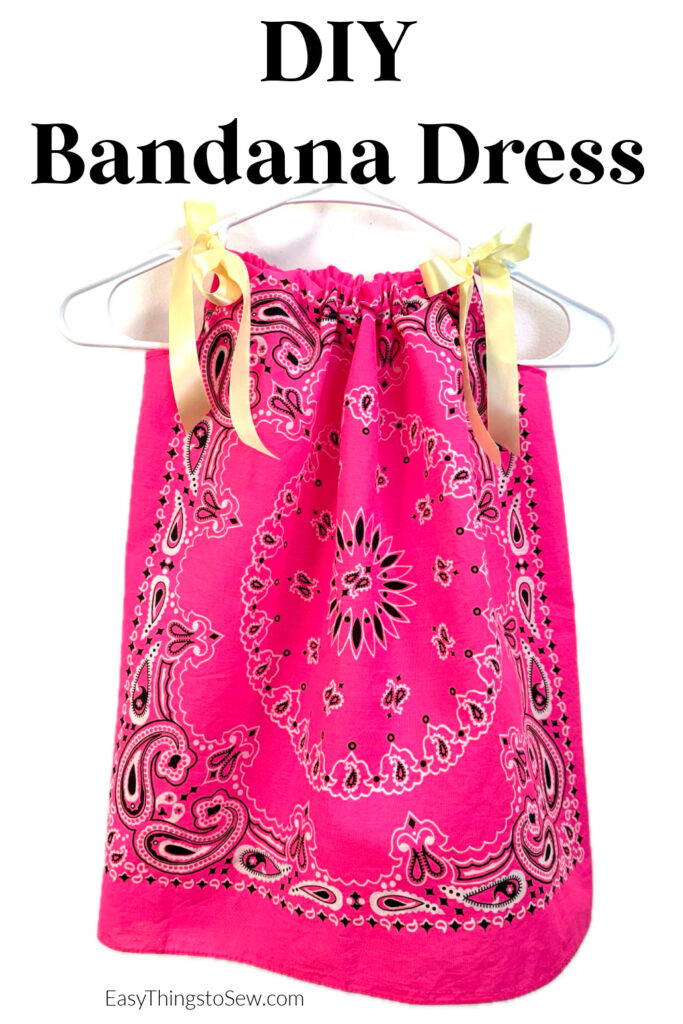
This quick and easy DIY bandana dress is perfect for kids to wear!
The adjustable ribbon straps and full bodice mean this dress can grow with the child, starting off as a long dress for toddlers, then becoming a shorter dress as they grow taller, and then becoming a long tunic or top to be worn with shorts or pants for girls up to 12 years old.
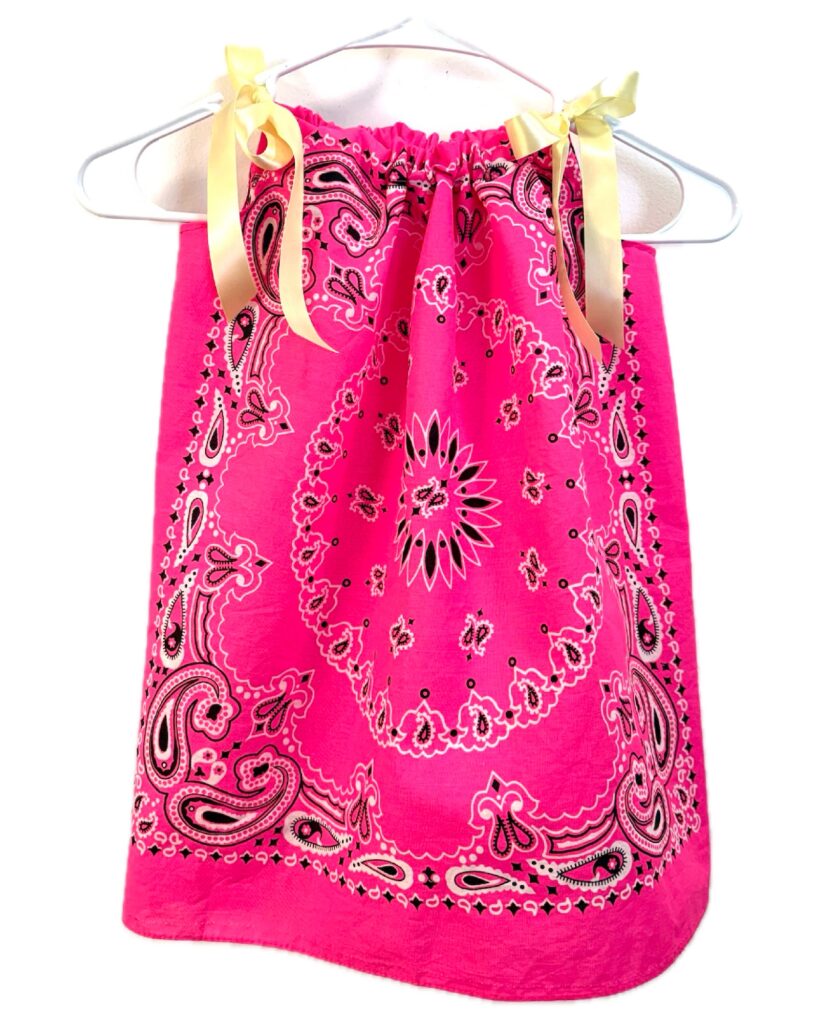
These easy, breezy dresses are lightweight and perfect for warm weather, making them a great summer sewing project. Especially for Fourth of July when you can use red, white and blue bandanas.
They also make great nightgowns, too!
These dresses are a fun version of pillowcase dresses, which are popular to sew for Operation Christmas Child shoeboxes.
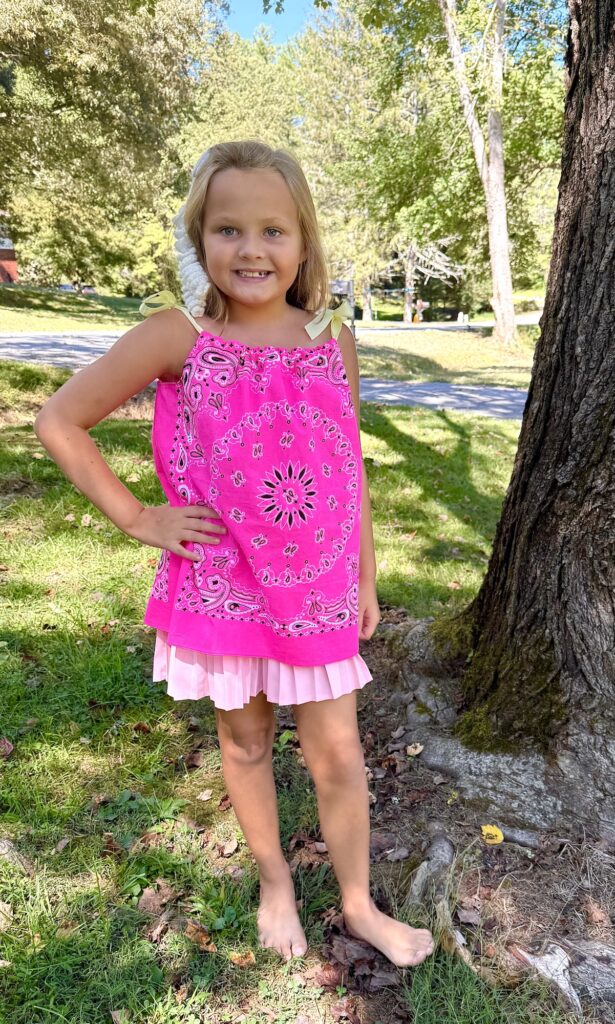
I find bandanas for my sewing projects, such as these bandana tote bags, at Hobby Lobby. They are .99 each, which makes this an affordable DIY dress for just a few dollars.
How to Make a Bandana Dress
It is very important to prewash the bandanas before sewing so that they pre-shrink and the starch is removed.
Supplies
- 2 Bandanas (pre-washed and ironed)
- 2 yards (72 inches) of ribbon (½″ – 1″ wide)
- Safety pin or bodkin
- Fray Check, clear nail polish or hot glue (optional)
Directions
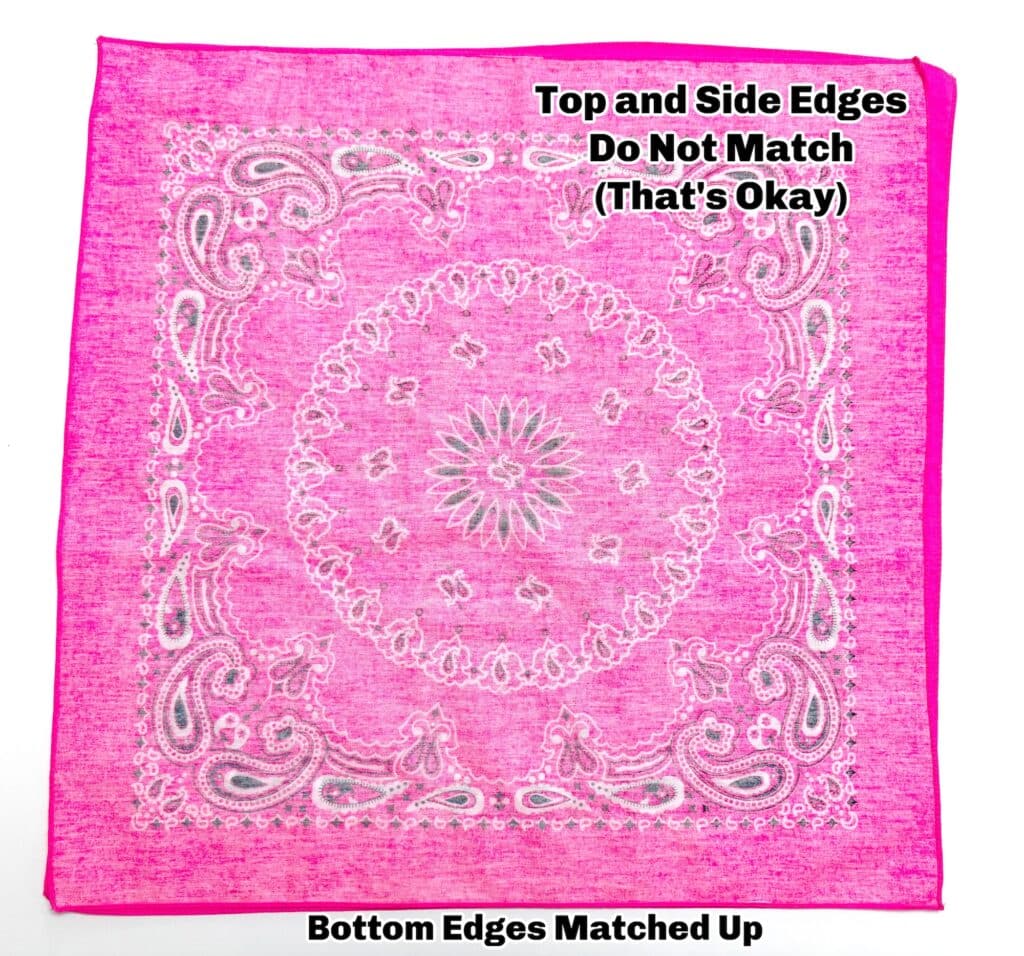
Place bandanas right sides together.
*The important thing is to match the edges of the bottom of the dress exactly. While the rest of the bandana edges might not match up exactly on the sides and top, those can be fixed when sewing seam allowances.
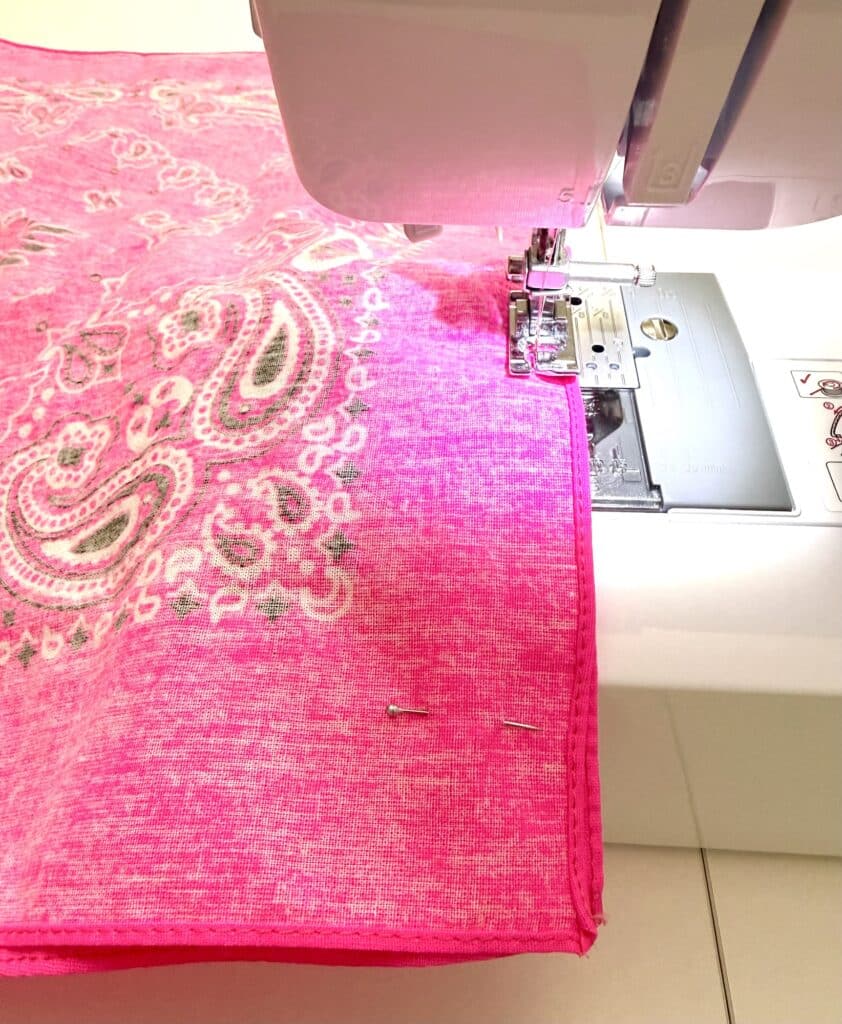
Sew each of the sides together, backstitching at the beginning and end of stitching. I placed my presser foot edge along the finished edge of the bandana to create the seam, which is about 3/8 inch.
With the dress laying flat, measure 2″ (5 cm) in from the stitched seam and 4 ½″ (12 cm) down from the top. Draw a line on the fabric using these measurements (I used a disappearing ink pen), but draw a curve in what would be the corner to create the armhole. It should look like a backwards “J.”
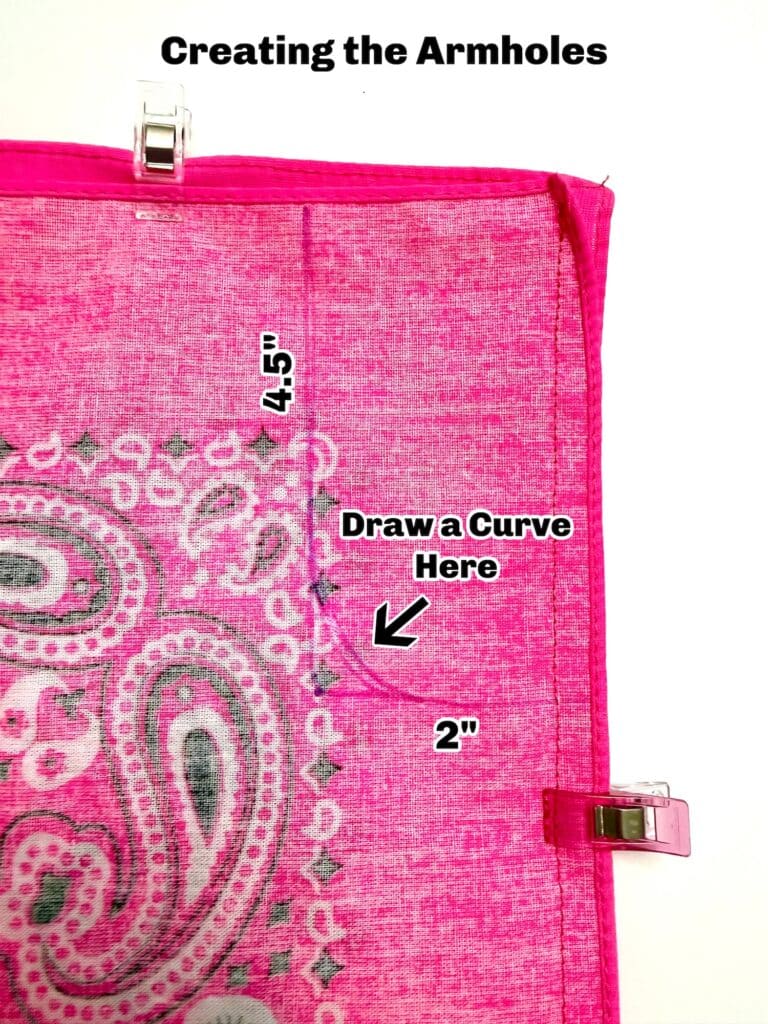
Fold the bandana dress in half, matching up the side seams. Cut out the armholes through all 4 layers of fabric.
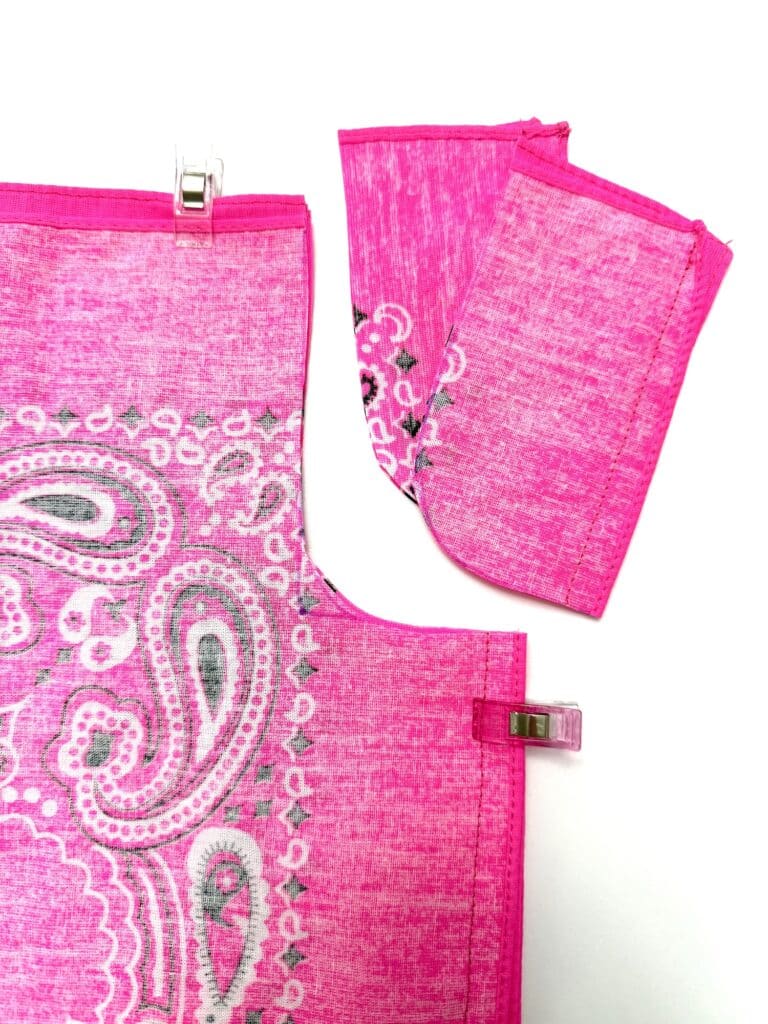
Open the dress back up.
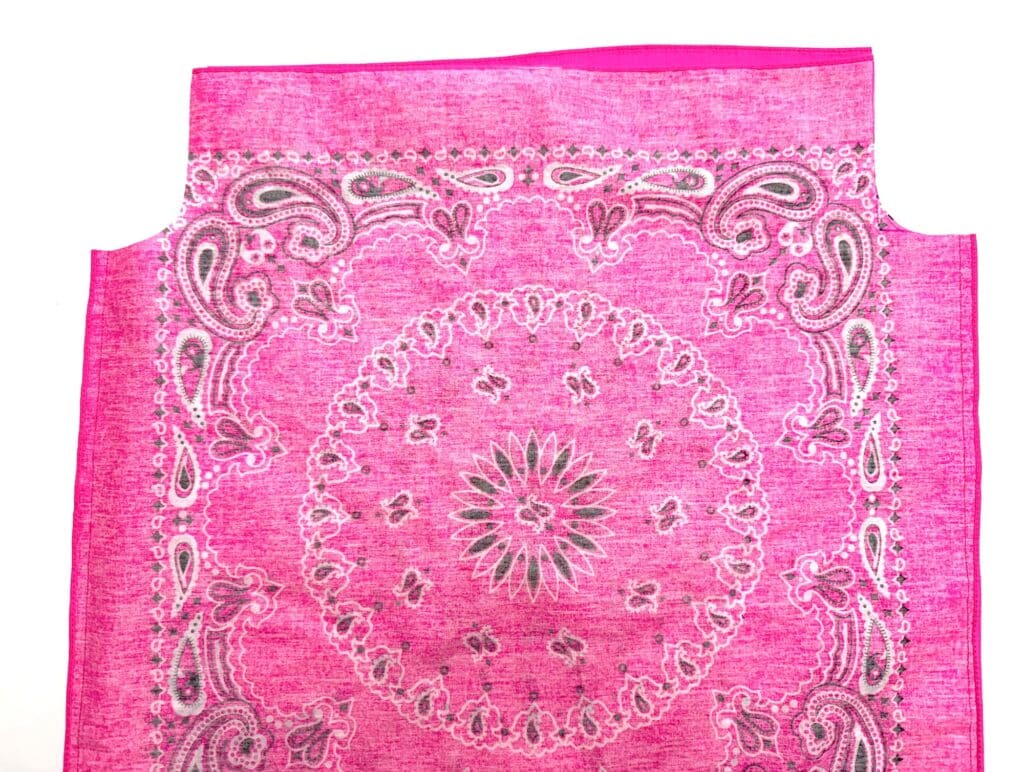
Make a rolling hem along the raw edges of the armholes by folding over ¼″ towards the wrong side of the bandana (will be the inside of the dress when you are done), then folding over another ¼″ and pinning or clipping together.
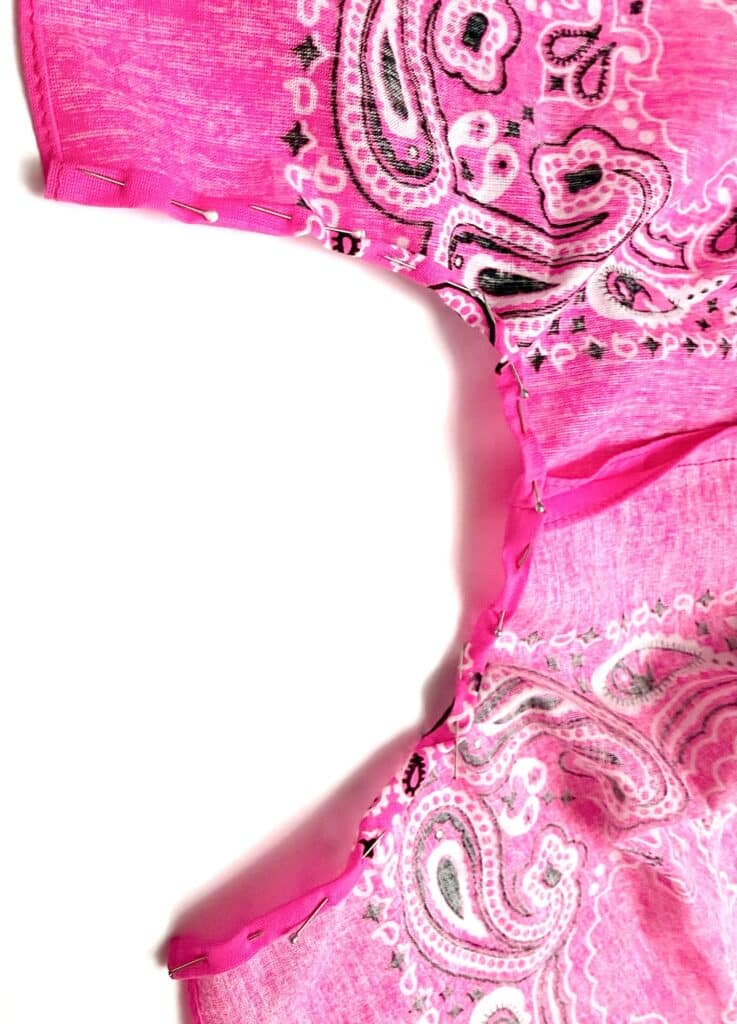
- Be sure to open the seam allowance on the side seam as you are rolling the fabric over.
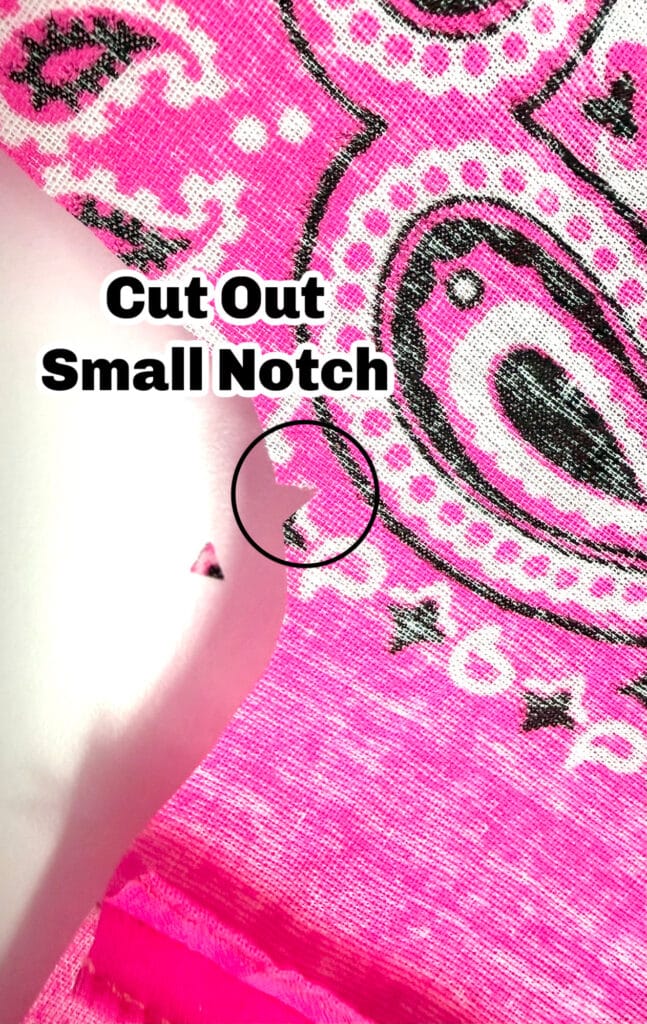
- Make a very small notch or small slits in the curved part of the armhole no bigger than ¼″. This will allow the fabric to lay flatter while rolling the hem.
- Stitch along the folded edge of the rolled hem to catch both layers.
To make the ribbon casing at the top of the dress, fold the top of each layer over 1 ½″ (4 cm) towards the wrong side of the fabric. Pin and sew along the finished edge of the bandana.
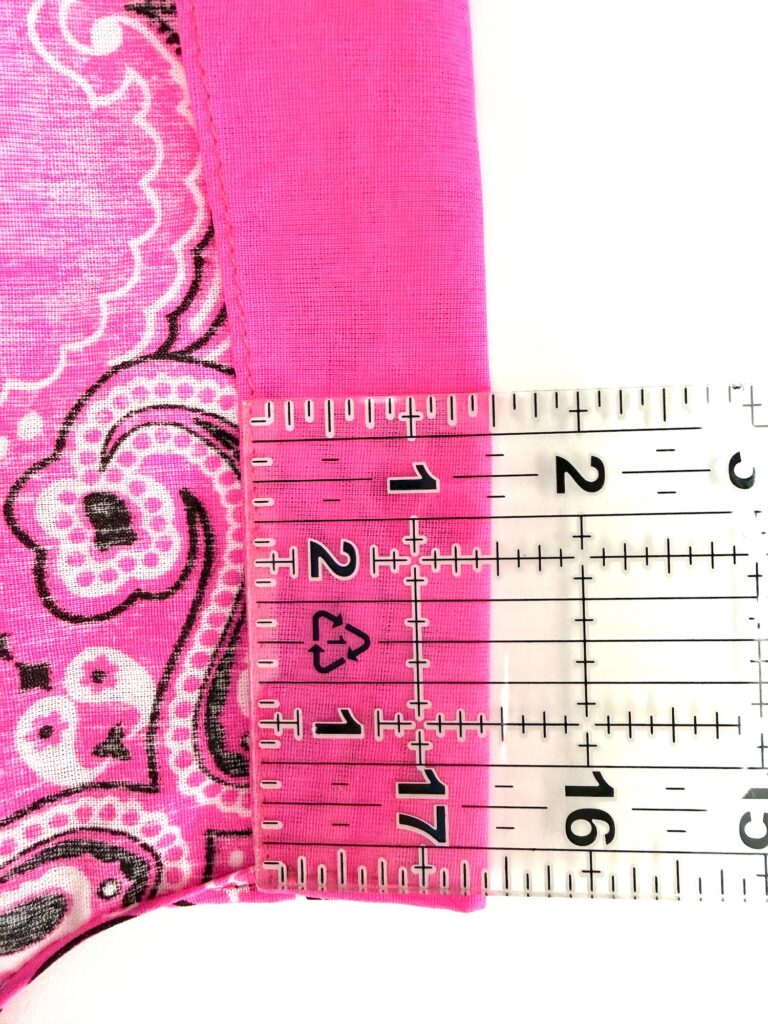
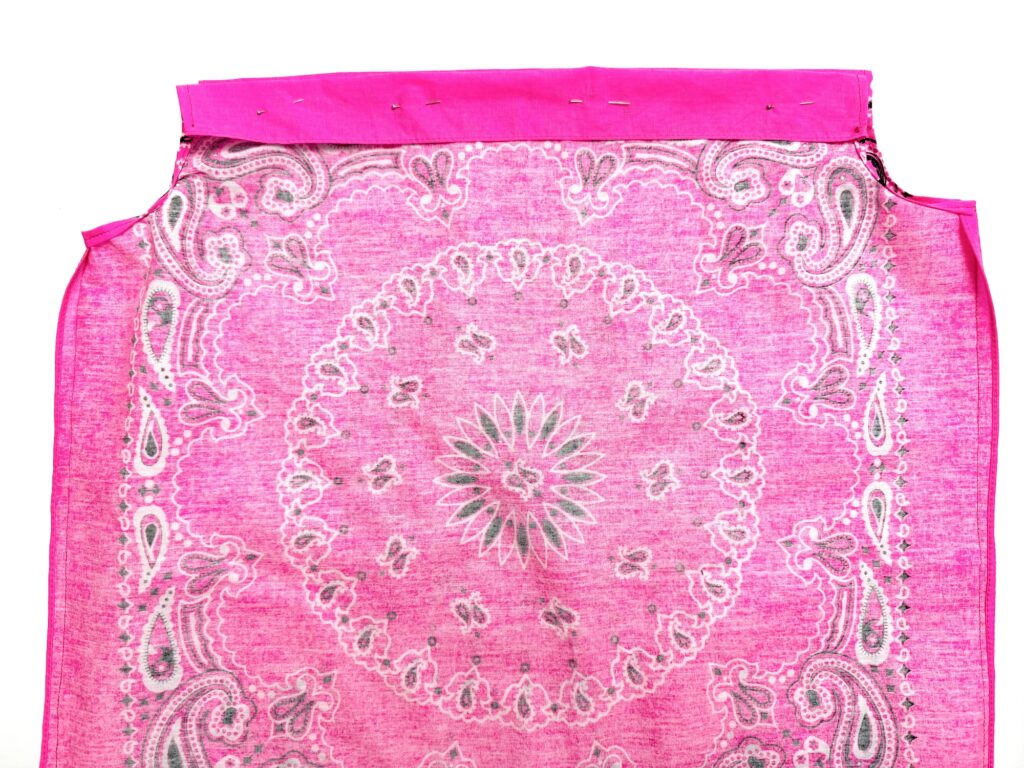
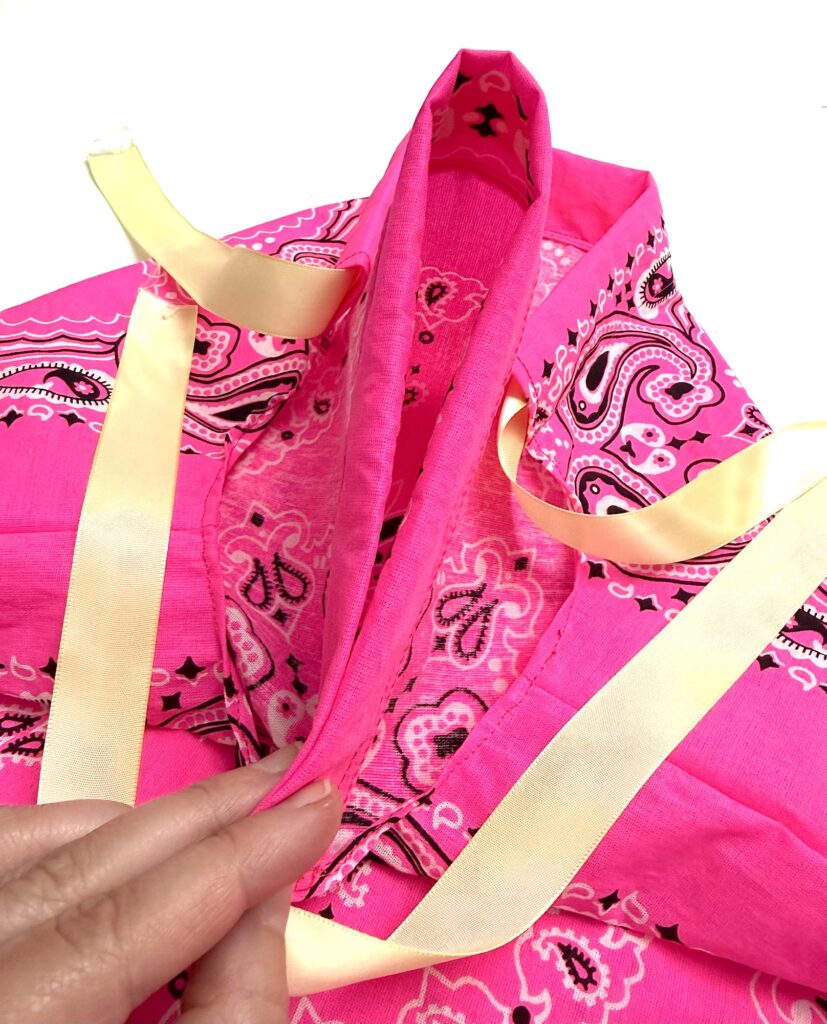
Attach a safety pin or sewing bodkin to the end of a 36″ (one yard) piece of ribbon. Insert into the casing and push and pull it through until you get to the other side. Repeat the process in the other casing.
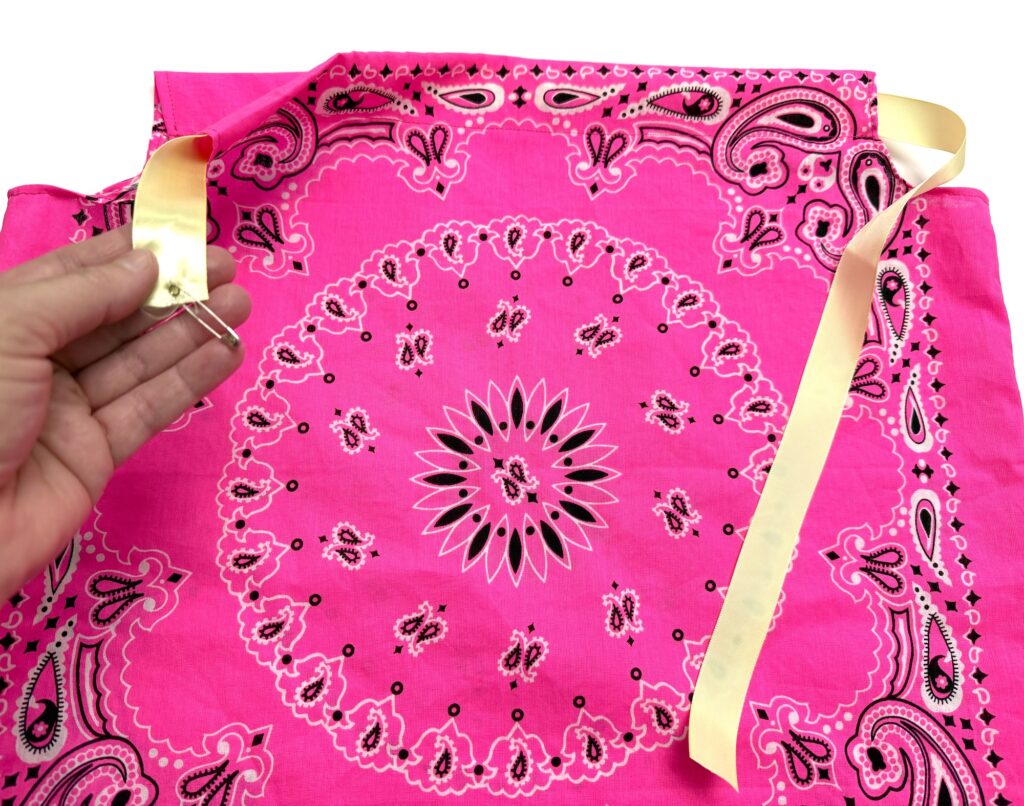
Position the ends of the ribbons so that there are equal amounts on both sides of the dress.
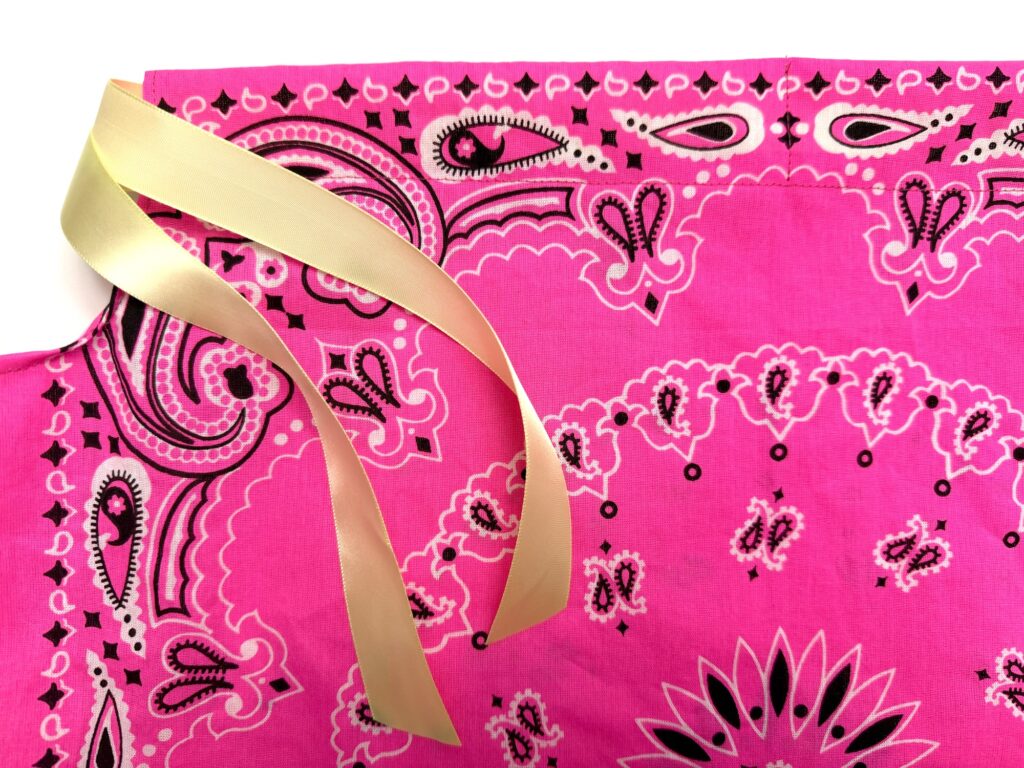
To prevent fraying, add a small amount of Fray-Check, clear nail polish, or hot glue to the cut ends of the ribbon. Alternatively, you could also create a rolling hem on the ends of each ribbon and sew.
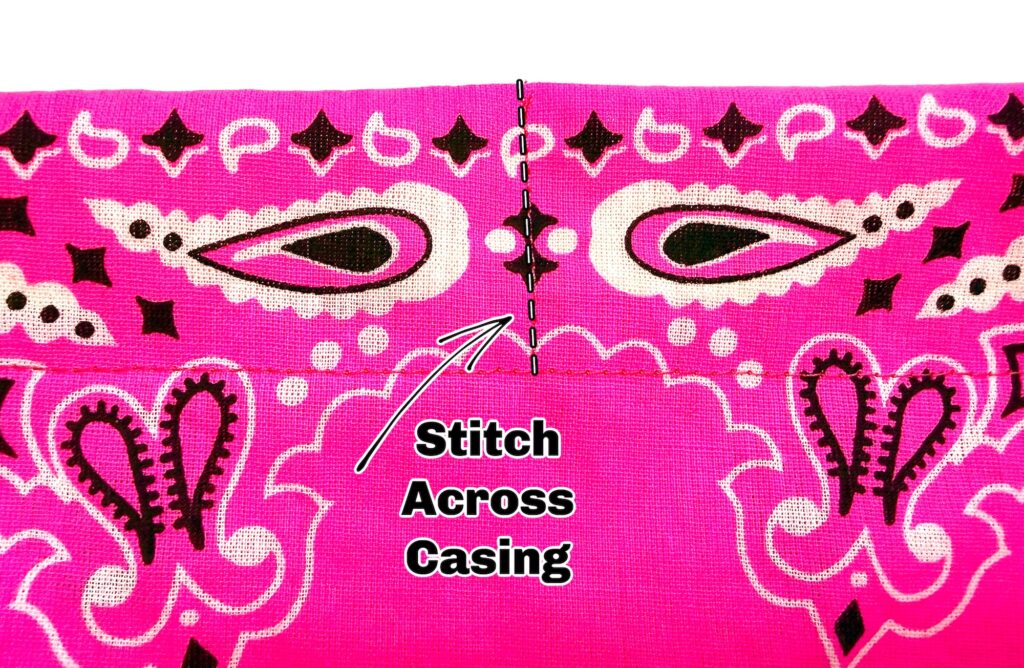
Optional: Fold the dress in half to find the middle point of the casing and pin on each side (or make a mark with disappearing ink).
Sew a vertical line on top of the casing at the mid-way point so that the ribbon can’t be accidentally pulled out of the casing.
Helpful Tips I Learned While Making a Bandana Dress for Kids
- If you don’t have bandanas, you could easily use fabric instead, cut to a 21″ X 21″ square.
- If you can’t tell which side is the “wrong” side of a bandana, look at the finished edges. The folded edge of the seam will be on the “wrong” side of the bandana.
- You can make the armholes bigger (measure further down from the top) to fit taller children.
- If you prefer a dress that isn’t as full, you can make larger side seams to reduce the fullness.
- None of the bandanas that I’ve used from Hobby Lobby have been the exact same size, meaning they aren’t perfectly square and don’t match up on all of the sides. I’m not sure if it’s just a Hobby Lobby problem or if all bandanas are this way.
- Because this dress is loose and cinched up, uneven hems and edges will barely be noticed.
- I matched up the side seams when making the dress so that they would be even inside with no raw edges. By doing this, the fabric didn’t lay flat on one side, but it isn’t noticeable because the dress is cinched.
- My neckline casing edges did not match perfectly, either. I just folded them over so that they matched on top, and then sewed a straight seam, even though the seam didn’t completely follow the bandana edge. That way the stitching is straight, the casings matched up, but there might be extra fabric below the seam on some portions of the casing inside.
- Two bandanas at .99 cents each plus 2 yards of ribbon (I usually find clearance ribbon for $1) means I can make a girl’s dress for around $3!
- A ruffle can easily be added to the bottom of the dress! Lace or eyelet trim can be added to the bottom by placing it on the wrong side and stitching to the bottom edge of the bandana. You’ll need about 42 inches (107 cm) of trim.
Want to save this idea for later? Be sure to Pin It to Pinterest! You could also flip it to Flipboard or save to your Facebook profile, too.
You may also like these upcycled clothing sewing tutorials, too: