Scrap Fabric Easy Sew Christmas Ornaments (with Free SVG)
Turn fabric scraps into pretty Christmas ornaments with this simple tutorial.

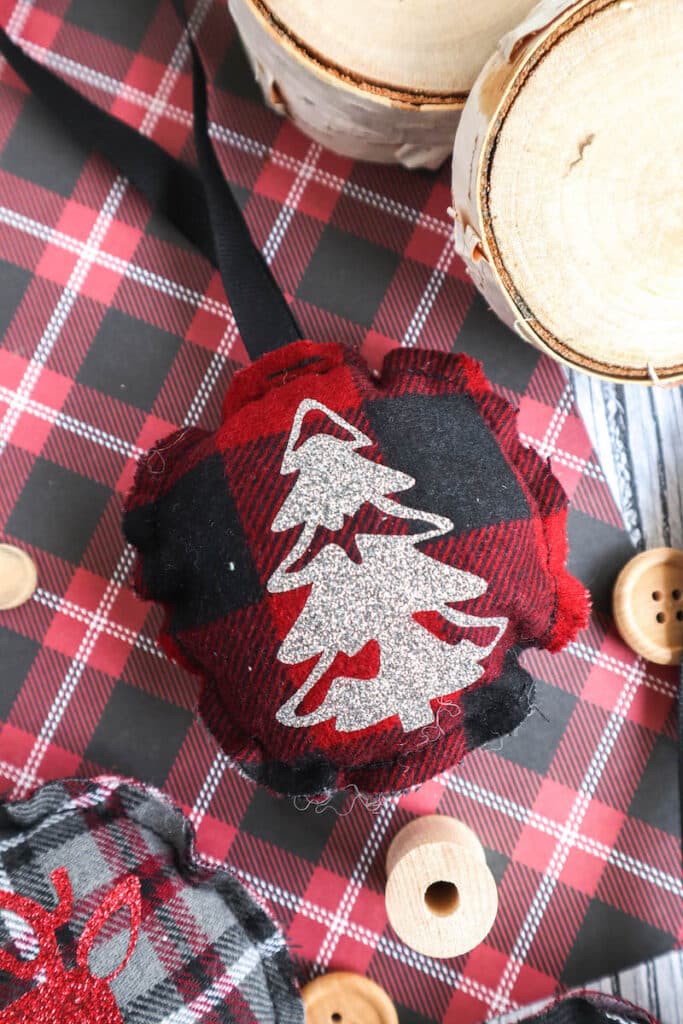
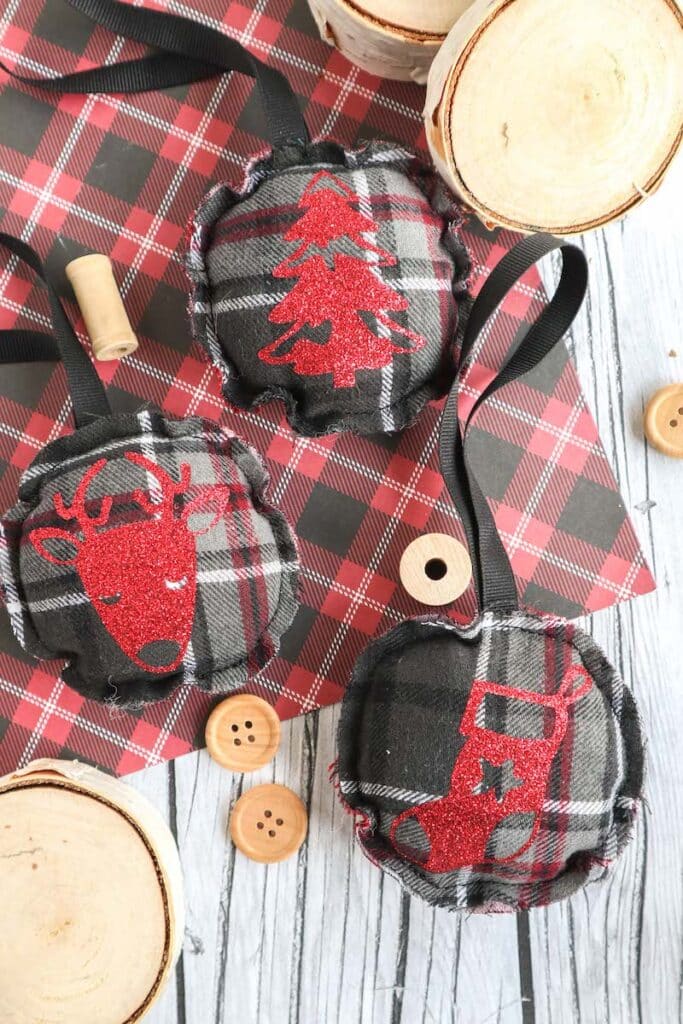
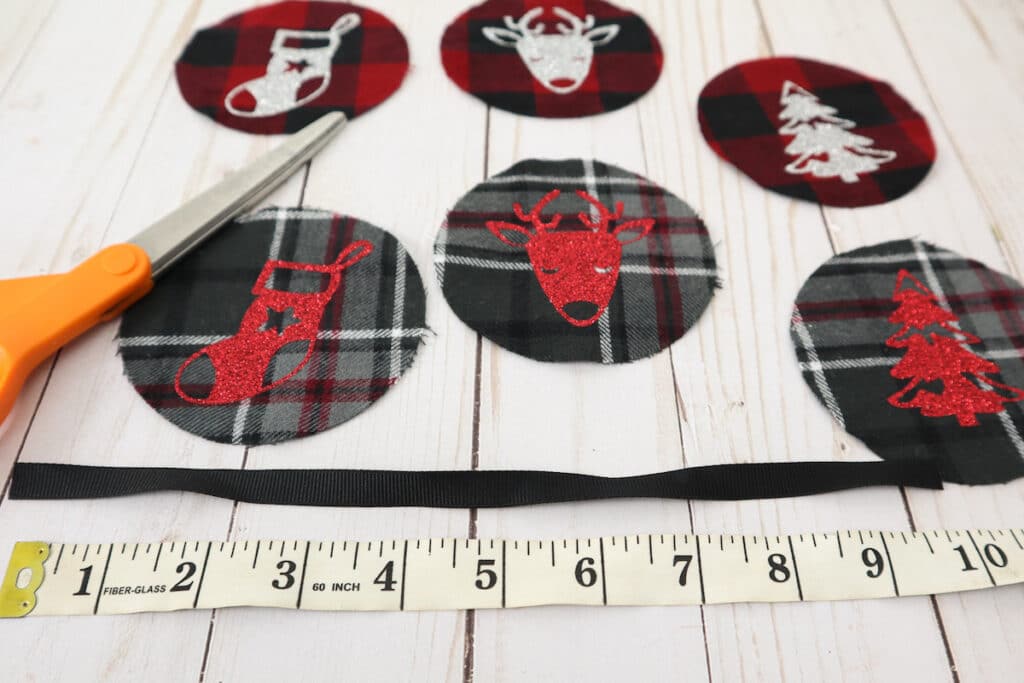
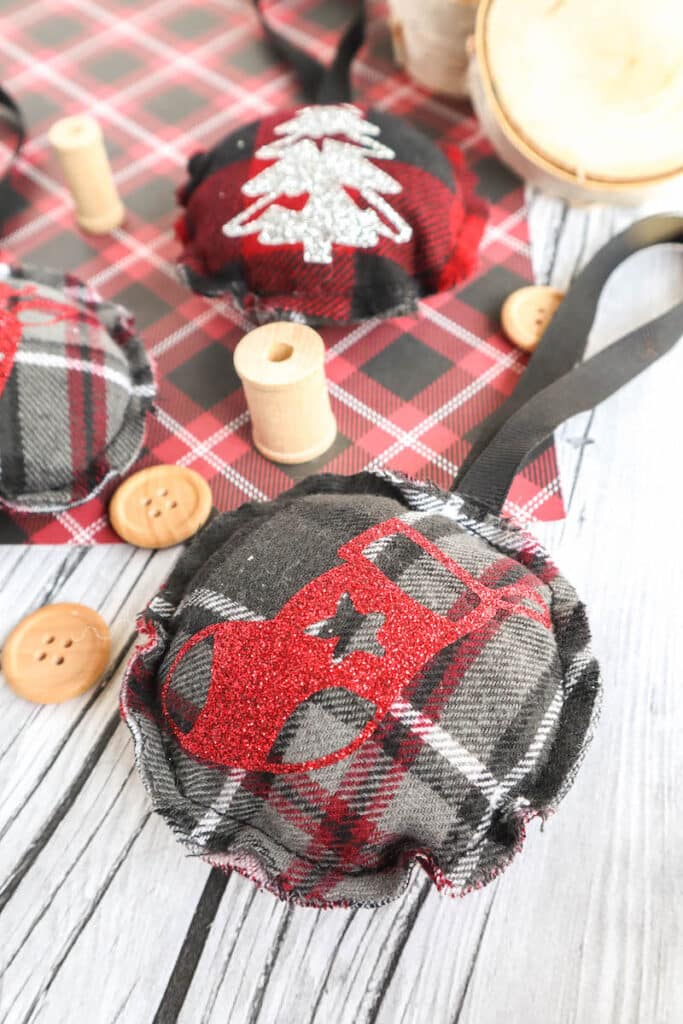
Use your fabric scrap stash to make adorable Christmas ornaments! We even used old plaid shirts to make DIY ornaments.
If you want to add glittery Cricut vinyl transfers, it makes the ornaments extra fancy. (But not required!)
*Important: Don’t be worried about how many steps are in the instructions! Most of these are for using Cricut. So if you’re not using Cricut vinyl, then the directions are very easy. Start with Step 18.
How to Sew Scrap Fabric Christmas Ornaments
Keep in mind that the instructions for just sewing the ornament start at Step 18 if you are not interested in applying Cricut vinyl transfers.
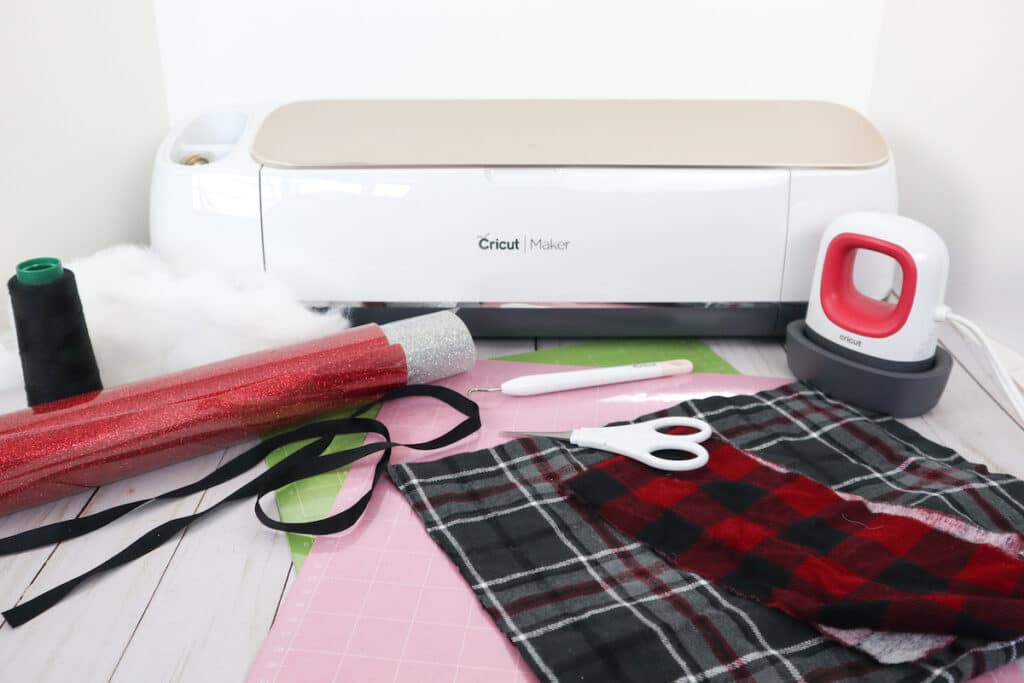
Supplies
- Free Christmas Stocking-Reindeer-Tree SVG file
- Woven flannel fabric
- Cricut Maker with Fine Point Blade and Rotary Blade
- Glitter Iron on Vinyl in Red and Silver (get a multi-pack sampler such as this one for several colors)
- Cricut Strong Grip and Fabric Grip Mat
- Weeding Tool
- Scissors
- EasyPress Mini
- EasyPress Mat or Towel
- Sewing machine and matching thread color
- Fabric Scissors
- Batting or Polyfill
- Grosgrain ribbon, ¼” wide in black (10 inch long piece for each ornament)
Instructions
Preparing the Images
1. Open Cricut Design Space. Click on the “+” sign to start a new project, opening up a blank canvas.
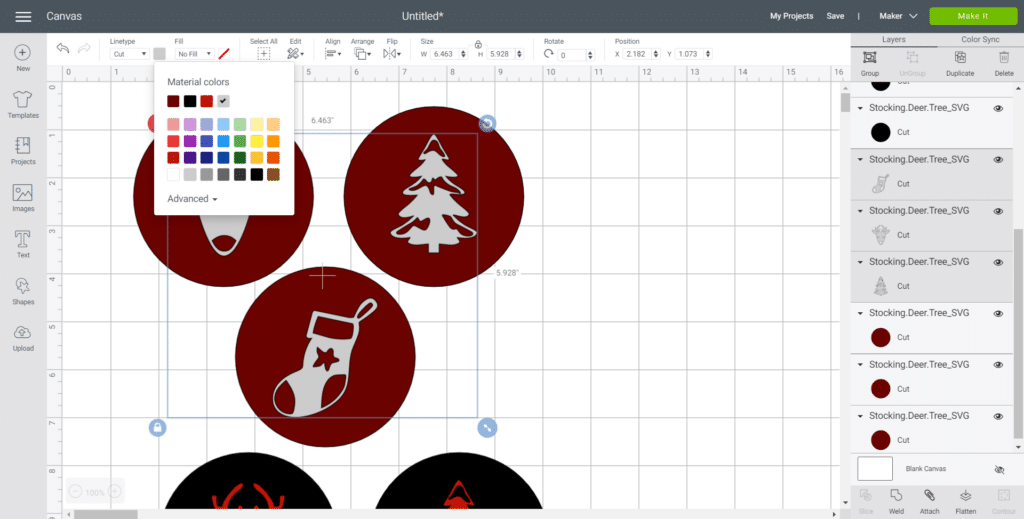
2. Click on the “Upload” button from the toolbar and browse your downloaded files to insert the Stocking.Deer.Tree SVG file. The images will appear on the canvas. Change the image colors if desired to match with your material color.
Cutting the Iron-on Vinyl
3. Select “Make It” in the upper right corner to proceed with cutting.
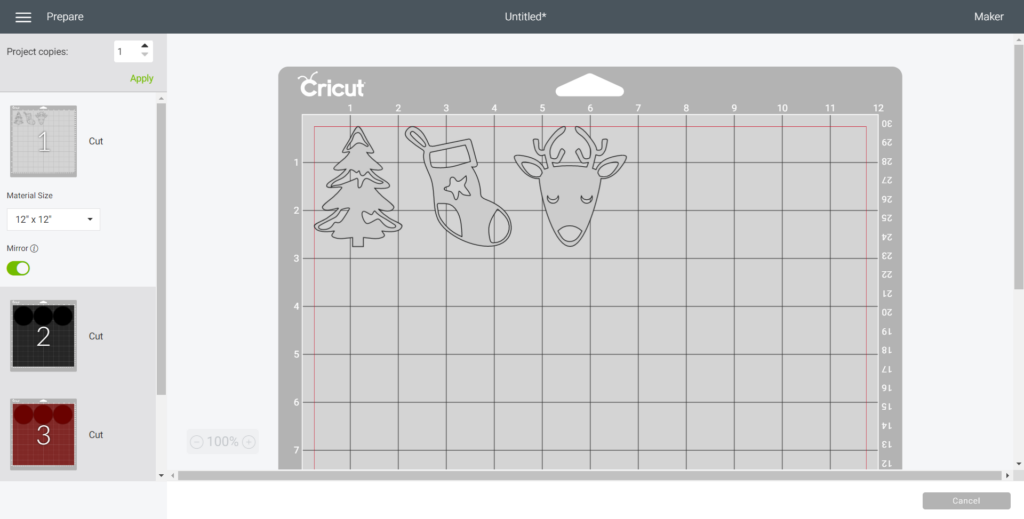
4. Click the “Mirror” toggle button to on for all mats with images to be cut in Glitter Iron-On material.
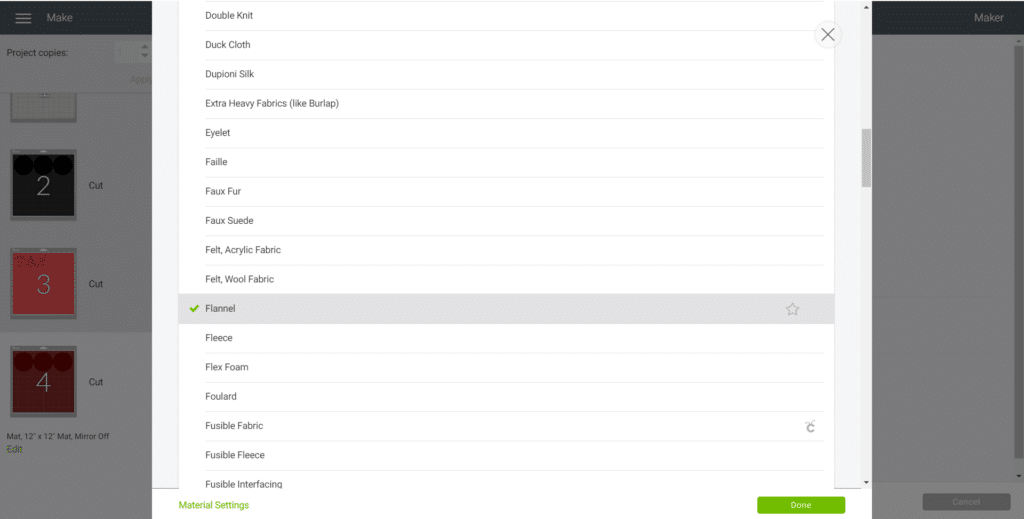
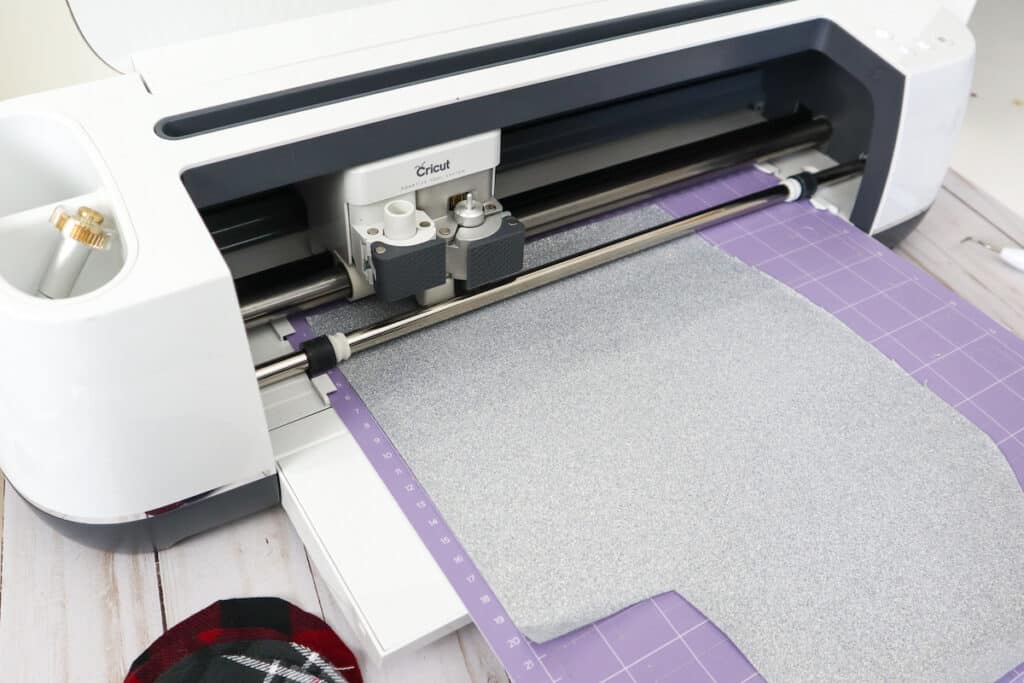
5. For cutting the circle shapes, choose flannel fabric from the list of options in the drop-down menu.
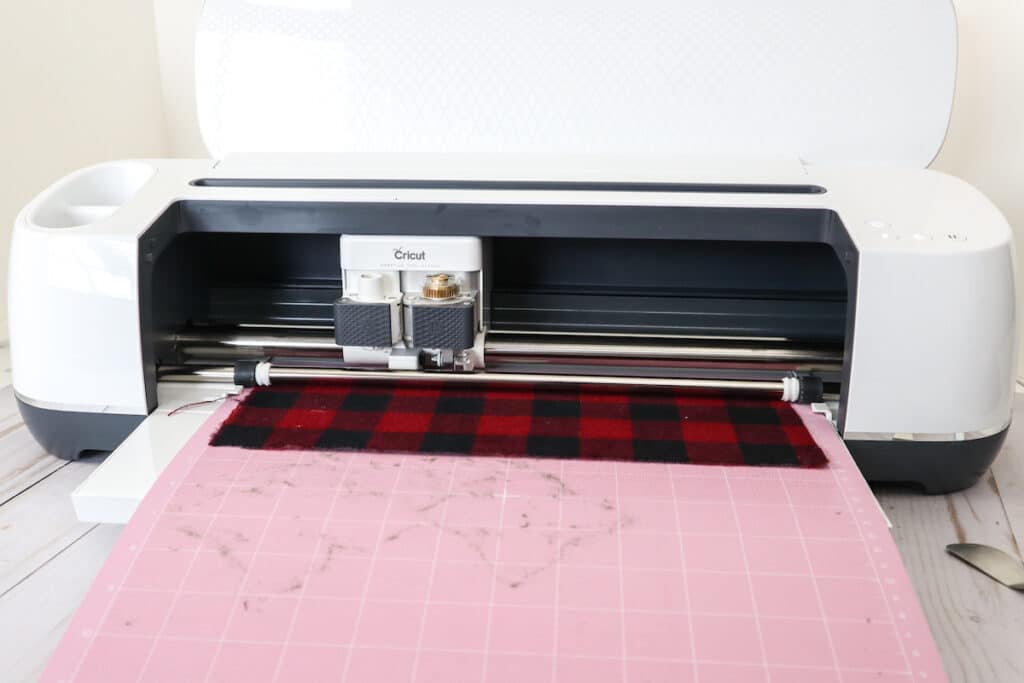
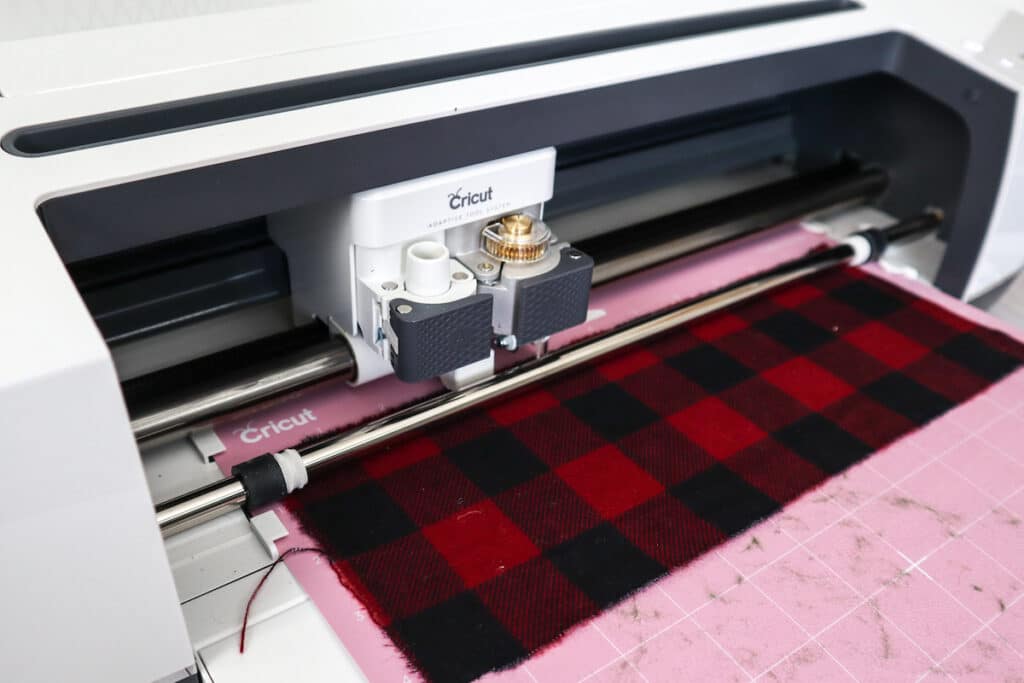
6. Place a piece of flannel fabric on a fabric grip mat and proceed with cutting.

7. Remove the circle shapes from the mat and repeat for more circle shapes in a coordinating flannel fabric.
8. For cutting the stocking, deer and tree shapes, choose Glitter Iron-On Vinyl from the list of options in the drop-down menu.
9. Place the Iron-On vinyl directly onto the strong grip Cricut mat with the SHINY SIDE DOWN. Following the instructions prompted on the screen, cut out the vinyl.
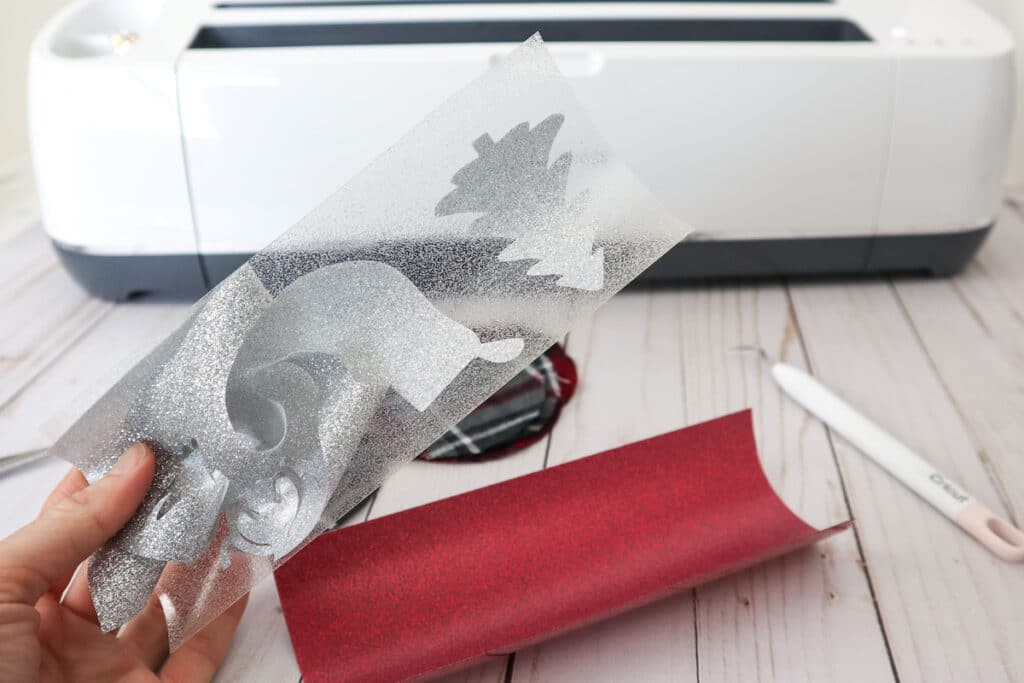
10. Remove the Glitter Iron-On Vinyl from the mat and using a weeding tool, peel away the excess vinyl leaving only the Christmas images.
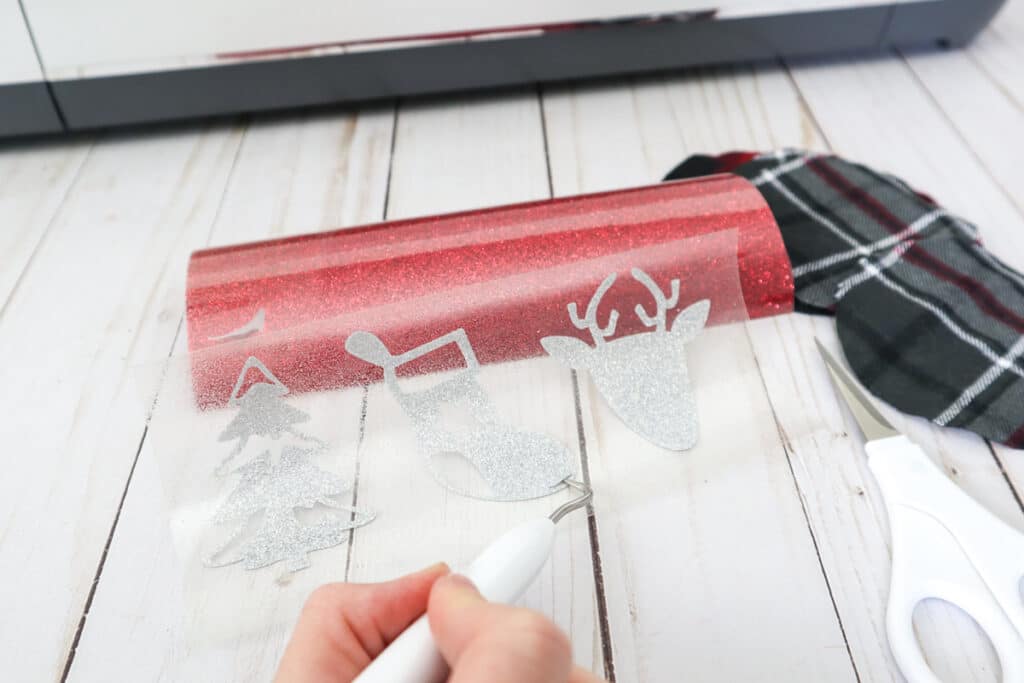
11. Cut the vinyl around each of the images. You can cut an oblong circle around the images, leaving about ⅓ inch of vinyl around the designs.
Applying the Image with the Cricut EasyPress Mini
12. Position the mat or a towel on a flat surface. Set the temperature and time on the machine following the chart for the type of vinyl and material being used. You could also reference this helpful EasyPress Interactive Quick Reference Guide for temperature.
For a 100% Cotton flannel and Glitter Iron-On Vinyl like I used, set the EasyPress Mini to medium heat.
13. Preheat each of the fabric ornament pieces for 5 seconds.
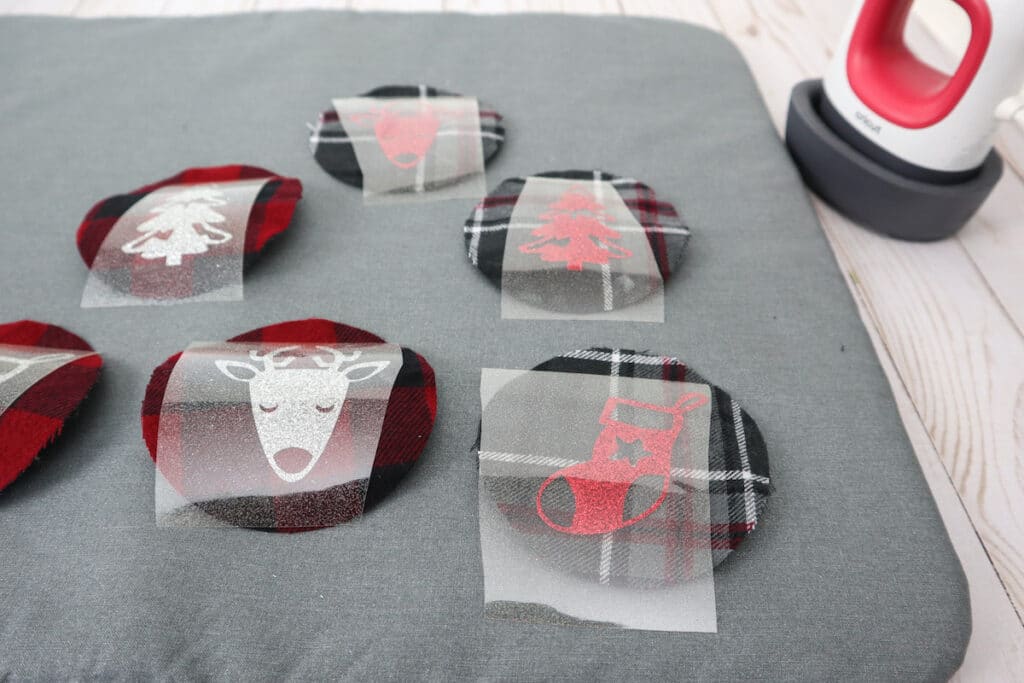
14. Place one image in the center of each circle with the shiny side up.
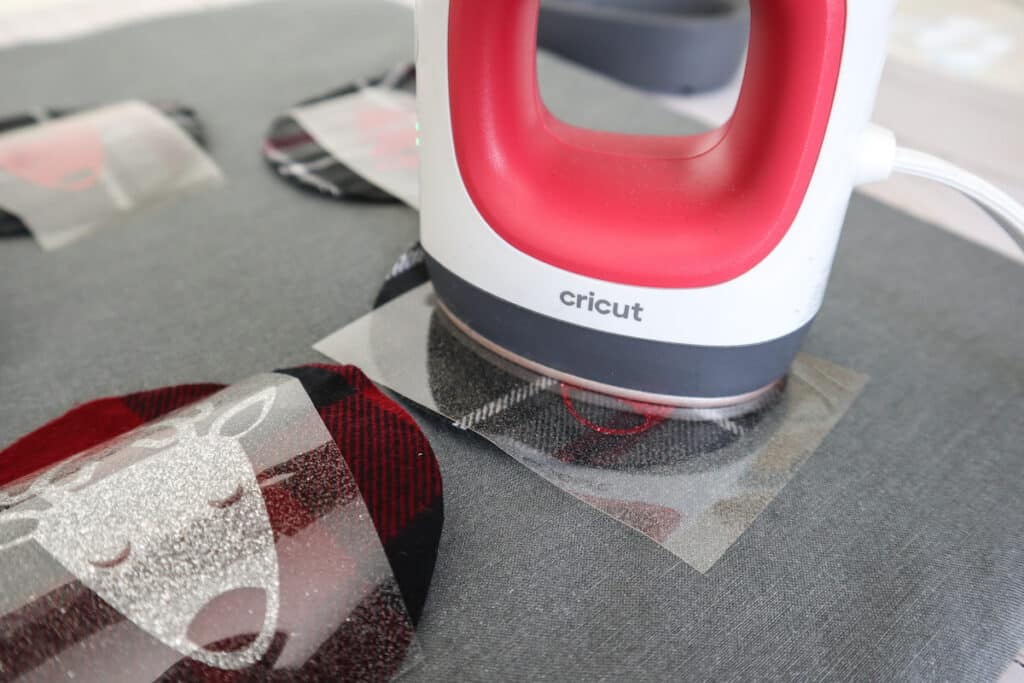
15. Press the image on to the ornament for 25 seconds, constantly moving EasyPress Mini as you press.
Helpful Tip: Make sure you do not place an iron or the EasyPress Mini directly over the vinyl without the protective plastic cover!
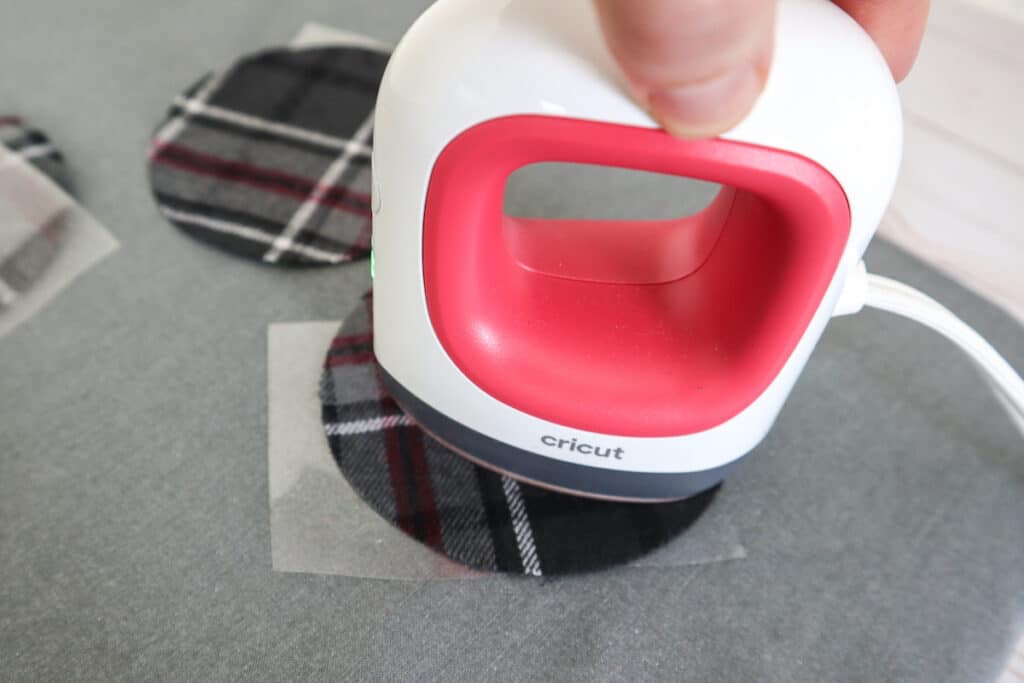
16. Turn the ornament upside down and apply heat for another 15 seconds.
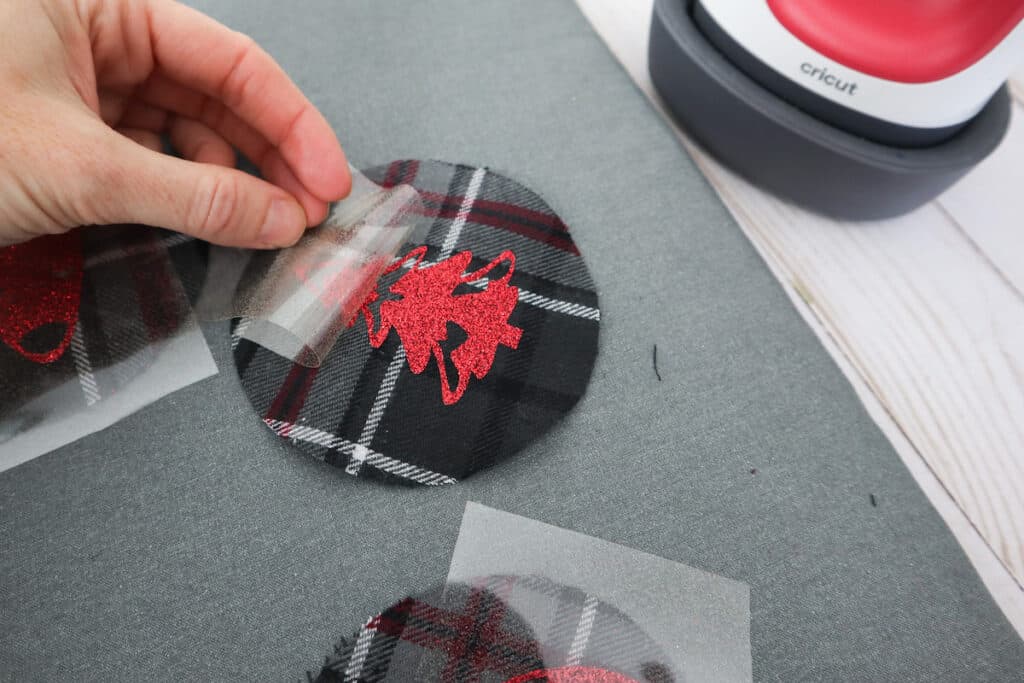
17. While vinyl is still warm, peel the plastic part of the vinyl off very carefully. You can now throw away that piece of vinyl.
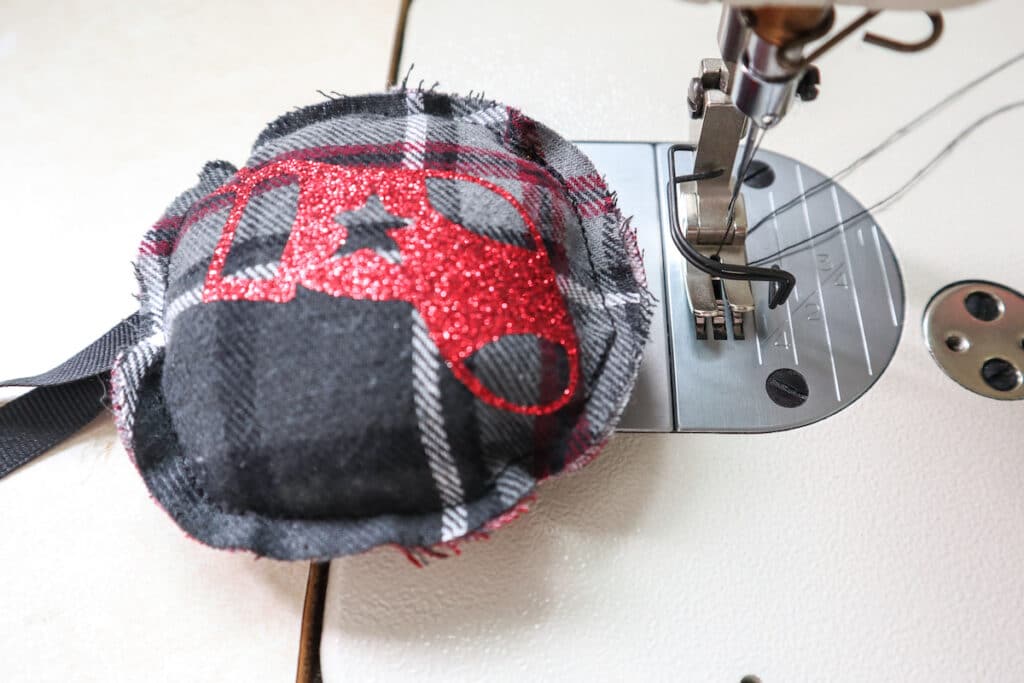
Sewing the Ornaments
If you skipped ahead to this step, you will need to cut out circles from your fabric.
Tracing a glass or a circle cookie cutter on your fabric is among the easiest ways to quickly make circles.
Make the circle 3 inches wide or larger.
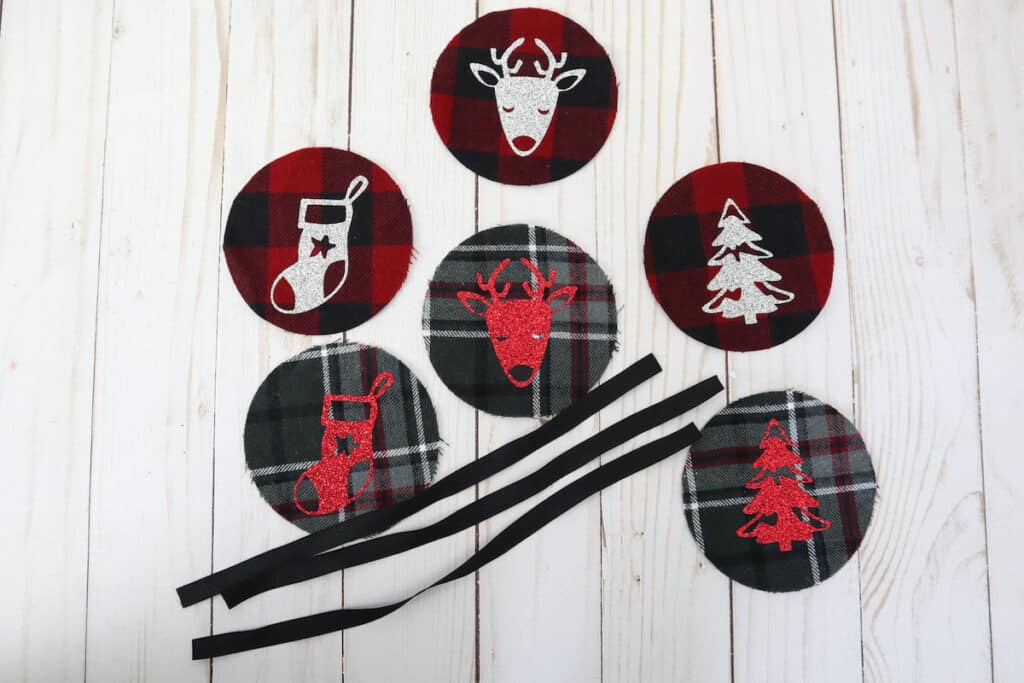
Cut the ribbon into 10-inch lengths for each ornament.
18. Fold the ribbon in half and place the cut ends slightly overlapping each other at the top of the ornament.
Stitch across the fold to secure as the ornament hanger.
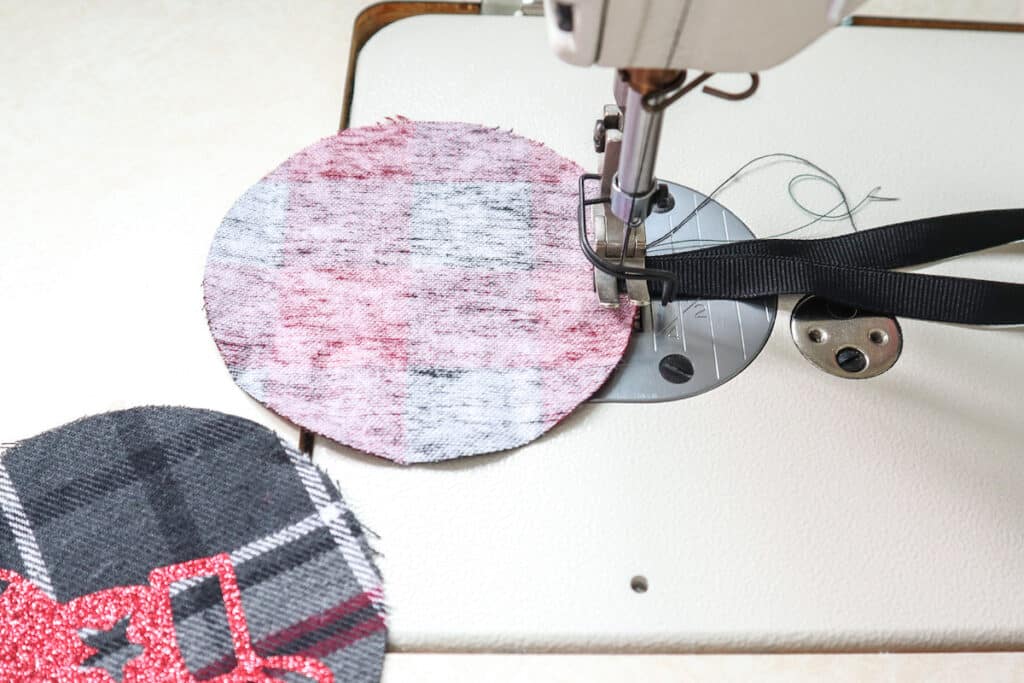
19. Place two circle shapes together, including one circle shape with the ribbon sewn on it. The wrong sides should be facing each other on the inside, with right sides facing out.
Make sure the tops for each ornament are aligned on the front and back.
20. Stitch around the outer edge with a ¼” seam allowance, leaving a 1” gap opening on the bottom.
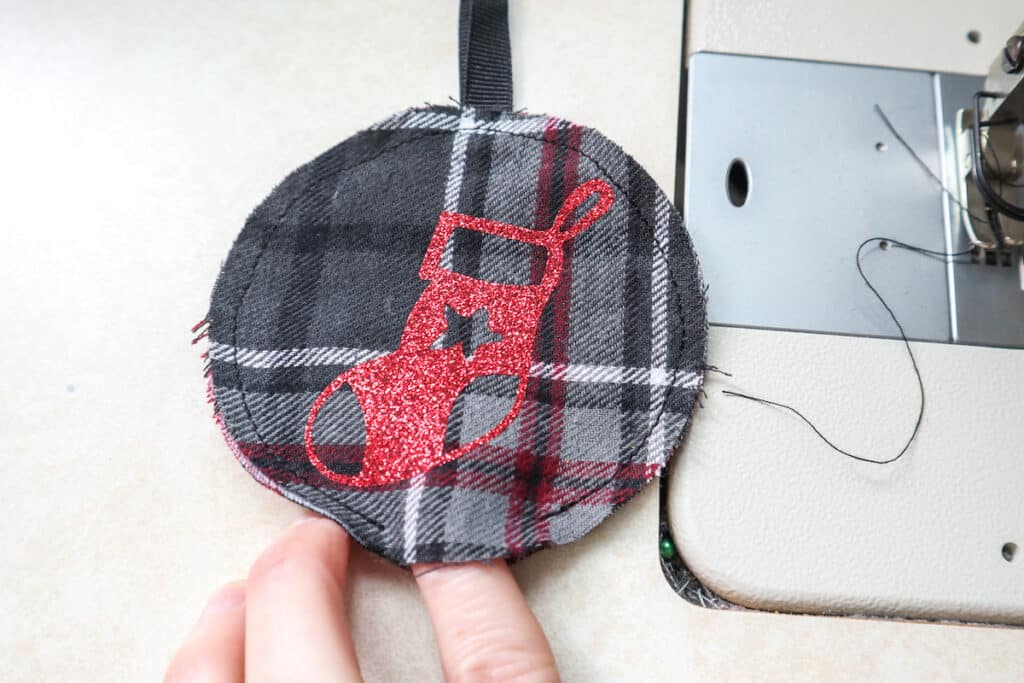
21. Insert batting or Poly-fill into the opening and make it as plump as you would like.
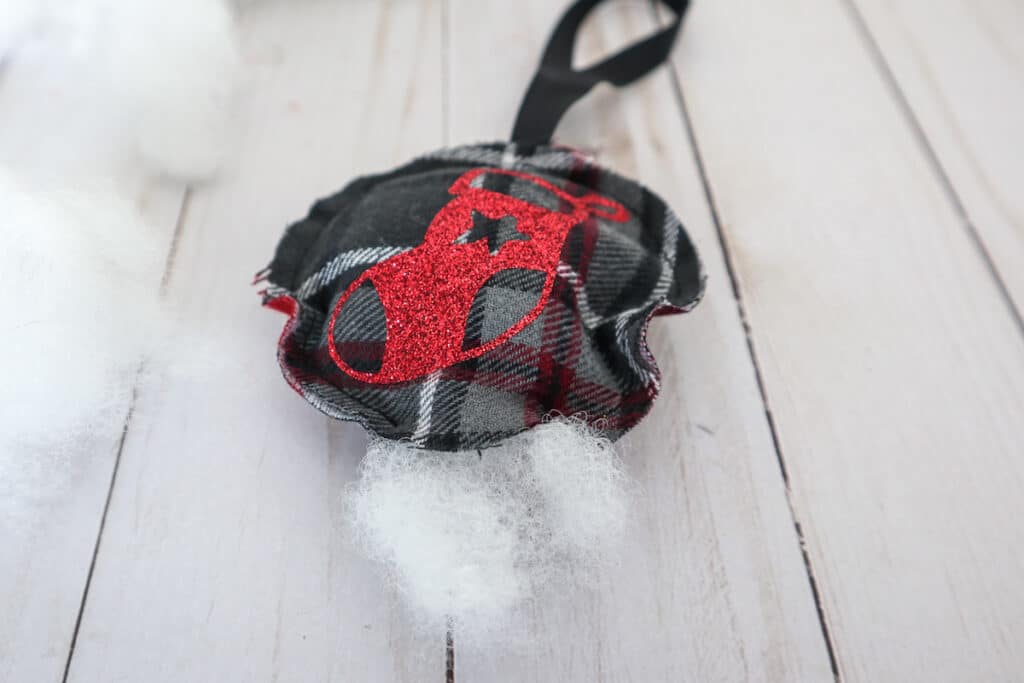
Then sew the opening closed with your sewing machine, using the same seam allowance. Remember to backstitch at the end to secure the stitches.
It is okay if you sew over some of the batting or Poly-fill.
Cut off the extra thread and you are done!
Helpful Tips for Make Scrap Fabric Ornaments
- What we love about these DIY ornaments is that you could use scrap fabric from clothing. So, if you have a flannel shirt that is too small or has a hole or rip in it somewhere, why not repurpose it to make these festive ornaments?
- You don’t need to have a Cricut machine to make these. They are cute on their own as stuffed ornaments.
- If you’d like to add extra design, you could paint on a Christmas stencil with acrylic paint. These Christmas stencils are made for ornaments.
- You could also add a painted monogram for each member of the family. Use either a monogram stencil or paint free hand.
Be sure to Pin This to your Christmas or Sewing boards to remember for later!

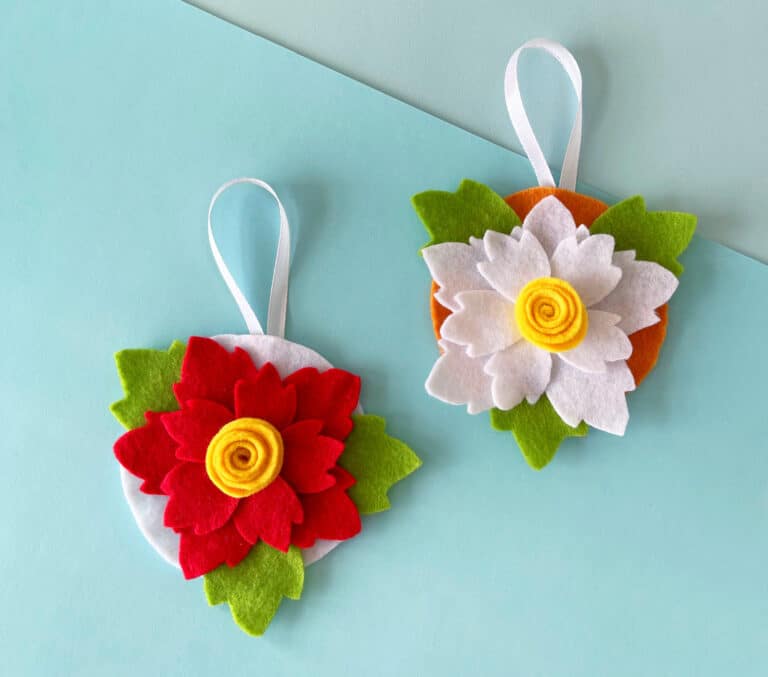
Check out our other DIY Christmas ornaments, too: