Quickest and Easiest Dish Mat Bag
DIY dish mat bags are so popular because they turn unusual sewing supplies into beautiful accessories! Drying mats are inexpensive, too, which means you can make a bag for just a few dollars!
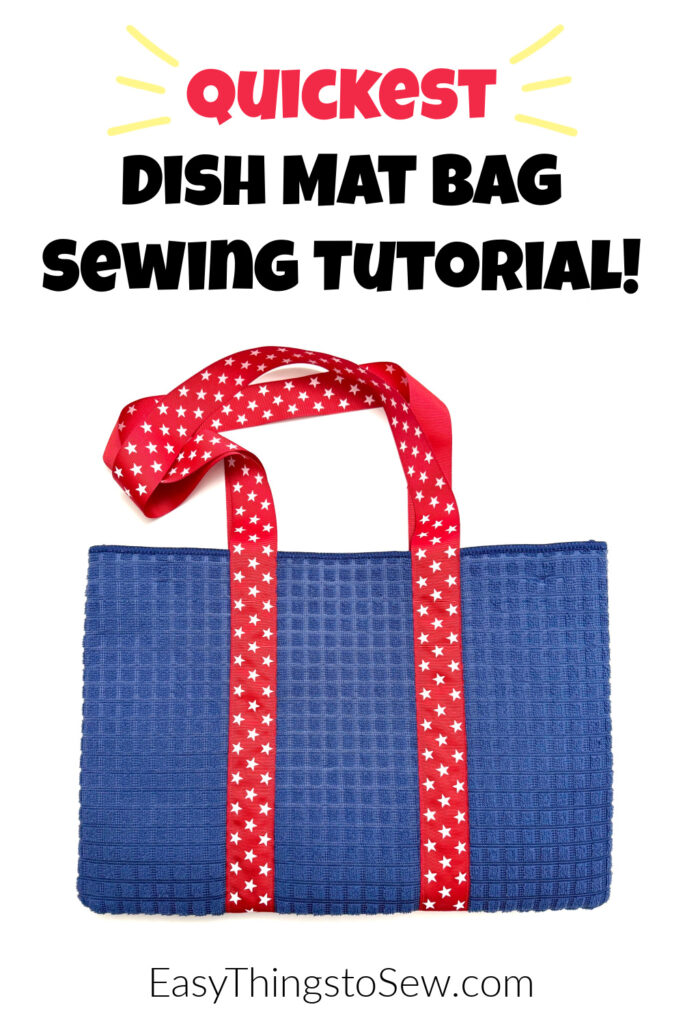
This easy Dish Mat Bag sewing pattern is the quickest and easiest way to transform two drying mats and some ribbon into a pretty bag in less than an hour! It is a perfect beginner sewing tutorial.

I know that so many of you have limited options for dish mats (I do, too) because of where you live and no selection at stores. That is why I wanted to show you that even if you have to use plain colored dish mats, you can still make a beautiful and unique bag with patterned ribbon because the ribbon handle becomes the focal point with this bag style.
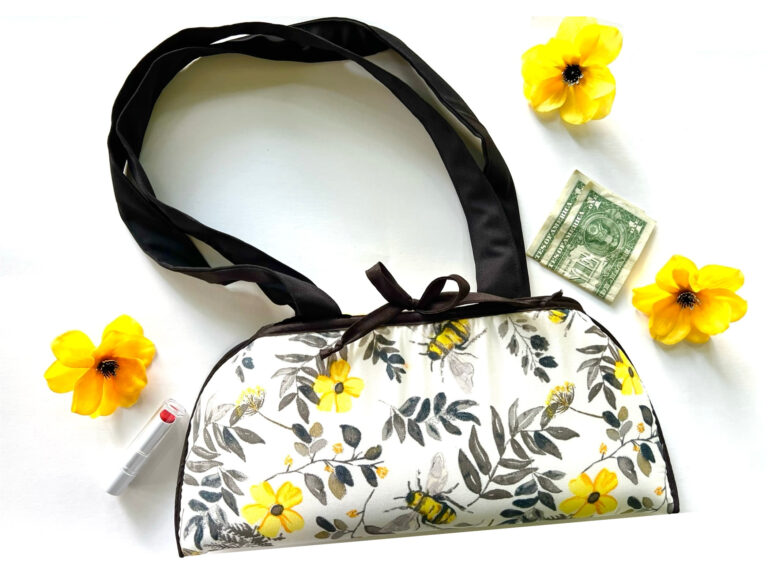
This bag is similar to my DIY Dish Mat Tote Bag with finished edges, but it is quicker to make and adds color and pattern with the full-length handles sewn on the outside.
My entire bag cost less than $4 to make because I chose small dish mats and used ribbon I found on clearance.
Want another easy dish mat sewing project? See my quick and easy reversible dish mat basket or this bedside caddy!
DIY Dish Drying Mat Bag
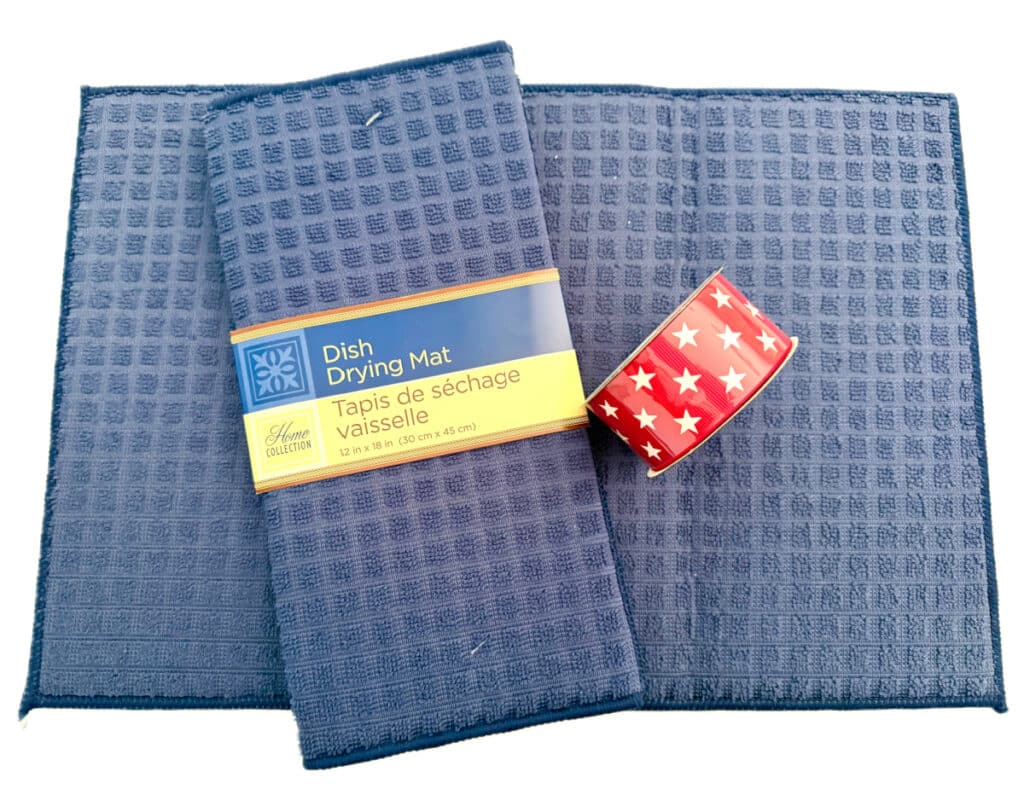
I used two standard-size dish drying mats from the Dollar Tree (12 in X 18 in or 30 cm X 45 cm). You can find larger sized dish mats at Dollar Tree, TJ Maxx, Dollar General and other home stores, though they will usually cost a little more.
Supplies
- Two dish drying mats (can be any size, but both must be the same size)
- Ribbon (I used 100″ or about 2 ¾ yards)
- Sewing clips
Directions
Remove the tags from the drying mats.
Decide on the length of the handles. For my bag, which fits over my shoulder, I used two 50″ (127 cm) lengths of ribbon. You could also make a hand-held tote bag which would have shorter handles.
Place one dish drying mat on a solid surface, with the top side (if you have a directional pattern) facing up and the right side (pretty side) facing you.
Place the raw end of one length of ribbon along the bottom edge of the drying mat, bring the ribbon up and loop back over to bring the other cut edge of the ribbon to the bottom of the drying mat, creating a handle.
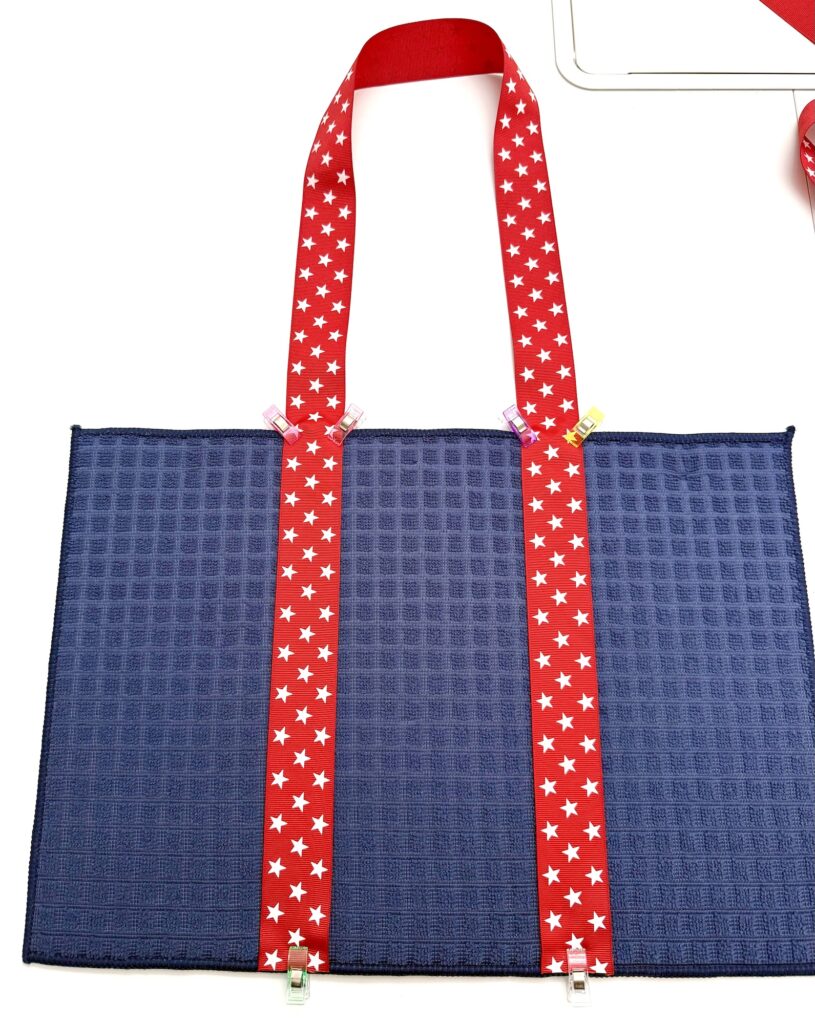
Clip the ribbon to the drying mat to secure. (I prefer clips because of the thickness of the mat, though you could use pins.)
Tips to Make Your Handles:
- Handles can be any size that works for you. It is best to “practice” with handle sizes by clipping the ribbon to the top of the drying mat as a temporary handle and seeing what size works for you. Then add in the measurement of covering each side of the drying mat with the ribbon, too.
- Any wide ribbon, webbing or handles made from fabric will work.
- When placing the handle, be sure the loop on the top is not twisted.
- You can place your handles as wide apart as you would like. I chose to cover the folds on the drying mat with my ribbon handles so that they would not be seen. Whatever width you choose, just be sure that it is the same distance on either side from the outer edge of the drying mat.
Now do the same thing on the other drying mat.
Helpful Tip for Placing Handles:
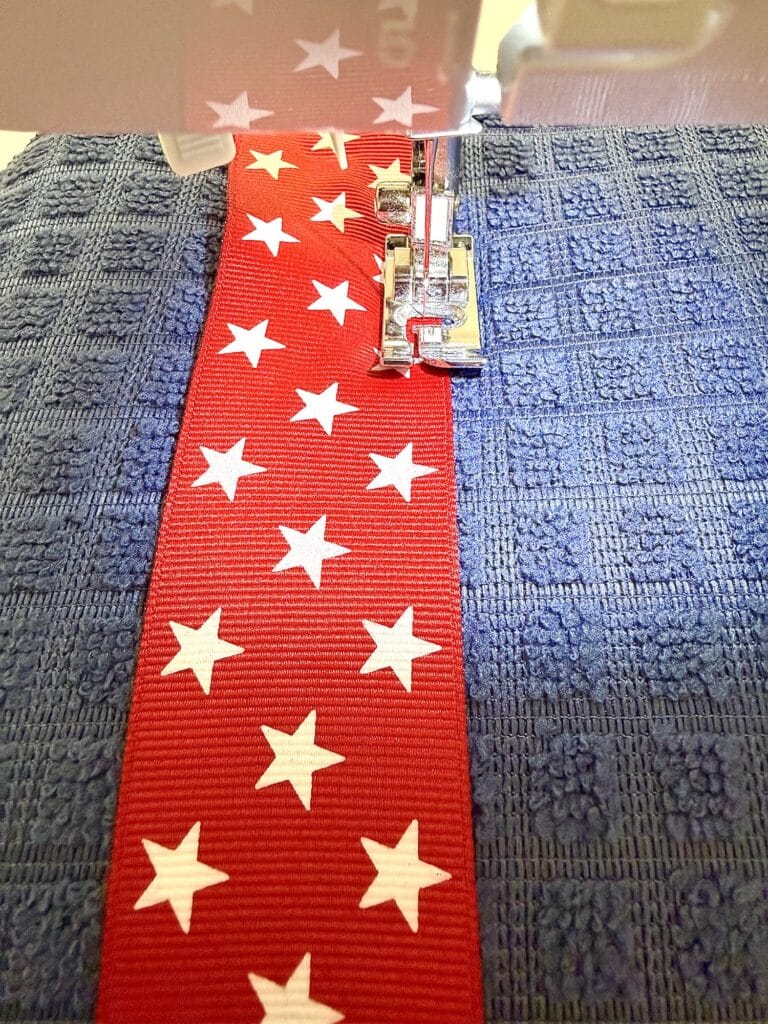
Once you have the handles on both mats, place them right sides together and make sure the handles line up evenly. If they are not (drying mats might not always be the exact same size), adjust the handles so that they match up.

Sew along the outer edge of both sides of the handle, about 1/8 inch from the edges. You do not have to backstitch on the bottom edge, but be sure to backstitch on the top edge.
Place the two drying mats with the ribbon sides facing each other. Make sure that the handles are matching. (It is more important to make sure the handles are matching exactly rather than the outer edges of the mats.) Clip the edges together.
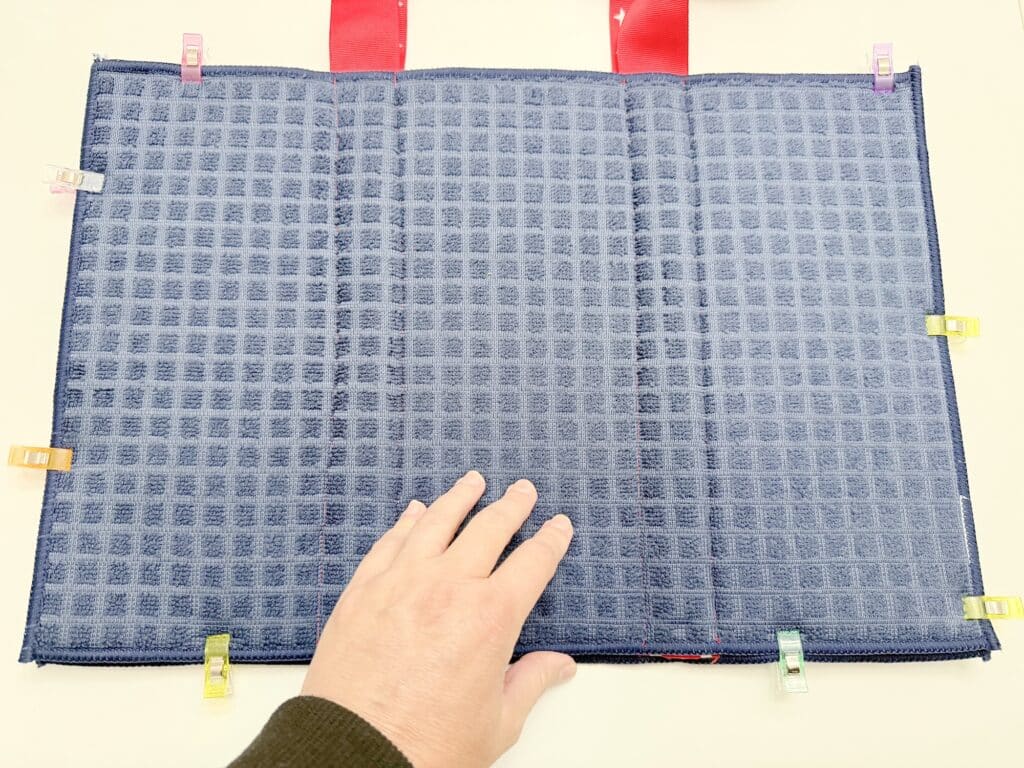
Sew around the three outer edges (not the edge with the handles) using a ¼ inch seam allowance.
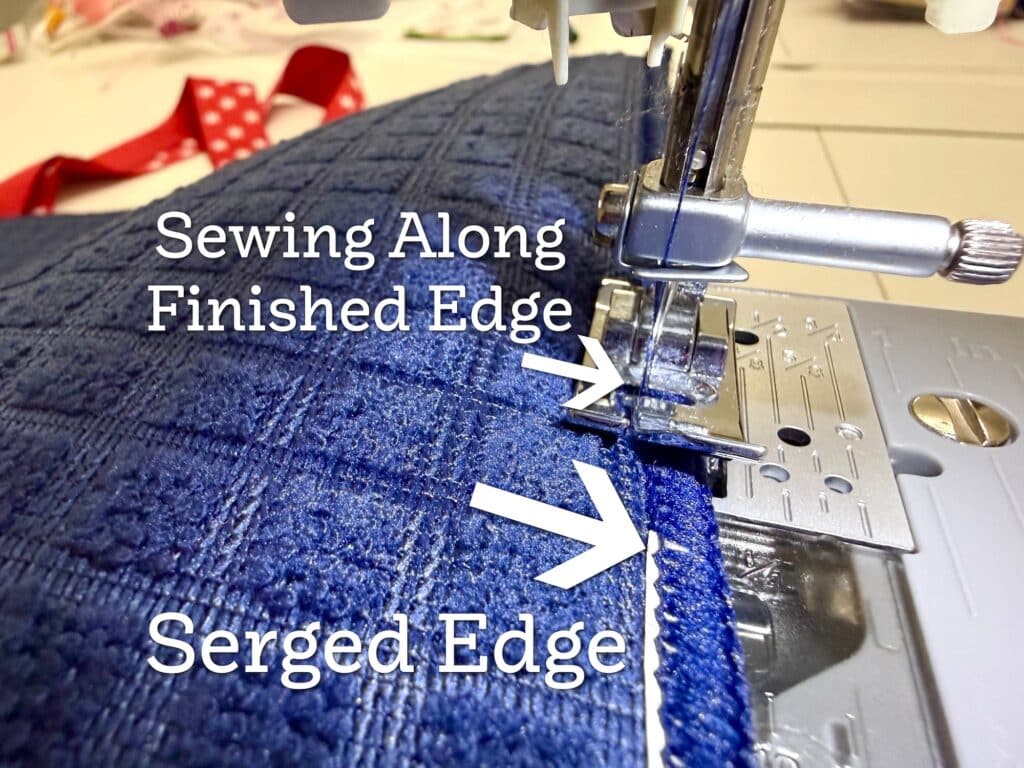
I actually just sewed along the serged (finished) edges of the drying mats, which may or may not have been ¼ inch. I didn’t want much excess showing inside the bag, so this way there was no bulky seams inside.
You could turn the bag inside out and be done right now if you like a slim line bag!
If you like a boxy bag, though, you can do one more step to box the corners and give your bag a flat bottom with room to hold wider objects.
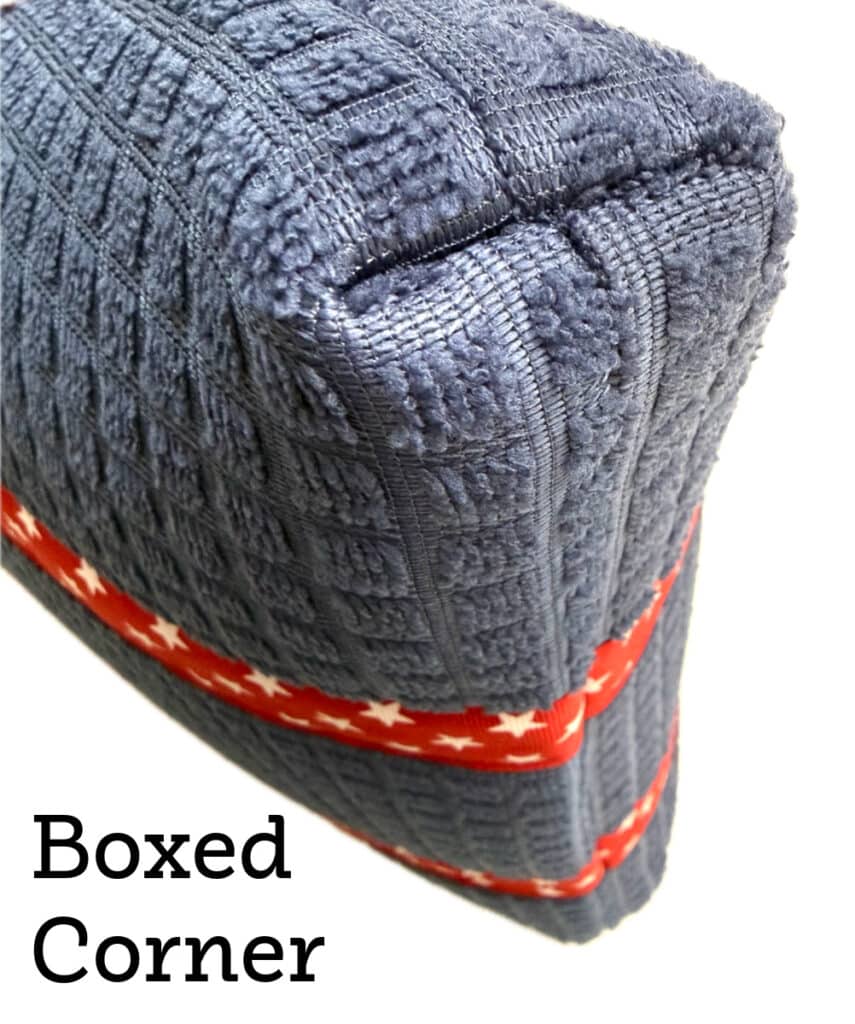
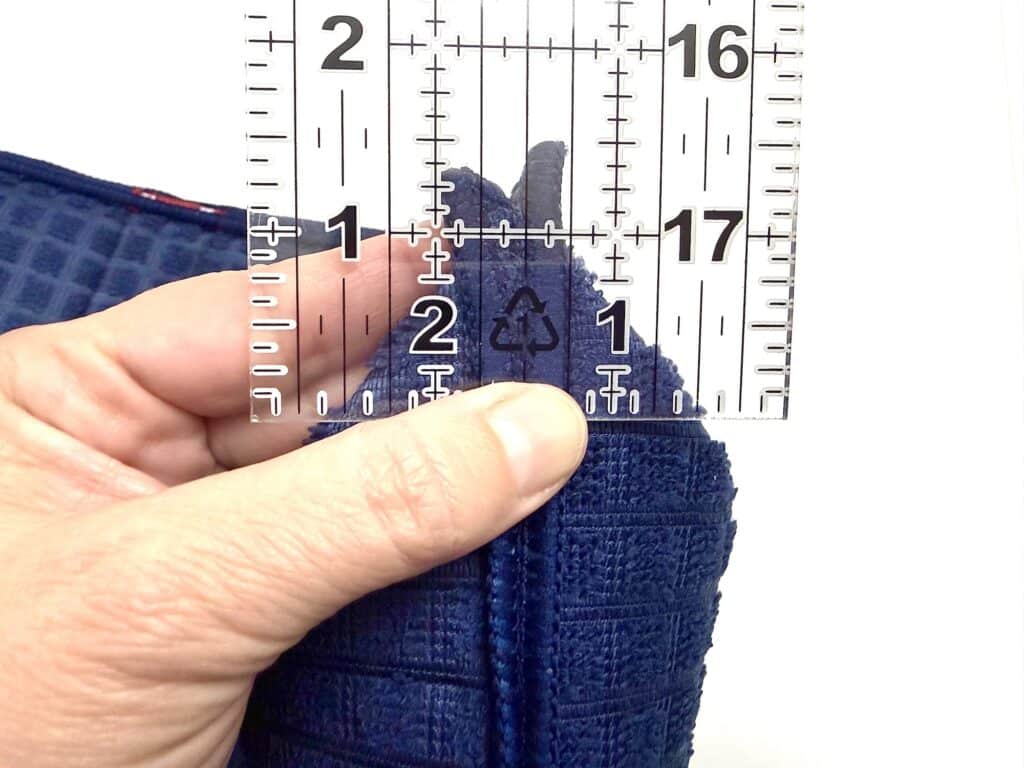
With the right sides together (don’t turn the bag inside out yet), pinch the corner together so that the bottom seam is pinched together with the side seam.
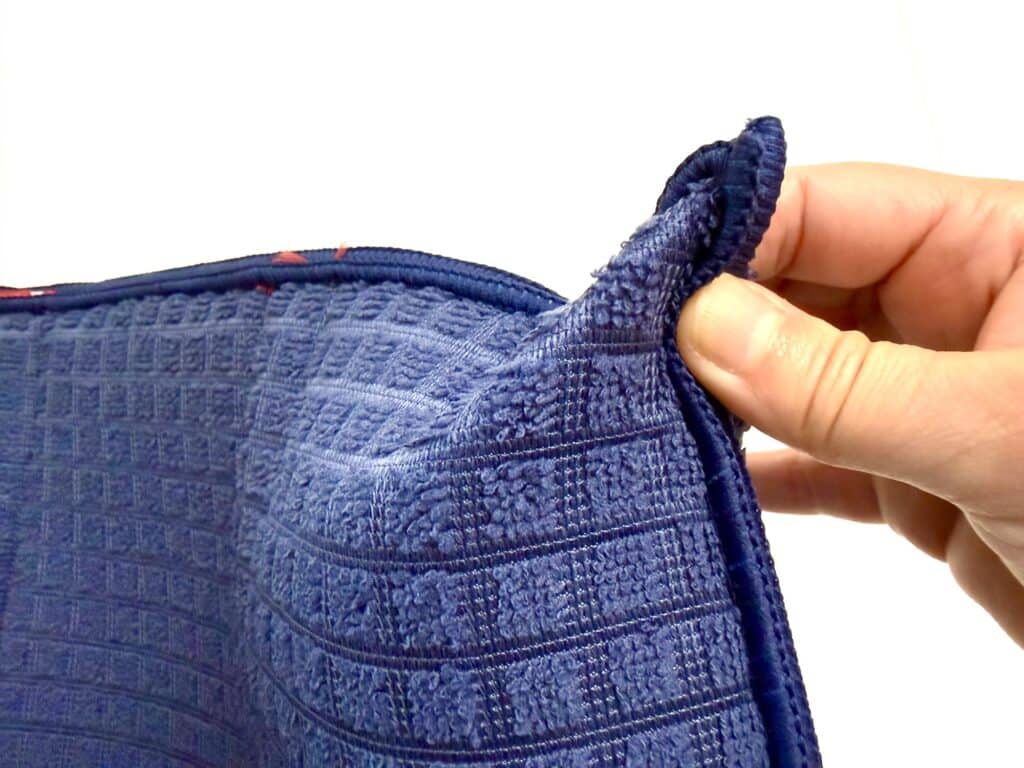
Measure down about 1 inch from the point. (The more you measure, the boxier the corners will be, but the shorter your bag will be.) A transparent sewing ruler makes measuring quick and easy!
Draw a straight line across the pinched corner at that measurement, then sew along the line, being sure to backstitch at the beginning and end to secure the stitching.
Helpful Tips for Boxing Corners:
- This will be a really thick part of the bag, so you may need to sew more slowly to allow the needle to go through the thickness.
- I used a universal needle for my sewing, but if you prefer to use a heavy sewing machine needle for denim and thicker projects, that is fine.
- You can cut off the excess corner after sewing the corners together if you prefer, but I did not.
- If you want to hide the boxed corner seams, you can do a French Seam as I did in my DIY Dish Drying Mat Tote Bag with Satin Edges.

Be sure to Pin this idea to save for later, or save it to Facebook or Flipboard.
If you love sewing bags, be sure to see these easy sewing tutorials next: