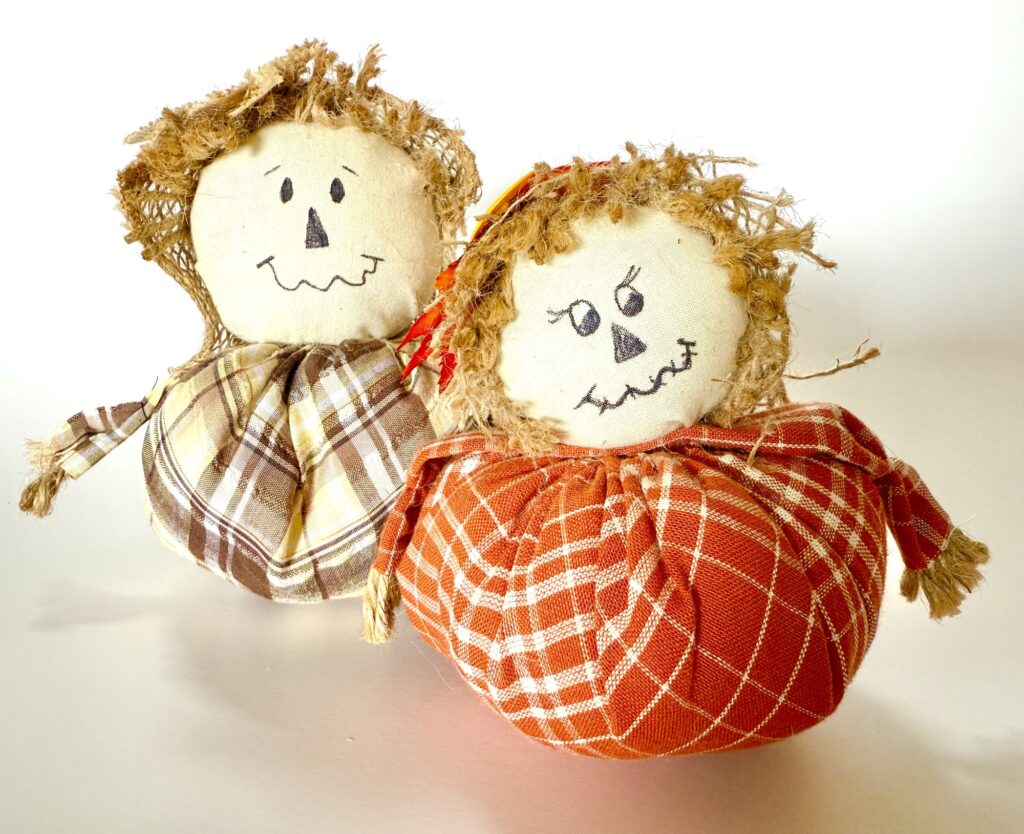
Fabric Scarecrows
These DIY stuffed scarecrows are incredibly easy to make, even though they look complicated! Our fabric scarecrows are perfect autumn decor and especially great to sell at Fall craft fairs!
Be sure to see our easy DIY fabric pumpkins, too, which are made in a similar way.
These scarecrow stuffies are just one of our many Halloween sewing projects.
How to Sew Stuffed Scarecrows
Watch me make these scarecrows in my YouTube video tutorial at the end of the directions.
My brown plaid fabric was cut out of an old button-down shirt!
Supplies
- Fabric for Body and Arms (11 X 11 inch square, plus extra)
- Fabric for Face (8 X 8 inches)
- Hand Sewing Needle (I prefer long, thick tapestry needles)
- Heavy duty thread or embroidery floss (double-strands of sewing machine thread is okay, too)
- Poly-fil or stuffing
- Jute twine, raffia or yarn
- 6 X 6 inch burlap square
- Thin black marker suitable for fabric
- Embellishments (flowers, leaves, button, ribbon, etc.)
Directions
Step 1
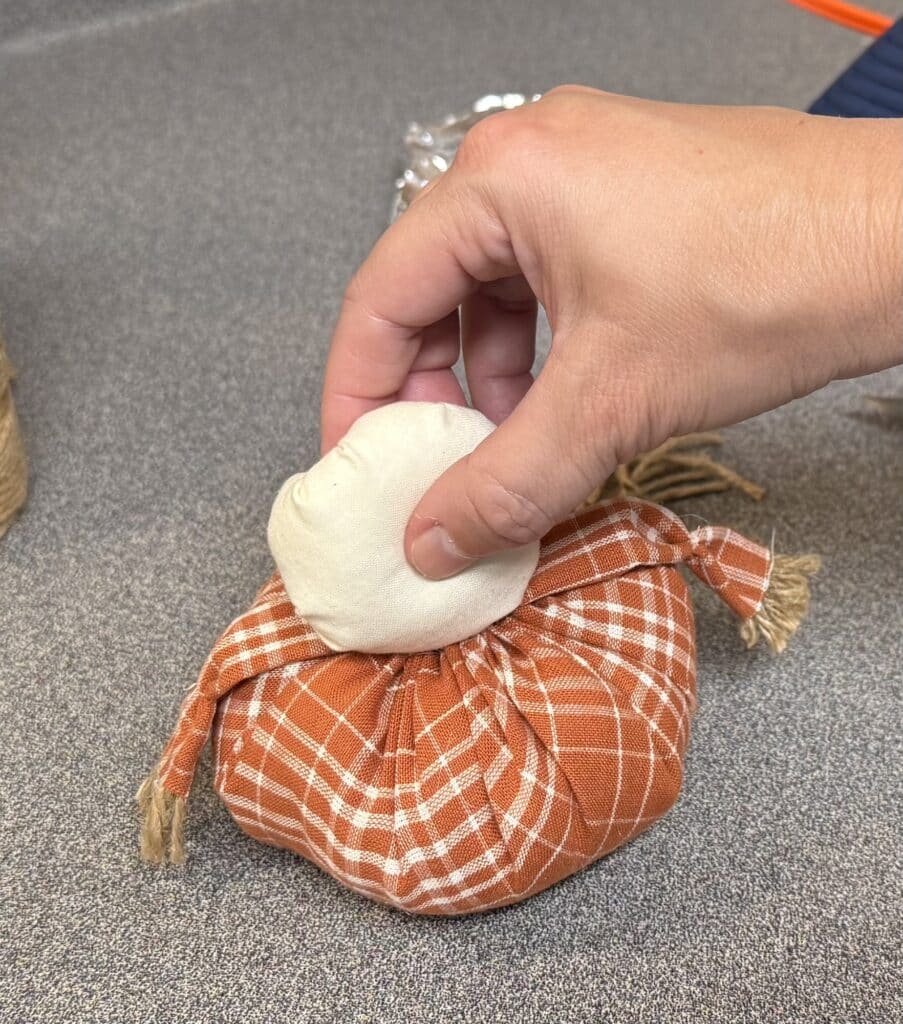
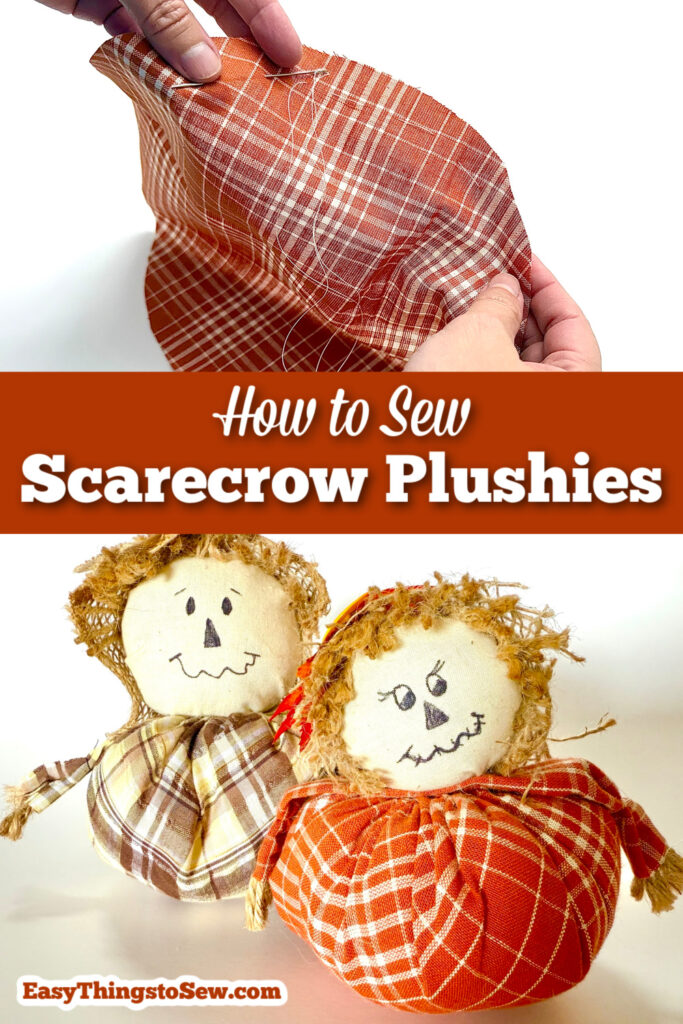
Cut an 11-inch diameter circle out of fabric for the body. Also cut a 2 X 7 inch rectangle from the same fabric.
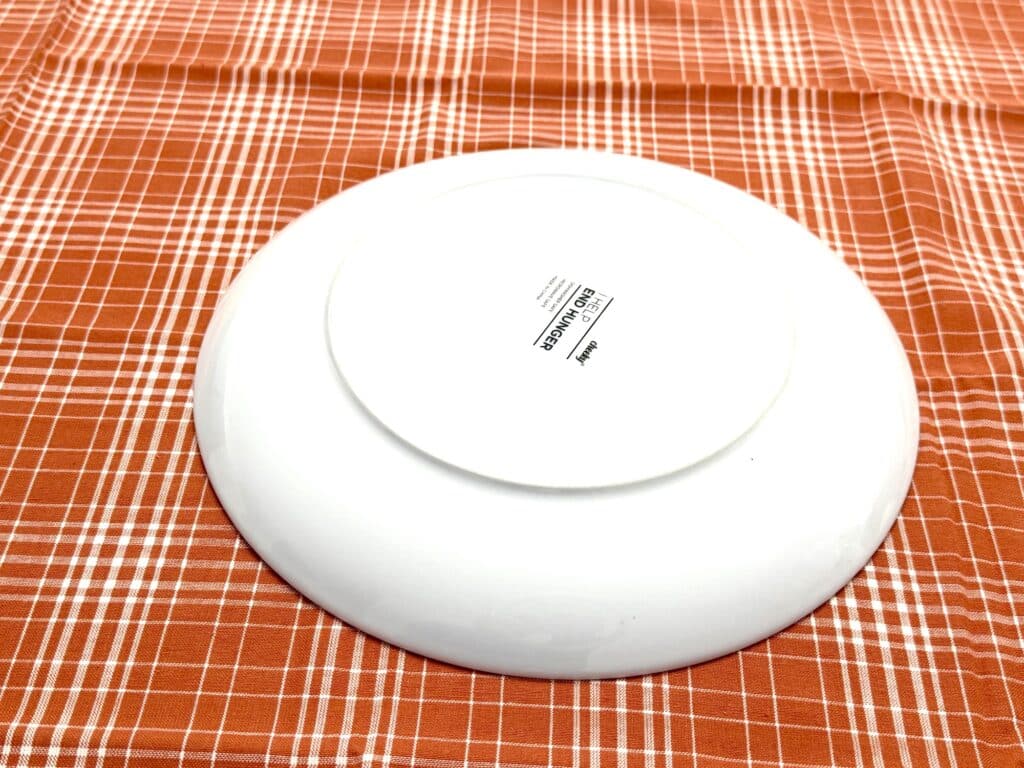
Cut a 7 1/2 inch diameter circle out of muslin or flesh colored fabric.
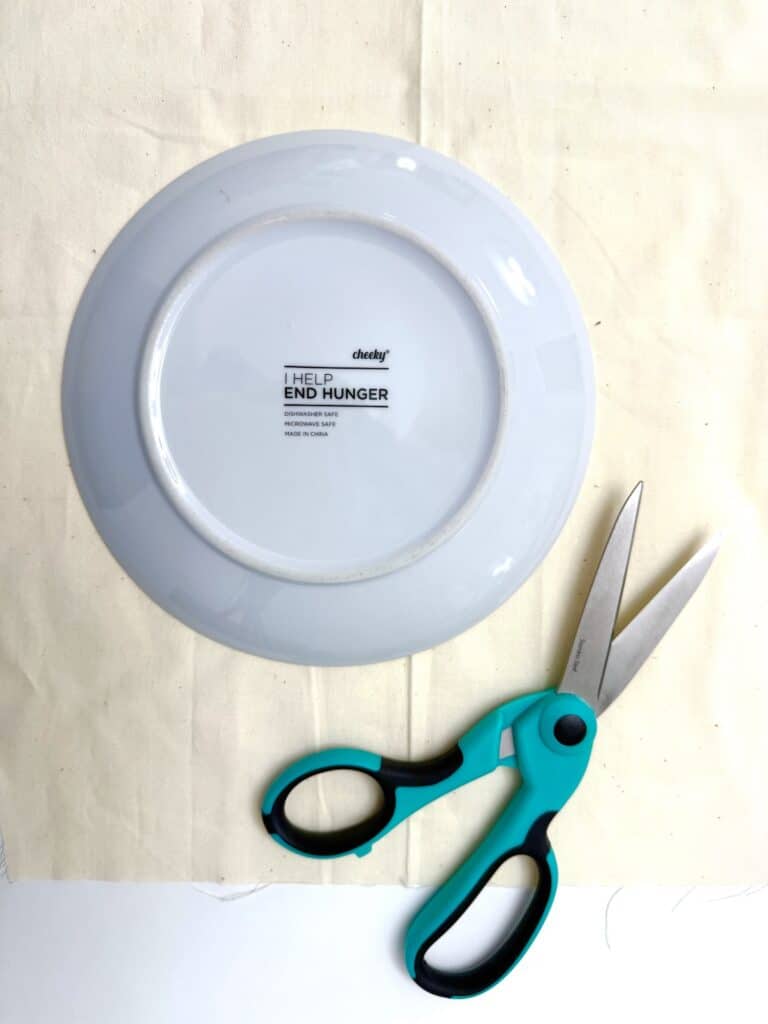
Helpful Tip: Plates can make great templates for tracing a circle on your fabric!
Step 2
Thread a hand sewing needle with a double-strand of embroidery floss or thread. You will be pulling on these threads, so you need them to be strong.
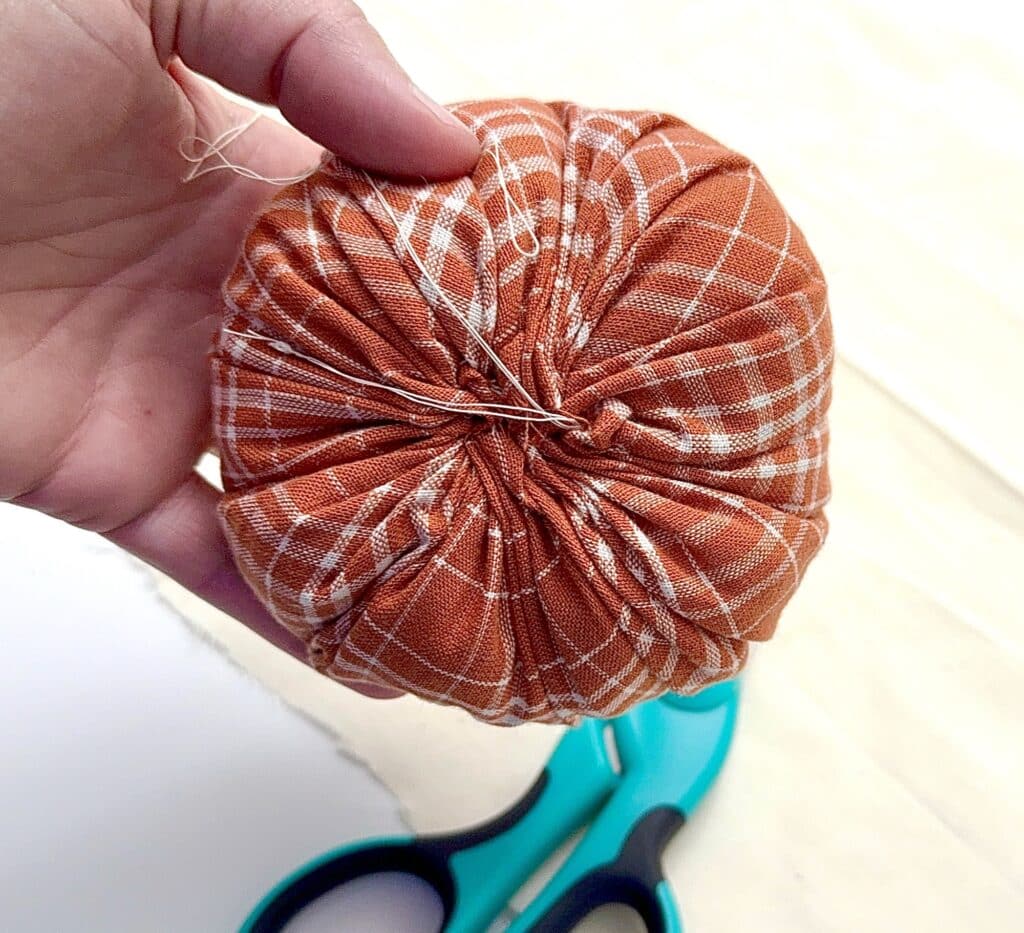
Stitch a basting stitch around the outer edge of the 11-inch circle about 1/2 inch from the edge. Use long, straight stitches and when you have gone all the way around, leave the threads long and do not knot.
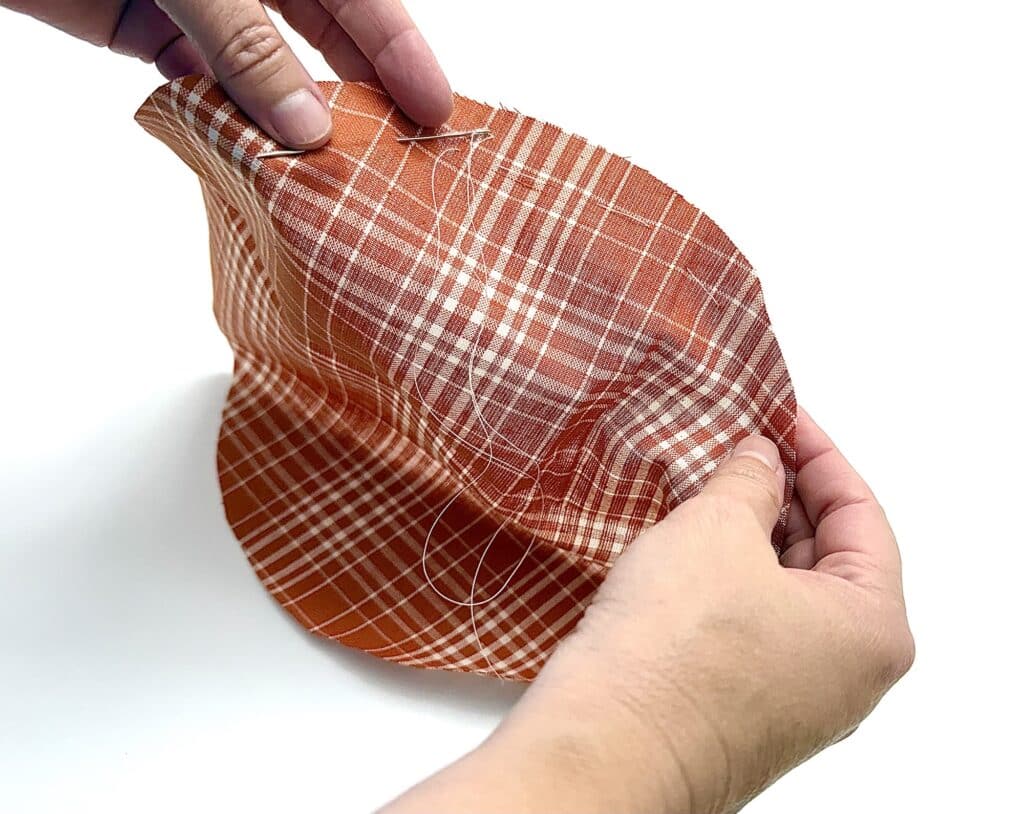
Pull on the threads on either end (if you knotted the thread on one end, just pull on it to lengthen and loosen the thread) and start to gather the circle into a pouch.
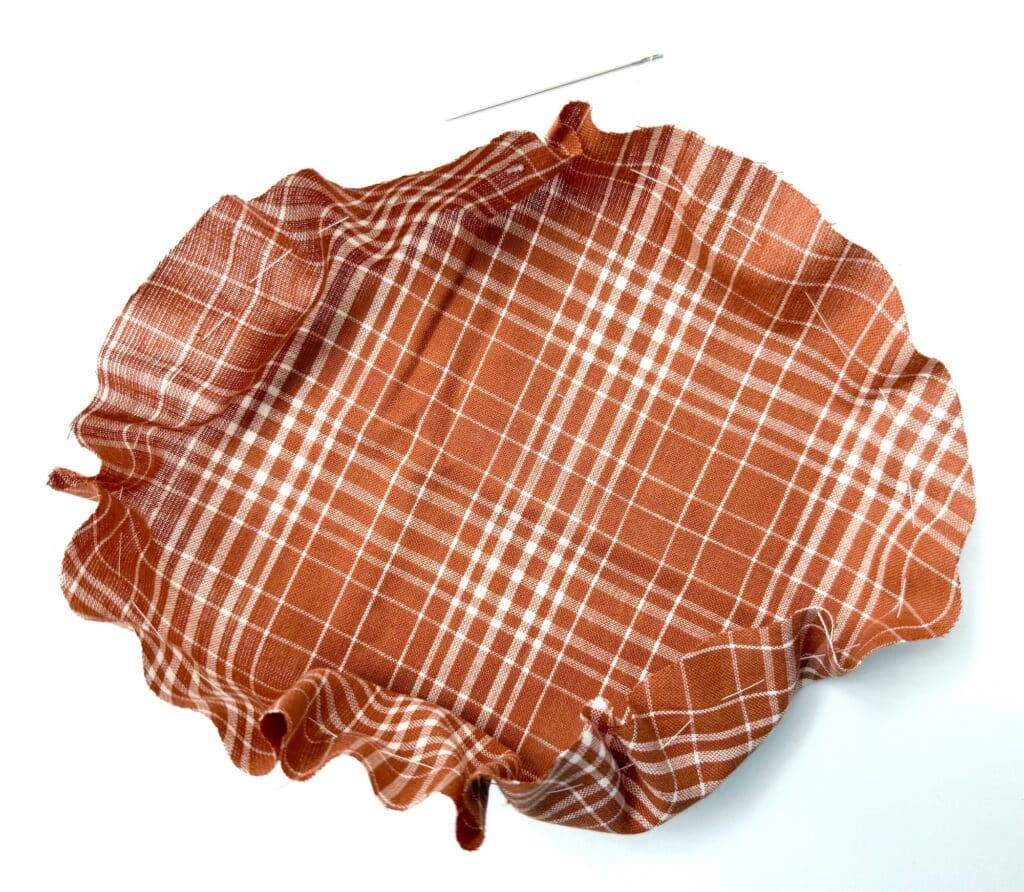
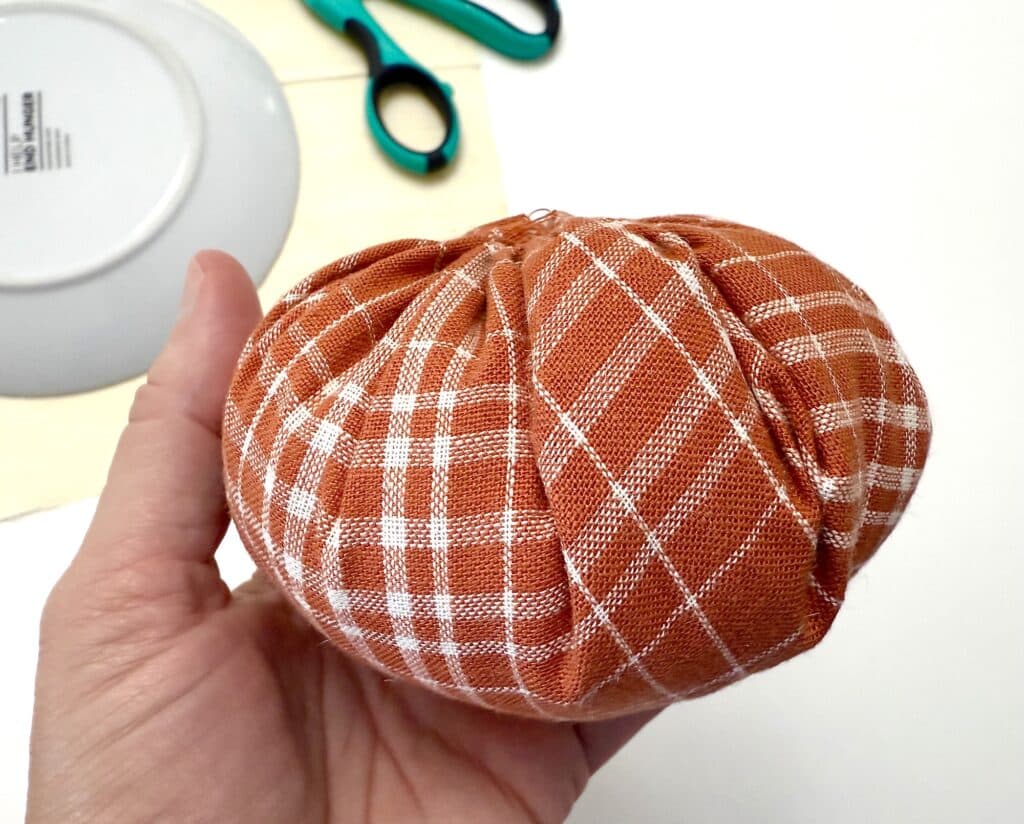
Fill the pouch with Poly-fill or stuffing until it is a plush as you would like.
Tip: Here’s a money-saving sewing hack video when using Poly-fill.
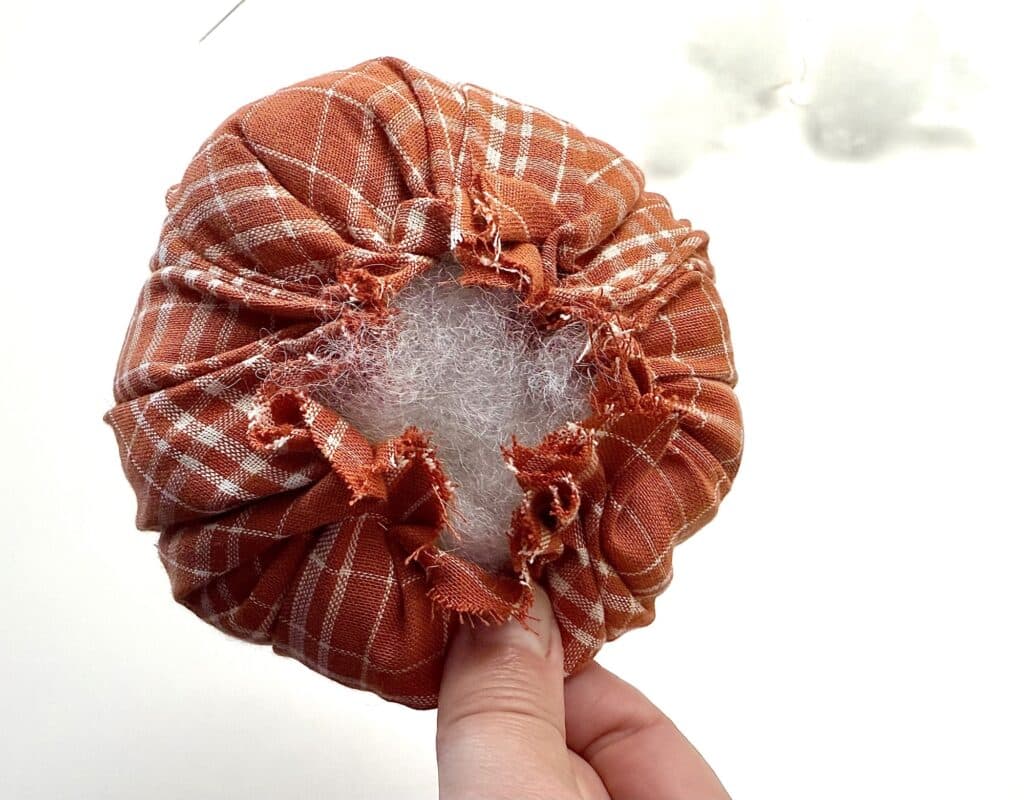
Pull both threads tight, gathering the fabric as you do, until the fabric closes in the center and you can’t see the stuffing anymore. Then tie the threads in a tight knot (I suggest knotting 3-4 times for strength.)
Step 3
Repeat the same process as Step 2 with the face fabric.
Step 4
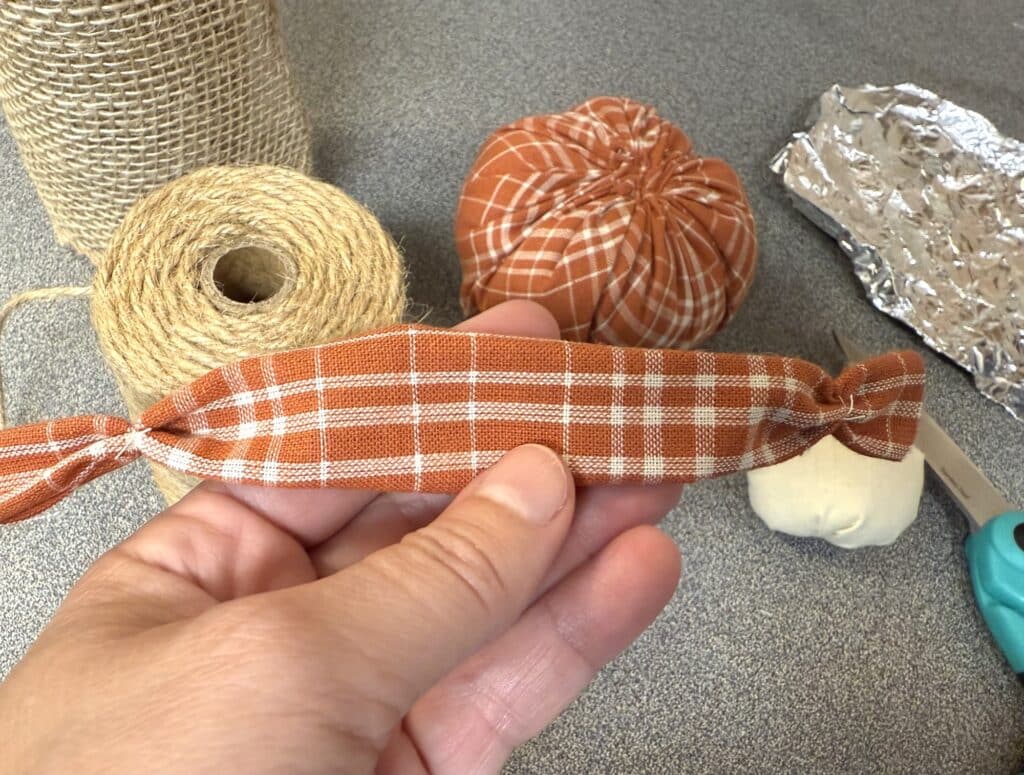
With the wrong side facing up, fold one of the long edges of the fabric rectangle in by 1/3. Then fold the other side inward to cover the folded edge.
Using thread or embroidery floss, tie a knot at each end of the folded fabric rectangle about 1/2 inch from the edge.
Step 5
Cut jute twine, raffia or yarn into 1 1/2 inch pieces.
Fold each piece in half and place a dot of hot glue on the fold. Insert the folded end into the open end on one side of the fabric rectangle.
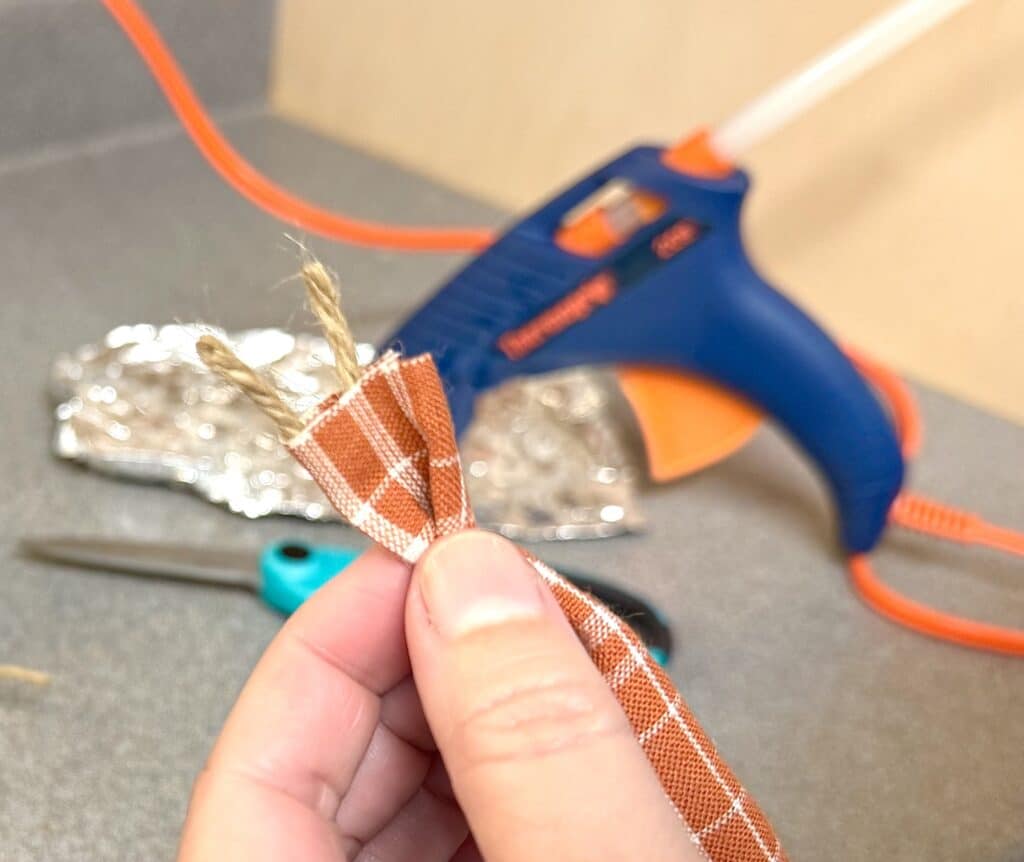
Continue to add folded pieces until the open end of the fabric is full and it looks like scarecrow hands.
Repeat on the other side of the open end. This will create the scarecrow arms.
Step 6
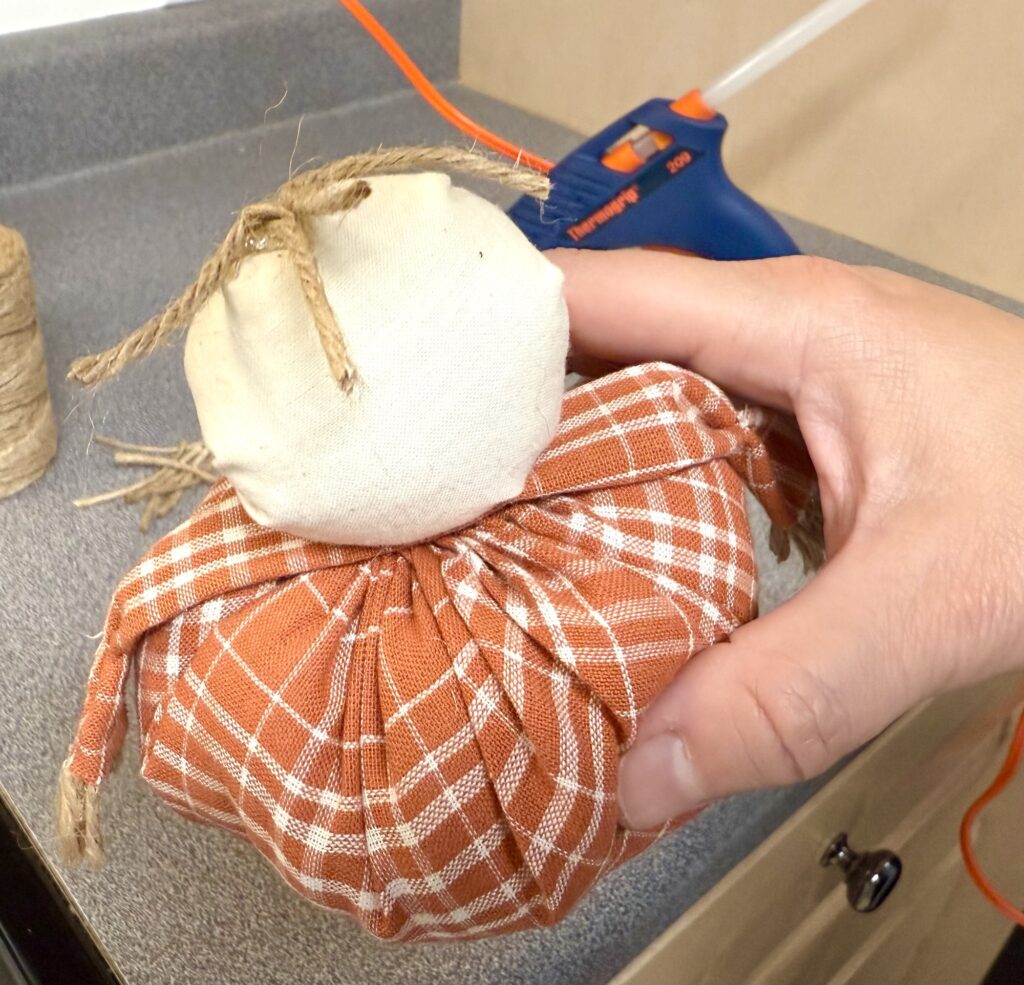
Hot glue the scarecrow arms over the gathered middle of the fabric body base. Be sure to put the cut, unfinished edge facing down when gluing it and center it on top of the body.
Step 7
Hot glue the face to the scarecrow body by adding a line of hot glue on one edge of the fabric circle. Place the hot glue on top of the scarecrow arms, with the gathered middle facing the back of the scarecrow.
Hold in place until secure.
Step 8
Cut 2-inch strips of twine, raffia or yarn. Fold the strip in half and place a dot of hot glue on the fold. Place on top of the head in random patterns to make the hair.
It is okay if the strips are too long in the front because you can trim them later.
Step 9
After you have glued hair on top of the head and the sides, place a line of hot glue on top of the hairline and press the edge of the 6 X 6 inch burlap piece on top. Glue the top and sides and hold the burlap down until secure.
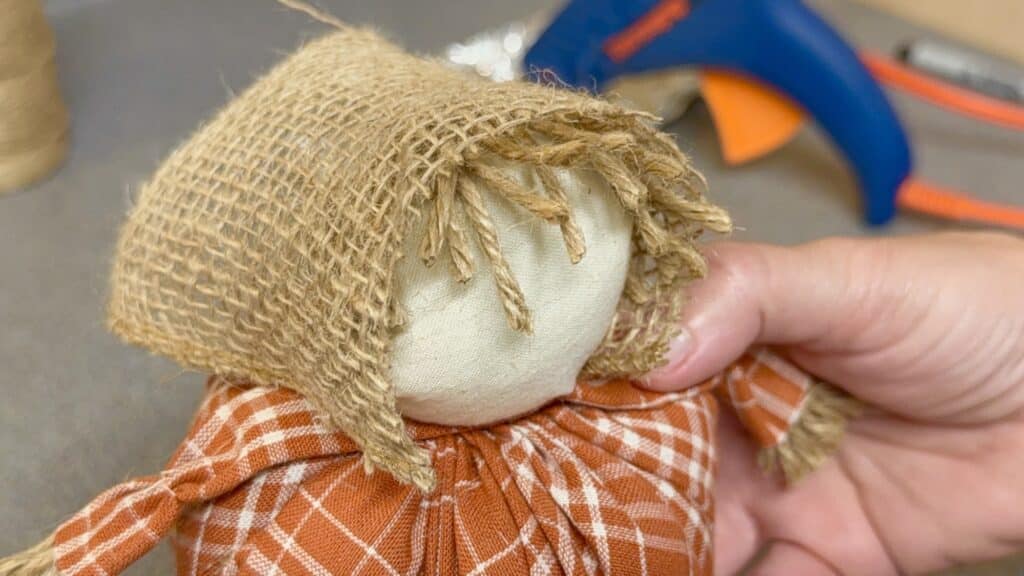
Then place hot glue on the back of the fabric head and press down the burlap fabric.
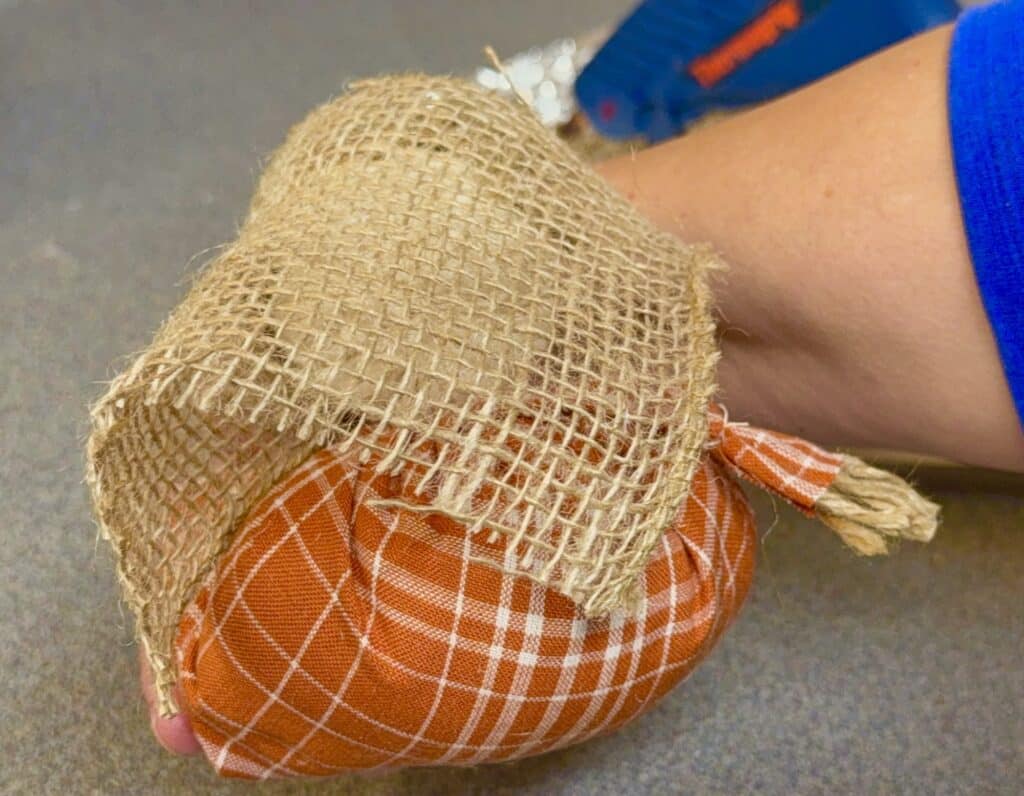
Once dried, take scissors and cut off the excess burlap along the bottom and sides to tidy up the fabric. You will be trimming off the corners and straightening up the burlap.
Step 10
Using a fabric-safe marker, draw eyes, nose and mouth on the front of the fabric face. Search the internet for scarecrow faces as inspiration.
Tip: Be sure to test your marker on the same type of fabric you are using for the face BEFORE starting to draw a facial expression! Many types of markers can run and bleed into the fabric, creating a mess! I used a fine point Sharpie on my muslin fabric, but it is always necessary to test first!
Step 11
Add embellishments such as flowers, leaves, buttons, or ribbon as desired.
Watch me make this scarecrow in my video tutorial below:
If you like this idea, be sure to Pin It on Pinterest to save for later!
You may also like these scarecrow crafts: