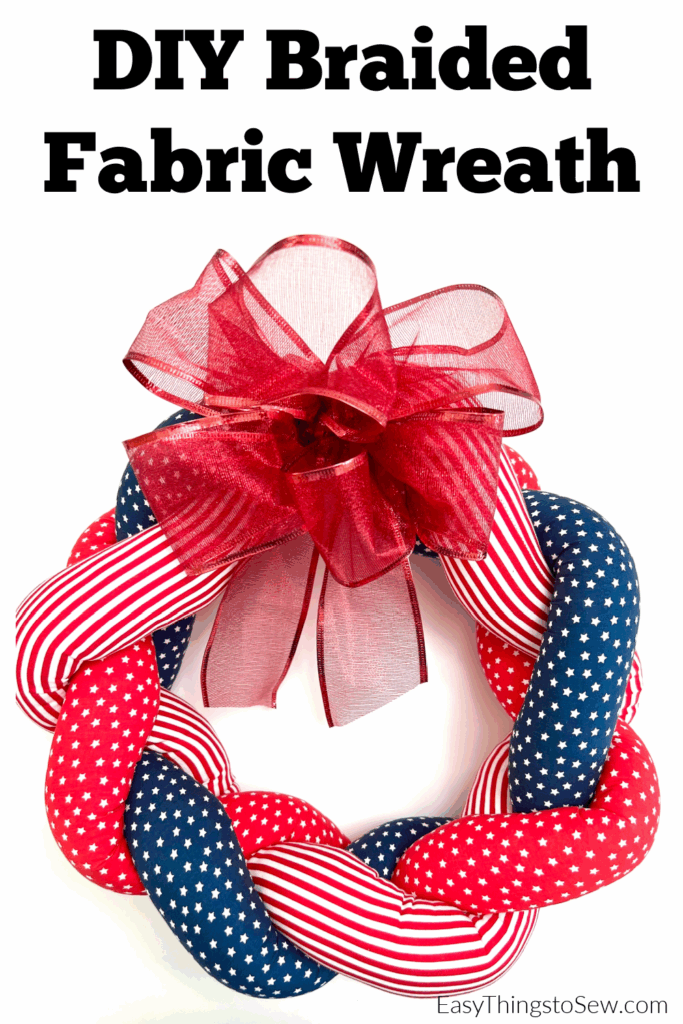
Braided Fabric Wreath (with Video Tutorial)
A braided fabric wreath is a vintage homemade decoration that has been around for generations. If you remember your grandma or mother having one of these classic wreaths, you will love this tutorial!
And even if this classic wreath isn’t part of your core memories, you will still love making this easy DIY wreath!
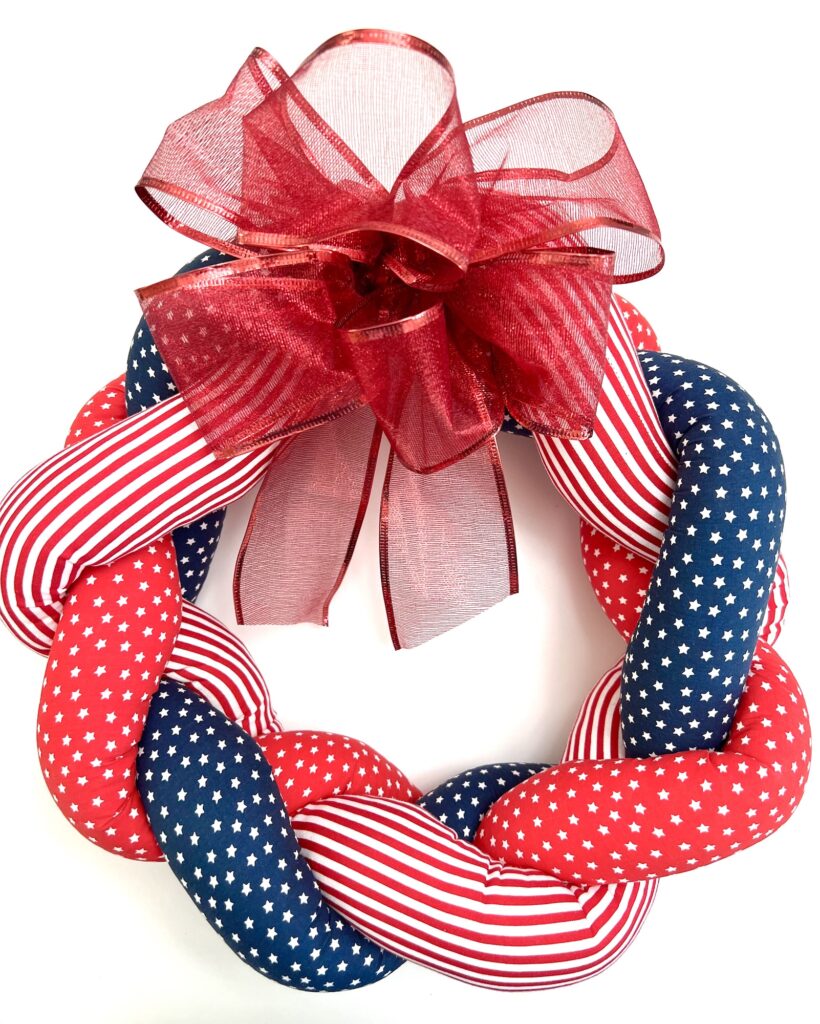
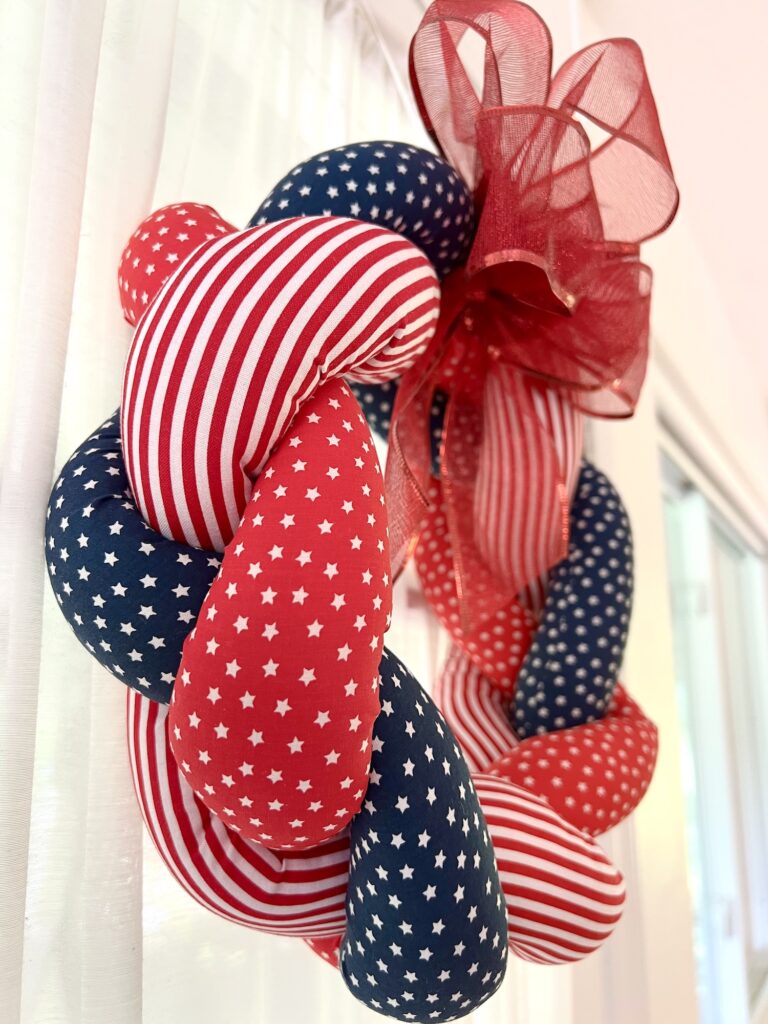
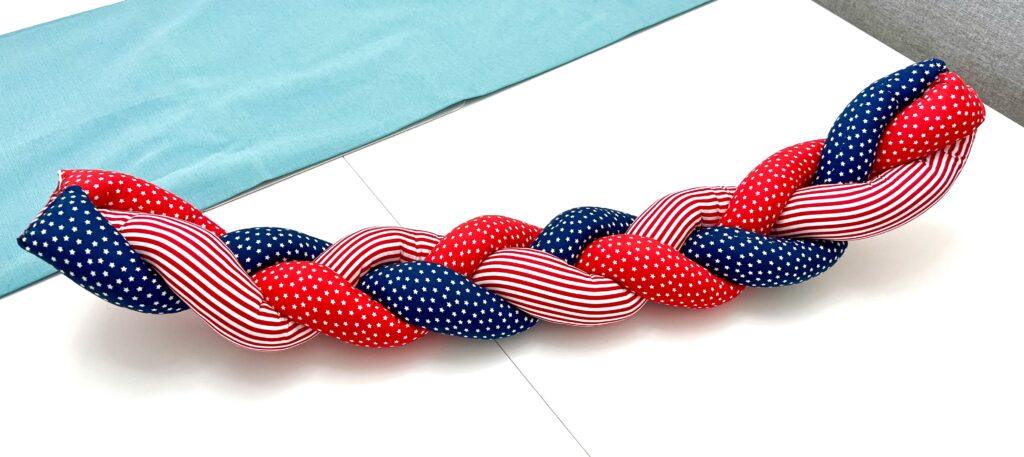
This chunky braided wreath is a statement piece.
If you used less stuffing in your tubes, you will have a thinner wreath compared to mine. You can definitely customize this sewing project with depth and width just by altering the length of fabric and how much fiber fill you use.
Supplies
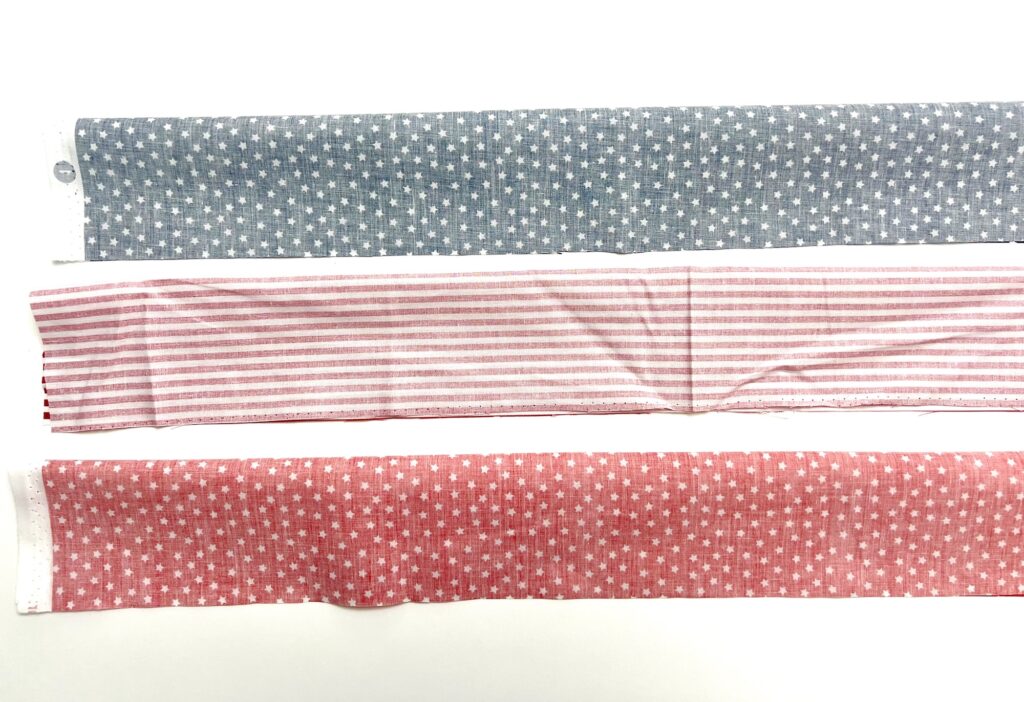
- Three strips of fabric with a different print or color, 6 in. x 44 in.
- Poly-fil or fiberfill stuffing, about 16-18 oz. (Or use my money-saving fiber fill hack)
- Ruler, Yard stick or broom handle
- Upholstery Needle
- Ribbon to make a bow
- Safety pins or clips (optional)
- Common sewing items such as sewing machine, matching thread, scissors
Directions
Step 1
Cut three strips of fabric 6 inches wide x 44 inches long.
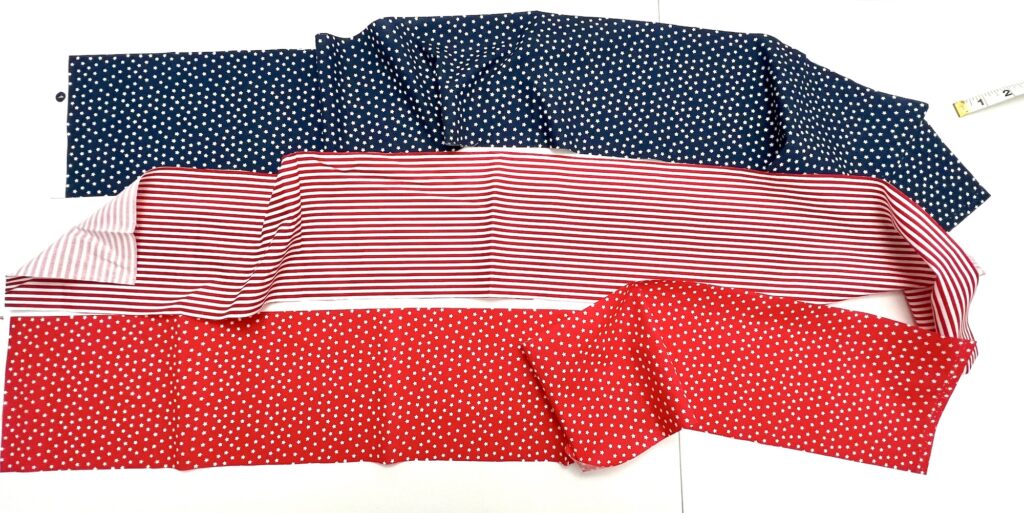
Fold each of the strips along the long edge, with right sides together.
Step 2
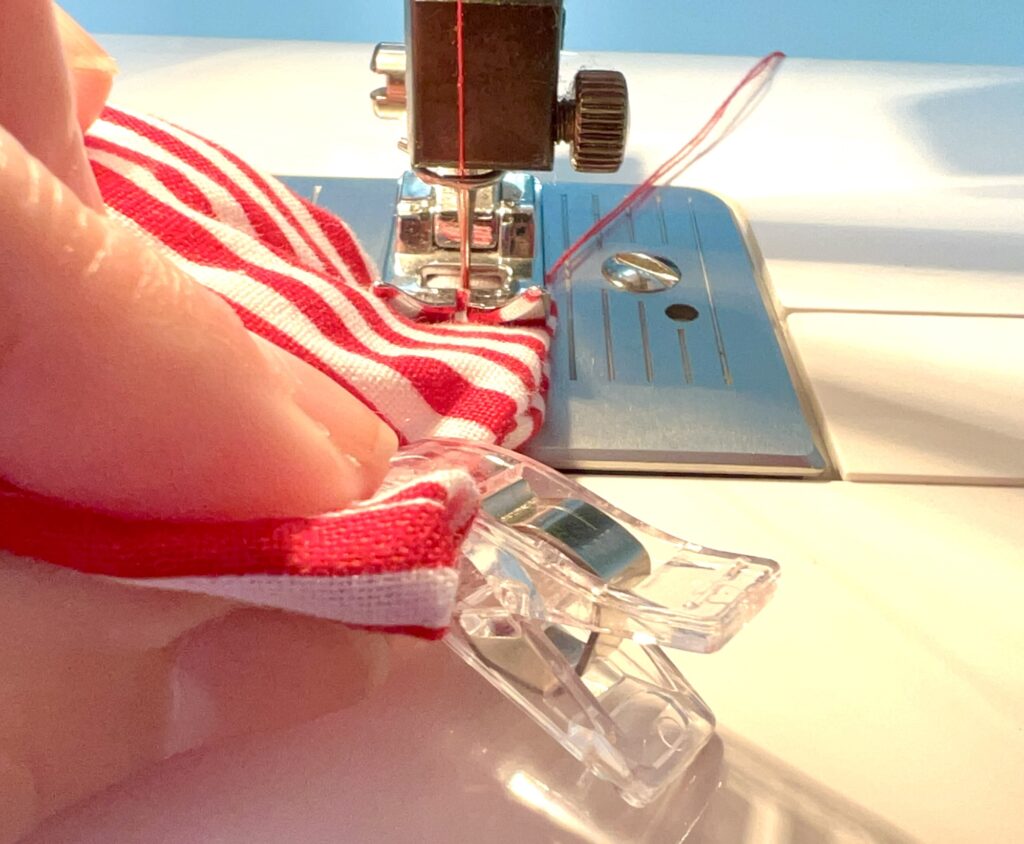
Sew across one short end and then the long edge with a ¼” seam allowance to form a tube.
Cut the corner by snipping a diagonal across the fabric corner on the short side near the stitching but not cutting the stitching.
Step 3
Turn each of the tubes inside out. This can be easier if you use a long sewing bodkin or a ruler/yard stick.

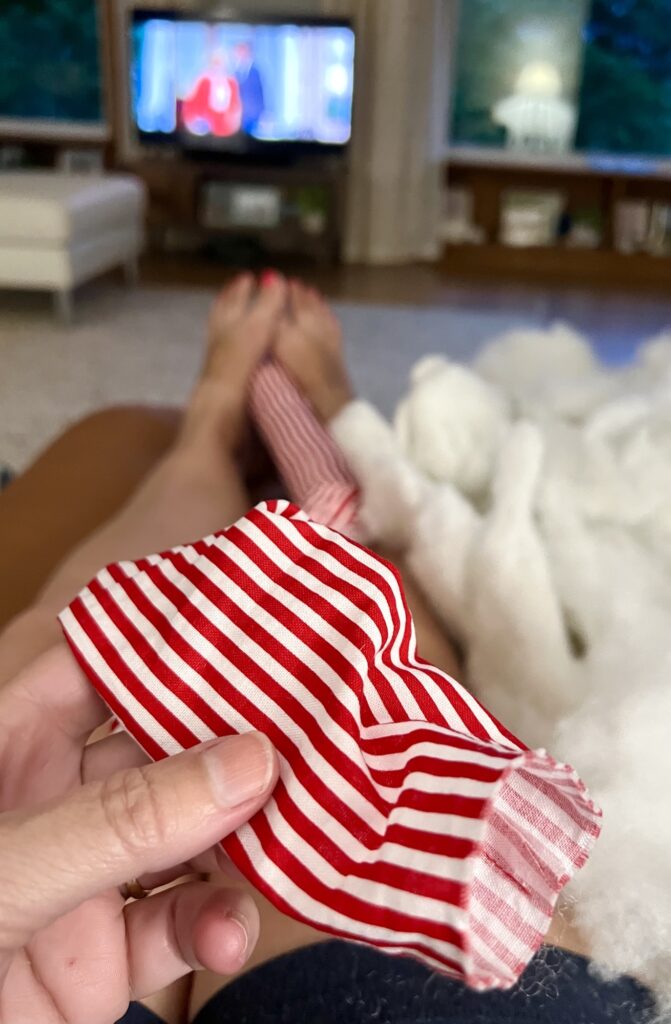
Stuff the tubes with fiber fill. You will need to use a ruler, yard stick or broom handle to stuff down the Poly-fil into the bottom of the tube.
*Tip: This is an activity best done while watching TV! It took me quite a long time to stuff all three tubes, so I put on a Cary Grant and Doris Day movie and was finished around the same time the movie finished.
Do not pack the tubes too tightly (that’s what I did the first time!) because you will have a hard time sewing the ends closed.
You will want to fill the tubes just enough so they are slightly stiff and not too fluffy, but still have a lot of bend to them. Leave at least 1 inch at the ends that is empty without filling.
Step 4
Fold the fabric of the open short ends to the inside about ½ inch.
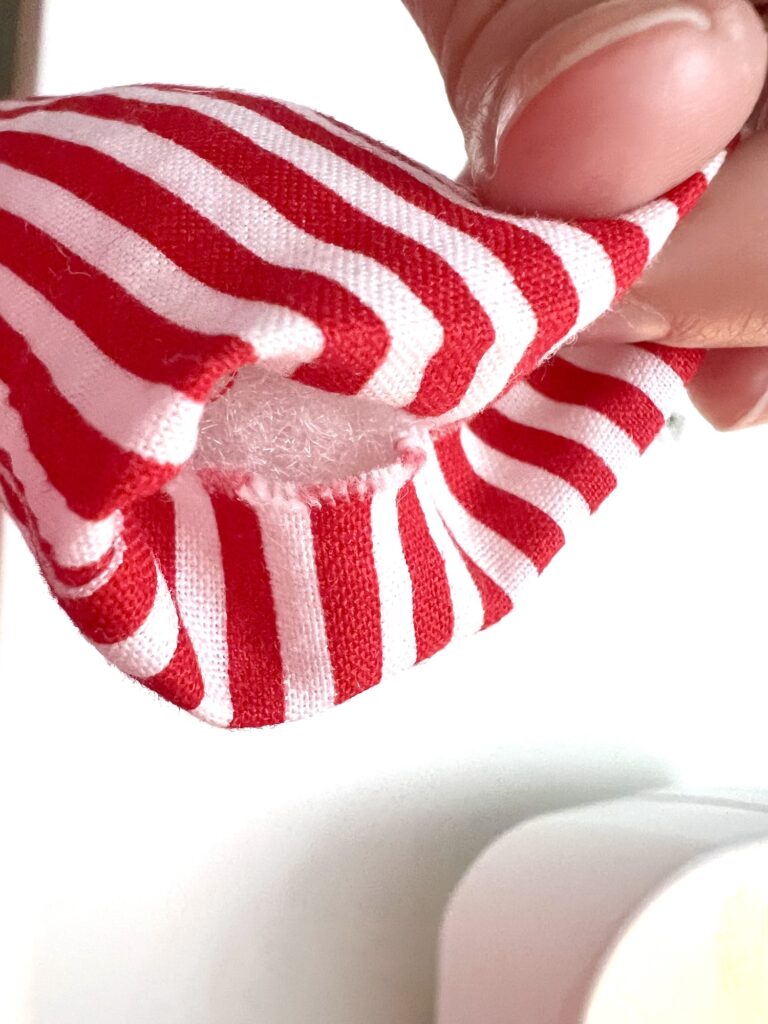
Stitch across the open ends with a ¼ inch seam allowance to close.

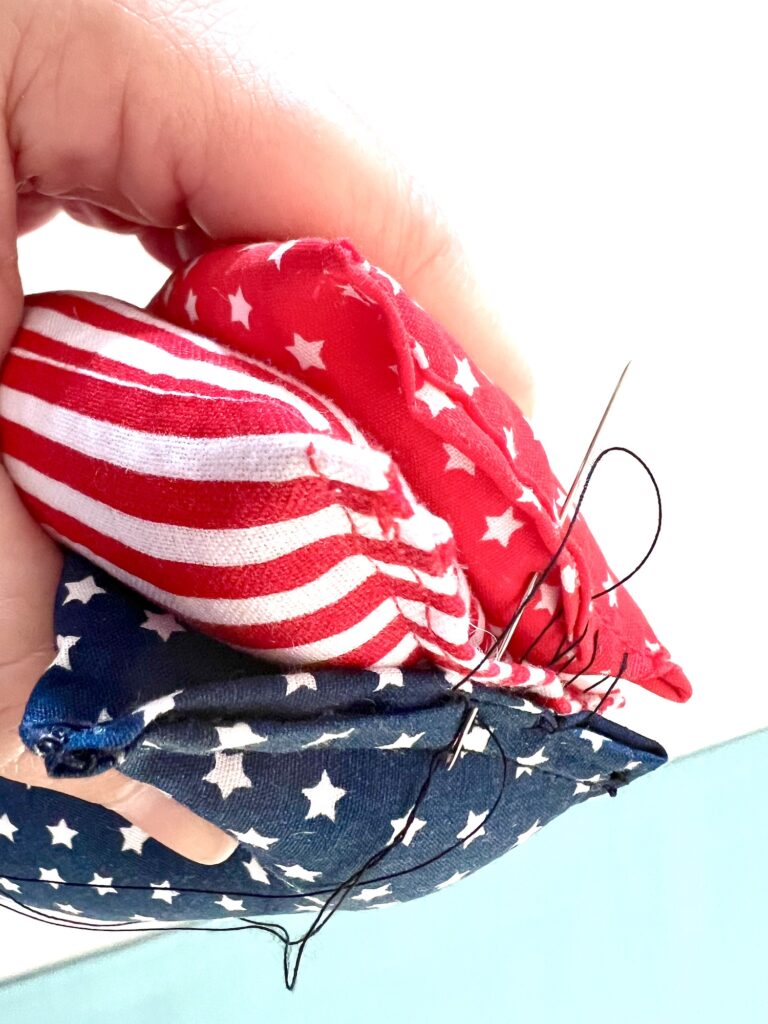
Step 5
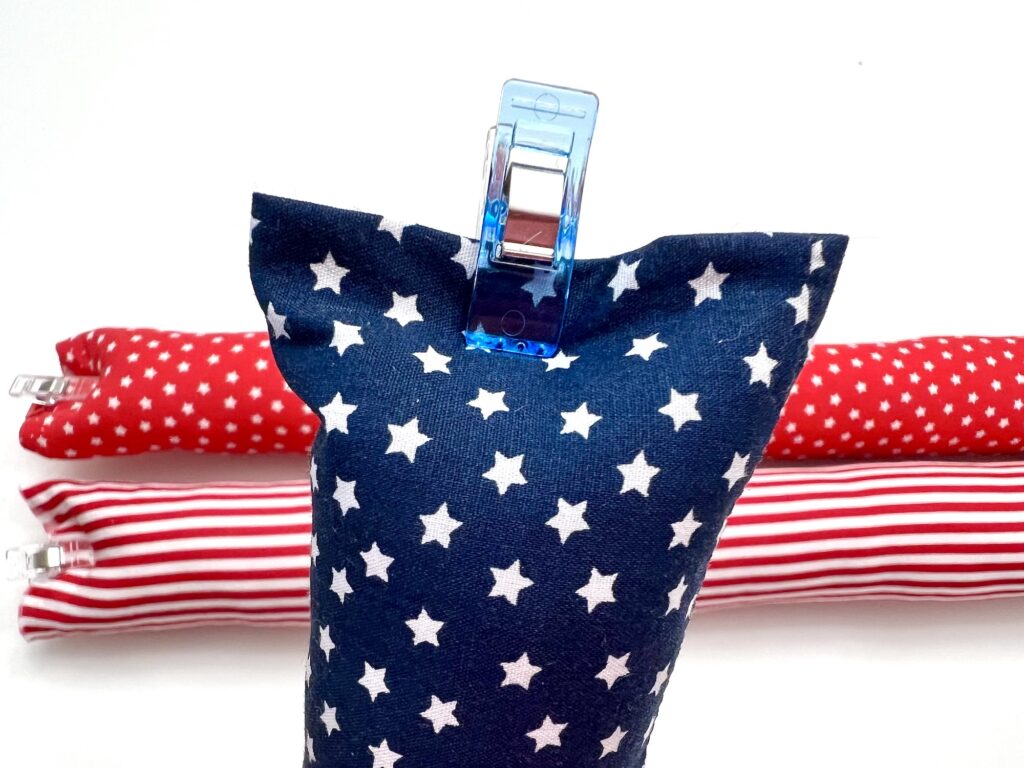
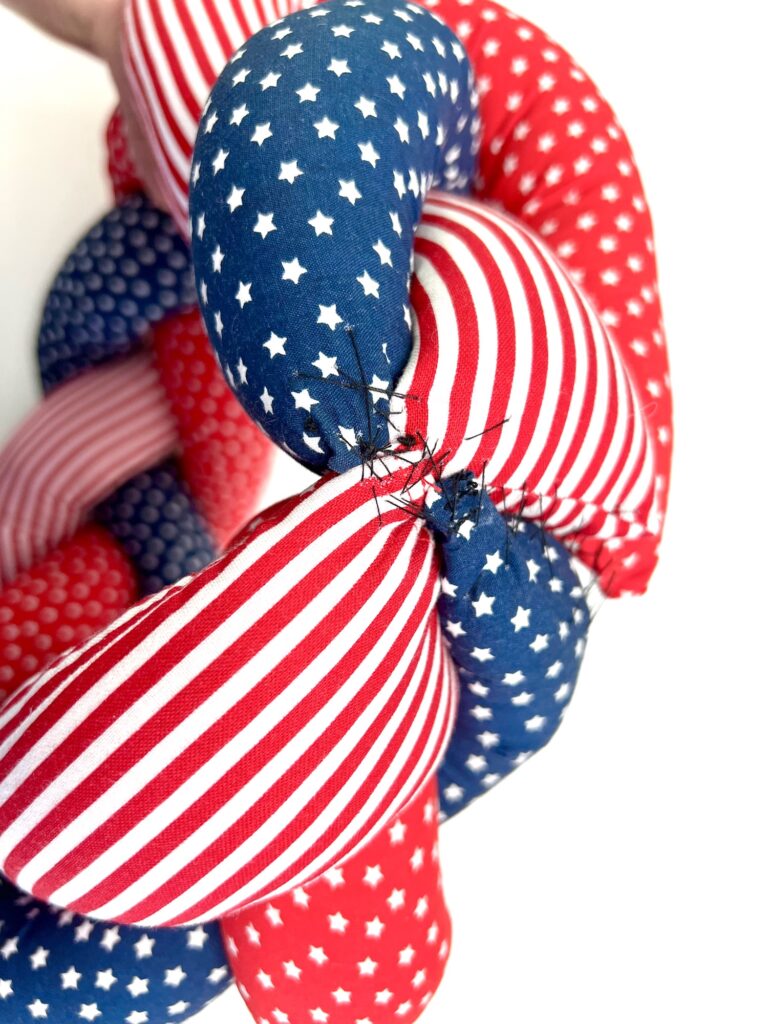
Combine all three tubes together at the short end. I found it was easier to stagger the tubes rather than stack all three on top of each other. Pin, clip or safety pin in place.
Sew the tubes together. If you have enough slack in the fabric on the ends, you may be able to use your sewing machine. However, it will probably be easier to hand stitch using a thick upholstery needle.
Step 6
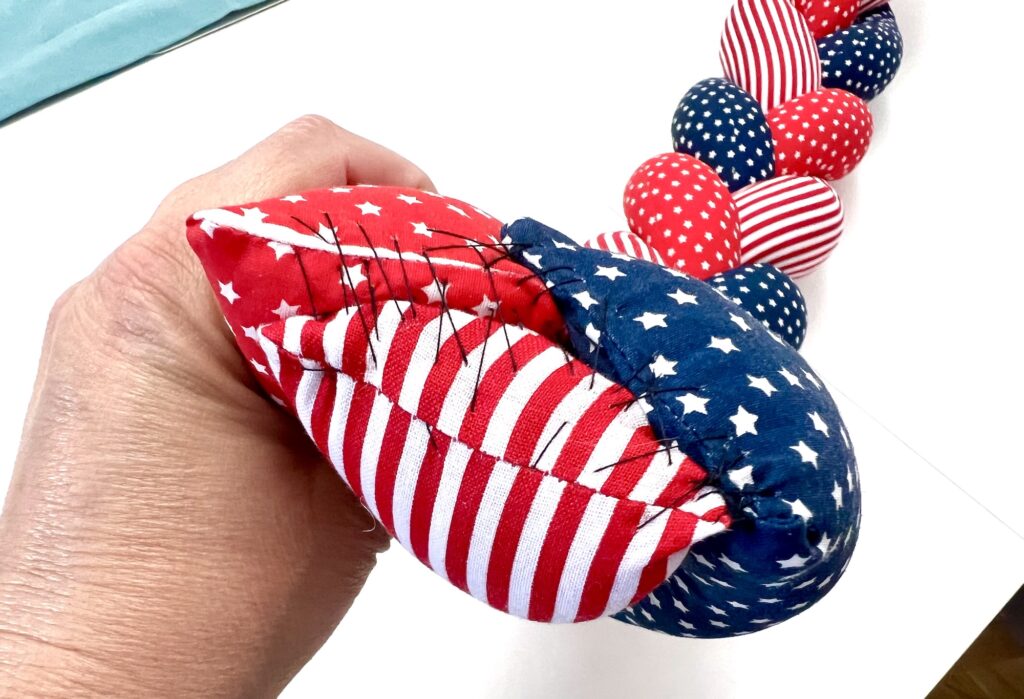
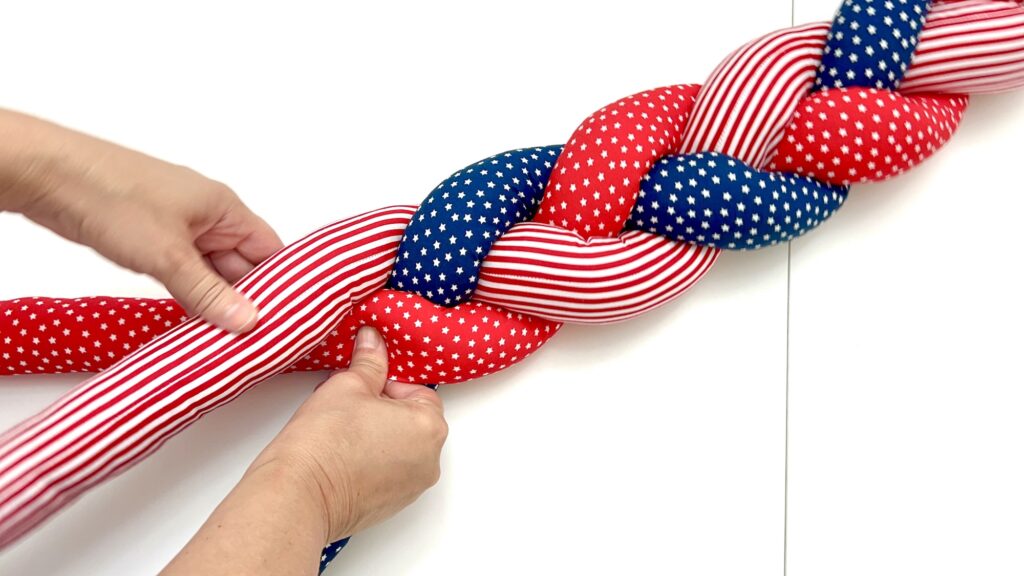
Braid the wreath tubes, making sure to keep the braid tight and reposition the tubes, if needed, so that the seam doesn’t show on the front of the wreath.
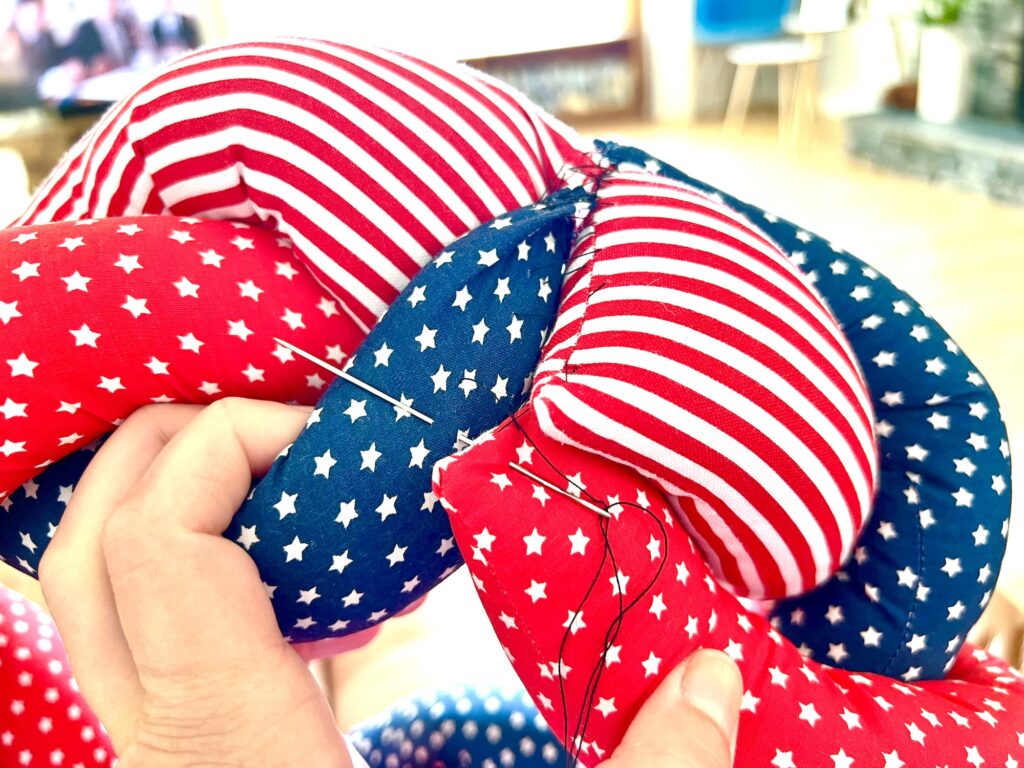
Once done, pin or clip the three ends together. Sew them all together at the ends of the tubes.
Step 7
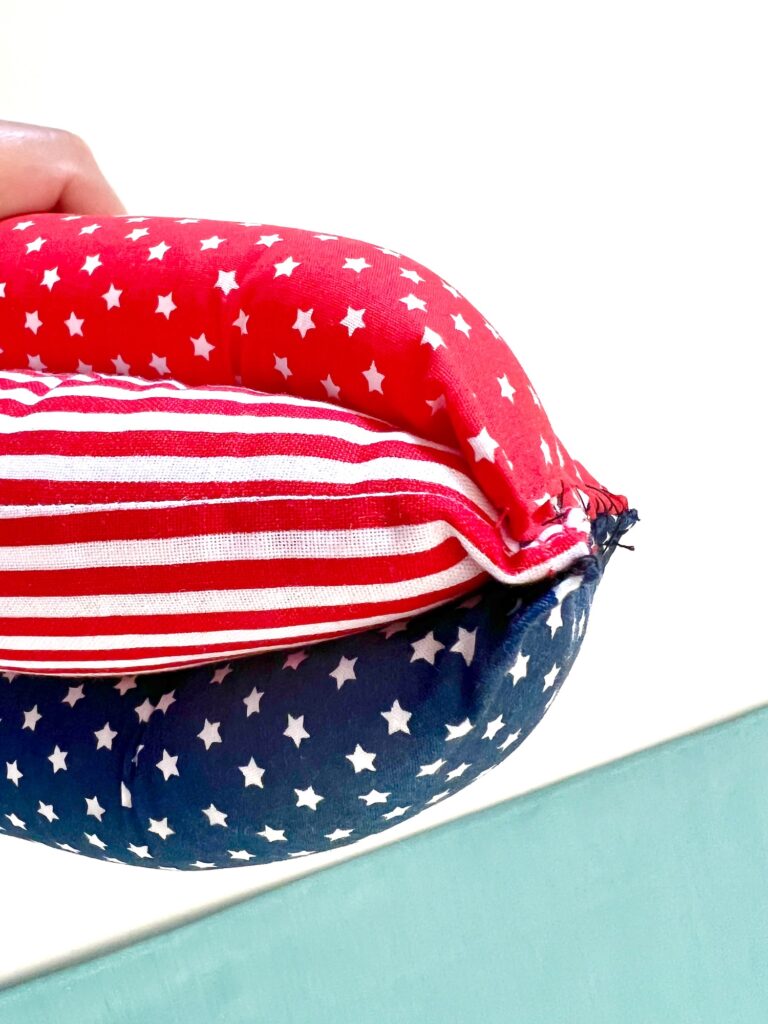
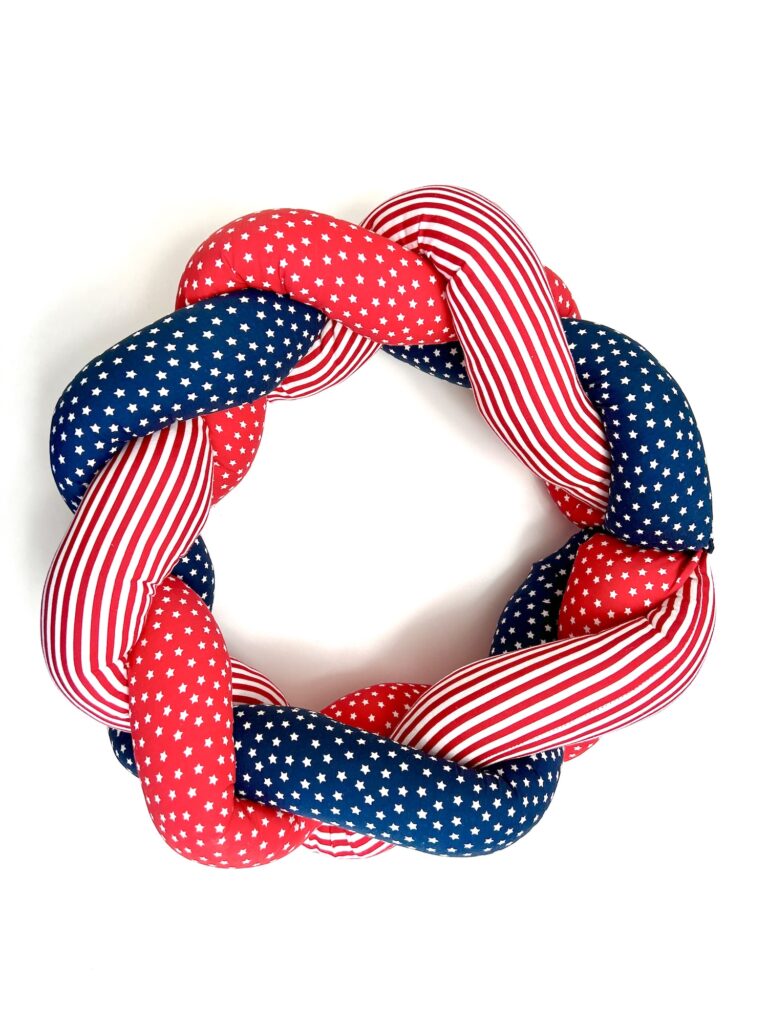
Shape the braid into a circle shape for the wreath.
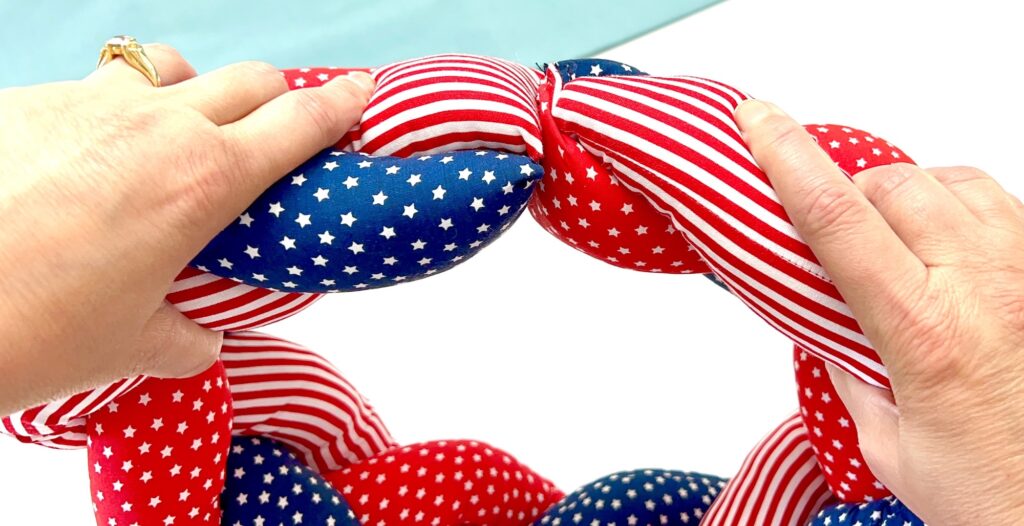
Combine both sides of the braid by hand stitching the tubes together.
Step 8
Add a bow to cover the area where the braided tubes meet.
I used 2.5 inch wired ribbon and tied two bows together (using this easy bow-making method).
I placed that on top of the wreath and then wrapped another piece of ribbon around the bow knot and wreath and tied in a knot in the back to secure.
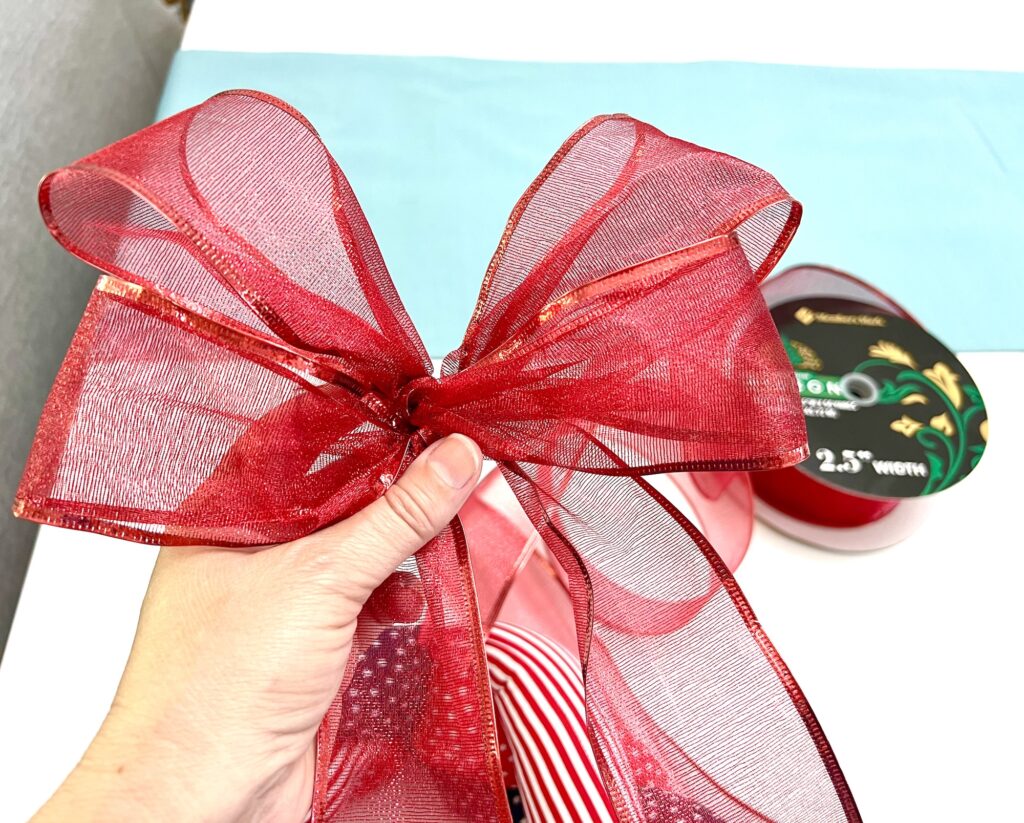

Here’s another way to make a wreath bow.
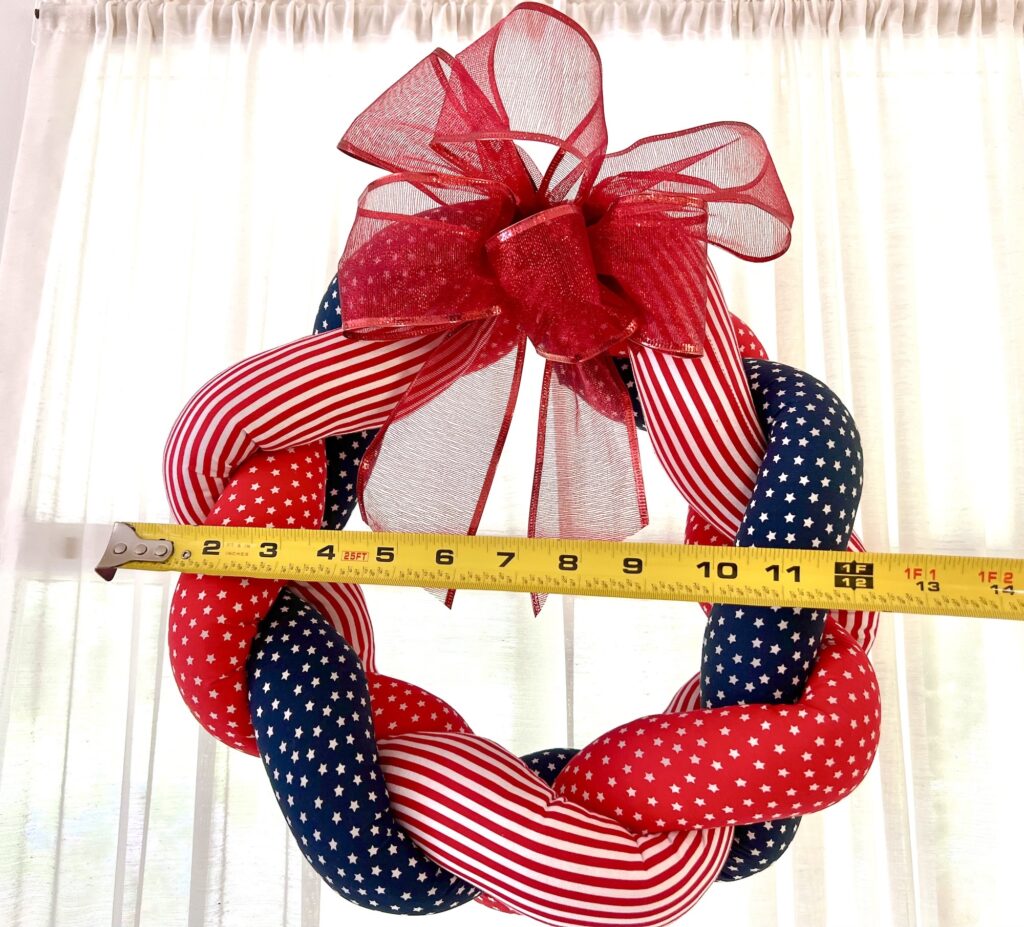
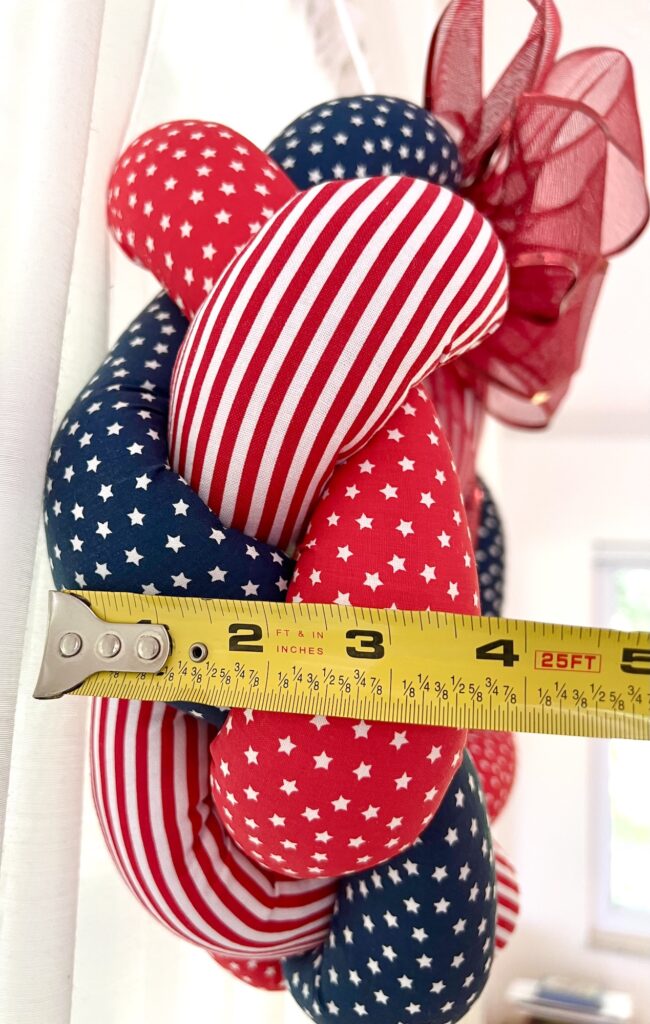
This wreath is approximately 12 inches wide and three to four inches deep.
Watch me make this old-fashioned wreath in my YouTube video below (and I’d love is you subscribed to my channel!):
Helpful Tips I Learned While Making This Braided Fabric Wreath
- Do not overstuff the tubes! I did and found that the braiding and folding of the tubes was much more difficult. Plus, it makes it harder to sew the seams on the end.
- An upholstery needle is much easier than an embroidery needle! The long, thick upholstery needle can sew through the bulkiness faster.
- If your fabric isn’t long enough, you can sew several pieces together to create a length that you need.
- I used a 44 inch fabric length because that was the width of my fabric.
- The longer the strips of fabric, the larger the wreath will be. You can easily increase the length of the fabric used to make a larger wreath.
- Create a bow with ribbon, buy a pre-made bow or make a bow out of a coordinating piece of fabric.
Pin this idea to save for later!
This is just one of our collection of Fourth of July Wreaths and Patriotic Crafts for Adults.
Want more patriotic sewing crafts? Check these out next:


My mother and I made these years ago, but in a Christmas theme. I still hang mine every year. And my mother is now 96! Thanks for sharing and for the memories.
What wonderful memories! I may do a Christmas one this year, too. And your story goes to show how classic this wreath design is!